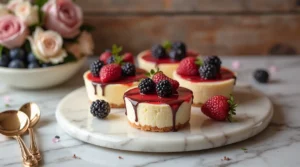
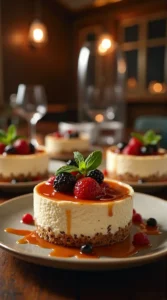
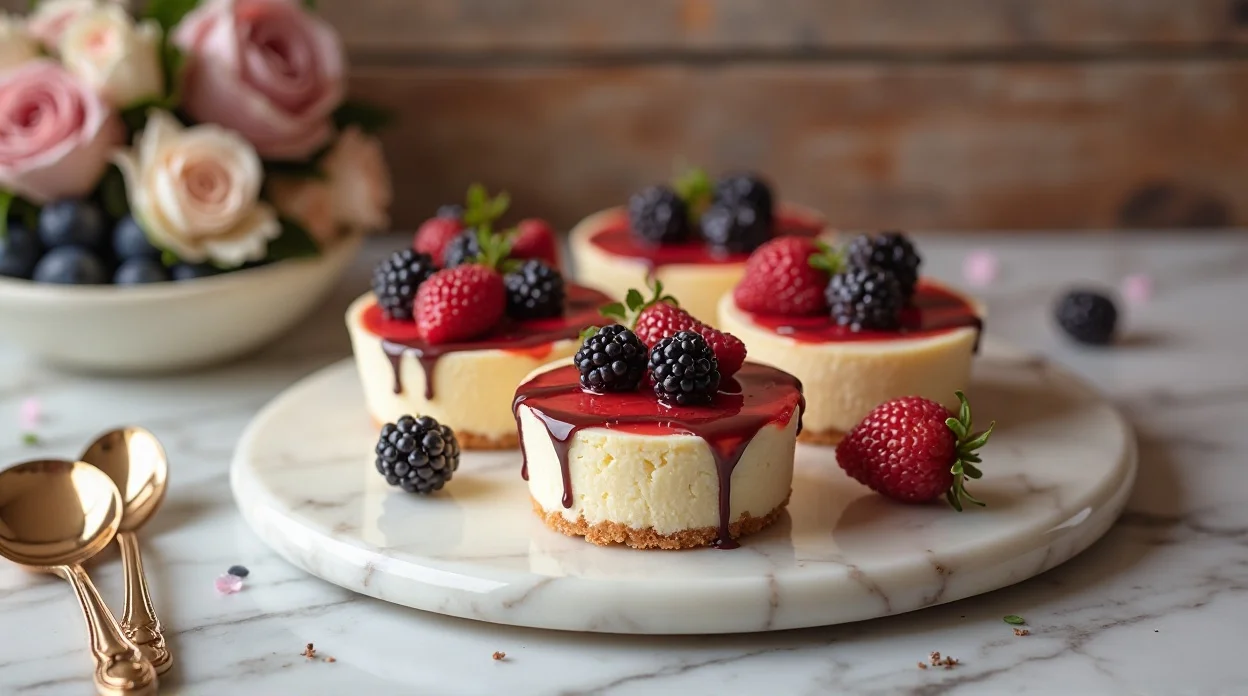
Easy No-Bake Mini Cheesecakes Recipe
So you want cheesecake… but you also don’t want to turn on the oven, wash a million dishes, or spend three hours pretending you’re on a baking show. Totally fair. That’s exactly where Easy No-Bake Mini Cheesecakes come in.
These little beauties are creamy, sweet, and dangerously snackable. Plus, they look fancy enough that people might think you actually tried really hard. (Don’t worry—we won’t tell them the truth.)
If you love desserts that taste like effort but require minimal energy, you’re going to love this recipe.
Why This Recipe is Awesome
Let’s be honest—some desserts feel like a full-time job. This one? Not even close.
Here’s why this recipe deserves a permanent spot in your dessert lineup:
- No oven needed. Your kitchen stays cool and drama-free.
- Beginner-friendly. Honestly, it’s almost impossible to mess up.
- Perfect portions. Mini cheesecakes mean built-in portion control… theoretically.
- Great for parties. Guests see mini desserts and instantly think you’re a culinary genius.
- Customizable toppings. Chocolate, berries, caramel—go wild.
Also, FYI: These chill in the fridge while you relax. That’s my kind of cooking.
Don’t forget these lovely recipes: Bakery-Style Snickerdoodle Cookie Recipe
Ingredients You’ll Need
Here’s the short and sweet shopping list:
- Graham cracker crumbs (the classic cheesecake base hero)
- Melted butter
- Cream cheese, softened (don’t skip softening it—trust me)
- Powdered sugar
- Vanilla extract
- Heavy whipping cream
- Fresh strawberries or berries (optional but highly recommended)
- Chocolate sauce or caramel drizzle (because why not?)
Pro tip: Use full-fat cream cheese. Yes, I said it. It makes the cheesecake extra creamy and worth every bite.
Step-by-Step Instructions
- Make the crust first.
Mix graham cracker crumbs with melted butter in a bowl. Stir until it looks like wet sand. Press the mixture into cupcake liners or a mini cheesecake pan. Place it in the fridge while you prepare the filling. - Beat the cream cheese.
Add softened cream cheese to a mixing bowl and beat until smooth. No lumps allowed here—this step matters. - Add the sweet stuff.
Mix in powdered sugar and vanilla extract. Keep beating until the mixture becomes creamy and fluffy. - Whip the cream.
In another bowl, whip the heavy cream until soft peaks form. This gives the cheesecake that light, dreamy texture. - Combine everything.
Fold the whipped cream gently into the cream cheese mixture. Don’t rush this part—slow and steady keeps it fluffy. - Fill the crusts.
Spoon or pipe the cheesecake filling over the chilled crusts. Smooth the tops if you want them to look extra fancy. - Chill and relax.
Refrigerate for at least 3–4 hours. Overnight is even better. Good things come to those who wait… unfortunately. - Add toppings and serve.
Top with berries, chocolate drizzle, or caramel sauce. Then watch them disappear in minutes.
Common Mistakes to Avoid
Even though this recipe is pretty forgiving, people still manage to get creative with mistakes. Let’s avoid that.
Using cold cream cheese.
If it’s straight from the fridge, it won’t mix properly. Result? Lumpy cheesecake. Not cute.
Skipping the chilling time.
I know patience is hard, but these need time to set. Otherwise, you’ll end up with cheesecake soup.
Adding too much butter to the crust.
Yes, butter is amazing—but too much makes the crust greasy.
Overmixing the whipped cream.
You want soft peaks, not butter. There’s a difference.
Overfilling the cups.
Unless you want a cheesecake avalanche, keep it neat.
Alternatives & Substitutions
- Want to tweak the recipe? Totally doable.
- No graham crackers? Use digestive biscuits or crushed cookies instead.
- Want it healthier-ish? Try Greek yogurt mixed with cream cheese for a lighter filling.
- Dairy-free option: Use dairy-free cream cheese and coconut cream. IMO, it still tastes pretty great.
- Chocolate version: Mix melted chocolate into the filling. Boom—chocolate cheesecake.
- Fruit swirl: Add strawberry or raspberry puree before chilling.
Honestly, once you make these, you’ll probably start experimenting. That’s how dessert addiction begins.
FAQ (Frequently Asked Questions)
Can I make these ahead of time?
Absolutely. In fact, you should. These cheesecakes taste even better after chilling overnight.
Do I really need to chill them for hours?
Yes… unless you enjoy eating cheesecake mousse instead. Chilling helps them set properly.
Can I freeze mini cheesecakes?
Yep! Freeze them in an airtight container. When you’re ready, let them thaw in the fridge.
Can I use store-bought whipped topping?
You can. It works fine and saves time. But freshly whipped cream tastes better—just saying.
Why is my cheesecake filling runny?
Most likely, the whipped cream wasn’t whipped enough,h or the cheesecakes didn’t chill long enough.
Can I make this recipe in a big pan instead?
Sure! Just press the crust into a small springform pan and follow the same steps.
Do these taste like real baked cheesecake?
Honestly? Pretty close. They’re just lighter, creamier, and way easier to make.
Final Thoughts
If desserts had a “low effort, high reward” category, Easy No-Bake Mini Cheesecakes would win every time. They’re creamy, customizable, and surprisingly impressive for something that takes minimal work.
Plus, once people taste them, they’ll probably ask for the recipe. That’s your moment to casually say, “Oh yeah, they’re super easy.”
Now go make a batch and treat yourself. Or share them… if you’re feeling generous. 😄
Easy No-Bake Mini Cheesecakes
Ingredients
Method
- Mix graham cracker crumbs and melted butter until combined.
- Press the mixture into lined muffin cups to form the crust.
- Place the crusts in the refrigerator while preparing the filling.
- Beat softened cream cheese until smooth and creamy.
- Add powdered sugar and vanilla extract and mix well.
- Whip the heavy cream until soft peaks form.
- Gently fold the whipped cream into the cream cheese mixture.
- Spoon or pipe the filling over the chilled crusts.
- Refrigerate for at least 4 hours or until set.
- Top with berries or drizzle with chocolate or caramel before serving.
Notes
Chill the cheesecakes long enough so they hold their shape.
You can swap graham crackers with crushed digestive biscuits or cookies.
Add lemon zest or fruit puree for extra flavor.