Garlic Parmesan Crusted Chicken Recipe
So you want something crispy, cheesy, garlicky… but you also don’t want to spend your entire evening cooking like you’re auditioning for a food show? Yeah, same here.
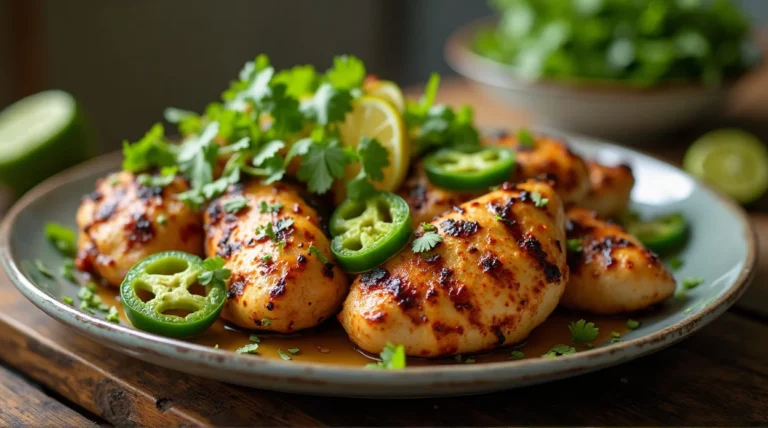
Let me introduce you to Garlic Parmesan Crusted Chicken Recipe—aka the dish that makes you feel like a kitchen genius with minimal effort. It’s crunchy on the outside, juicy on the inside, and loaded with that rich garlic-parmesan flavor that makes people suspiciously quiet at the dinner table (because they’re too busy eating).
And the best part? It looks fancy… but it’s secretly super easy. Your kind of recipe, right?
Why This Recipe is Awesome
Let’s hype this up properly, because it deserves it:
- Crispy without frying. Yes, you get that golden crunch without deep-frying chaos.
- Big flavor, simple ingredients. Garlic + parmesan = instant upgrade.
- Quick and easy. Dinner is ready in about 30 minutes.
- Family-friendly. Even picky eaters suddenly become food critics (in a good way).
- Minimal mess. One baking tray, fewer dishes—your future self says thanks.
Honestly, this is one of those recipes where you’re like, “Wait… why don’t I make this every week?”
Ingredients You’ll Need
Here’s everything you need—no weird, hard-to-find stuff:

- 2 boneless chicken breasts – sliced into thinner cutlets for faster cooking
- ½ cup grated parmesan cheese – the real MVP
- ½ cup breadcrumbs – for that crispy coating (panko = extra crunch)
- 2 cloves garlic (minced) – because garlic is life
- 1 tsp Italian seasoning – optional, but adds a nice herby vibe
- ½ tsp salt & ½ tsp black pepper – basic but essential
- 1 egg – helps everything stick together
- 2 tbsp olive oil or melted butter – adds flavor and helps crisp
Optional extras:
- Fresh parsley for garnish
- Extra parmesan for topping (because why not?)
Pro Tip: Use freshly grated parmesan if you can—it melts and tastes way better than the pre-packaged stuff.
Step-by-Step Instructions
1. Prep the Chicken
- Slice your chicken breasts into thinner cutlets or pound them slightly. This helps them cook evenly and faster.
- Season lightly with salt and pepper. Simple, but important.
2. Set Up Your Coating Station
- In one bowl, beat the egg.
- In another bowl, mix breadcrumbs, parmesan cheese, minced garlic, Italian seasoning, salt, and pepper.
- Give it a quick mix so everything is evenly distributed.
3. Coat the Chicken
- Dip each chicken piece into the egg first, then press it into the breadcrumb mixture.
- Make sure it’s fully coated—don’t be shy here, we want maximum crunch.
4. Arrange & Drizzle
- Place coated chicken pieces on a lined baking tray.
- Drizzle or brush with olive oil or melted butter. This helps create that golden crust.
5. Bake to Perfection
- Bake in a preheated oven at 200°C (400°F) for about 20–25 minutes.
- Flip halfway through if you want even crispiness on both sides.
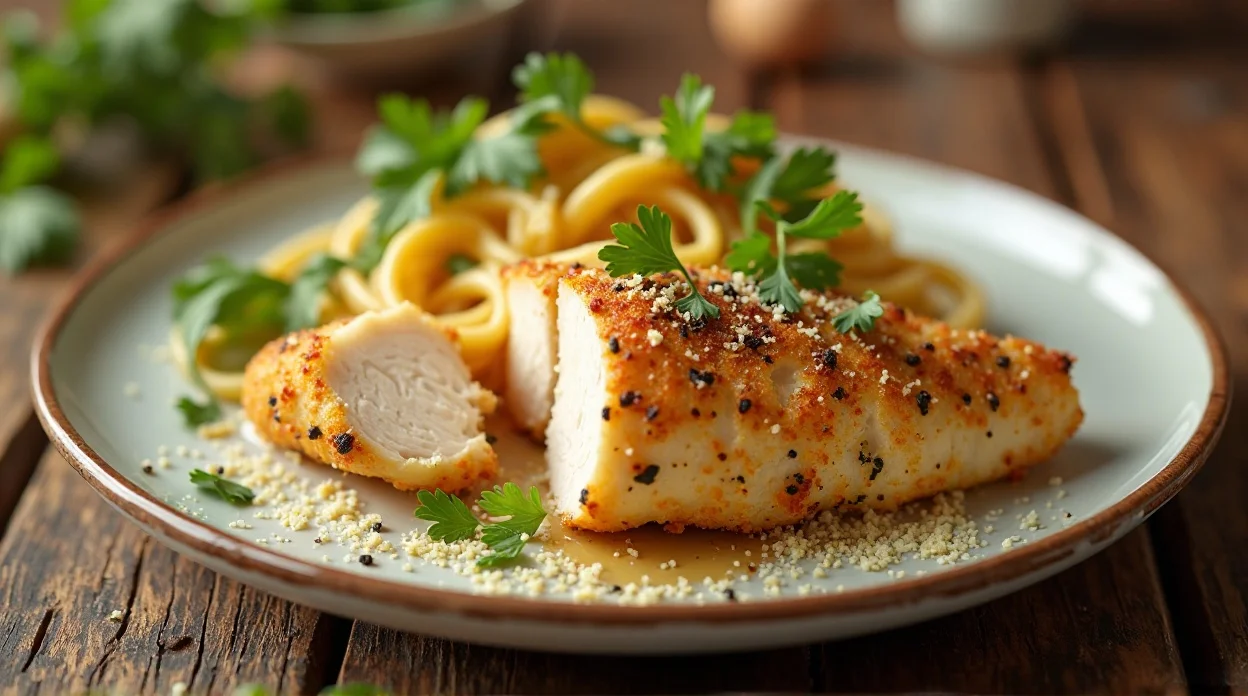
6. Serve & Enjoy
- Once golden and cooked through, remove from the oven and let rest for a couple of minutes.
- Sprinkle fresh parsley and extra parmesan on top if you’re feeling fancy.
- Serve hot and enjoy that crispy, cheesy goodness.
Common Mistakes to Avoid
- Skipping the egg step: The coating won’t stick properly. Rookie move.
- Using too little oil: No oil = no crisp. Don’t sabotage yourself.
- Overcrowding the tray: Give each piece space, or they’ll steam instead of crisp.
- Not preheating the oven: This is not optional. Preheat = better texture.
- Overcooking: Dry chicken is sad chicken. Keep an eye on it.
Alternatives & Substitutions
Want to switch things up? Go for it:
- Gluten-free option: Use gluten-free breadcrumbs.
- Low-carb version: Swap breadcrumbs for crushed almonds or pork rinds.
- Different cheese: Try mozzarella or cheddar, but parmesan gives the best crust.
- Air fryer version: Cook at 180°C (350°F) for 12–15 minutes—super crispy!
- Add spice: Sprinkle chili flakes or paprika for a little kick.
IMO: Parmesan + garlic is already a winning combo, so don’t overcomplicate it.
You can also try this lovely Recipe: Pistachio Cake Recipe
FAQ (Frequently Asked Questions)
Can I make this ahead of time?
Yes! Prep and coat the chicken, then refrigerate. Bake when ready. Easy meal prep win.
Can I use chicken thighs instead of breasts?
Absolutely. Thighs are juicier and more forgiving—just adjust cooking time slightly.
How do I keep it extra crispy?
Use panko breadcrumbs and don’t skip the oil drizzle. Also, don’t overcrowd the tray.
Can I fry instead of baking?
Yes, but then it becomes less “healthy-ish.” Still delicious though, not gonna lie.
Can I store leftovers?
Yep! Keep in the fridge for up to 3 days. Reheat in oven or air fryer for best results.
Why is my coating falling off?
You probably skipped proper egg coating or didn’t press the crumbs well enough. Press firmly!
Can I freeze it?
Yes, freeze before or after cooking. Reheat in the oven straight from frozen for convenience.
Final Thoughts
This Garlic Parmesan Crusted Chicken is the perfect mix of easy, crispy, and ridiculously flavorful. It’s one of those meals that feels fancy enough for guests but simple enough for a weeknight dinner. Plus, it’s versatile—you can pair it with pasta, salad, rice, or just eat it straight off the tray (no judgment here). So go ahead—grab your ingredients, turn on that oven, and create something delicious.
Now go impress someone… or just treat yourself like the legend you are. You’ve earned it. 🍗🧄🧀
Garlic Parmesan Crusted Chicken Recipe
Ingredients
Method
- Preheat oven to 400°F (200°C) and line a baking tray with parchment paper.
- In a bowl, mix Parmesan cheese, breadcrumbs, minced garlic, salt, pepper, and Italian seasoning.
- Dip each chicken breast into beaten eggs, then coat thoroughly with the Parmesan mixture.
- Place coated chicken on the prepared tray and drizzle with olive oil or melted butter.
- Bake for 20–25 minutes until golden and cooked through.
- Optional: Broil for 2–3 minutes for an extra crispy crust.
- Let rest for a few minutes before serving.
Notes
- Use freshly grated Parmesan for the best flavor and texture.
- Pound chicken evenly for uniform cooking.
- Serve with a squeeze of lemon for a fresh, zesty finish.
DID YOU MAKE THIS EASY RECIPE?
If you have, then share it with us by sending a photo. We’re excited to see what you’ve made 🙂