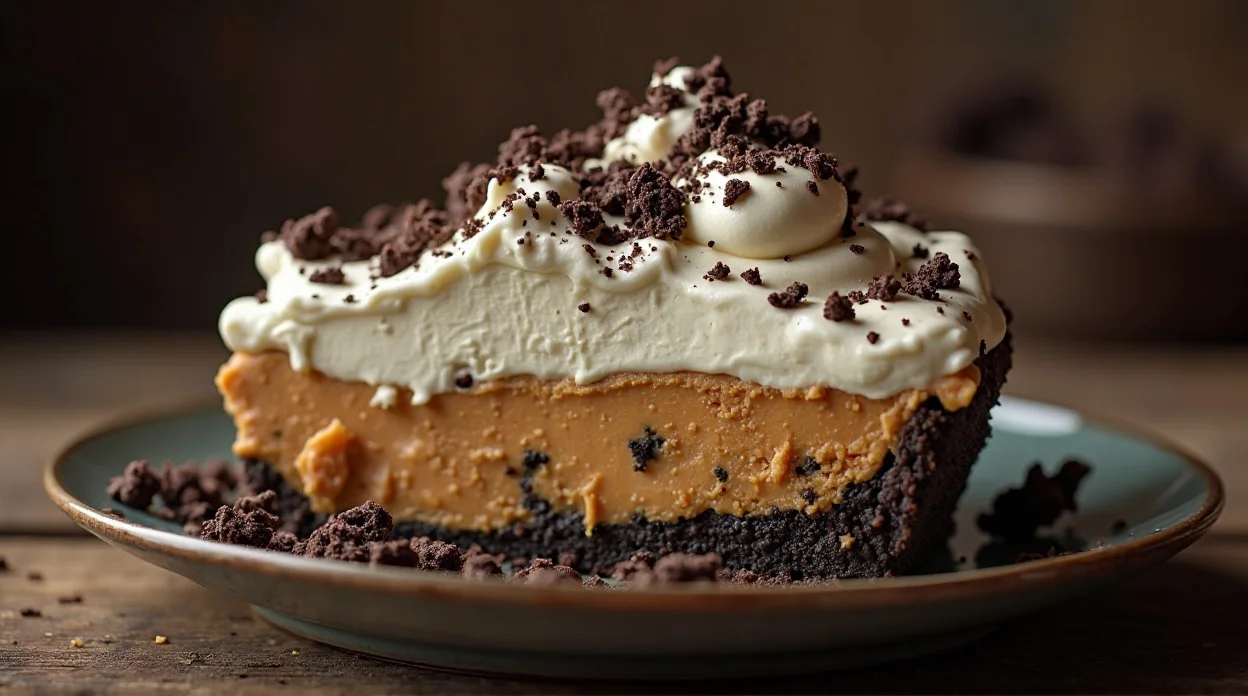
No Bake Oreo Peanut Butter Pie Recipe
So you’re craving dessert but don’t feel like turning on the oven? Same. Enter the No-Bake Oreo Peanut Butter Pie Recipe—a creamy, dreamy, chocolatey masterpiece that basically makes you look like a dessert wizard without lifting more than a spoon. Picture this: a crunchy Oreo crust, silky peanut butter filling, and a crown of whipped cream (with optional chocolate drizzle for the dramatic effect). It’s like the universe said, “You deserve a treat, and it’s ridiculously easy.”
Honestly, this pie is basically the love child of Oreos and peanut butter, and yes… it’s as magical as it sounds.
Why This Recipe is Awesome
Why do we love this pie? Oh, let me count the ways:
- No baking required. Seriously. If you can mix and chill, you’re basically a pastry chef.
- It’s idiot-proof. Even I didn’t mess it up—and I can burn water.
- Crunch meets creamy. Oreo crust + peanut butter filling = dessert harmony.
- Quick prep. About 15 minutes to assemble. Then chill and voilà.
- Everyone will ask for seconds. And then you’ll be asked for the recipe. Smile knowingly.
This pie is basically dessert for lazy geniuses who still want maximum flavor points.
Ingredients You’ll Need
Let’s keep it simple. You probably have most of this already:
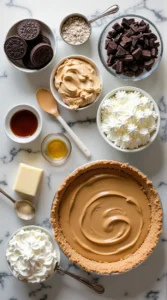
- 24 Oreo cookies – the crust foundation. Don’t skip.
- 4 tbsp unsalted butter – melts to bind that crust like a dream.
- 1 cup creamy peanut butter – the heart of this pie. Go natural if you want, but creamy is king.
- 8 oz cream cheese – softens the peanut butter filling for creamy perfection.
- 1 cup powdered sugar – sweetens everything without gritty sugar chunks.
- 1 tsp vanilla extract – optional, but flavor booster alert.
- 1 ½ cups whipped cream – fold in for fluffiness or use pre-made Cool Whip.
- Optional toppings: chocolate shavings, crushed Oreos, and peanut butter drizzle.
Pro Tip: Double the pie if you’re feeding a crowd. Trust me… it disappears fast.
Step-by-Step Instructions
1. Make the Crust
- Crush 24 Oreos into fine crumbs. I like using a food processor, but a ziplock bag and rolling pin work too—bonus points if you do it without making a mess.
- Mix the crumbs with melted butter until it looks like wet sand. Press this mixture into a 9-inch pie pan, making sure the edges are even.
- Chill in the fridge while you make the filling—patience is part of the magic.
2. Prepare the Peanut Butter Filling
- In a bowl, beat together cream cheese and peanut butter until smooth. Add powdered sugar and vanilla extract, mix until fully combined.
- Gently fold in 1 cup whipped cream, leaving it light and fluffy. This is where the pie gets dreamy.
3. Assemble the Pie
- Spoon the peanut butter filling over the chilled Oreo crust. Smooth the top with a spatula or the back of a spoon.
- Pop it back in the fridge for at least 2 hours (or overnight if you’re planning ahead).
4. Decorate & Serve
- Before serving, add extra whipped cream on top. Sprinkle crushed Oreos, chocolate shavings, or even a drizzle of peanut butter for that “I’m fancy but didn’t try too hard” vibe.
- Slice, serve, and brace yourself for compliments.
Common Mistakes to Avoid
- Skipping the chilling step. The filling won’t set properly—hello, messy slices.
- Using crunchy peanut butter. You want creamy smoothness, not peanut butter rocks.
- Overmixing whipped cream. You’ll end up with butter instead of fluff.
- Skipping the crust press. The crust needs to be compact, or the pie falls apart like sad cookie sand.
- Cutting too soon. Give it a proper chill, or you’ll cry over a gooey mess.
Alternatives & Substitutions
Want to switch things up? No problem.
- Different cookies: Golden Oreos or chocolate sandwich cookies work great.
- Nut butter swap: Almond butter or cashew butter if peanut butter isn’t your jam.
- Crust shortcut: Buy pre-made chocolate cookie crusts if you’re lazy (I won’t judge).
- Whipped cream alternative: Use Cool Whip, or make a chocolate ganache topping for extra drama.
- Sugar-free version: Swap powdered sugar for a powdered sweetener of choice.
IMO, the key is to keep it creamy and not overcomplicate. Less stress = more fun.
You can also try this lovely Recipe: Oreo Churro Bites Recipe
FAQ (Frequently Asked Questions)
Can I make this pie ahead of time?
Yes! Chill it overnight for the best results. Flavors actually deepen, so technically, waiting makes you even smarter.
Can I use crunchy peanut butter?
Technically, yes, but why ruin smooth perfection? Smooth peanut butter = creamy filling.
Can I freeze this pie?
Yep! Wrap tightly in plastic wrap and freeze for up to 1 month. Thaw in the fridge before serving.
Can I use low-fat cream cheese?
Sure, but the texture won’t be as dreamy. Dessert math: full-fat = happiness points.
How long does this pie last in the fridge?
About 3–4 days. After that, it’s still edible, but freshness starts to fade.
Can I skip the whipped cream?
You can, but then it’s a dense peanut butter pie. Not bad, just less airy and dreamy.
Final Thoughts
The No-Bake Oreo Peanut Butter Pie is proof that you can have incredible desserts without turning your kitchen into a war zone. It’s creamy, crunchy, and ridiculously easy. Perfect for parties, last-minute guests, or even just a treat for yourself (we don’t judge). Go ahead—slice yourself a generous piece, add a drizzle of chocolate, and enjoy every blissful bite.
You’ve earned it, dessert champion. 🥧💛
No Bake Oreo Peanut Butter Pie Recipe
Ingredients
Method
- Mix crushed Oreos with melted butter and press into a 9-inch pie pan to form the crust.
- In a bowl, beat cream cheese, peanut butter, powdered sugar, and vanilla until smooth.
- Fold in whipped cream gently until fully incorporated.
- Pour filling into Oreo crust and spread evenly.
- Refrigerate for at least 2 hours until firm.
- Top with chocolate shavings or drizzle before serving.
Notes
- Use chilled cream cheese for easier mixing.
- Can be made a day ahead for convenience.
- Serve with extra whipped cream or crushed Oreos on top for added texture.
DID YOU MAKE THIS EASY RECIPE?
If you have, then share it with us by sending a photo. We’re excited to see what you’ve made 🙂