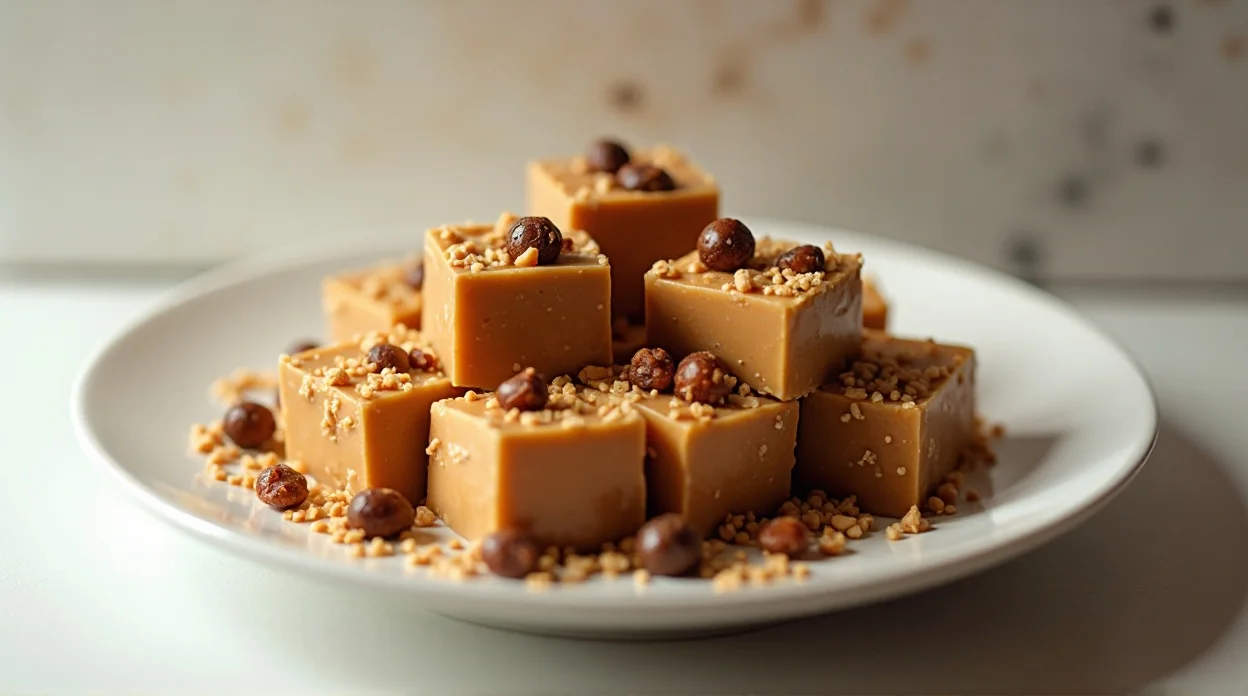
No-Bake Peanut Butter Fudge Recipe
So you want dessert… but you also want zero effort and maximum reward? Same here. Some days we’re all about gourmet cooking, and other days we just want something sweet that doesn’t involve turning on the oven or washing 47 bowls.
That’s exactly where this Easy No-Bake Peanut Butter Fudge Recipe swoops in like a dessert superhero. It’s creamy, peanut-buttery, slightly dangerous (because you will eat more than planned), and ridiculously simple. If you can stir and wait a little bit, congrats—you’re already qualified.
Let’s make some fudge magic happen.
Why This Recipe is Awesome
First of all, this recipe is almost suspiciously easy. Like, “Did I really just make fudge?” easy.
Here’s why people end up making it again and again:
- No oven required. Your kitchen stays cool and drama-free.
- Only a handful of ingredients. Nothing fancy, nothing weird.
- It takes about 10 minutes of actual work. Yes, really.
- Perfect for beginners. If you can mix things in a bowl, you’re good.
- Great for parties, snacks, or midnight cravings (we don’t judge).
Also, IMO, peanut butter desserts just hit differently. They’re rich, creamy, and comforting all at once.
And let’s be honest—homemade fudge makes you look like you tried way harder than you actually did.
More About Us: Carrot Cake Sandwich Cookies Recipe
Ingredients You’ll Need
Here’s the short and sweet shopping list:
- 1 cup peanut butter (creamy works best, but chunky is welcome too)
- 1/2 cup unsalted butter
- 1 teaspoon vanilla extract
- 2 cups powdered sugar
- Pinch of salt (optional but highly recommended)
That’s it. No complicated ingredients. No treasure hunt at the grocery store.
Quick tip: Use good-quality peanut butter if you can. It really makes the flavor pop.
Step-by-Step Instructions
Follow these simple steps, and you’ll have fudge chilling in no time.
- Melt the butter and peanut butter.
Place the butter and peanut butter in a saucepan over low heat. Stir constantly until everything melts and becomes smooth. Don’t rush this part—low heat keeps the texture perfect. - Add vanilla and salt.
Remove the mixture from the heat and stir in the vanilla extract and a pinch of salt. This tiny step boosts the flavor more than you’d expect. - Mix in powdered sugar.
Gradually add the powdered sugar while stirring. The mixture will thicken quickly, so keep mixing until it becomes smooth and creamy. FYI, arm workout included. - Prepare your pan.
Line a small square pan with parchment paper or lightly grease it. This makes removing the fudge super easy later. - Spread the mixture evenly.
Pour the fudge mixture into the pan and smooth the top with a spatula. Try not to eat half of it right now (tempting, I know). - Chill and set.
Place the pan in the refrigerator for about 1–2 hours, or until the fudge becomes firm. - Slice and enjoy.
Lift the fudge out using the parchment paper and cut it into small squares. Congrats—you just made homemade fudge like a pro.
Pro tip: For super clean slices, use a sharp knife and wipe it between cuts.
Common Mistakes to Avoid
Even easy recipes have a few sneaky traps. Here’s what to watch out for:
1. Overheating the mixture
Cranking the heat too high can ruin the texture. Low and steady wins the fudge race.
2. Dumping all the sugar at once
Yes, it’s faster. No, it’s not better. Add powdered sugar gradually so it mixes smoothly.
3. Skipping the parchment paper
You can skip it… But then you’ll spend 10 minutes trying to remove stuck fudge. Rookie move.
4. Not letting it chill long enough
I know patience is hard when dessert is involved. But letting it fully set makes slicing easier.
5. Using super oily natural peanut butter
It can separate and mess with the texture. Stir it well first if that’s what you’re using.
Alternatives & Substitutions
Want to tweak the recipe a bit? Go for it.
- Crunchy peanut butter: Adds a nice texture if you like a little bite in your fudge.
- Chocolate swirl: Melt some chocolate and swirl it into the top before chilling. Instant upgrade.
- Dairy-free option: Use plant-based butter. Works surprisingly well.
- Less sweet version: Slightly reduce the powdered sugar and add a bit more peanut butter.
- Add toppings: Crushed cookies, chopped nuts, or mini chocolate chips.
Personally, I love adding chocolate chips because peanut butter + chocolate = an unbeatable combo.
Important: Don’t change too many ingredients at once, or the texture might get weird.
FAQ (Frequently Asked Questions)
Can I use natural peanut butter for this?
Yes, but stir it really well first. Natural peanut butter separates easily, and that can make your fudge oily. Not the vibe we’re going for.
Do I really need to refrigerate it?
Technically… yes. Unless you enjoy soft, scoopable fudge instead of firm squares. Chilling is what makes it set properly.
How long does peanut butter fudge last?
If stored in an airtight container in the fridge, it can last about a week. Realistically though? It usually disappears in 2–3 days.
Can I freeze peanut butter fudge?
Absolutely. Wrap it tightly and freeze for up to 2–3 months. When you want some, just thaw a few pieces in the fridge.
Can I make this fudge less sweet?
You can reduce the powdered sugar slightly or add a pinch more salt. Salt balances the sweetness really well.
What size pan works best?
An 8×8-inch pan works great. If you use a smaller pan, your fudge will just be thicker—which honestly isn’t a bad thing.
Can I add chocolate on top?
Oh yes, and you probably should. Melt chocolate, spread it over the fudge before chilling, and boom—next-level dessert.
Final Thoughts
So there you go—a ridiculously easy dessert that looks impressive and tastes amazing. No baking, no stress, no complicated steps. Just mix, chill, slice, and enjoy.
This recipe is perfect for beginners, busy days, or when your sweet tooth suddenly demands attention. And let’s be honest, having homemade fudge in the fridge feels like a small life victory.
So go ahead—make a batch, share it with friends, or keep it all for yourself. I won’t tell. 😄
And if you end up eating three pieces in one sitting… honestly, same.
No-Bake Peanut Butter Fudge Recipe
Ingredients
Method
- Melt peanut butter and butter together in a saucepan over low heat while stirring continuously.
- Remove from heat and stir in vanilla extract and salt until combined.
- Gradually add powdered sugar and mix until the mixture becomes smooth and thick.
- Line a square pan with parchment paper or lightly grease it.
- Spread the fudge mixture evenly into the prepared pan.
- Smooth the top with a spatula for an even layer.
- Refrigerate for 1–2 hours until the fudge is firm.
- Lift from the pan, cut into squares, and serve.
Notes
Do not overheat the peanut butter and butter mixture.
Chill fully before slicing for clean squares.
Store leftovers in an airtight container in the refrigerator for best freshness. DID YOU MAKE THIS EASY RECIPE? If you have, then share it with us by sending a photo. We’re excited to see what you’ve made:-):