Cherry Pie Recipe
So, you’ve decided to bake a cherry pie. Maybe you’re trying to impress a date, maybe you’re trying to win the neighborhood bake-off, or maybe—like me most Tuesdays—you’ve just realized that eating a bowl of plain maraschino cherries for dinner is “frowned upon by society.” Whatever your motivation, you’ve come to the right place. We’re about to turn some fruit and flour into a flaky, bubbly masterpiece that’ll make you feel like a culinary god (even if you currently have flour in your eyebrows).
Why This Recipe is Awesome
Look, I’ve tried those “gourmet” recipes that require you to massage the cherries individually under a full moon. No thanks. This recipe is the sweet spot between “I’m a professional pastry chef” and “I just woke up from a nap.”
It’s practically foolproof. Seriously, even if you’re the type of person who accidentally sets cereal on fire, you can handle this. The crust is buttery enough to make you weep, and the filling isn’t that gloopy, neon-red stuff you find in a can that looks like it belongs in a science experiment. We’re going for authentic, rustic, and “Oh my god, did you actually make this?” vibes. Plus, it makes your house smell like a literal hug.
Ingredients You’ll Need
Grab your shopping bag. Or, you know, just dig through the back of your pantry and hope for the best.
- 5 cups Sour Cherries: Fresh is great if you have the patience of a saint to pit them. Frozen is totally fine (and my personal lazy-day hero).
- 1 cup Granulated Sugar: Because we aren’t here for a salad, are we?
- 4 tablespoons Cornstarch: The “glue” that keeps your pie from becoming a cherry soup.
- 1 tablespoon Lemon Juice: To give it a little zing so it’s not just a sugar bomb.
- 1/2 teaspoon Vanilla Extract: Because vanilla makes everything taste like you know what you’re doing.
- A pinch of Salt: To balance the vibes.
- Double Pie Crust: Homemade if you’re feeling fancy, store-bought if you value your sanity. No judgment here.
- 2 tablespoons Butter: To dot on top. Everything is better with butter.
- 1 Egg (plus a splash of water): For that golden-brown “Instagram-ready” glow.
Step-by-Step Instructions
Alright, roll up those sleeves. It’s showtime.
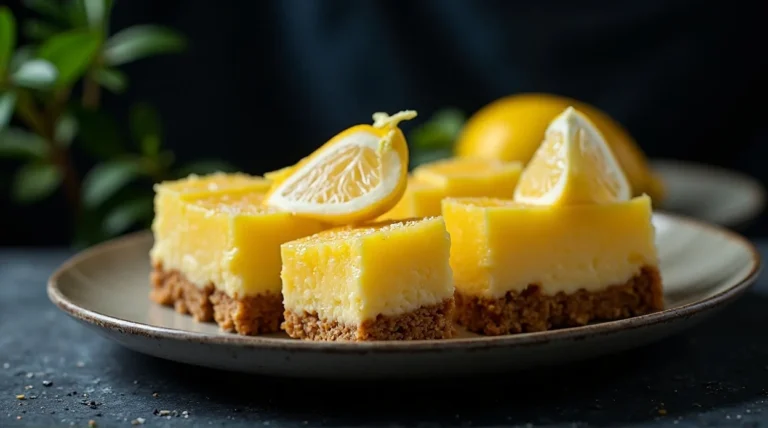
🍫 The Ultimate No-Bake Dessert Ebook 🍓
30 mouthwatering no-bake recipes you can whip up in minutes — creamy cheesecakes, fruity parfaits, chocolatey bars, and more!
- ⚡Quick & easy — no oven required
- 📖30 recipes + bonus treat
- 🍓Chocolate, fruit, nutty & refreshing flavors
- ✨Beautifully designed, instant download
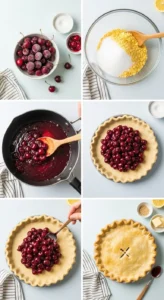
- Preheat and Prep: Crank your oven to 400°F (200°C). While that’s heating up, roll out one of your crusts and drape it into a 9-inch pie plate. Don’t worry if it looks messy; “rustic” is just a fancy word for “it doesn’t look perfect but it tastes better.”
- Mix the Magic: In a large bowl, toss your cherries, sugar, cornstarch, lemon juice, vanilla, and salt. Stir it gently. You want the cherries coated, not pulverized into a smoothie.
- Fill it Up: Dump that beautiful red mixture into your prepared bottom crust. Level it out a bit so you don’t have a cherry mountain in the middle.
- Butter it Down: Take those 2 tablespoons of butter, chop them into tiny bits, and scatter them over the filling. It’s like a little gift for your future self.
- The Top Lid: Lay the second crust over the top. You can do a fancy lattice if you want to show off, or just put the whole sheet on and cut a few slits in the top so the steam can escape. If you don’t vent it, your pie might actually explode. Drama is for TV, not your oven.
- Seal the Deal: Crimp the edges together with your fingers or a fork. Brush the top with your egg wash. This is the secret to that “bakery-style” finish.
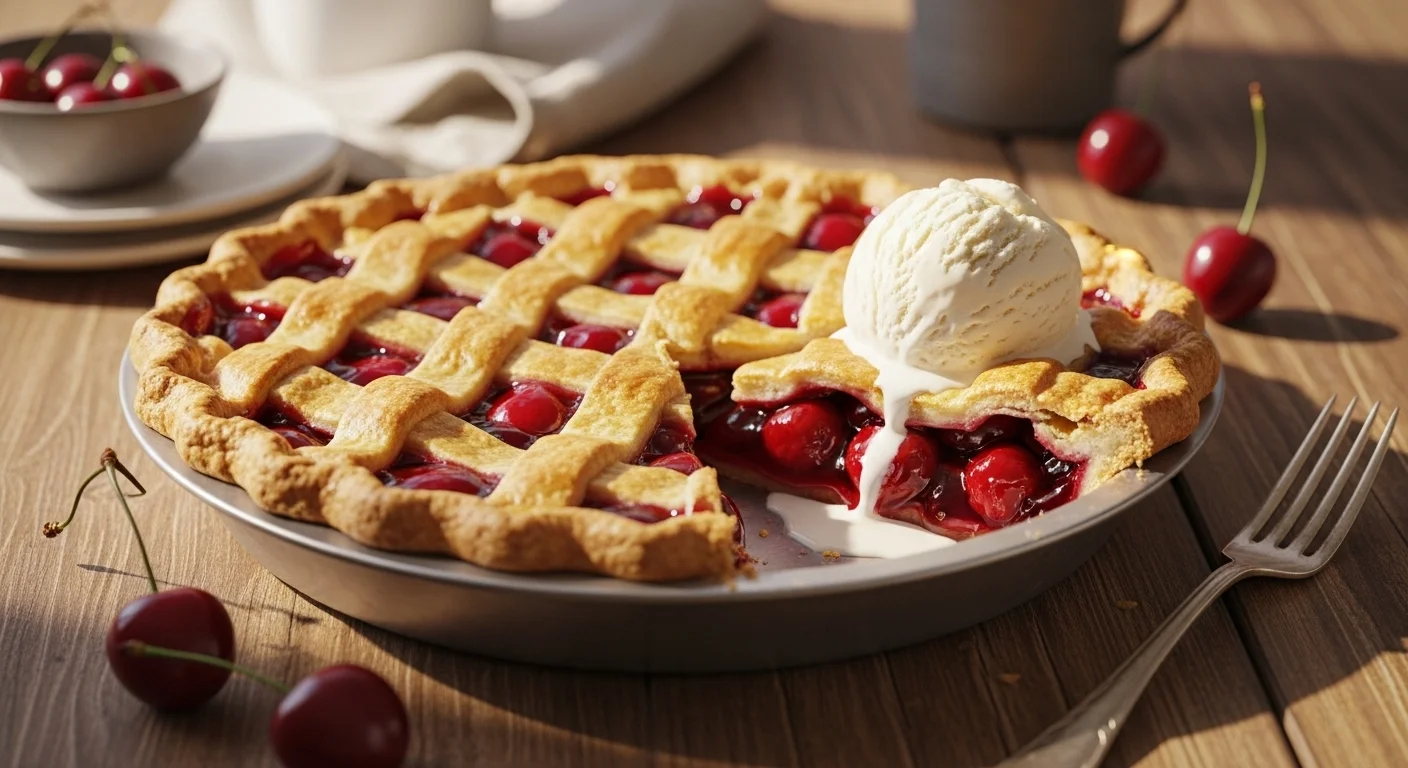
- Bake Away: Pop it in the oven for 45 to 55 minutes. You’re looking for a golden crust and filling that’s bubbling like a delicious volcano.
- The Hardest Part: Let it cool for at least two hours. If you cut it while it’s hot, the filling will run everywhere. Patience is a virtue, and also the key to a clean slice.
Common Mistakes to Avoid
Don’t be that person. Watch out for these traps:
- Forgetting the Vent: I mentioned this, but it bears repeating. Unless you want a cherry-flavored ceiling, cut the slits in the crust.
- Thawing Frozen Cherries Poorly: If using frozen, don’t let them sit in a pool of water. Drain the excess juice before mixing, or you’ll end up with a “Soggy Bottom” (shoutout to the British baking fans).
- The “Raw Center” Blunder: If the crust is getting too dark but the middle isn’t bubbling yet, cover the edges with some foil. Protect the crust at all costs.
- Under-measuring the Cornstarch: If you eyeball this and get it wrong, you’re eating cherry stew with a side of crackers. Use the actual measuring spoon, please.
Alternatives & Substitutions
- The “I Hate Pitting” Swap: Use frozen sweet cherries instead of sour ones, but cut the sugar back by about 1/4 cup so your teeth don’t ache.
- The Crust Shortcut: Graham cracker crust? It’s unconventional for a traditional cherry pie, but honestly? It’s your kitchen, live your truth. Just know the texture will be totally different.
- Spice it Up: Throw in a dash of cinnamon or almond extract. Almond and cherry are basically soulmates, IMO.
- Vegan Vibes: Use a vegan pie crust and swap the butter for a plant-based version. It still tastes amazing.
You can also try this lovely Recipe: Strawberry Pie Recipe
FAQ
Can I use canned cherry pie filling?
Technically, yes, but we might not be friends anymore. Canned filling is usually 10% fruit and 90% corn syrup “goo.” If you’re going to bake a pie, treat yourself to real fruit.
What if I don’t have a rolling pin?
A wine bottle works perfectly. Just make sure it’s empty first (or full, I’m not your boss) and wash the label off so you don’t get paper in your dough.
Why is my bottom crust soggy?
Usually, this happens if the oven wasn’t hot enough or you didn’t bake it long enough. Try baking the pie on the lowest rack for the first 15 minutes to give the bottom a “heat blast.”
Do I really have to wait for it to cool?
Do you want a pie or a puddle? If you cut it hot, the starch hasn’t set. Wait the two hours. Go watch a movie or something.
Can I freeze this masterpiece?
Absolutely. You can freeze it unbaked or baked. If unbaked, just add an extra 15 minutes to the baking time when you’re ready to eat. FYI, it stays good for months!
Final Thoughts
There you have it. You are now the proud owner of a gorgeous, homemade cherry pie. It wasn’t that scary, right? Whether you share it with friends or eat the whole thing yourself while standing over the kitchen sink (no judgment, we’ve all been there), you should be proud.
Baking is supposed to be fun, not a high-stress final exam. Now go grab a scoop of vanilla ice cream—because a cherry pie without ice cream is just a tragedy waiting to happen—and enjoy the fruits of your labor. You totally nailed it!
Cherry Pie Recipe
Ingredients
Method
- Preheat oven to 375°F (190°C).
- In a bowl, mix cherries, sugar, cornstarch, lemon juice, vanilla, and almond extract.
- Place one pie crust in a pie dish and pour in the cherry filling.
- Dot the filling with small pieces of butter.
- Cover with the top crust or lattice design and seal the edges.
- Brush the top with beaten egg and cut small slits for steam.
- Bake for 40-45 minutes until crust is golden and filling is bubbly.
- Let the pie cool before slicing and serving.
Notes
- Adjust sugar based on the tartness of cherries.
- Let the pie cool completely for cleaner slices.
- Serve with vanilla ice cream for extra indulgence.