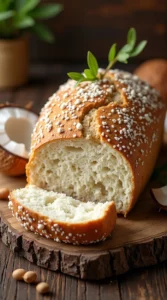
Coconut Flour Bread Recipe
So you want bread… but without the wheat, gluten, or the guilt trip that comes with eating half a loaf in one sitting? Yeah, same here. Good news: this Coconut Flour Bread Recipe is about to become your new kitchen bestie.
It’s fluffy, slightly nutty, surprisingly filling, and ridiculously easy to make. No complicated techniques. No weird chef skills required. Just mix, bake, and boom—you’ve got homemade bread that actually tastes good.
Plus, if you’re into low-carb, gluten-free, or just experimenting with healthier baking, this recipe fits right in. And honestly? Even if you’re not, it’s still delicious.
Why This Recipe is Awesome
Let’s be honest—healthy bread can sometimes taste like a brick wearing a disguise. But this coconut flour bread? Totally different story.
Here’s why people love it:
- Gluten-free but still fluffy. No sad, crumbly slices here.
- Low-carb friendly. Great for keto or low-carb diets.
- Super filling. Coconut flour packs serious fiber.
- Quick and easy. Mix, bake, done. No kneading drama.
- Beginner-proof. Seriously, if I didn’t mess it up, you won’t either.
Also, FYI: coconut flour absorbs a lot of liquid, which means this bread stays moist instead of dry and sad.
🍫 The Ultimate No-Bake Dessert Ebook 🍓
30 mouthwatering no-bake recipes you can whip up in minutes — creamy cheesecakes, fruity parfaits, chocolatey bars, and more!
- ⚡Quick & easy — no oven required
- 📖30 recipes + bonus treat
- 🍓Chocolate, fruit, nutty & refreshing flavors
- ✨Beautifully designed, instant download
Ingredients You’ll Need
Grab these simple ingredients before you start:
- 1/2 cup coconut flour
- 6 large eggs
- 1/4 cup melted coconut oil (or butter if you prefer)
- 1/4 cup unsweetened almond milk
- 1 teaspoon baking powder
- 1/2 teaspoon salt
- 1 teaspoon honey or maple syrup (optional, but nice)
- 1/2 teaspoon apple cider vinegar
Pro Tip: Coconut flour behaves differently from regular flour. Always measure it accurately, or your bread might turn into a dense little brick.
Step-by-Step Instructions
1. Preheat the Oven
Preheat your oven to 350°F (175°C).
Line a small loaf pan with parchment paper or grease it well. Trust me—sticking bread is a heartbreak nobody needs.
2. Mix the Wet Ingredients
Grab a bowl and whisk together:
- Eggs
- Melted coconut oil
- Almond milk
- Honey
- Apple cider vinegar
Mix until everything looks smooth and slightly frothy.
3. Add the Dry Ingredients
Now add:
- Coconut flour
- Baking powder
- Salt
Stir until the batter becomes thick. Don’t panic—that’s normal. Coconut flour absorbs liquid like a sponge.
4. Let the Batter Rest
Let the mixture sit for 2–3 minutes. This allows the coconut flour to fully absorb moisture and thicken properly.
Yes, patience matters here.
5. Pour into the pan
Transfer the batter into your prepared loaf pan. Smooth the top with a spatula so it bakes evenly.
6. Bake the Bread
Bake for 35–40 minutes, or until the top turns golden and a toothpick comes out clean.
Your kitchen will smell amazing at this point. Just saying.
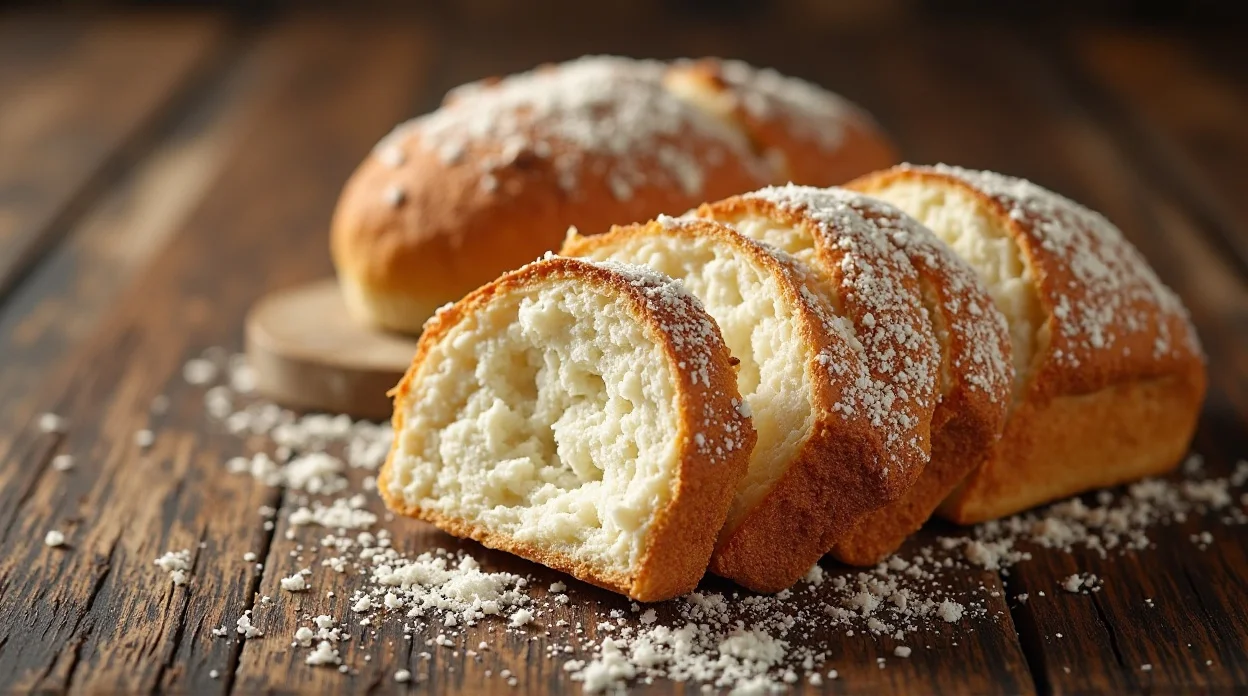
7. Cool Before Slicing
Let the bread cool for 10–15 minutes before slicing.
I know it’s tempting, but cutting hot bread can make it crumble. Stay strong.
More About Us: Zucchini Bread Recipe
Common Mistakes to Avoid
- Not Measuring Coconut Flour Correctly
Coconut flour is powerful stuff. Use too much, and your bread becomes dry. Always measure carefully. - Skipping the Eggs
Some people try to reduce eggs in this recipe. Bad idea. Coconut flour needs them for structure. - Forgetting to Preheat the Oven
Thinking the oven will heat up while baking? Rookie mistake. Preheat first. - Overbaking the Bread
Leave it too long, and it dries out. Check around the 35-minute mark. - Cutting It Too Early
Hot bread falls apart. Let it cool unless you enjoy crumb chaos.
Alternatives & Substitutions
Sometimes the pantry just refuses to cooperate. No worries—here are some easy swaps.
- Butter instead of coconut oil
Works perfectly and gives a richer flavor. IMO, butter makes everything better anyway. - Dairy milk instead of almond milk
Regular milk works fine if you’re not dairy-free. - Add seeds or nuts
Want extra texture? Add: - Chia seeds
- Sunflower seeds
- Chopped walnuts
- Make it savory
Skip the honey and add: - Garlic powder
- Herbs
- Shredded cheese
Now you’ve got fancy sandwich bread.
FAQ (Frequently Asked Questions)
Can I toast coconut flour bread?
Absolutely! In fact, toasting makes it even better. It becomes slightly crispy and perfect for butter or avocado.
Why is coconut flour bread so dense?
Coconut flour absorbs a ton of moisture. If the bread feels too dense, you may have added too much flour or baked it too long.
Can I freeze this bread?
Yep. Slice it first, store it in a freezer bag, and freeze for up to 3 months. Then just toast slices when you want them.
Can I make this recipe vegan?
Technically, yes, but it’s tricky. Coconut flour relies heavily on eggs. You’d need egg substitutes like flax eggs, but the texture may change.
Can I use regular flour instead of coconut flour?
Short answer: nope. Coconut flour behaves totally differently from wheat flour. Substituting it directly won’t work.
How long does coconut flour bread last?
Stored in an airtight container, it lasts 3–4 days in the fridge. Though honestly, it rarely survives that long.
Final Thoughts
And there you have it—an easy, delicious Coconut Flour Bread Recipe that doesn’t require chef-level skills or fancy ingredients.
It’s quick, healthy-ish, gluten-free, and surprisingly satisfying. Whether you toast it for breakfast, turn it into sandwiches, or just eat it warm with butter (no judgment here), it gets the job done.
Remember: baking with coconut flour takes a little patience, but once you get the hang of it, it’s ridiculously rewarding.
So go ahead—grab a mixing bowl and give it a try. Worst-case scenario, your kitchen smells amazing. Best case?
You just discovered your new favorite homemade bread.
Coconut Flour Bread Recipe
Ingredients
Method
- Preheat the oven to 350°F (175°C) and line a small loaf pan with parchment paper.
- In a large bowl whisk together eggs, melted coconut oil, almond milk, honey, and apple cider vinegar until smooth.
- Add coconut flour, baking powder, and salt to the wet mixture.
- Mix well until a thick batter forms.
- Let the batter rest for 2–3 minutes so the coconut flour absorbs the liquid.
- Pour the batter into the prepared loaf pan and smooth the top evenly.
- Bake for 35–40 minutes until the top is golden and a toothpick inserted in the center comes out clean.
- Allow the bread to cool in the pan for 10–15 minutes before slicing and serving.
Notes
Letting the batter rest helps improve the texture of the bread.
Allow the bread to cool before slicing to prevent crumbling.
Store leftovers in an airtight container in the refrigerator for up to 4 days.
Slices can be frozen for up to 3 months and toasted when ready to eat. DID YOU MAKE THIS EASY RECIPE? If you have, then share it with us by sending a photo. We’re excited to see what you’ve made:-):