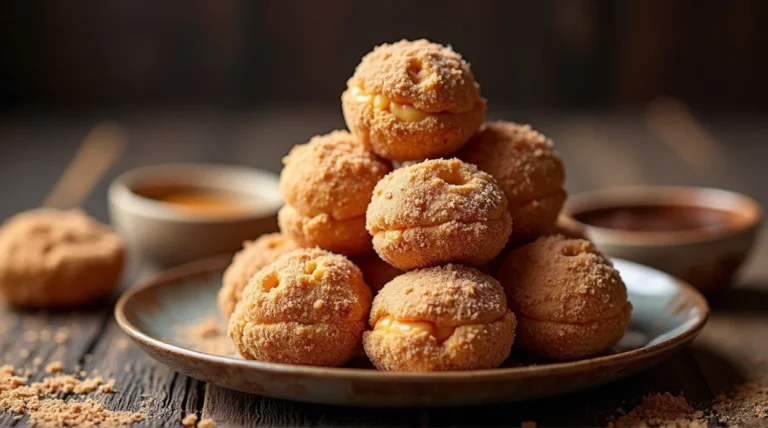
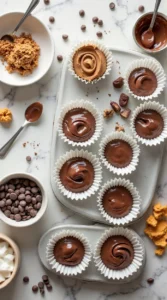
Frozen Peanut Butter Nutella Cups Recipe
So you want dessert… but you also want zero effort and maximum chocolate happiness. Totally fair. Maybe it’s late at night. Maybe it’s hot outside. Maybe you just opened the pantry, saw Nutella and peanut butter sitting there, and thought, “Hmm… something magical could happen here.”
Well, good news: it absolutely can.
These Frozen Peanut Butter Nutella Cups are ridiculously easy to make, require almost no cooking skills, and taste like something you’d find in a fancy dessert shop. Except you made them in your kitchen while wearing pajamas. Iconic. They’re creamy, chocolatey, peanut buttery, and perfectly chilled. Think of them as the love child of a peanut butter cup and a frozen dessert. And honestly? They might disappear faster than you expect.
Let’s make them before someone else finishes the Nutella.
Why This Recipe is Awesome
There are easy desserts… and then there are “wow, that was suspiciously easy” desserts. This one falls into the second category.
Here’s why these frozen cups are dangerously good:
🍫 The Ultimate No-Bake Dessert Ebook 🍓
30 mouthwatering no-bake recipes you can whip up in minutes — creamy cheesecakes, fruity parfaits, chocolatey bars, and more!
- ⚡Quick & easy — no oven required
- 📖30 recipes + bonus treat
- 🍓Chocolate, fruit, nutty & refreshing flavors
- ✨Beautifully designed, instant download
- Only a handful of ingredients. Nothing fancy or hard to find.
- No oven required. Your kitchen stays cool, and your life stays simple.
- Perfect sweet + salty combo. Peanut butter and Nutella were basically made for each other.
- Great for meal prep desserts. Yes, that’s a thing.
- They look impressive. People will assume you bought them from a bakery.
And the best part? They’re almost impossible to mess up. Seriously, even if your cooking skills peak at instant noodles, you’ve got this.
Ingredients You’ll Need
Simple ingredients, big dessert energy.
- 1 cup creamy peanut butter – Smooth works best, but crunchy adds a fun texture if you like a little chaos.
- ½ cup Nutella – The chocolate-hazelnut superstar of this recipe.
- ½ cup melted chocolate chips – Creates that delicious outer shell.
- 2 tablespoons coconut oil – Helps the chocolate harden nicely in the freezer.
- Mini cupcake liners – Because nobody enjoys peeling frozen chocolate off a pan.
Optional but awesome toppings:
- Crushed peanuts
- Sea salt flakes
- Chocolate drizzle
Pro tip: Use good-quality chocolate chips if possible. It makes the shell extra smooth and satisfying.
Step-by-Step Instructions
1. Prepare Your Muffin Tray
- Line a mini muffin tin with cupcake liners.
- This keeps everything neat and makes removing the cups ridiculously easy later.
2. Melt the Chocolate
- In a microwave-safe bowl, combine the chocolate chips and coconut oil.
- Microwave in 20–30 second intervals, stirring each time, until the mixture becomes smooth and glossy.
3. Create the First Chocolate Layer
- Spoon about 1 teaspoon of melted chocolate into each liner.
- Use the back of the spoon to spread it slightly up the sides. This creates a little chocolate “cup.”
- Place the tray in the freezer for 10 minutes so the chocolate sets.
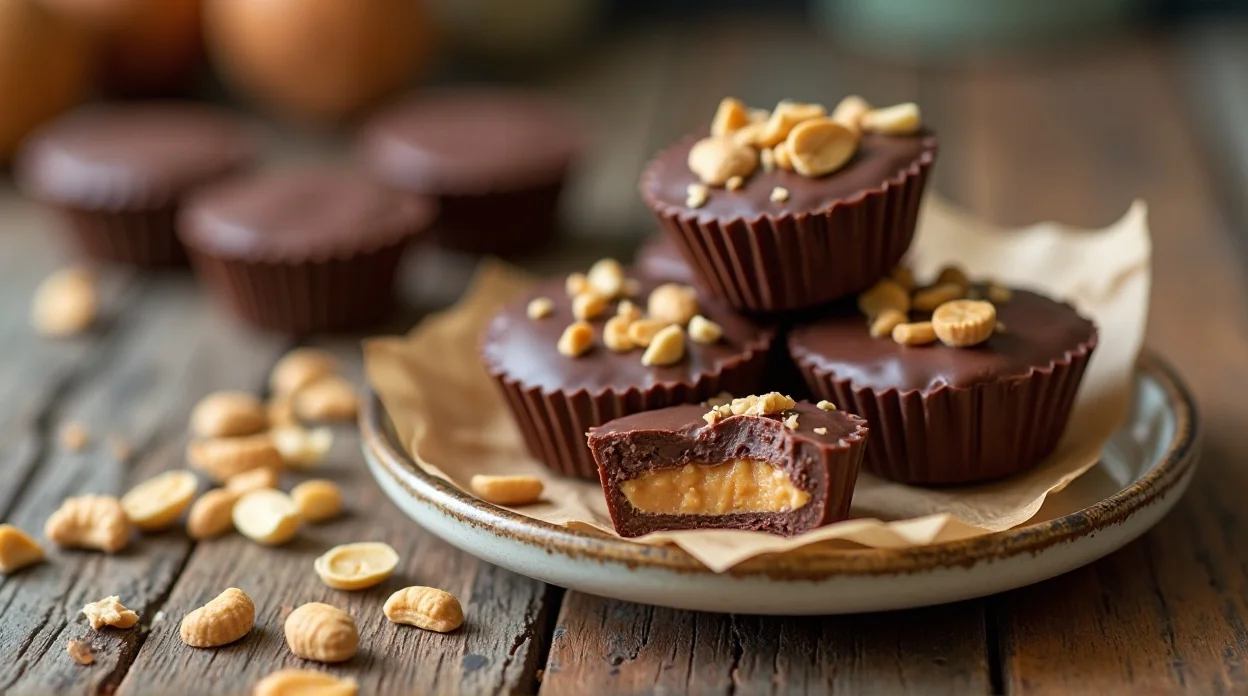
4. Add the Peanut Butter Layer
- Remove the tray from the freezer.
- Add about 1 teaspoon of peanut butter into each cup. Smooth it gently so it forms an even layer.
5. Add the Nutella Swirl
- Now drop ½ teaspoon of Nutella on top of the peanut butter layer.
- Use a toothpick or knife to lightly swirl the Nutella into the peanut butter. Don’t overmix—pretty swirls are the goal.
6. Seal with More Chocolate
- Top each cup with another spoonful of melted chocolate.
- Spread gently until the filling is completely covered.
7. Freeze Until Firm
- Place the tray back into the freezer for 30–40 minutes.
- Once the chocolate shell hardens, the cups are ready to enjoy.
8. Try Not to Eat All of Them at Once
- Remove the liners and dig in.
- Or store them in the freezer and pretend you’ll eat “just one a day.” (Good luck with that.)
Common Mistakes to Avoid
Even a no-bake recipe can go sideways. Let’s avoid that.
- Skipping the first freeze step
If the first chocolate layer doesn’t set, the peanut butter sinks. Suddenly, you have dessert soup instead of layered cups. - Overfilling the cups
Leave a little space for the final chocolate layer. Otherwise, things get… messy. - Using oily natural peanut butter
Some natural peanut butters separate a lot. Stir them well first, or the filling might get runny. - Not lining the tray
Yes, technically, you can skip liners. But then enjoy chiseling frozen chocolate from your pan like an archaeologist.
Alternatives & Substitutions
Want to customize these cups? Easy.
- Use almond butter instead
If peanut butter isn’t your thing, almond butter works great and adds a slightly nutty sweetness. - Try dark chocolate
Dark chocolate gives the cups a richer flavor and balances the sweetness of the Nutella. - Add crushed cookies
Sprinkle crushed Oreos or graham crackers between layers for extra crunch. - Make them dairy-free
Use dairy-free chocolate chips, and you’re good to go. - Add caramel
A tiny drizzle of caramel between layers? Next-level dessert energy.
IMO, adding a pinch of sea salt on top makes them taste like gourmet candy.
You can also try this lovely Recipe: Peanut Butter Nutella Swirl Brownies Recipe
FAQ (Frequently Asked Questions)
Do I have to keep these frozen?
Yes! They’re best stored in the freezer so the chocolate shell stays firm and the filling stays creamy.
Can I make these ahead of time?
Absolutely. In fact, they’re perfect for making a few days in advance.
Can I use chunky peanut butter?
Yes, and it adds a nice crunchy texture. Just know your cups will look a little more rustic.
How long do they last in the freezer?
Stored in an airtight container, they last up to 2 months. Realistically, though… they’ll be gone way sooner.
Can I make them bigger?
Sure! Use a regular muffin tin instead of a mini one. Just increase the filling amounts slightly.
Why is my chocolate shell cracking?
That usually happens if the chocolate layer is too thin. Add a slightly thicker coating next time.
Final Thoughts
If you love peanut butter cups and Nutella (and honestly, who doesn’t?), these Frozen Peanut Butter Nutella Cups are about to become your new obsession. They’re easy, delicious, freezer-friendly, and dangerously snackable. Plus, they look impressive enough to share with friends… though keeping them all for yourself is also a valid option. So grab your peanut butter, open that jar of Nutella, and whip up a batch tonight.
Then sit back, grab one from the freezer, and enjoy your new favorite no-bake dessert.
Frozen Peanut Butter Nutella Cups Recipe
Ingredients
Method
- Line a muffin tray with paper liners.
- Melt chocolate chips with coconut oil until smooth.
- Spoon a small amount of melted chocolate into each liner and spread to cover the bottom.
- Freeze for about 10 minutes until the chocolate layer firms up.
- In a bowl, mix peanut butter, Nutella, powdered sugar, and a pinch of sea salt until smooth.
- Add a spoonful of the peanut butter Nutella mixture over the chocolate base.
- Top with another layer of melted chocolate to seal the cups.
- Freeze for about 30 minutes until fully set.
- Remove from liners and enjoy chilled.
Notes
- Store the cups in the freezer for the best texture.
- Use dark chocolate for a richer flavor.
- Sprinkle crushed peanuts or sea salt on top before freezing for extra crunch.
DID YOU MAKE THIS EASY RECIPE?
If you have, then share it with us by sending a photo. We’re excited to see what you’ve made 🙂