Ice Cream Cone Cupcakes Recipe
So you want cupcakes… but also ice cream… but also something that makes people go “WAIT, what is THAT?!” Perfect. You’re about to make Ice Cream Cone Cupcakes Recipe —aka the dessert that looks like ice cream but secretly isn’t (plot twist).
They’re fun, adorable, and honestly? A little bit chaotic in the best way. Perfect for birthdays, parties, or just flexing your baking skills without actually working that hard. 😄
Why This Recipe is Awesome
Let’s talk about why these cupcakes are basically the life of the party:
- They look like ice cream cones – instant wow factor.
- Kid magnet – kids will lose their minds over these. Adults, too, let’s be honest.
- Surprisingly easy – looks complicated, but it’s not. Pinky promise.
- Customizable – flavors, colors, toppings… go wild.
- Mess-free serving – no plates needed, just grab and eat.
And best of all? You get all the fun of ice cream… without it melting everywhere. That’s a win.
Ingredients You’ll Need
Here’s your fun, slightly chaotic ingredient lineup:
🍫 The Ultimate No-Bake Dessert Ebook 🍓
30 mouthwatering no-bake recipes you can whip up in minutes — creamy cheesecakes, fruity parfaits, chocolatey bars, and more!
- ⚡Quick & easy — no oven required
- 📖30 recipes + bonus treat
- 🍓Chocolate, fruit, nutty & refreshing flavors
- ✨Beautifully designed, instant download
- 12–15 flat-bottom ice cream cones – your edible “cupcake liners”
- 1 box cake mix (or homemade batter if you’re feeling fancy)
- Ingredients required for cake mix (eggs, oil, water)
- 1–2 cups frosting (buttercream or store-bought)
- Food coloring (optional) – for that ice cream vibe
- Sprinkles – because life is better with sprinkles
Optional extras:
Chocolate chips
Mini marshmallows
Chopped nuts
Cherry on top (yes, literally 🍒)
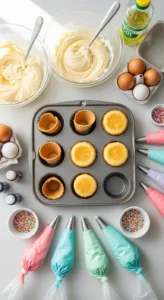
Step-by-Step Instructions
Preheat the oven
Set your oven according to the cake mix instructions (usually around 180°C / 350°F). Line a muffin tray with foil or place cones directly in the slots so they stand upright.
Prepare the batter
Mix your cake batter according to package instructions. Keep it smooth and lump-free. Nothing fancy here.
Fill the cones
Pour batter into each cone, filling about 2/3 full. Don’t overfill unless you want cupcake lava explosions (fun, but messy).
Bake to perfection
Place the tray in the oven and bake for 18–22 minutes, or until a toothpick comes out clean. The cones might look a little dramatic while baking—totally normal.
Cool completely
Let them cool fully before frosting. Warm cupcakes + frosting = melted mess. Patience, friend.
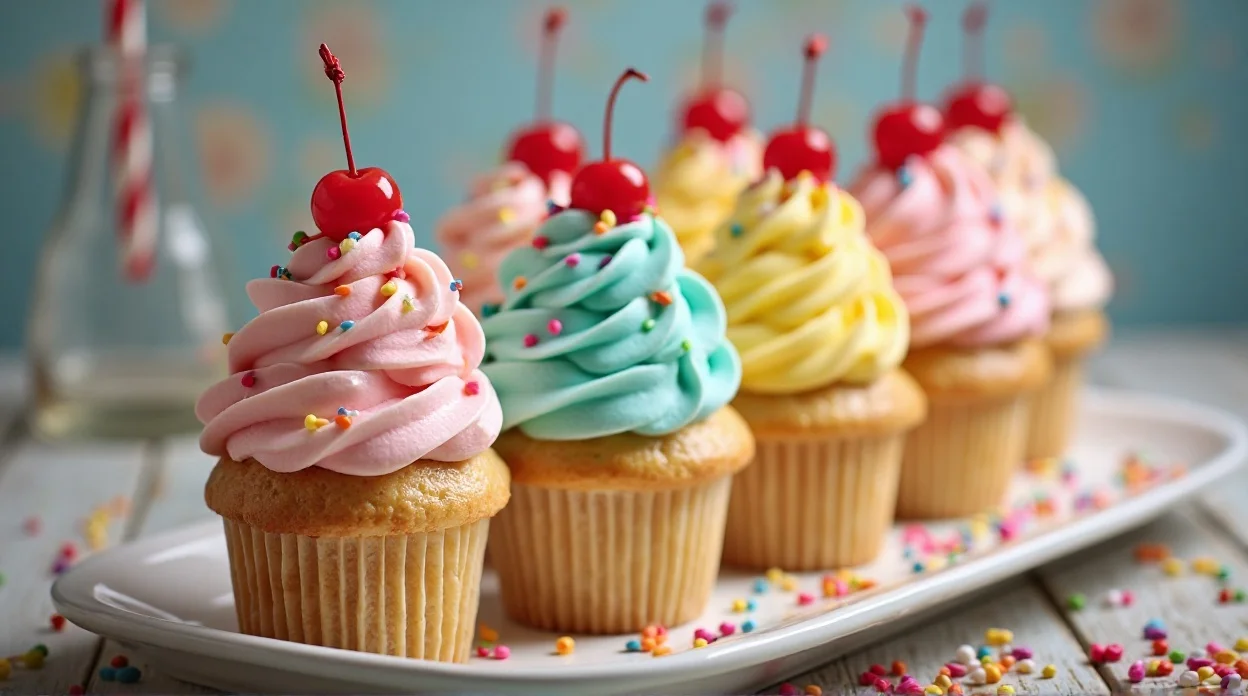
Frost like ice cream
Pipe frosting on top in a swirl to mimic soft-serve ice cream. This is your moment—make it pretty.
Decorate and serve
Add sprinkles, chocolate chips, or even a cherry on top. Boom—you just made edible art.
Common Mistakes to Avoid
Let’s avoid cupcake disasters, shall we?
- Overfilling the cones – batter overflow = ugly (but still tasty) results.
- Not stabilizing cones – they’ll tip over like sleepy toddlers. Use a muffin tray!
- Frosting too early – warm cupcakes melt frosting instantly. Tragic.
- Overbaking – dry cupcakes = no fun. Keep an eye on them.
- Skipping decorations – I mean, why would you? That’s the best part.
Alternatives & Substitutions
Because flexibility = kitchen survival:
- Cake flavors – chocolate, vanilla, red velvet, or funfetti. IMO, Funfetti is the most fun (obviously).
- Frosting options – whipped cream for a lighter feel or cream cheese frosting for richness.
- Cone swap – use sugar cones for extra crunch or waffle cones for a fancier look.
- Dairy-free version – use plant-based milk, egg substitutes, and dairy-free frosting.
- Mini version – use mini cones for bite-sized party treats. Dangerously cute.
You can also try this lovely Recipe: Grapes Rolled In Cream Cheese Recipe
FAQ (Frequently Asked Questions)
Can I make these ahead of time?
Yes! Bake the cupcakes a day ahead and frost them before serving for the freshest look.
Do the cones get soggy?
Not really if you eat them within a day. After that, they might soften a bit—but still delicious.
Can I use homemade cake batter?
Of course! Store-bought is quicker, but homemade works just as well (and earns you bonus points).
Why did my cones fall over?
You probably didn’t secure them in a muffin tray. They need support—like all of us sometimes.
Can I freeze them?
You can freeze unfrosted cupcakes, but cones may lose crispness. Fresh is best.
Can kids help with this recipe?
Absolutely! Kids love filling cones and adding toppings. Just supervise the oven part.
Can I make them without frosting?
You can, but… why would you do that? Frosting is half the fun.
Final Thoughts
And there you have it—your fun, adorable, and totally irresistible Ice Cream Cone Cupcakes Recipe that are guaranteed to steal the show. They’re playful, easy, and perfect for impressing literally anyone without breaking a sweat. Whether it’s a birthday party or just a random Tuesday, these cupcakes bring instant joy.
Pro tip: Make extra. People will come back for seconds… and thirds. Now go bake, decorate, and show off your masterpiece. You’ve officially leveled up your dessert game—and honestly? You deserve it. 🍦🎉
Ice Cream Cone Cupcakes Recipe
Ingredients
Method
- Preheat oven to 180°C (350°F)
- Place cones upright in a muffin tray
- Prepare cake batter as per package instructions
- Fill each cone 2/3 full with batter
- Bake for 18–20 minutes until a toothpick comes out clean
- Let cool completely
- Beat butter until creamy
- Add powdered sugar, milk, and vanilla to make frosting
- Add food coloring if desired
- Pipe frosting on top like soft-serve ice cream
- Decorate with sprinkles