Oreo Nutella Lava Bites Recipe
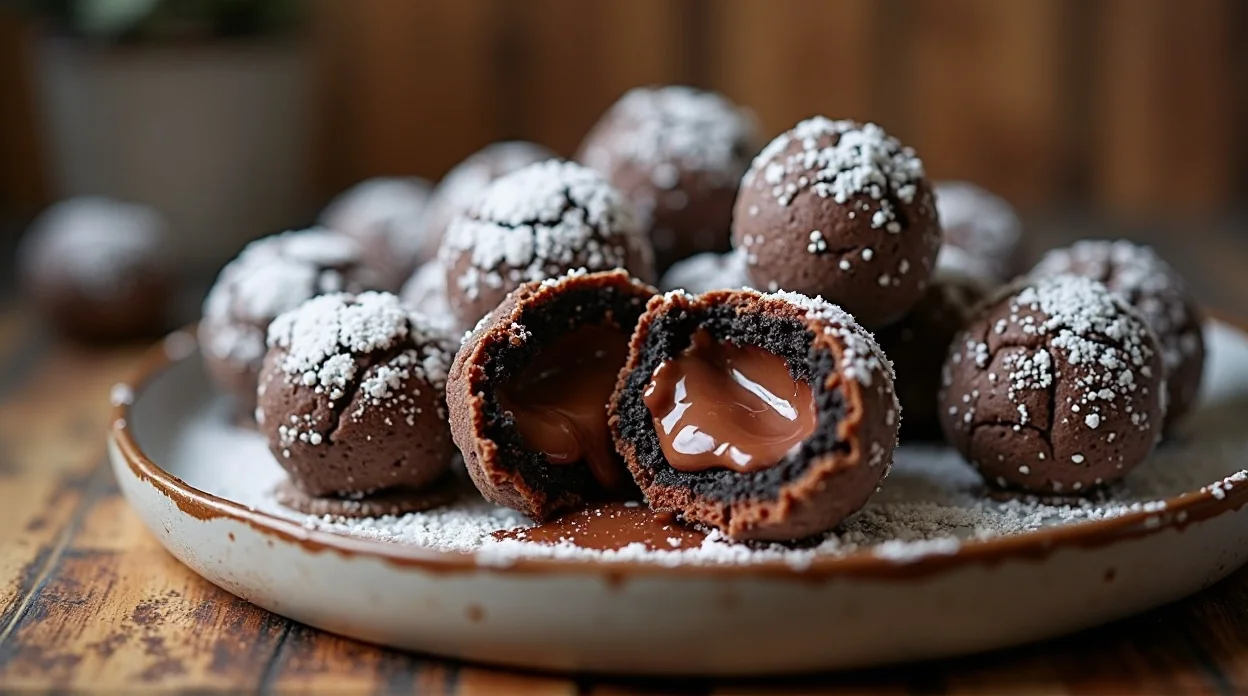
So you’re craving something chocolatey, gooey, and absolutely sinful, but you don’t want to spend hours in the kitchen? Same. That’s exactly why these Oreo Nutella Lava Bites exist. Tiny, indulgent, and bursting with Nutella lava inside a crispy Oreo shell—they’re basically bite-sized happiness with a chocolate coating. Honestly, if dessert therapy were a thing, this would be it.
And the best part? You don’t have to be some professional baker to make them. Even if your culinary skills usually stop at “microwave popcorn,” these bites have your back. Trust me, your taste buds will thank you.
Why This Recipe is Awesome
Okay, let’s talk about why these bites are basically a gift from dessert heaven:
- Lava magic: One bite and BAM—Nutella oozes like chocolate lava. It’s messy, it’s glorious, and it’s impossible not to smile.
- Oreo crunch: That cookie exterior gives just the right crispy-to-soft ratio, making your first bite a delightful crunch followed by molten chocolate.
- Ridiculously easy: No chocolate tempering, no fancy gadgets. Seriously, it’s idiot-proof. If I can make these without burning down the kitchen, you can too.
- Crowd-pleaser: Friends, family, coworkers—if you bring these to a party, you’ll instantly become “that dessert person.”
- Customizable: Want it spicier? Throw in a pinch of cinnamon or cayenne. Want it nutty? Add hazelnuts. It’s basically a chocolate playground.
In short, these bites combine crunchy, sweet, and gooey into one little package of pure joy.
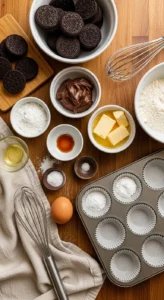
Ingredients You’ll Need
Here’s what you’ll need to whip up these magical bites. Keep it simple, fun, and chocolate-centric:
🍫 The Ultimate No-Bake Dessert Ebook 🍓
30 mouthwatering no-bake recipes you can whip up in minutes — creamy cheesecakes, fruity parfaits, chocolatey bars, and more!
- ⚡Quick & easy — no oven required
- 📖30 recipes + bonus treat
- 🍓Chocolate, fruit, nutty & refreshing flavors
- ✨Beautifully designed, instant download
- 10–12 Oreo cookies – or more if you’re planning on “taste-testing.”
- 1/2 cup Nutella – the gooey star of the show. Don’t cheat, please.
- 1/4 cup butter, melted – because chocolate + butter = happiness.
- 1/4 cup all-purpose flour – to help structure the lava.
- 1/4 cup powdered sugar – optional, for that fancy dusting effect.
- 1 large egg – the binder extraordinaire.
- 1/2 tsp vanilla extract – adds that extra flavor magic.
- Pinch of salt – balance is key, people.
Optional extras for flair:
- Chopped hazelnuts – because crunch plus chocolate is always a yes.
- Mini chocolate chips – for a double chocolate delight.
- A dusting of cocoa powder – looks pretty and tastes fancy.
Step-by-Step Instructions
Alright, buckle up. Making these bites is easy, but let’s walk through it like pros:
Preheat & prep: Preheat your oven to 350°F (175°C). Line a mini muffin tray with paper liners. Pro tip: Spray liners lightly with non-stick spray for easier removal.
Crush the Oreos: Throw them in a food processor or a ziplock bag + rolling pin. Don’t pulverize them into dust—leave some texture for that perfect crunch.
Mix the batter: In a bowl, whisk melted butter, egg, and vanilla extract until smooth. Stir in flour, salt, and powdered sugar. You want a thick but scoopable batter.
Assemble the bites:
- Spoon a small amount of Oreo crumbs into each muffin liner to create a base.
- Add a generous dollop of Nutella on top. Yes, the gooier, the better.
- Top with remaining Oreo crumbs. Press lightly to make sure everything sticks together.
Bake: Pop them in the oven for 10–12 minutes. Edges should look set, centers still soft. Do not overbake—that’s how you lose your lava.
Cool slightly: Let them sit for 5 minutes in the tray. This gives the lava a tiny moment to firm up, but don’t wait too long—you know the temptation is real.
Optional finishing touch: Dust with powdered sugar or cocoa powder, sprinkle with nuts, or drizzle a little extra Nutella on top. Style points matter.
Serve & enjoy: Break one open to watch the Nutella lava flow. Instant happiness.
Common Mistakes to Avoid
Even dessert pros make mistakes. Avoid these rookie errors:
- Overbaking: Lava = goo. Cookie-like chocolate = disappointment. Watch the timer!
- Skipping the butter: No butter = dry bites. Just… no.
- Overfilling liners: Tempting, I know. But leave some room for expansion, or you’ll have lava explosions in your oven.
- Ignoring cooling time: Bite immediately? Fine. Burn tongue? Also fine, but maybe not ideal.
- Pro tip: Don’t underestimate the power of slightly underbaked centers. That’s where the lava magic lives.
Alternatives & Substitutions
Let’s make this flexible because life is short, and chocolate is universal:
- Nutella alternatives: Peanut butter, almond butter, or any chocolate-hazelnut spread. I mean, why limit happiness?
- Cookie alternatives: Chocolate chip cookies, Biscoff, or even graham crackers. Texture may vary, but the fun remains.
- Flour-free option: Almond or oat flour works if you want a low-carb twist. Slightly adjust baking time.
- Sugar-free options: Skip powdered sugar or use a sugar substitute. Still indulgent.
- Extra crunch: Chop some hazelnuts or walnuts and fold them in the batter. Instant upgrade.
- Personal tip: I sometimes add a pinch of cinnamon or cayenne to the Nutella for a little unexpected flavor kick. Totally optional but mind-blowing.
You can also try this lovely Recipe: Cheddar Jalapeno Cornbread Recipe
FAQ (Frequently Asked Questions)
Can I make these ahead of time?
Absolutely! Assemble and freeze for up to a month. Bake straight from frozen—just add 2–3 extra minutes. Your future self will thank you.
Can I use mini Oreos?
Yes, but you’ll need slightly more cookies to fill the tray. Bite-size cuteness = guaranteed.
Can I double the recipe?
Yes. More bites = more happiness. Just make sure your tray can handle the crowd.
Can I use dark chocolate instead of Nutella?
Sure, but melt it first. Otherwise, you’ll get chunky chocolate instead of molten lava. And who wants that?
Can kids help make this?
Heck yes! Just supervise the oven part. Warning: spoon-licking may be extreme.
How long do leftovers last?
2–3 days in an airtight container. Heat 10–15 seconds in the microwave before serving to bring back the lava.
Can I add toppings?
Absolutely. Nuts, chocolate chips, caramel drizzle, whipped cream—let your inner dessert artist run wild.
Pro Tips to Level Up Your Lava Game
- Temperature matters: Room-temperature ingredients mix better and give smoother lava.
- Don’t overmix: Overmixing batter = dense bites. Lumps are okay—they add texture.
- Get creative with fillings: Nutella is classic, but try peanut butter, dulce de leche, or chocolate ganache for fun variations.
- Presentation counts: Dust with powdered sugar, drizzle chocolate, or top with a mini Oreo for maximum “wow.”
- Serve warm: Seriously, if you try to eat them cold, the lava isn’t lava anymore. Microwave for 10–15 secs before indulging.
Final Thoughts
Alright, dessert lovers, you now hold the key to tiny, chocolatey explosions of joy. Oreo Nutella Lava Bites are the ultimate treat for parties, Netflix binges, or just because life feels like it needs chocolate. They’re crunchy, gooey, and ridiculously easy to make.
Remember: life’s too short for boring desserts. You now have a bite-sized, chocolatey weapon of joy in your kitchen arsenal. Go impress someone—or yourself—and savor every molten, crunchy, indulgent bite. You’ve earned it. 🍫💖
Oreo Nutella Lava Bites Recipe
Ingredients
Method
- Crush Oreo cookies into very fine crumbs using a food processor or rolling pin.
- Mix Oreo crumbs with milk until a soft dough forms.
- Scoop a small portion of dough and flatten it in your hand.
- Add a small spoon of Nutella in the center and wrap the dough around it to form a ball.
- Place all balls on a lined baking tray.
- Bake in a preheated oven at 350°F (175°C) for about 8–10 minutes.
- Drizzle melted chocolate over the warm bites.
- Dust with powdered sugar if desired and serve warm for a gooey lava center.
Notes
- Freeze Nutella in small drops for easier filling.
- Do not overbake to keep the center soft and molten.
- Best served warm for the ultimate lava effect.
DID YOU MAKE THIS EASY RECIPE?
If you have, then share it with us by sending a photo. We’re excited to see what you’ve made 🙂