

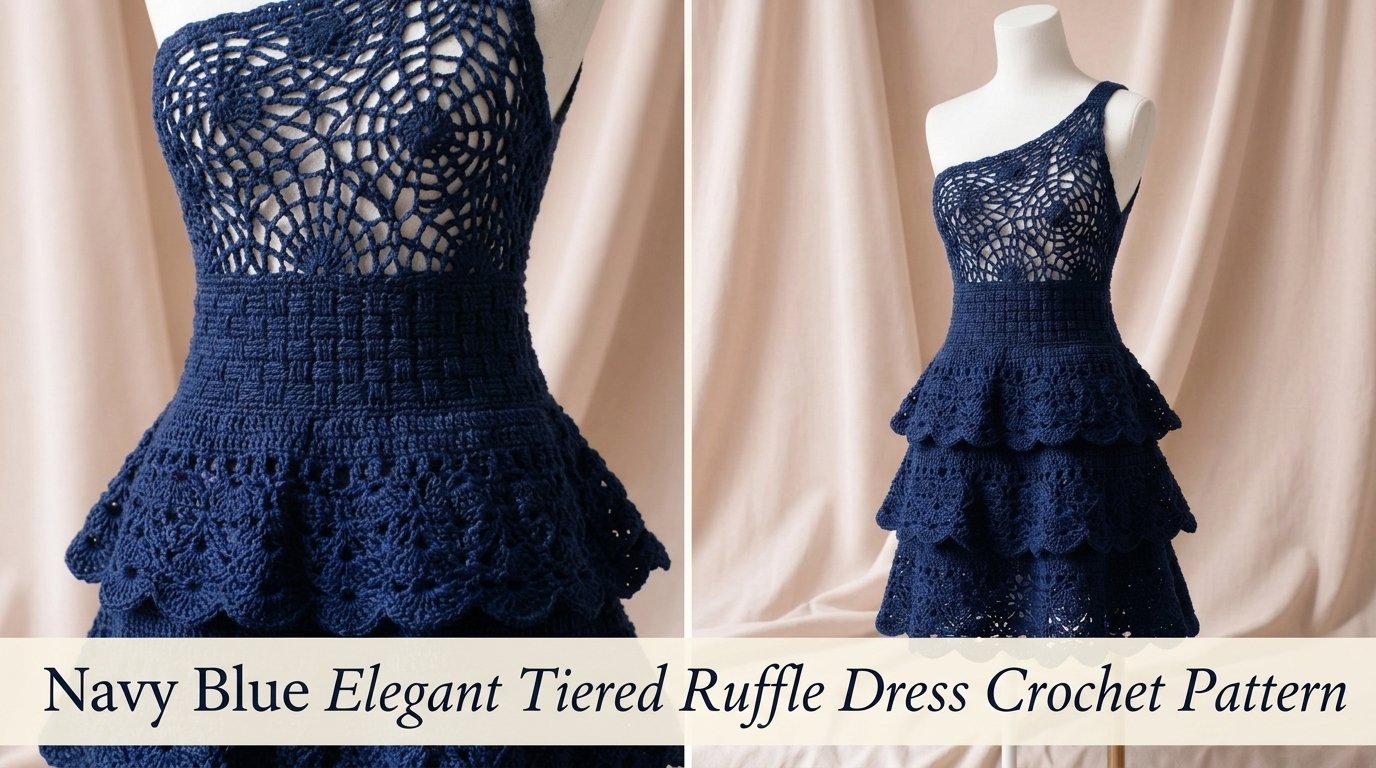
I still remember the exact moment this dress began. It was late evening, the light already low, and I was standing in front of my yarn shelves with a single skein of deep navy cotton in my hands. The color felt quiet and confident at the same time—like the sky just after the sun has gone but before the stars take over. I kept turning the yarn, imagining how it would fall if it were cut into soft layers that moved when you walked.
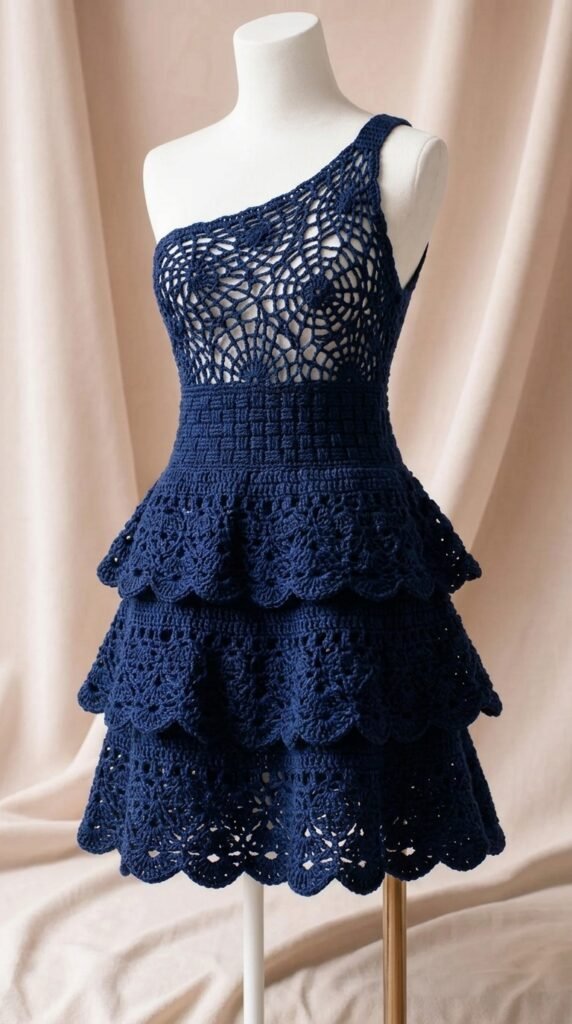
That was the start of this tiered ruffle dress. I wanted something that felt elegant without being stiff, that had movement without looking fussy, and that you could actually wear on a warm evening or a special daytime occasion. The result is a top-down dress with a simple fitted bodice that flows into three graduated ruffle tiers. The ruffles are worked with a gentle shell stitch so they bloom outward rather than standing stiff. The whole piece has a soft, almost liquid drape once it’s blocked.
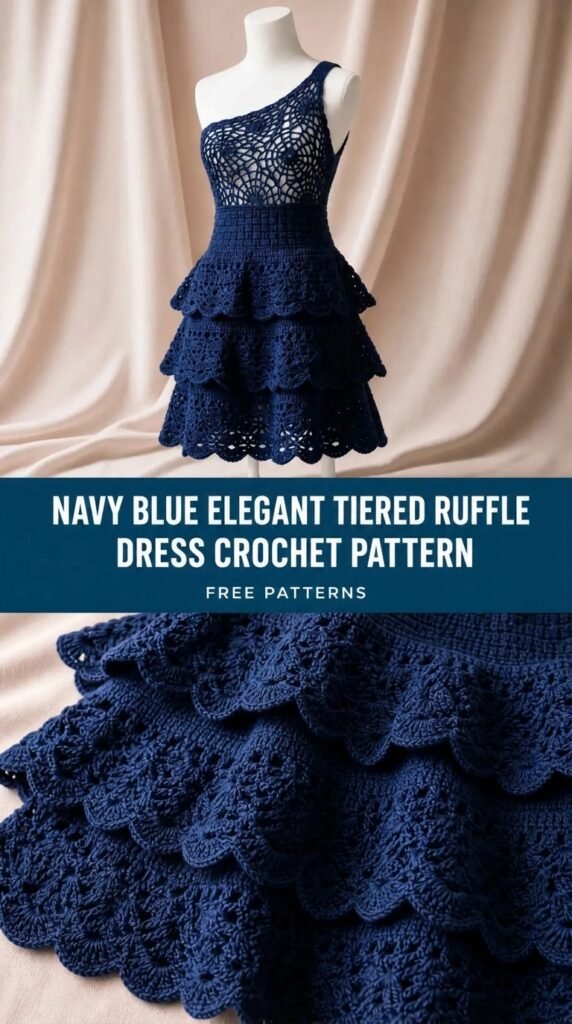
This is the Navy Blue Elegant Tiered Ruffle Dress. It is meant to feel like something you reach for when you want to look put-together but still completely comfortable.
About This Pattern
This dress is worked top-down in one piece. You begin with a circular yoke that shapes the neckline and armholes, then continue the bodice in the round to the high waist. From there, three successive ruffle tiers are added, each slightly wider than the last. The ruffles are created with a combination of double crochet and shell stitches so they have both structure and softness.
Skill level is intermediate. You should be comfortable working in the round, increasing evenly, and reading stitch counts. The shell ruffles look more complicated than they are once you get the rhythm.
Finished measurements (after blocking):
- Bust: 36–38 in (91–97 cm)
- High waist: 30–32 in (76–81 cm)
- Total length from shoulder: approximately 38 in (96 cm)
- Hem circumference: approximately 70 in (178 cm)
The dress is designed with a little positive ease through the bodice and a generous, flowing skirt. It works best with yarns that have good drape—cotton, cotton blends, or a soft acrylic that softens after washing.
Materials You’ll Need
Yarn
- Color A (Main): DK weight yarn, approximately 1,350 yards / 1,235 meters. I used a soft mercerized cotton in deep navy.
- Allow 15% extra for gauge variation and swatching.
Hooks
- 4.0 mm (G/6) for the main body and ruffles
- 3.5 mm (E/4) for the neckline and armhole edgings
Notions
- Stitch markers (at least 8)
- Tapestry needle
- Scissors
- Blocking mats and pins (or wires if you prefer)
- Optional: 2 small buttons or snaps for the optional back neck opening if you prefer a closer fit
Abbreviations and Terminology
All instructions use US crochet terminology.
- ch – chain
- sc – single crochet (insert hook, yarn over, pull up loop, yarn over, pull through both loops)
- hdc – half double crochet (yarn over, insert hook, yarn over, pull up loop, yarn over, pull through all three loops)
- dc – double crochet (yarn over, insert hook, yarn over, pull up loop, yarn over, pull through two loops, yarn over, pull through remaining two loops)
- tr – treble crochet (yarn over twice, insert hook, yarn over, pull up loop, [yarn over, pull through two loops] three times)
- sl st – slip stitch
- sp – space
- st(s) – stitch(es)
- sk – skip
- rep – repeat
- shell – (2 dc, ch 1, 2 dc) worked in the same stitch or space
- inc – increase (work two stitches in the same stitch)
Notes:
- Turning chains do not count as a stitch unless a step explicitly says they do.
- The beginning ch-3 of a round counts as the first dc.
- Join rounds with a slip stitch to the top of the beginning chain unless otherwise stated.
Gauge
Work a gauge swatch in the main pattern stitch (rounds of dc).
Using 4.0 mm hook:
16 dc and 9 rows = 4 in (10 cm) after light blocking.
If your swatch is smaller than 4 in, go up a hook size. If it is larger, go down a hook size. The ruffles will open more or less depending on your gauge, so matching the stitch width is more important than exact row height.
Main Pattern Instructions
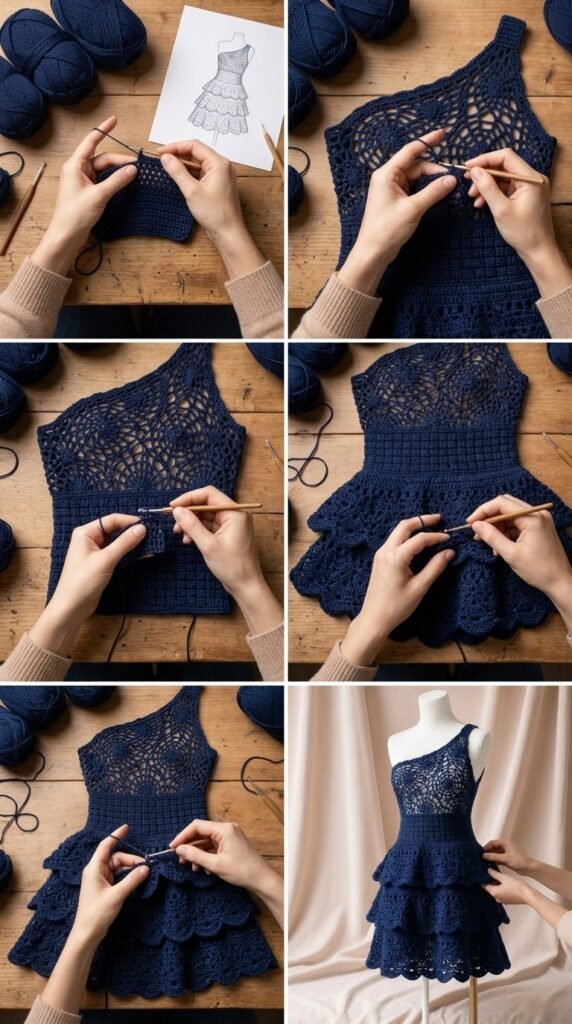
Yoke
With 4.0 mm hook and Color A, ch 96. Join with sl st to first ch, being careful not to twist. Place a marker in the join.
Round 1: Ch 3 (counts as first dc), dc in each ch around. Join. (96 dc)
Round 2: Ch 3, dc in next 7 sts, 2 dc in next st, *dc in next 8 sts, 2 dc in next st; rep from * around. Join. (108 dc)
Round 3: Ch 3, dc in next 8 sts, 2 dc in next st, *dc in next 9 sts, 2 dc in next st; rep from * around. Join. (120 dc)
Round 4: Ch 3, dc in next 9 sts, 2 dc in next st, *dc in next 10 sts, 2 dc in next st; rep from * around. Join. (132 dc)
Round 5: Ch 3, dc in next 10 sts, 2 dc in next st, *dc in next 11 sts, 2 dc in next st; rep from * around. Join. (144 dc)
Round 6: Ch 3, dc in next 11 sts, 2 dc in next st, *dc in next 12 sts, 2 dc in next st; rep from * around. Join. (156 dc)
Round 7: Ch 3, dc in next 12 sts, 2 dc in next st, *dc in next 13 sts, 2 dc in next st; rep from * around. Join. (168 dc)
Round 8: Ch 3, dc in next 13 sts, 2 dc in next st, *dc in next 14 sts, 2 dc in next st; rep from * around. Join. (180 dc)
At this point the yoke should measure approximately 18 in (46 cm) across when laid flat. If it is significantly smaller or larger, adjust by adding or removing an increase round.
Divide for Armholes
Round 9 (divide): Ch 3, dc in next 44 sts (front), ch 6 for underarm, sk next 40 sts (first armhole), dc in next 50 sts (back), ch 6 for second underarm, sk remaining 40 sts, join to top of beg ch-3. (94 dc + 12 underarm chains = 106 sts)
Round 10: Ch 3, dc in each dc and each ch around. Join. (106 dc)
Rounds 11–20: Ch 3, dc in each st around. Join. (106 dc)
These ten rounds form the fitted bodice. The piece should measure approximately 8 in (20 cm) from the underarm to the current edge. Adjust the number of rounds if you prefer a longer or shorter bodice.
First Ruffle Tier
Round 21 (setup for first ruffle): Ch 3, dc in next 2 sts, 2 dc in next st, *dc in next 3 sts, 2 dc in next st; rep from * around. Join. (132 dc)
Round 22: Ch 3, *(2 dc, ch 1, 2 dc) in next st (shell made), sk next 2 sts; rep from * around, ending with a shell in the last st if needed. Join to top of beg ch-3. (44 shells)
Round 23: Sl st into first ch-1 sp, ch 3, (dc, ch 1, 2 dc) in same sp, *shell in next ch-1 sp; rep from * around. Join.
Rounds 24–28: Repeat Round 23.
You now have six rounds of shells. This forms the first (uppermost) ruffle tier.
Second Ruffle Tier
Round 29 (increase for second tier): Ch 3, *2 dc in next ch-1 sp, ch 1, 2 dc in same sp, ch 1; rep from * around. Join. (This creates extra spaces for the next set of shells.)
Round 30: Sl st into first ch-1 sp, ch 3, (dc, ch 1, 2 dc) in same sp, *shell in next ch-1 sp; rep from * around. Join. (Approximately 66 shells)
Rounds 31–36: Repeat Round 30.
Six rounds of shells form the second tier.
Third Ruffle Tier
Round 37 (increase for third tier): Ch 3, *2 dc in next ch-1 sp, ch 1, 2 dc in same sp, ch 1; rep from * around. Join.
Round 38: Sl st into first ch-1 sp, ch 3, (dc, ch 1, 2 dc) in same sp, *shell in next ch-1 sp; rep from * around. Join. (Approximately 90–95 shells)
Rounds 39–45: Repeat Round 38.
Seven rounds of shells form the lowest and fullest ruffle.
Final edge round: Ch 1, sc in each dc and each ch-1 sp around. Join. Fasten off and weave in ends.
Special Techniques
Creating Soft, Even Ruffles
The shell stitch used here (2 dc, ch 1, 2 dc) produces a gentle wave rather than a sharp point. When you work the next round into the ch-1 spaces only, the shells stack and the fabric flares outward naturally. Keep your tension consistent; if the shells start to cup inward, try going up half a hook size for the ruffle sections only.
Optional Back Neck Opening
If you prefer a closer fit at the neck or want an easier-on dress, leave a 3-inch opening at the center back of the yoke during Rounds 1–4 and work the rows back and forth instead of joining. Add a small button or snap after finishing.
Assembly and Finishing
Because the dress is worked in one piece, there is almost no seaming.
- Weave in all ends securely on the wrong side.
- Optional: Work one round of sc around each armhole using the 3.5 mm hook for a neat finish.
- Optional: Work one round of sc around the neckline with the 3.5 mm hook. If you left a back opening, continue the sc down both sides of the opening and add a button loop.
Blocking and Care
This dress needs a good wet block to open the ruffles and set the drape.
- Soak the finished dress in lukewarm water with a mild wool wash or baby shampoo for 15–20 minutes.
- Gently squeeze out excess water—do not wring.
- Roll in a clean towel to remove more moisture.
- Lay flat on blocking mats. Shape the bodice to the finished measurements and gently stretch the three ruffle tiers outward so they lie flat and even. Pin the outer edges of each tier.
- Allow to dry completely (usually 24 hours).
Care: Hand wash in cool water, roll in a towel, and dry flat. Never hang the wet dress—the ruffles will stretch. Store folded rather than on a hanger.
Fit and Troubleshooting Tips
- Bodice feels tight: Add 1–2 extra rounds of plain dc before beginning the first ruffle.
- Ruffles are cupping instead of flaring: Your tension is a little tight. Go up a hook size for the shell rounds only, or block more aggressively.
- Ruffles are too floppy: Your tension is loose or the yarn is very soft. Try a smaller hook for the shell rounds.
- Want a longer dress: Simply add more rounds to the third tier (or add a fourth tier using the same increase method).
- Want a fuller skirt: Work an extra increase round between tiers.
If the dress feels slightly short after blocking, the cotton will relax a little more with wear.
FAQ’s
Can I make this dress in a different size?
Yes. The easiest way is to adjust the starting chain in multiples of 12 and keep the same increase rate in the yoke. For a smaller size, start with 84 chains; for a larger size, start with 108 or 120 chains. Always check the yoke measurement against your own bust and shoulder width before dividing for the armholes.
What yarn substitutes work well?
Any DK-weight yarn with good drape will work. Soft cotton, cotton-bamboo blends, or a light acrylic that softens after washing are ideal. Avoid stiff cottons or heavy wool—the ruffles need to move freely. If you switch yarn, make a gauge swatch and adjust hook size so you still get 16 dc = 4 in.
How much extra yarn do I need if I add a fourth tier or lengthen the dress?
Plan on an extra 200–250 yards for a full fourth tier. Adding two or three extra rounds to the existing third tier usually needs only 80–100 yards.
Can I work the bodice in rows instead of rounds for a better fit?
Absolutely. After the yoke increases, work the bodice back and forth, leaving a small opening at the center back if you like. Just make sure your stitch count stays consistent so the ruffle increases still land evenly.
My ruffles look uneven or are twisting. What went wrong?
Most often this happens when the shells are not worked into the same ch-1 space consistently, or when tension changes between rounds. Slow down on the shell rounds, keep the same number of yarn-overs each time, and block thoroughly. The blocking step is what really settles the tiers into even, graceful waves.
Is this dress suitable for beginners?
It is written for intermediate crocheters. If you are comfortable with double crochet, working in the round, and counting stitches, you can manage it. The shell ruffles look more advanced than they are once you complete the first two rounds.
Can I add sleeves?
Yes. After dividing for the armholes, you can pick up stitches around each armhole and work short sleeves in the same dc stitch, or even continue a few rounds of shells for a ruffled sleeve edge. Just be aware that sleeves will change the overall balance of the dress and may require a bit more yarn.
Final Thoughts
There is something deeply satisfying about watching the three tiers bloom as you block this dress. What begins as a neat stack of shells becomes soft, moving layers that catch the light differently with every step. I hope you enjoy the process as much as I did—the quiet rhythm of the shells, the way the navy yarn looks richer under your hands, and the moment you try it on and feel the gentle weight of the ruffles.
If you make this Navy Blue Elegant Tiered Ruffle Dress, I would love to see it. Leave a comment, share a photo, or pin it so others can find the pattern too. Wear it somewhere that makes you feel quietly confident. You earned it.


Leave a Reply
You must be logged in to post a comment.