

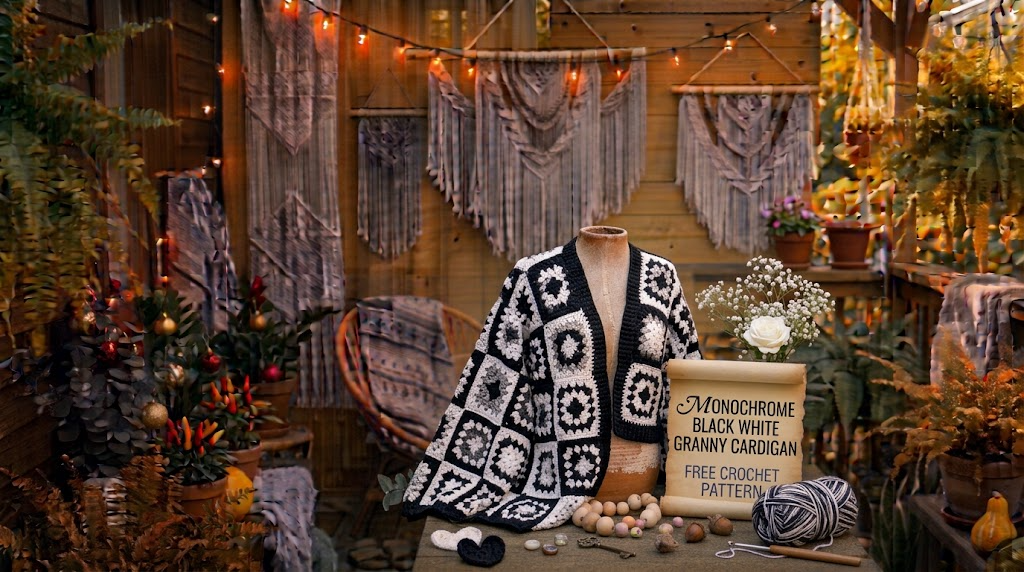
Some crochet projects become favorites because of their colors, while others stand out because of their construction. For me, a black and white cardigan combines both. I love how these two classic shades create a striking contrast without making the finished garment feel overly complicated or difficult to style.
When planning this Monochrome Black White Granny Cardigan Free Crochet Pattern, I wanted something comfortable enough for everyday wear but interesting enough to become a statement piece. Traditional granny squares were the perfect choice. Their familiar clusters create beautiful texture, while alternating black and white gives every square a clean, graphic appearance.
This cardigan has a relaxed silhouette, comfortable sleeves, and a simple open front. You can wear it over a basic T-shirt, a fitted dress, or your favorite jeans. The best part is that you can make it using individual granny squares, so the project feels manageable even if you prefer working on smaller sections.
About This Monochrome Black White Granny Cardigan Pattern
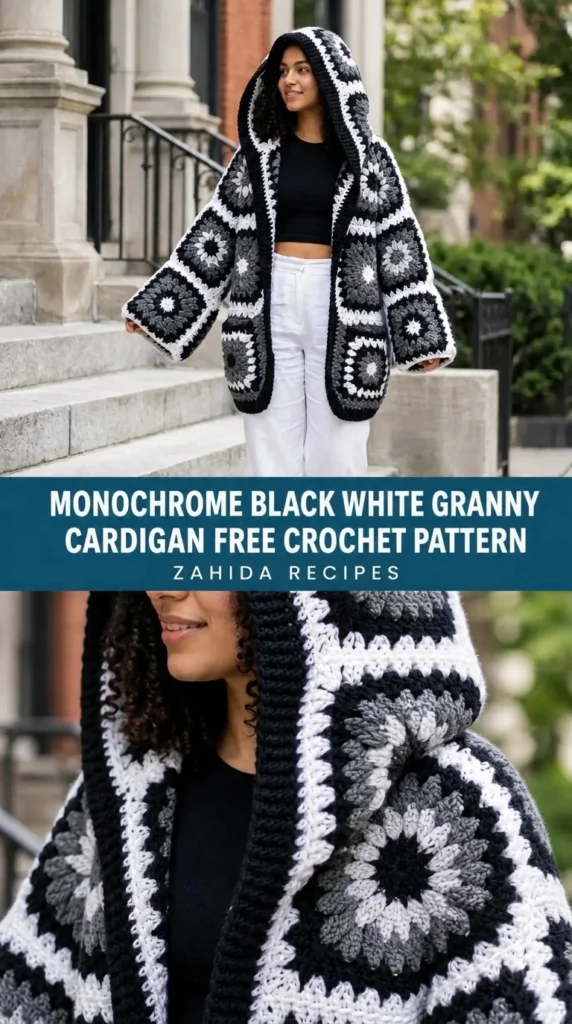
This cardigan is constructed from individual granny square motifs joined together to create the back, front panels, and sleeves.
The design uses a traditional granny stitch made with groups of three double crochet stitches separated by chain spaces. Black and white yarn alternate in a balanced pattern, creating a timeless checkerboard-inspired appearance.
The cardigan features:
- Classic black and white granny squares.
- Relaxed, slightly oversized fit.
- Open-front design without buttons.
- Long, comfortable sleeves.
- Ribbed cuffs and lower edging.
- Simple neckline finishing.
- Lightweight fabric with a comfortable drape.
Skill Level: Intermediate.
You should understand basic crochet stitches, changing colors, joining motifs, and working in rounds. Beginners can also attempt this project by making the squares individually before assembling the garment.
Finished Sizes: S, M, L, XL, and 2XL.
| Size | Bust | Body Length |
| S | 36 in | 22 in |
| M | 40 in | 23 in |
| L | 44 in | 24 in |
| XL | 48 in | 25 in |
| 2XL | 52 in | 26 in |
The cardigan is designed with approximately 4–6 inches of positive ease for a relaxed fit.
Materials You’ll Need
Yarn
Choose a soft acrylic or acrylic-wool blend that holds its shape without feeling too heavy.
- Color A – Black: Approximately 1,000–1,400 yards, depending on size.
- Color B – White: Approximately 1,000–1,400 yards, depending on size.
Yarn Weight: Worsted weight (Category 4), approximately 200 meters per 100 grams.
Allow 15% extra yarn if your gauge tends to be loose or you plan to lengthen the sleeves.
Crochet Hooks
- 5.0 mm crochet hook for granny squares.
- 4.5 mm crochet hook for ribbing and edging.
Additional Supplies
- Tapestry needle.
- Stitch markers.
- Scissors.
- Measuring tape.
- Blocking mats and rust-resistant pins.
- Optional removable stitch markers for assembly.
Abbreviations and Terminology
This pattern uses US crochet terminology.
| Abbreviation | Meaning |
| ch | Chain |
| sl st | Slip stitch |
| sc | Single crochet |
| dc | Double crochet |
| sp | Space |
| sk | Skip |
| st | Stitch |
| sts | Stitches |
| rnd | Round |
| rep | Repeat |
| RS | Right side |
| WS | Wrong side |
Basic Stitch Instructions
- Chain (ch): Yarn over and pull through the loop on your hook.
- Slip Stitch (sl st): Insert hook into the stitch, yarn over, and pull through both loops.
- Single Crochet (sc): Insert hook, yarn over and pull up a loop, yarn over and pull through both loops.
- Double Crochet (dc): Yarn over, insert hook, pull up a loop, yarn over and pull through two loops twice.
Granny Cluster: Work 3 dc into the same chain space.
Granny Square Corner: Work 3 dc, ch 2, and 3 dc into the same corner space.
Important: The beginning chain-3 counts as the first double crochet unless otherwise stated.
Gauge
Gauge is important because the cardigan is assembled from individual squares. If your squares are different sizes, the panels may not line up correctly.
Gauge: One completed granny square should measure approximately 6 × 6 inches after blocking.
To make your gauge swatch:
- Work a granny square using the instructions below.
- Complete four rounds.
- Fasten off and weave in the ends.
- Gently block the square.
- Measure across the center.
If your square measures smaller than 6 inches, try a larger hook. If it measures larger, use a smaller hook.
Make sure all your squares have consistent measurements before joining them.
Main Pattern Instructions
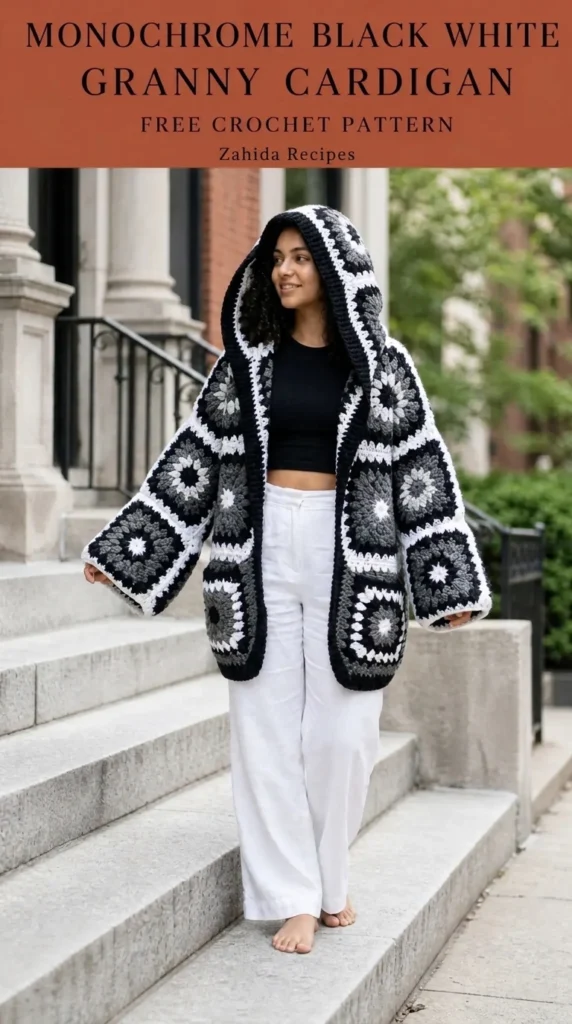
1. Granny Square Foundation
You will create individual squares using black and white yarn.
For a balanced monochrome design, alternate the colors between rounds.
Color Sequence:
- Round 1: Black.
- Round 2: White.
- Round 3: Black.
- Round 4: White.
Repeat this color arrangement for every square.
Granny Square Instructions
Round 1: With Color A (black), ch 4 and join with a sl st to form a ring.
Ch 3 (counts as first dc), work 2 dc into the ring, ch 2.
Work 3 dc, ch 2 into the ring three more times.
Join with a sl st to the top of the beginning ch-3.
Count: 4 granny clusters and 4 corner spaces.
Fasten off.
Round 2: Join Color B (white) into any corner space.
Ch 3, 2 dc, ch 2, 3 dc into the same corner space.
Ch 1.
Into the next corner space, work 3 dc, ch 2, 3 dc.
Repeat around all four corners, placing ch 1 between corner groups.
Join with a sl st to the beginning ch-3.
Fasten off.
Round 3: Join Color A into any corner space.
Ch 3, 2 dc, ch 2, 3 dc into the same corner.
Ch 1, work 3 dc into the next side space, ch 1.
Into the next corner, work 3 dc, ch 2, 3 dc.
Repeat around.
Join with a sl st and fasten off.
Round 4: Join Color B into any corner space.
Ch 3, 2 dc, ch 2, 3 dc into the same corner.
Ch 1, work 3 dc into each side space, placing ch 1 between clusters.
Work 3 dc, ch 2, 3 dc into each corner.
Repeat around and join.
Fasten off and weave in the ends.
Count Check: Each completed square should have four corner spaces and three granny clusters along each side.
Make all squares using the same four-round construction.
2. Number of Granny Squares
The following layout provides a relaxed cardigan shape.
| Size | Back Squares | Front Squares | Sleeve Squares |
| S | 6 | 3 each | 6 each |
| M | 8 | 4 each | 8 each |
| L | 8 | 4 each | 8 each |
| XL | 10 | 5 each | 10 each |
| 2XL | 10 | 5 each | 10 each |
For the back, arrange the squares in two columns for S and three columns for the larger sizes, adjusting the layout to your desired width.
For the front, arrange the squares vertically in one column per side.
For each sleeve, arrange the squares into a long rectangular panel.
The square layout is flexible, but the final assembled panels should be measured against your body before joining.
3. Arranging the Squares
Before sewing, lay all your squares on a flat surface.
Alternate the visual placement of the colors to create an interesting monochrome pattern.
For example:
- Place a black-centered square beside a white-centered square.
- Avoid placing all matching squares together.
- Keep the left and right front panels visually balanced.
- Make both sleeves the same length.
This arrangement gives the cardigan a coordinated appearance without requiring complicated colorwork.
4. Joining the Granny Squares
You can use either a whipstitch seam or a slip-stitch join.
I recommend a slip-stitch join in black yarn because it creates a subtle outline between the squares.
Joining Method:
- Place two squares together with the right sides facing outward.
- Insert your hook through the corresponding stitches on both squares.
- Join black yarn.
- Work slip stitches evenly along the edge.
- Keep your tension relaxed.
- Fasten off after completing the seam.
Join the back squares first, followed by the front panels.
Next, connect the front panels to the back at the shoulders, leaving the center front open.
Leave enough space at the top of each side for the neckline.
5. Creating the Cardigan Body
Once the front and back panels are joined, fold the cardigan at the shoulder seams.
Lay it flat and check that the side edges line up.
Join each side seam from the bottom upward, leaving an opening for the sleeves.
For a comfortable fit, leave approximately 8–9 inches for the armhole opening, adjusting as necessary for your size.
Try the cardigan on before completing the side seams.
The body should hang comfortably without pulling across the back or chest.
6. Making the Sleeves
Each sleeve is made from a rectangular arrangement of granny squares.
Join the squares together using the same slip-stitch method.
Fold the rectangle lengthwise with the right sides facing outward.
Join the long edges to create a sleeve tube.
Attach the sleeve to the armhole, matching the sleeve seam with the underarm seam.
Distribute the fabric evenly around the opening.
Repeat for the second sleeve.
Fit Tip: If you prefer wider sleeves, add an extra granny square to the sleeve width before assembly.
Special Techniques and Additional Elements
1. Ribbed Sleeve Cuffs
The cuffs give the cardigan a neat finish and help the sleeves sit comfortably around your wrists.
Using black yarn and a 4.5 mm hook:
Round 1: Join yarn around the sleeve opening. Ch 1 and work 1 sc into each stitch evenly around. Join with a sl st.
Row 2: Ch 1, sc in the back loop only across. Turn.
Rows 3–8: Ch 1, sc in the back loop only across. Turn.
Join the first and last rows using slip stitches.
Fasten off and weave in the end.
Repeat for the second sleeve.
2. Bottom Ribbed Border
Attach black yarn to one lower corner of the cardigan.
Row 1: Ch 1 and work sc evenly across the entire bottom edge. Turn.
Row 2: Ch 1, sc in the back loop only across. Turn.
Rows 3–6: Repeat Row 2.
This creates a simple ribbed finish that balances the geometric granny square texture.
3. Front Opening Border
Join black yarn at the lower right front edge.
Work single crochet evenly up the front opening, around the neckline, and down the opposite front edge.
Keep your stitches evenly spaced.
Work two additional rows of single crochet.
Do not pull the border too tightly, as this can cause the front edges to curl inward.
Assembly and Finishing
Before considering the cardigan complete, take a few minutes to inspect the entire garment.
Weave in Loose Ends
Use a tapestry needle to weave every yarn tail into nearby stitches.
Because black and white create strong contrast, weave black ends into black sections and white ends into white sections whenever possible.
Check the Seams
Inspect:
- Shoulder joins.
- Side seams.
- Sleeve seams.
- Sleeve attachment points.
- Bottom border.
- Front opening.
Reinforce any areas that feel loose.
Check the Fit
Try on the cardigan and check the following:
- The shoulder seams sit comfortably.
- The sleeves allow easy movement.
- The front panels hang evenly.
- The body length suits your preference.
- The cuffs are not too tight.
You can add extra rows to the bottom border if you want a longer cardigan.
Blocking and Care
Blocking makes a noticeable difference in granny square garments.
It helps the individual motifs sit evenly and gives the cardigan a more polished appearance.
Wet Blocking
For acrylic or washable wool-blend yarn:
- Fill a basin with cool or lukewarm water.
- Add a small amount of gentle detergent.
- Submerge the cardigan.
- Allow it to soak for approximately 10–15 minutes.
- Remove it carefully without wringing.
- Press excess water out using a clean towel.
- Lay flat on blocking mats.
- Adjust the cardigan to its intended measurements.
- Allow it to dry completely.
Avoid hanging the cardigan while wet because the weight can stretch the granny squares.
For acrylic yarn, use steam only if the yarn label allows it. Keep the iron or steamer away from direct contact with the fabric.
Washing and Storage
- Hand wash when possible.
- Use cool water.
- Avoid harsh detergents.
- Do not twist or wring.
- Dry flat.
- Store folded rather than hanging.
- Keep away from rough surfaces that may cause snagging.
Fit and Troubleshooting Tips
My Granny Squares Are Different Sizes
This usually happens because of changing tension.
Check your hook size and stitch technique. Block the squares to the same measurements before joining.
The Cardigan Looks Too Stiff
Your tension may be too tight, or your yarn may be too heavy.
Try a larger hook for the granny squares and use a softer yarn blend.
The Front Edges Curl
This can happen when the front border is too tight.
Undo the border and work again with a slightly larger hook. Keep the stitches relaxed.
The Sleeves Are Too Short
Add another row of granny squares or extend the sleeve with additional rounds before attaching the cuffs.
The Cardigan Feels Too Wide
If you have not joined the panels yet, remove a square from the body width. If the cardigan is already assembled, consider adding a more fitted side seam.
The Squares Do Not Match
Measure every square before assembly. Small differences become more noticeable when several motifs are joined together.
Final Thoughts
I love how this Monochrome Black White Granny Cardigan Free Crochet Pattern combines traditional granny square construction with a clean, modern color palette.
Black and white never go out of style, and the simple contrast makes this cardigan easy to coordinate with different outfits. The individual squares also make the project enjoyable because you can work on a few motifs whenever you have a little free time.
Take your time with the square placement, keep your seams neat, and remember that blocking can make a big difference to the finished garment.
Most importantly, make it your own. You can add extra sleeve length, adjust the body width, or experiment with different arrangements of black and white squares.
I hope you enjoy making this cardigan as much as I enjoyed designing it. Happy crocheting!




Leave a Reply
You must be logged in to post a comment.