

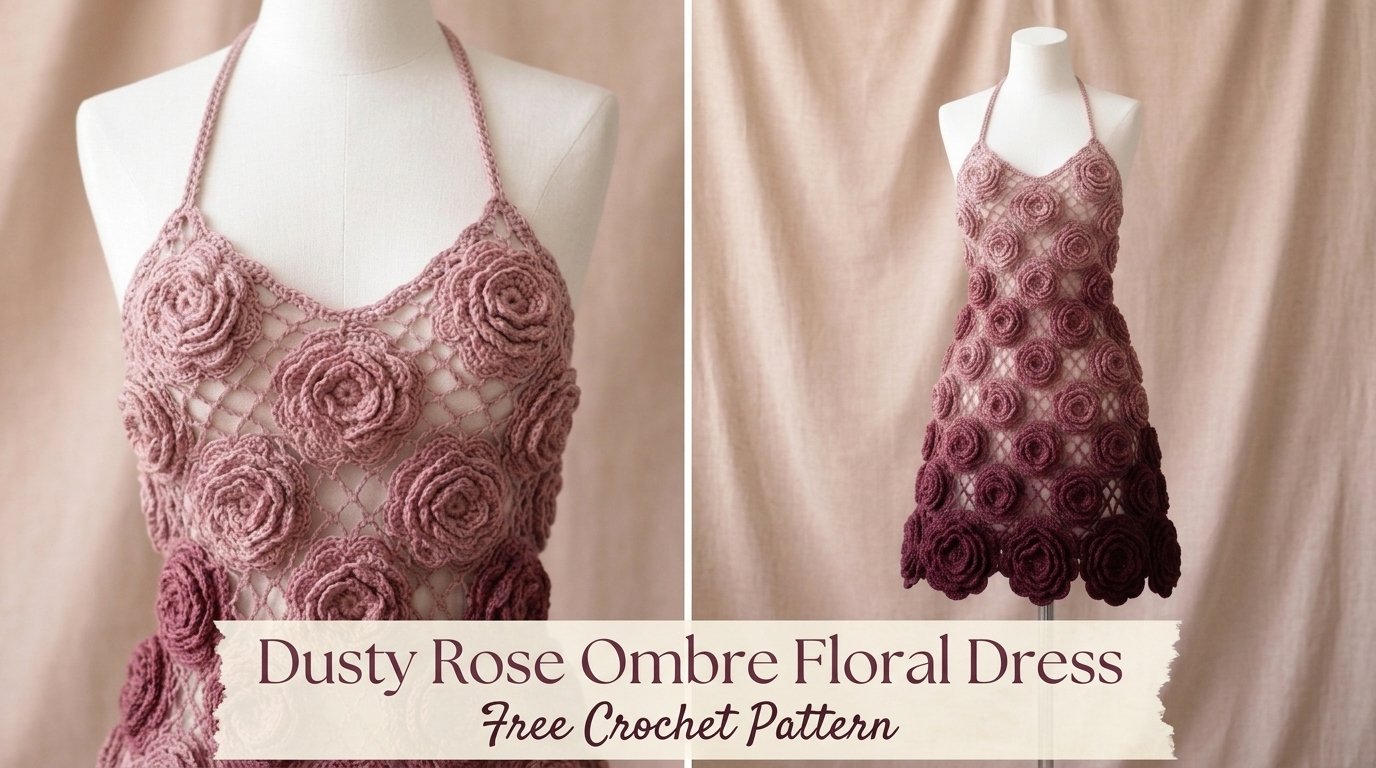
I still remember the afternoon the idea for this dress settled in. I was standing at my window with a half-finished swatch in my hands when the light shifted. Outside, the late roses had faded to that soft, dusty pink that feels like memory more than color. I held the swatch up and watched the same shade move through the lace. That was the moment I knew I wanted a dress that felt like those roses—gentle, layered, and quietly blooming.
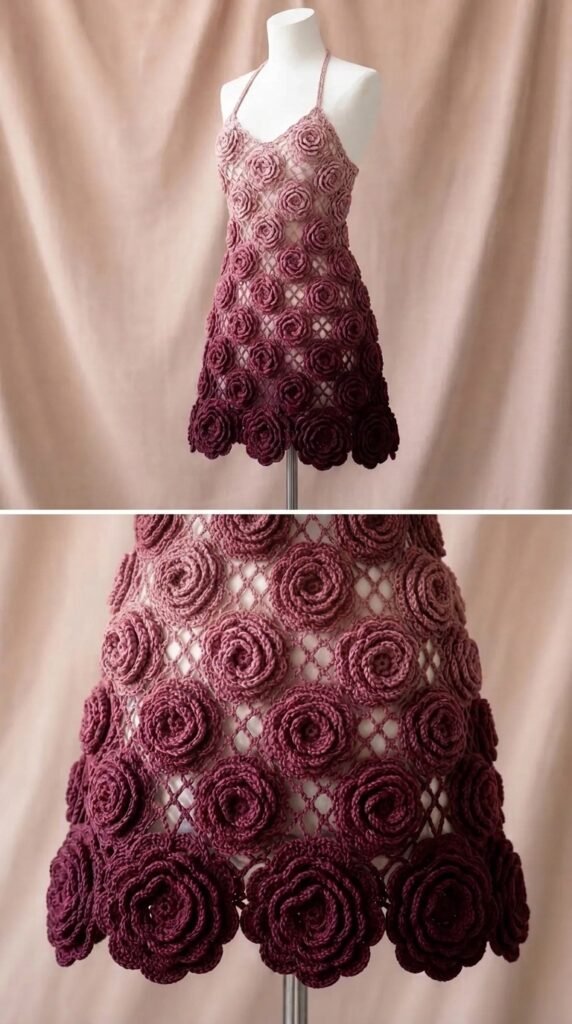
The Dusty Rose Ombre Floral Dress grew from that single observation. I wanted the color to shift the way real petals do, from the lightest blush at the neckline down to a deeper rose near the hem. I also wanted the fabric itself to feel floral without being stiff or costume-like. The result is an intermediate top-down dress worked in a repeating floral lace that creates soft, overlapping flower shapes as you go. The ombre happens gradually through simple color changes, so the dress never looks striped—just softly shaded.
This is the pattern I reached for when I needed something beautiful that still felt wearable. I hope it becomes that for you too.
About This Pattern
This is a seamless top-down dress with a lightly fitted bodice that flows into an A-line skirt. The floral lace stitch pattern runs continuously from the neckline to the hem, creating raised petal-like clusters that catch the light. The ombre effect is built by changing yarn colors at planned intervals so the shift feels natural rather than abrupt.
Skill level is intermediate. You should be comfortable with working in the round, reading lace charts or written lace instructions, increasing evenly, and keeping track of stitch multiples. The lace itself is not especially complex once the repeat is established, but it does require attention on the first few rounds.
Finished measurements (after blocking) are given for sizes S (M, L, XL):
Bust: 34 (38, 42, 46) inches
Length from shoulder to hem: 38 (39, 40, 41) inches
The dress is designed with approximately 2–4 inches of positive ease at the bust so it skims rather than clings. The skirt flares gently and has lovely drape once blocked.
Materials You’ll Need
Yarn
Sport-weight yarn with good drape (cotton, bamboo, or a soft cotton-blend works beautifully). You will need four shades that move from light to deep dusty rose. Approximate totals:
- Color A (lightest blush): 280 (310, 340, 380) yards
- Color B (soft dusty rose): 320 (350, 390, 430) yards
- Color C (medium dusty rose): 340 (380, 420, 470) yards
- Color D (deepest rose): 360 (400, 450, 500) yards
Allow 15 % extra for gauge variation and swatching.
Hooks
- 3.5 mm (E) for the main body
- 3.25 mm (D) for the neckline and lower edge if you prefer a slightly firmer finish
Notions
- Stitch markers (at least 8)
- Tapestry needle
- Scissors
- Blocking mats and pins (or wires if you have them)
- Optional: small clear beads for the flower centers if you want extra sparkle
Abbreviations and Terminology
All instructions use US crochet terminology.
- ch – chain
- sc – single crochet (insert hook, yarn over, pull up loop, yarn over, pull through both loops)
- hdc – half double crochet (yarn over, insert hook, yarn over, pull up loop, yarn over, pull through all three loops)
- dc – double crochet (yarn over, insert hook, yarn over, pull up loop, yarn over, pull through two, yarn over, pull through remaining two)
- tr – treble crochet (yarn over twice, insert hook, yarn over, pull up loop, [yarn over, pull through two] three times)
- sl st – slip stitch
- sp – space
- st(s) – stitch(es)
- sk – skip
- rep – repeat
- beg – beginning
- FLO – front loop only
- BLO – back loop only
Turning chains do not count as a stitch unless a step explicitly says they do. The floral lace is worked in multiples of 12 stitches plus a few extra for the increases.
Gauge
Work a gauge swatch in the floral lace pattern.
With 3.5 mm hook and Color A, chain 36. Work the first four rounds of the lace pattern (see Main Pattern Instructions). Block the swatch lightly.
Target: 22 stitches and 12 rounds = 4 inches in the floral lace pattern after blocking.
If your swatch is too small, go up a hook size. If it is too large, go down a half size. Because this is a dress, matching gauge is important for the finished fit.
Main Pattern Instructions
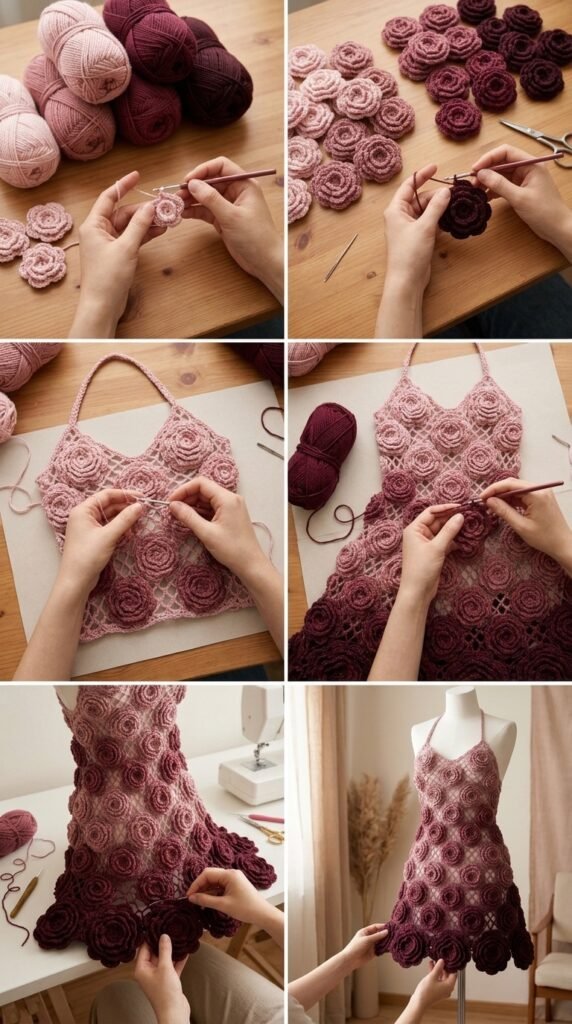
Neckline Foundation
With Color A and 3.5 mm hook, chain 96 (108, 120, 132). Being careful not to twist the chain, join with a slip stitch to the first chain to form a ring. Place a marker for the beginning of the round.
Round 1: Ch 1, sc in each chain around. Join with sl st to first sc. 96 (108, 120, 132) sc.
Round 2: Ch 3 (counts as dc here and throughout the foundation), dc in next 2 sts, *ch 2, sk 2, dc in next 3 sts; rep from * around, ending with ch 2, sk 2, join to top of beg ch-3. 24 (27, 30, 33) groups of 3 dc.
Round 3: Sl st into first ch-2 space, ch 3, 2 dc in same space, *ch 1, 3 dc in next ch-2 space; rep from * around, ch 1, join to top of beg ch-3.
Establishing the Floral Lace
The floral lace is built on a 12-stitch repeat that creates a raised five-petal flower shape every few rounds.
Round 4 (begin lace): Ch 1, sc in same st as join, *ch 3, sk 2 dc, (dc, ch 1, dc, ch 1, dc) in next ch-1 space (this forms the flower center), ch 3, sk 2 dc, sc in next dc; rep from * around, ending with ch 3, join to first sc. You now have 24 (27, 30, 33) flower centers.
Round 5: Sl st into first ch-3 space, ch 1, sc in same space, *ch 2, (dc, ch 1) four times in next flower center, dc in same center, ch 2, sc in next ch-3 space; rep from * around, join to first sc.
Round 6: Sl st into first ch-2 space, ch 1, sc in same space, *ch 3, sk next dc, sc in next ch-1 space, [ch 3, sc in next ch-1 space] three times, ch 3, sk next dc, sc in next ch-2 space; rep from * around, join to first sc.
Round 7: Sl st into first ch-3 space, ch 3, 2 dc in same space, *ch 1, 3 dc in next ch-3 space; rep from * around, ch 1, join to top of beg ch-3.
Rounds 4–7 form the basic floral lace repeat. From this point forward you will work the same sequence, inserting increase rounds at the points indicated for each size so the dress flares gently.
Bodice (Color A)
Continue working the floral lace repeat (Rounds 4–7) in Color A until the piece measures approximately 7 (7.5, 8, 8.5) inches from the neckline edge. End after a Round 7.Place markers at the four “side” points (every 6 or 7 flower centers depending on size) to help keep increases balanced later.
Transition to Color B and Upper Skirt
Join Color B. Work one full lace repeat (Rounds 4–7) even.
Increase Round (worked in place of Round 7): Ch 3, 2 dc in same space, *ch 1, 3 dc in next ch-3 space, ch 1, (3 dc, ch 1, 3 dc) in next ch-3 space; rep from * around, adjusting so you add 8–12 extra 3-dc groups evenly. Join.
Resume the regular lace sequence. Work two more full repeats in Color B.
Mid-Skirt (Color C)
Join Color C. Work three full lace repeats, inserting one increase round after the first repeat. Aim to add another 8–12 groups of 3 dc so the skirt continues to flare.
Lower Skirt (Color D)
Join Color D. Work the remaining length in Color D, inserting one final increase round about halfway through this section if needed for your preferred hem circumference. Continue until the total length from neckline reaches 37 (38, 39, 40) inches (the last inch will come from the edging and blocking). End after a Round 7.
Hem Edging
Still with Color D:
Edging Round 1: Ch 1, sc evenly around the entire lower edge, working 1 sc in each dc and 2 sc in each ch-1 space. Join.
Edging Round 2: Ch 1, sc in first st, *ch 3, sk 2, sc in next st; rep from * around, adjusting at the end so the spacing stays even. Join and fasten off.
Neckline Finishing
Return to the neckline with Color A and the smaller hook if desired.
Neck Round 1: Join yarn at the back, ch 1, sc evenly around the original foundation, working into the back bumps or remaining loops for a neat edge. Join.
Neck Round 2: Ch 1, sc in each sc around. Join and fasten off.
Weave in all ends securely on the wrong side.
Special Techniques
Creating the raised flower effect
The five-dc cluster worked into the ch-1 spaces of Round 5 forms the petals. When you work Round 6 you are essentially outlining those petals with chains and single crochets, which lifts them slightly. After blocking the flowers become more pronounced and the fabric gains a soft, dimensional texture.
Smooth color changes
To keep the ombre soft, change colors at the end of a Round 7 (after the 3-dc groups). Finish the last stitch of the old color, drop it, and pull the new color through the final two loops. Carry the unused yarn loosely up the inside for a few rounds if you prefer fewer ends, or cut and weave as you go.
Assembly and Finishing
Because the dress is worked in one piece, there is no seaming. The only finishing work is weaving in ends and blocking.
If you chose to add beads, thread them onto the yarn before working the flower centers and slide one into place as you complete each (dc, ch 1, dc, ch 1, dc) cluster.
Blocking and Care
Wet-block the finished dress for the best results. Soak it in lukewarm water with a mild wool wash for 15–20 minutes. Gently squeeze out excess water (never wring). Lay the dress flat on blocking mats, shape the neckline, smooth the lace, and pin the hem into a gentle A-line. Allow to dry completely.

The floral lace opens beautifully with blocking and the ombre becomes more visible. Once dry, the dress should hold its shape with a soft, fluid drape.
Care: Hand wash in cool water, roll in a towel to remove moisture, and dry flat. Never hang a wet lace dress— it can stretch. Store folded rather than on a hanger.
Fit and Troubleshooting Tips
If the bodice feels tight, you can add an extra increase round earlier or go up a hook size for the upper section only. If the skirt flares more than you like, omit one of the later increase rounds.
Cupping at the neckline usually means the foundation chain was too tight. Next time use a larger hook for the starting chain or go up a size in the first two rounds.
If the flowers look flat, check that you are working the five-dc clusters into the same space and that you are not pulling the chains too tightly in the following round. A light steam after blocking can also help the petals stand up.
For a longer dress, simply continue the Color D section until you reach the desired length before working the hem edging.
FAQ’s
Can I make this dress longer or shorter?
Yes. The length is easy to adjust. Simply work additional or fewer lace repeats in Color D before starting the hem edging. Keep in mind that extra length will use more yarn, especially in the deepest shade.
What if I want to add sleeves?
This version is designed as a sleeveless dress. You can add short sleeves by picking up stitches around the armholes after the bodice is complete and working a few rounds of the same floral lace, decreasing slightly at the underarm. Full sleeves would require more extensive modification and additional yarn.
Can I substitute a different yarn weight?
Sport weight gives the best drape and lace definition for this design. DK weight can work if you go up a hook size and accept a slightly denser fabric and larger overall size. Fingering weight will create a more delicate, airy dress but will need more rounds to reach the same length and may require an extra size adjustment for the bust.
How do I make the ombre shift even softer?
Instead of changing colors at the end of a full lace repeat, you can introduce the new color one or two rounds earlier and carry the previous color for a short distance. Another option is to work one transitional round using both the old and new colors held together lightly.
My stitch counts are off after an increase round. What should I do?
Count the number of 3-dc groups rather than individual stitches. As long as the groups remain evenly spaced and the total number of groups has increased by the planned amount, the lace will still look correct. A small difference of one or two stitches rarely shows once the dress is blocked.
Is this pattern suitable for a beginner who has made a few lace projects?
If you are comfortable working in the round, following multi-round lace repeats, and placing markers, you can manage this pattern. The first four rounds of the lace are the most important to master—once those feel natural, the rest of the dress becomes rhythmic.
Can I wear this dress without a slip?
The lace is open enough that most makers prefer a matching or neutral slip underneath for everyday wear. If you used a denser yarn or tighter gauge, the fabric may provide more coverage, but a light slip is still recommended for comfort and modesty.
Final Thoughts
There is something deeply satisfying about watching the dusty rose shades shift as the lace grows under your hands. When you finally block the finished dress and see the flowers open, it feels like the original window-light moment all over again.
I hope this Dusty Rose Ombre Floral Dress becomes a favorite in your handmade wardrobe. Wear it to a garden party, a quiet dinner, or simply around the house when you want to feel a little more special. If you make one, I would love to see how your roses turned out—leave a comment, tag your photos, or pin it so others can find the pattern too.
Happy crocheting, and may your stitches always bloom.


Leave a Reply
You must be logged in to post a comment.