

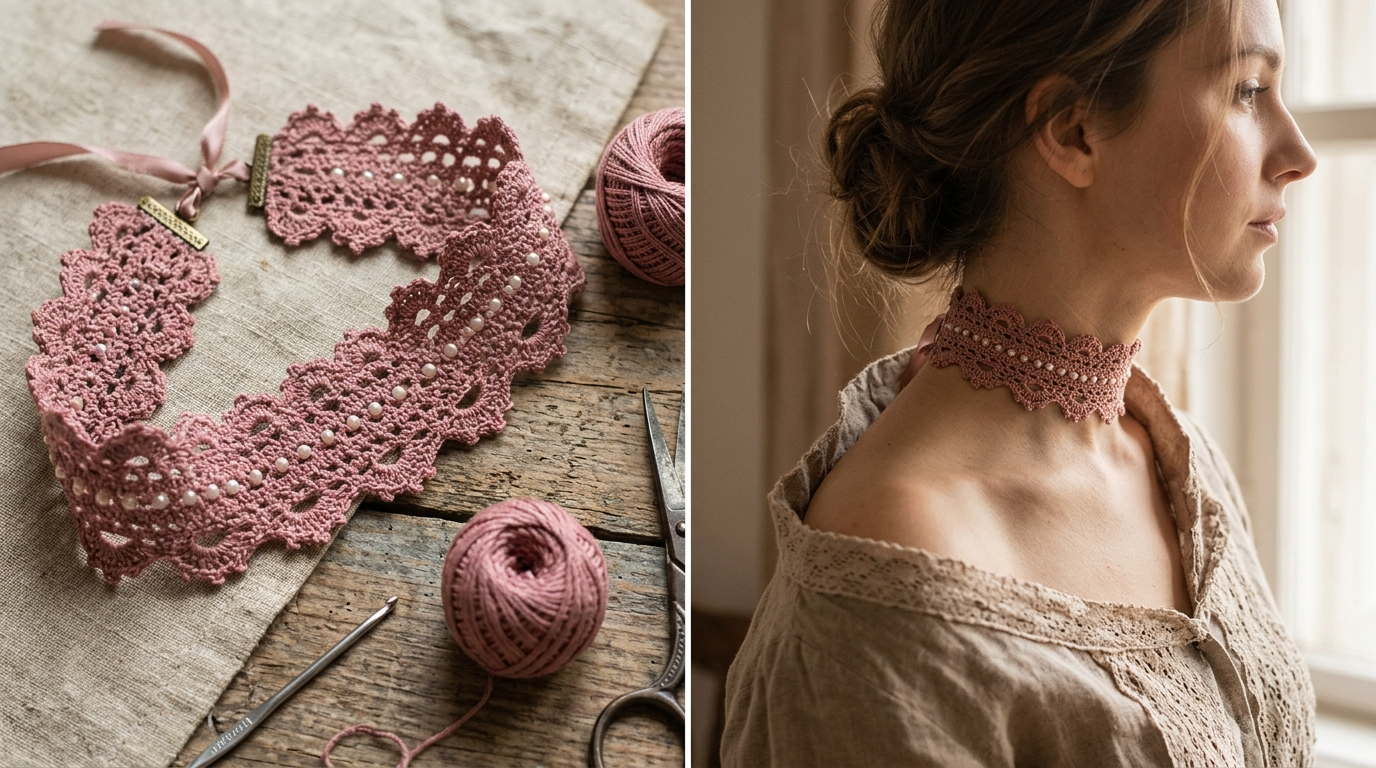
There is something incredibly charming about vintage-inspired crochet accessories. I especially love pieces that look delicate and romantic but don’t require an entire afternoon to wear or style. A little lace, a beautiful color, and carefully placed details can turn even the simplest outfit into something special.
I wanted to create a crochet choker that felt like an accessory from an old Victorian jewelry collection. I imagined soft dusty rose yarn, tiny floral details, delicate openwork, and a scalloped edge that would sit beautifully against the neckline.
After experimenting with different lace stitches, I settled on a narrow decorative band with repeating shell motifs and small picot accents. The result is the Dusty Rose Victorian Lace Choker Crochet Pattern, a feminine handmade accessory that combines vintage elegance with modern wearability.
About This Pattern
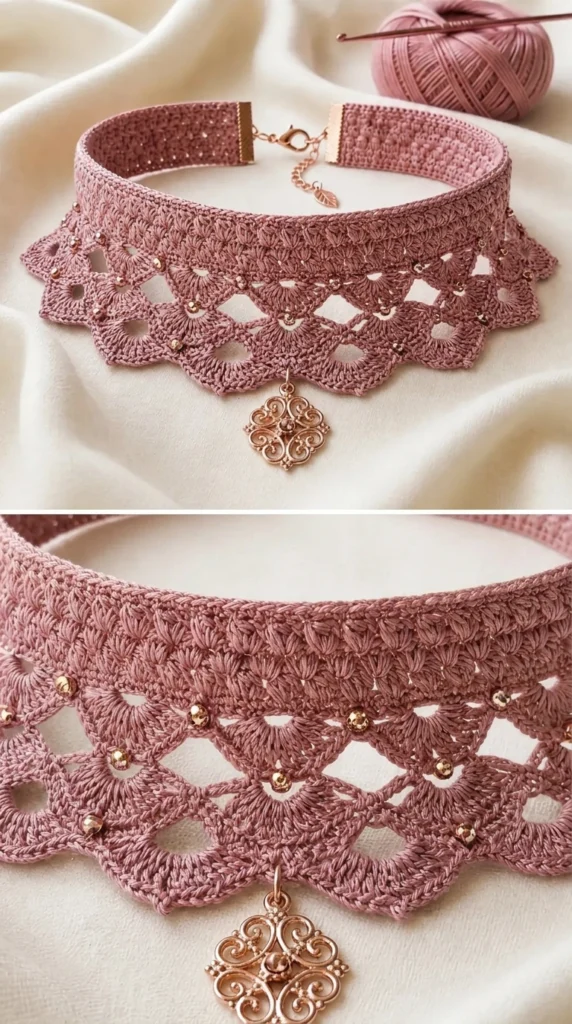
This Victorian-inspired crochet choker is worked as a narrow lace band with decorative shell motifs along the lower edge. Its lightweight construction makes it comfortable for everyday styling, while the scalloped detailing gives it a romantic antique appearance.
The pattern is worked in rows using fine cotton crochet thread. Small chain spaces create an airy lace effect, while double crochet shells provide texture and definition.
Skill Level: Intermediate
You should be comfortable with chain stitches, single crochet, double crochet, slip stitches, and working into chain spaces. The picot edging requires a little extra attention, but the instructions walk you through it.
Finished Measurements:
- Length: Approximately 12–14 inches, excluding the closure extension.
- Width: Approximately 1½ inches at the widest point.
- Adjustable extension: Approximately 2 inches.
- Suitable for an adult neck circumference of approximately 13–16 inches.
The finished choker should feel flexible rather than stiff. If you prefer a firmer band, you can use a slightly smaller hook and block it gently.
Materials You’ll Need
Yarn
- Color A – Dusty Rose: Approximately 35–45 yards of size 10 crochet cotton thread.
- Color B – Soft Ivory (optional): Approximately 5–8 yards for decorative flower centers or accent details.
I recommend mercerized cotton thread because it gives the lace a lovely stitch definition and holds its shape well.
Allow approximately 15% extra yarn if your tension is naturally loose or you plan to make the choker longer.
Crochet Hooks
- 1.5 mm steel crochet hook for the main lace band.
- 1.25 mm steel crochet hook for tighter decorative details, if desired.
Notions
- Small tapestry needle.
- Sharp scissors.
- Two stitch markers.
- One small pearl-style button, approximately 8–10 mm.
- Small jump ring or decorative metal loop.
- Measuring tape.
- Blocking mat and rust-resistant pins.
- Optional fabric-safe jewelry backing.
Abbreviations and Terminology
All instructions use US crochet terminology.
| Abbreviation | Meaning |
| ch | Chain |
| sc | Single crochet |
| dc | Double crochet |
| sl st | Slip stitch |
| sk | Skip |
| sp | Space |
| ch-sp | Chain space |
| st | Stitch |
| sts | Stitches |
| rep | Repeat |
| RS | Right side |
| WS | Wrong side |
| FO | Fasten off |
| picot | Decorative pointed loop |
Special Stitch Instructions
Single Crochet (sc): Insert your hook into the indicated stitch, yarn over, pull up a loop, yarn over again, and pull through both loops.
Double Crochet (dc): Yarn over, insert the hook, pull up a loop, yarn over and pull through two loops, then yarn over and pull through the remaining two loops.
Shell: Work 5 dc into the same stitch or chain space.
Picot: Ch 3, then sl st into the first chain made to form a small decorative point.
V-Stitch: Work (dc, ch 1, dc) into the same stitch or chain space.
Turning chains: Turning chains do not count as stitches unless a particular instruction specifically states otherwise.
Gauge
Gauge is important because the choker needs to sit comfortably around your neck without becoming too tight or too loose.
Make a small practice swatch using your 1.5 mm hook.
Aim for approximately:
- 10 dc stitches = 1 inch.
- 5 rows of dc = 1 inch.
Your lace swatch may look slightly open before blocking. This is normal.
If your stitches are too tight, move up to a 1.75 mm hook. If the fabric looks loose and floppy, try a 1.25 mm hook.
For this project, I recommend prioritizing the overall feel and finished measurements rather than worrying about matching the gauge perfectly.
Main Pattern Instructions
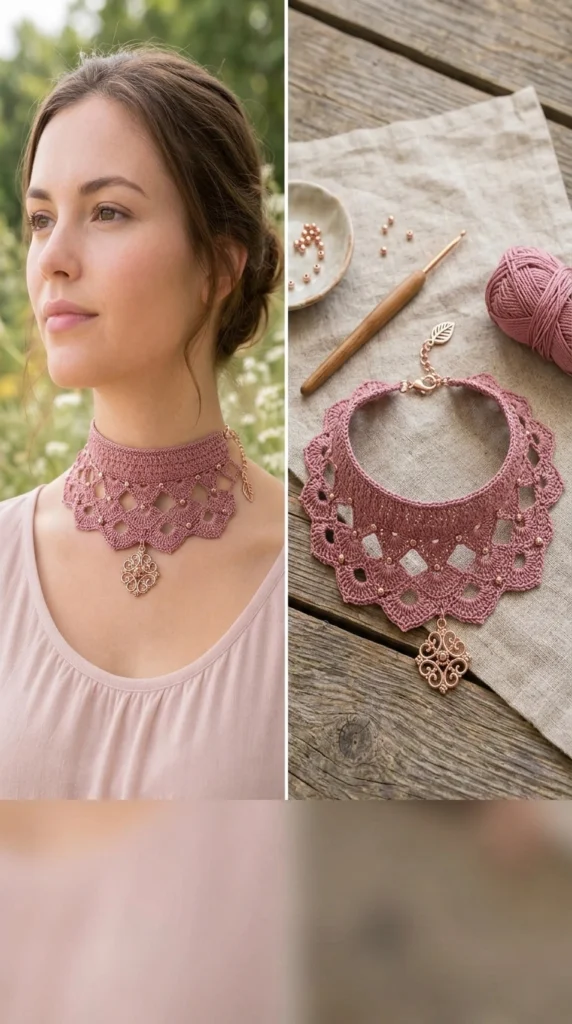
Part 1: Creating the Foundation Band
The foundation band establishes the length and structure of your Victorian lace choker.
With Color A (Dusty Rose), ch 61.
Foundation Row: Sc in the second ch from the hook and in each remaining ch across.
Count: 60 sc.
Row 1: Ch 1, turn. Sc in the first 3 sts, ch 1, sk next st, sc in next 4 sts. Rep across, adjusting the final repeat to finish with 3 sc.
This creates small openings that will help the decorative lace pattern sit naturally.
Row 2: Ch 3 (counts as dc), turn. Dc in the next 2 sts, ch 1, sk next ch-sp, dc in each of the next 4 sts. Continue across, maintaining the established spacing.
Row 3: Ch 1, turn. Sc in each dc and work 1 sc into each ch-sp across.
Count: 60 sc.
The foundation should now look like a narrow, flexible band with subtle openwork.
Part 2: Victorian Lace Shell Pattern
This section creates the main decorative texture.
The shell motifs are the most noticeable feature of the choker. They form delicate rounded fans along the lower edge.
Row 4: Ch 3, turn. Dc in the next 2 sts. Sk 2 sts, work 5 dc into the next st, sk 2 sts, sc in the next st.
Repeat the shell sequence across the row.
When necessary, adjust the final repeat so the edge remains balanced.
Row 5: Ch 1, turn. Sc in the first 3 sts. Ch 2, sk the next 3 dc of the shell, sc in the next dc, ch 2, sk the remaining 2 dc of the shell, sc in the next stitch.
Continue across, working into the corresponding shell sections.
Row 6: Ch 3, turn. Work 2 dc into the first ch-2 space, sc into the next sc, and work 5 dc into the following ch-2 space.
Continue the established sequence.
This row creates a second layer of shell texture. The fans should appear evenly spaced rather than crowded.
Row 7: Ch 1, turn. Sc across the top of each shell and work ch-2 spaces between the decorative sections as established.
Keep your tension relaxed so the lace does not pull inward.
Part 3: Decorative Victorian Openwork
The next rows create the delicate lace effect that makes this choker look like vintage jewelry.
Row 8: Ch 4, turn (counts as dc and ch 1). Sk 1 st, dc in the next st, ch 1, sk 1 st. Rep across.
Row 9: Ch 1, turn. Sc in the first dc, sc in each ch-1 space, and sc in every remaining dc across.
Row 10: Ch 3, turn. Dc in the first st, ch 2, sk 2 sts, work (dc, ch 1, dc) in the next st, ch 2, sk 2 sts.
Repeat the V-stitch and chain-space arrangement across.
Row 11: Ch 1, turn. Sc in the first 2 dc, work 3 sc into each ch-2 space, sc into the center of each V-stitch, and continue across.
The fabric should remain flexible and symmetrical.
Row 12: Ch 3, turn. Dc across, maintaining an even stitch count.
Fasten off if you are satisfied with the length and width.
Your main choker band is now complete.
Special Techniques and Additional Elements
Creating the Picot Lace Edging
A picot edge adds the small pointed details associated with traditional lacework.
Attach Color A to one lower corner of the choker.
Edging Round:
- Ch 1 and work sc evenly along the lower edge.
- At each shell peak, work 1 sc.
- Ch 3 and sl st into the first chain to create a picot.
- Work 2 sc into the next available space.
- Repeat the picot detail at the next shell peak.
- Continue until you reach the opposite corner.
- Sl st to secure.
Try to keep the picots evenly spaced.
The little pointed loops should sit neatly along the scallops without making the edge curl.
Adding a Delicate Flower Motif
A small crochet flower adds a romantic Victorian detail to the front of the choker.
Using Dusty Rose, make a magic ring.
Round 1: Ch 1, work 6 sc into the ring. Sl st into the first sc.
Round 2: Ch 1, *sl st into the next st, ch 3, work 2 dc into the same st, ch 3, sl st into the same st.* Repeat around to create 6 petals.
Fasten off, leaving a long tail for sewing.
For a more delicate appearance, use Soft Ivory for a tiny center detail.
With Color B, attach the thread to the flower center and work 3 sc into the center opening. Sl st to finish.
Fasten off and weave in the ends.
Optional Pearl Detail
For a vintage jewelry-inspired finish, you can add one small pearl-style bead to the center of the flower.
Use a needle and matching sewing thread to attach the bead securely.
Avoid using oversized beads because they can make the delicate lace band feel heavy.
Assembly and Finishing
Now it’s time to bring all the decorative elements together.
First, place the choker flat on your blocking mat. Position the small flower motif at the center of the front band.
The flower should sit just above the decorative shell section rather than covering the entire lace pattern.
Use the remaining yarn tail to sew it securely.
Next, check the two ends of the choker.
Creating the Button Closure
On one end, sew the small pearl-style button securely to the back of the band.
On the opposite end, create a button loop.
Button Loop:
- Attach Dusty Rose thread to the corner of the band.
- Ch 12.
- Sl st into the same corner.
- Check that the loop fits comfortably around your chosen button.
- Fasten off and weave in the ends.
If the loop feels too loose, reduce the chain count. If it is too tight, add one or two chains.
Adding an Adjustable Extension
For additional flexibility, attach a small jewelry chain or a crocheted chain extension to the opposite end.
You can make a simple extension by chaining 12–15 stitches and securing a small jump ring at the end.
Make sure all metal findings are securely attached and have smooth edges.
Blocking and Care
Blocking makes a noticeable difference in fine crochet lace.
I recommend wet blocking this choker if you have used cotton thread.
- Fill a small bowl with cool or lukewarm water.
- Add a small amount of gentle detergent.
- Submerge the choker briefly.
- Rinse carefully with clean water.
- Press out excess moisture using a soft towel.
- Place the choker flat on a blocking mat.
- Gently arrange the shell motifs and picot points.
- Pin the edges without stretching the fabric excessively.
- Allow it to dry completely.
Avoid pulling the choker too tightly during blocking because this can distort the decorative stitches.
Care Instructions
- Hand wash gently in cool water.
- Avoid bleach and harsh detergents.
- Do not wring or twist the lace.
- Dry flat on a clean towel.
- Never hang the choker while wet.
- Store flat in a small jewelry pouch.
If you have added decorative beads or metal findings, avoid soaking the finished accessory for extended periods.
Fit and Troubleshooting Tips
The Choker Feels Too Tight
If the choker feels uncomfortable around your neck, add a few foundation chains or use the adjustable extension.
Always measure your neck before deciding on the final length.
The Lace Edge Is Curling
Curling usually happens when the stitches are too tight or the edging contains too few stitches.
Try using a slightly larger hook and blocking the finished piece gently.
The Shells Look Uneven
Check that you are placing all 5 dc stitches into the same designated stitch or chain space.
Mark the center of the first shell if you find it difficult to maintain consistent placement.
The Choker Looks Too Wide
If you prefer a narrower accessory, remove one decorative row from the main lace section and use a smaller flower motif.
The Flower Feels Too Heavy
Use finer cotton thread and avoid large beads. The flower should complement the lace rather than pull it downward.
The Choker Doesn’t Sit Flat
Check your tension and make sure the foundation band is not tighter than the decorative rows.
Gentle blocking can help correct small differences in tension.
Final Thoughts
I love how this Dusty Rose Victorian Lace Choker brings together delicate crochet stitches, soft romantic color, and vintage-inspired details. It is a small project, but every little feature contributes to its finished appearance.
The scalloped shell motifs create a beautiful lace border, while the tiny flower and pearl detail give it the feeling of a handmade heirloom.
You can keep the design exactly as written or experiment with ivory, mauve, antique pink, or champagne-colored cotton thread.
I hope you enjoy making this Dusty Rose Victorian Lace Choker Crochet Pattern as much as I enjoyed designing it. If you create your own version, share your finished choker in the comments or save a picture to Pinterest. I’d love to see the colors and little details you choose!
Happy crocheting! 🌸


Leave a Reply
You must be logged in to post a comment.