

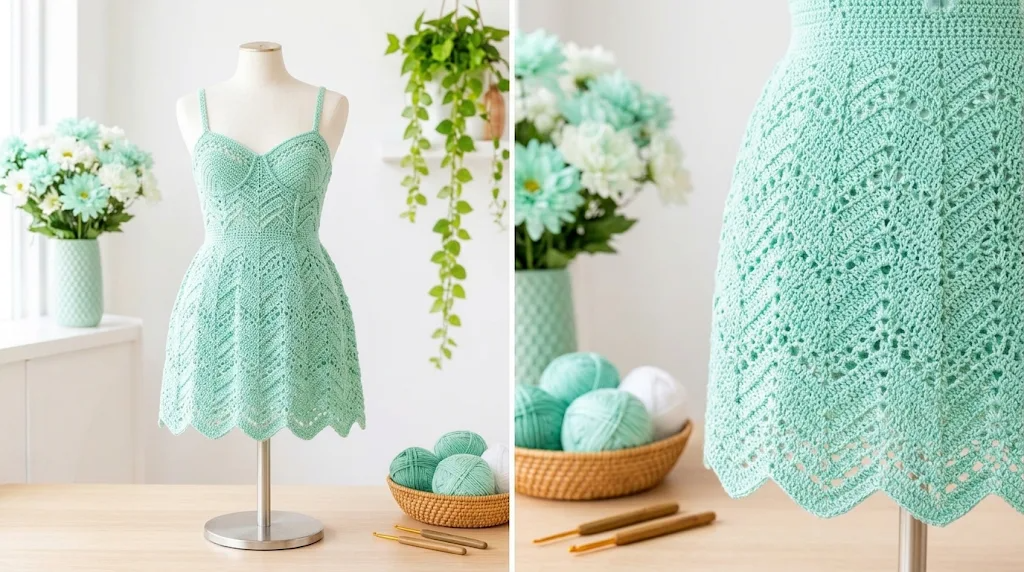
There is something especially sweet about a handmade baby dress. I love how a little bit of yarn can become something so delicate, soft, and memorable. When I started designing this mint chevron lace baby dress, I wanted a project that looked elegant without becoming overly complicated or uncomfortable for a little one.
Mint green felt like the perfect color. It has a fresh, gentle appearance that works beautifully for spring celebrations, family photographs, birthdays, and everyday special occasions. I paired it with a simple fitted bodice and a flowing lace skirt to create a dress that feels traditional but still has a modern touch.
The most exciting part of this design is the chevron lace pattern. Its repeating peaks and valleys create a lovely zigzag texture, while the open spaces allow the skirt to drape naturally.
This Mint Chevron Lace Baby Dress Free Crochet Pattern includes a complete bodice, shaped waist, decorative skirt, and delicate edging. Let’s get started!

About This Baby Dress Pattern
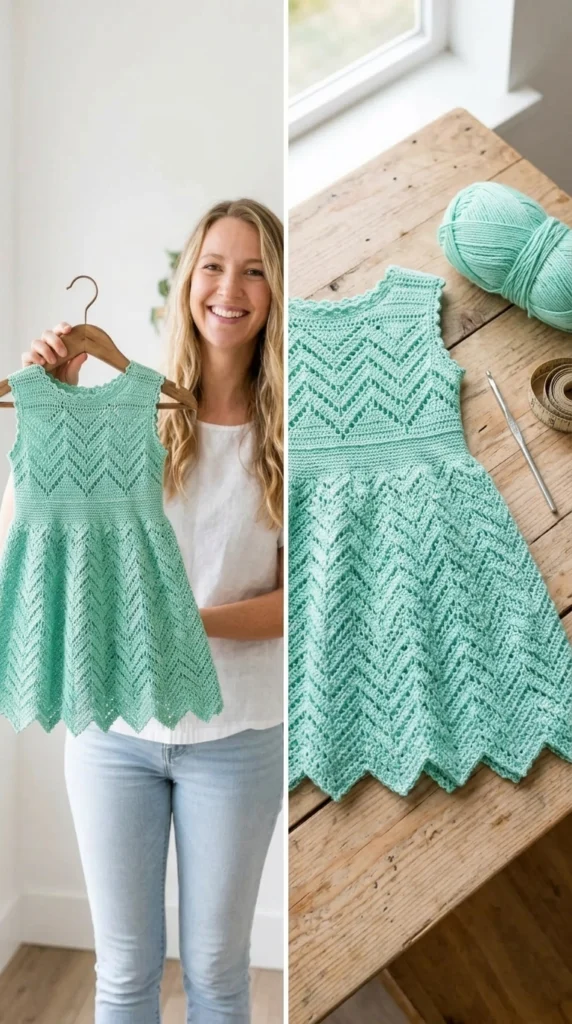
This baby dress is worked from the top down, beginning with a rectangular yoke. The yoke is shaped with evenly spaced increases to create the front, back, and armhole sections.
After completing the yoke, the armholes are separated and the remaining stitches are joined to work the skirt in continuous rounds.
The bodice uses mostly single crochet and double crochet stitches, creating a comfortable fabric with enough structure to support the lace skirt.
The skirt features a repeating chevron pattern made with double crochet stitches, chain spaces, and carefully placed decreases. These stitches form gentle zigzag waves that become more noticeable as the skirt grows.
Skill Level: Confident Beginner to Intermediate
You should know how to make basic crochet stitches, work in joined rounds, count stitches, and follow simple increases and decreases.
Finished Sizes:
| Size | Approximate Chest | Bodice Length | Total Dress Length |
|---|---|---|---|
| 0–3 months | 16 in | 4.5 in | 12 in |
| 3–6 months | 17 in | 5 in | 13 in |
| 6–12 months | 18 in | 5.5 in | 14 in |
| 12–18 months | 19 in | 6 in | 15 in |
These are approximate finished measurements. For a comfortable fit, compare them with the baby’s actual measurements and allow suitable ease.
Materials You’ll Need
Yarn
Choose a soft, baby-friendly DK-weight yarn. Cotton-acrylic blends are especially suitable because they offer softness, breathability, and good stitch definition.
- Color A – Mint Green: Approximately 350–550 yards (320–503 meters), depending on size.
- Color B – Soft Ivory: Approximately 20–35 yards (18–32 meters) for decorative edging, if desired.
Allow approximately 15% extra yarn if your gauge varies or you prefer a longer skirt.
Crochet Hooks
- 3.5 mm crochet hook for the bodice and neckline.
- 4.0 mm crochet hook for the lace skirt, if a softer drape is desired.
Additional Supplies
- Tapestry needle.
- Stitch markers.
- Small scissors.
- Measuring tape.
- Four small buttons.
- Blocking mat and rust-resistant pins.
- Optional lightweight cotton lining.
Avoid loose decorative accessories that could become choking hazards.
Abbreviations and Terminology
This pattern uses US crochet terminology.
| Abbreviation | Meaning |
|---|---|
| ch | Chain |
| sl st | Slip stitch |
| sc | Single crochet |
| hdc | Half double crochet |
| dc | Double crochet |
| tr | Treble crochet |
| sk | Skip |
| st | Stitch |
| sts | Stitches |
| sp | Space |
| rep | Repeat |
| inc | Increase |
| dec | Decrease |
| RS | Right side |
| WS | Wrong side |
| rnd | Round |
Basic Stitch Explanations
- Chain (ch): Yarn over and pull through the loop on your hook.
- Slip Stitch (sl st): Insert your hook, yarn over, and pull through both the stitch and the loop on your hook.
- Single Crochet (sc): Insert your hook, yarn over and pull up a loop, yarn over and pull through both loops.
- Half Double Crochet (hdc): Yarn over, insert hook, pull up a loop, yarn over and pull through all three loops.
- Double Crochet (dc): Yarn over, insert hook, pull up a loop, yarn over and pull through two loops twice.
- Treble Crochet (tr): Yarn over twice, insert hook, pull up a loop, then work through two loops three times.
- Increase (inc): Work two stitches into the same stitch.
- Decrease (dec): Work two stitches together to reduce the stitch count.
Important Notes:
- Turning chains do not count as stitches unless stated.
- Join each joined round with a slip stitch.
- Place a stitch marker at the beginning of each round.
- Check stitch counts after every shaping round.
- The pattern is written for the smallest size first, with larger sizes in parentheses.
Gauge
Gauge is important because the dress needs to fit comfortably while maintaining the chevron lace pattern.
Using the 3.5 mm hook, work:
20 single crochet stitches × 22 rows = 4 × 4 inches (10 × 10 cm).
For the lace skirt, work a small chevron swatch using the 4.0 mm hook.
Aim for approximately 18 double crochet stitches across 4 inches, measured across the main stitch fabric rather than the open chain spaces.
If your swatch is too small, try a larger hook. If it is too large, switch to a smaller hook.
Wash and dry your swatch before measuring if your chosen yarn is likely to change after washing.
Main Pattern Instructions
1. Crochet the Upper Bodice
The bodice begins with a rectangular foundation chain. The neckline is worked first, followed by shaping to create the armholes.
Use Color A and the 3.5 mm hook.
Choose the foundation chain for your size:
| Size | Foundation Chain |
|---|---|
| 0–3 months | 56 |
| 3–6 months | 60 |
| 6–12 months | 64 |
| 12–18 months | 68 |
Foundation Row: Ch the required number of stitches. Sc in the second ch from the hook and in each remaining ch. Turn.
Row 1: Ch 1, sc across. Turn.
Row 2: Ch 1, sc in the first 4 sts, 2 sc in the next st, sc across until the final 5 sts, 2 sc in the next st, sc in the final 4 sts. Turn.
Row 3: Ch 1, sc across. Turn.
Row 4: Ch 1, hdc across. Turn.
Repeat Rows 3 and 4 until the bodice measures approximately 2.5 inches from the foundation edge.
For larger sizes, continue until the same proportional neckline and upper bodice depth is achieved.
Fasten off.
2. Shape the Yoke
The yoke creates the front, back, and armhole sections.
Fold the bodice piece so that the two ends meet at the back. Mark the center of the front and back, then mark the armhole positions.
Work along the upper edge to create the shoulder and neckline shaping.
Round 1: Join Color A at the back edge. Ch 1, work sc evenly around the neckline. Join with sl st.
Round 2: Ch 2, dc around, placing 2 dc at the marked shoulder and side shaping points. Join.
Round 3: Ch 2, dc in each st, working 2 dc in each marked increase position. Join.
Repeat Round 3 until the yoke measures approximately:
- 4 inches for 0–3 months.
- 4.5 inches for 3–6 months.
- 5 inches for 6–12 months.
- 5.5 inches for 12–18 months.
Keep your increases balanced so that both sides remain symmetrical.
3. Separate the Armholes
Once the yoke reaches the required depth, divide the stitches into front, back, and armhole sections.
Place stitch markers at the armhole boundaries.
Work across the front section, chain the required number of stitches for the underarm, skip the armhole stitches, and continue across the back.
Join the round.
Underarm chain guide:
| Size | Underarm Chains |
|---|---|
| 0–3 months | 6 |
| 3–6 months | 7 |
| 6–12 months | 8 |
| 12–18 months | 9 |
Work one round of dc around the joined bodice and underarm chains.
Check that the front and back sections are centered correctly.
4. Crochet the Waistband
The waistband separates the fitted bodice from the flowing chevron skirt.
Use the 3.5 mm hook.
Round 1: Ch 1, sc in every stitch around. Join.
Round 2: Ch 2, dc in every stitch around. Join.
Round 3: Ch 1, sc in every stitch around. Join.
This creates a neat transition before the lace pattern begins.
5. Mint Chevron Lace Skirt Crochet Pattern
The skirt is the most decorative part of this design. The repeating peaks and valleys create a soft zigzag effect, while the chain spaces make the fabric light and airy.
Switch to the 4.0 mm hook.
For the chevron repeat, use a multiple of 12 stitches. Adjust the number of stitches around the waist if necessary so that the total is divisible by 12.
Chevron Lace Foundation Round
Round 1: Ch 3 (counts as first dc), dc in each stitch around. Join with sl st.
Check that your stitch count is divisible by 12.
Chevron Lace Pattern
Round 2: Ch 3, dc in the next 3 sts, (dc2tog over the next 2 sts, ch 1, sk 1 st, dc in the next 2 sts, 2 dc in the next st, ch 1, 2 dc in the next st, dc in the next 2 sts, ch 1, sk 1 st, dc2tog over the next 2 sts, dc in the next st) repeat around. Join.
Round 3: Ch 3, dc in each dc, working (dc, ch 1, dc) into each peak space and dc2tog across each valley decrease. Work the chain spaces as established. Join.
Round 4: Ch 3, dc in each dc, ch 1 in each chain space, and maintain the established peak and valley shaping. Join.
Round 5: Repeat Round 3.
Round 6: Repeat Round 4.
Continue alternating the shaping rounds and open lace rounds until the skirt measures approximately:
- 7.5 inches for 0–3 months.
- 8 inches for 3–6 months.
- 8.5 inches for 6–12 months.
- 9 inches for 12–18 months.
The skirt should hang naturally without pulling at the waistband.
Count check: Each chevron repeat must contain the same number of stitch positions as the repeat established in the foundation. Keep the increases at the peaks and decreases at the valleys balanced.
If the skirt begins to twist, check that your joins are aligned and that you have not accidentally skipped an extra stitch.
6. Add More Length to the Skirt
For a longer dress, continue the lace pattern for additional rounds.
Each extra pattern repeat adds approximately 1–1.5 inches, depending on your yarn and tension.
I recommend trying the dress on a suitable dress form or comparing it against a baby’s measurements before adding too much length.
The open lace pattern looks particularly beautiful when the skirt has enough room to swing gently.
Special Techniques and Additional Elements
7. Decorative Chevron Scalloped Hem
A soft scalloped border gives the bottom of the dress a finished appearance.
Switch to the 3.5 mm hook.
Round 1: Join Color B at any skirt edge stitch. Ch 1, sc evenly around. Join.
Round 2: Ch 1, sc in the first stitch, skip 2 stitches, work 5 dc in the next stitch, skip 2 stitches, sc in the next stitch.
Repeat this sequence around the hem.
If the final repeat does not fit perfectly, adjust the spacing slightly so that the scallops remain evenly distributed.
Join with a slip stitch and fasten off.
For a monochrome appearance, use mint yarn instead of ivory.
8. Crochet the Armhole Edging
Join Color A at the bottom of one armhole.
Round 1: Ch 1, sc evenly around the armhole. Join.
Round 2: Ch 1, sl st loosely around. Fasten off.
Repeat for the second armhole.
Keep the edging loose enough to avoid restricting movement.
9. Create a Simple Neckline Border
Join Color A at the back neckline.
Round 1: Ch 1, sc evenly around the neckline. Join.
Round 2: Ch 1, work reverse single crochet around for a decorative cord-like edge, if desired.
Alternatively, use a simple slip-stitch edging for a softer finish.
Assembly and Finishing
10. Add the Back Opening and Buttons
The dress needs an easy opening so that it can be put on and removed comfortably.
If you have worked the bodice as a flat piece with a back opening, keep the opening aligned with the center back.
For a button band:
- Join yarn at one side of the back opening.
- Work one row of sc evenly along the edge.
- Work a second row of sc.
- On the opposite side, make button loops using small chain spaces.
- Sew four small, securely attached buttons opposite the loops.
Space the buttons evenly from the neckline to the waist.
Make sure the buttons are securely attached and appropriate for baby clothing. Regularly inspect them for looseness.
11. Add a Waist Decoration
A simple crocheted waist tie can add a pretty finishing touch.
Ch approximately 100–120 stitches, depending on the size.
Sl st back along the chain and fasten off.
Thread the tie through the waistband stitches, keeping it at the back or front according to your preference.
For baby clothing, avoid long loose ties and small detachable decorations. A fixed crocheted bow sewn securely to the waistband is a safer decorative alternative.
12. Weave in the Ends
Use a tapestry needle to weave all loose yarn ends into the wrong side of the fabric.
Weave in each end in several directions to reduce the chance of unraveling.
Trim the remaining yarn carefully.
Check the inside of the dress for rough ends, loose stitches, and uncomfortable areas.
Blocking and Care
Blocking helps the chevron lace open up and allows the skirt to hang more evenly.
For cotton-acrylic yarn, gentle wet blocking is usually a good option.
- Fill a basin with cool or lukewarm water.
- Add a small amount of gentle detergent.
- Submerge the dress and allow the fibers to become thoroughly wet.
- Remove it carefully without wringing.
- Press out excess water using a clean towel.
- Lay the dress flat on a blocking mat.
- Arrange the chevron peaks and scalloped edges evenly.
- Allow the dress to dry completely.
Avoid pulling the lace too aggressively because this can stretch the skirt out of shape.
Care Instructions:
- Hand wash with mild detergent when possible.
- Avoid harsh bleach.
- Do not twist or wring the dress.
- Dry flat.
- Avoid hanging the dress while wet.
- Follow the yarn manufacturer’s washing instructions.
Fit and Troubleshooting Tips
Even a carefully designed crochet dress can need small adjustments. Here are a few common issues and their solutions.
1. The Bodice Feels Too Tight
Check your gauge first. If your stitches are smaller than the recommended measurements, use a larger hook or adjust the foundation chain.
2. The Skirt Looks Wavy or Ruffled
Too many increases can cause unwanted fullness. Check the chevron peaks and valleys to make sure the stitch placement is balanced.
3. The Chevron Pattern Looks Uneven
Use stitch markers at the peaks and valleys. These points should remain aligned throughout the skirt.
4. The Lace Looks Too Open
Try a smaller hook or use a slightly thicker DK yarn. Remember that the open chain spaces are intentional, but the fabric should still feel comfortable.
5. The Dress Is Too Short
Add more chevron repeats before completing the scalloped hem. Check the finished length as you work.
6. The Armholes Feel Uncomfortable
Avoid tight edging. If the armholes pull against the baby’s shoulders, loosen the border and check the yoke depth.
Final Thoughts
I love how this Mint Chevron Lace Baby Dress combines a simple, comfortable bodice with a beautiful flowing skirt. The mint shade gives it a fresh appearance, while the chevron lace creates just enough detail to make the finished dress feel special.
Although the pattern involves some shaping and stitch counting, the repeating lace sections become easier once you understand the peaks and valleys.
Take your time with the gauge, check your stitch counts, and enjoy watching the little dress grow with every round.
This Mint Chevron Lace Baby Dress Free Crochet Pattern makes a lovely handmade gift for a baby shower, birthday, family celebration, or spring photoshoot.
I’d love to see the colors you choose and how your finished dress turns out. Share your crochet creation, save the pattern to Pinterest, and enjoy making something beautiful stitch by stitch!


Leave a Reply
You must be logged in to post a comment.