

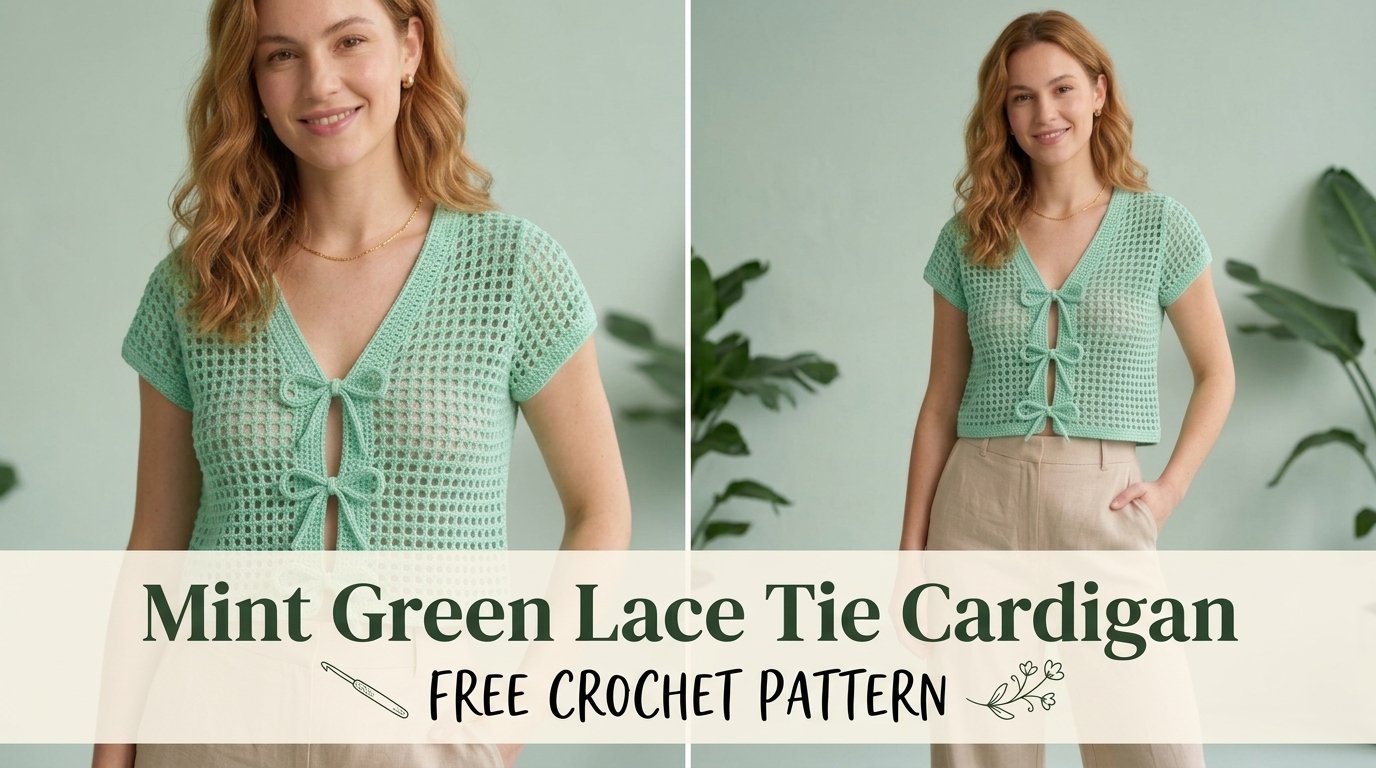
Looking for a light, breezy layer that feels fancy but works up without drama? This mint green lace tie cardigan delivers soft drape, open mesh, and those adorable little bow ties that make the whole thing look like it came from a vintage boutique. You get a cropped, relaxed fit that layers over tanks and sundresses without trapping heat. Confident beginners can handle it, and the finished piece looks way more complicated than it actually is.
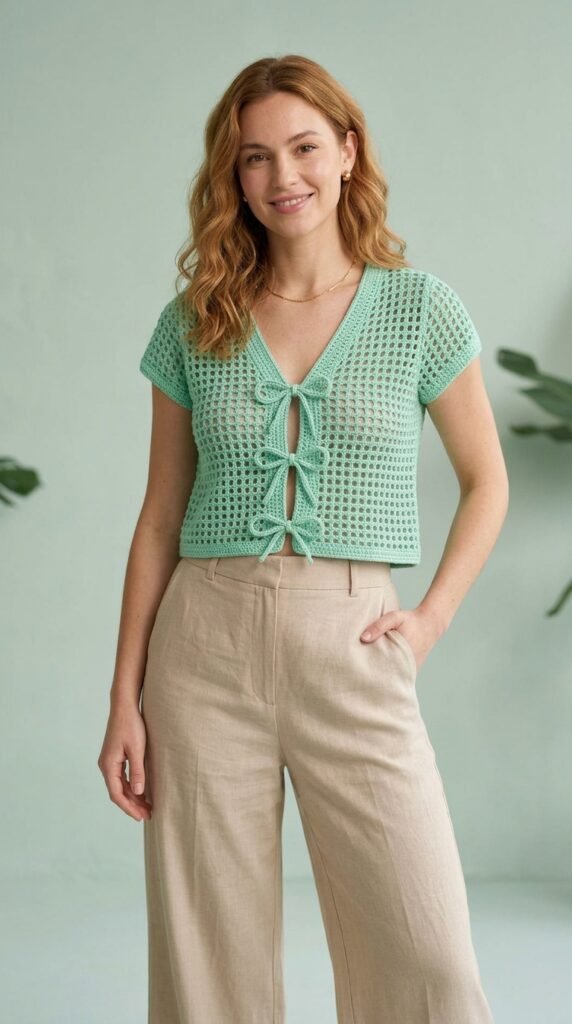
About This Lace Tie Cardigan Crochet Pattern
This cropped cardigan uses a simple filet-style mesh that creates an airy grid of open squares. The V-neck, short cap sleeves, and boxy shape keep it flattering and easy to wear. Three pairs of crocheted ties close the front with sweet little bows that you can leave loose or tighten however you like.
The body follows a two-row repeat that becomes almost meditative once you settle into the rhythm. You work the back and two fronts as separate panels, seam the shoulders and sides, then add the sleeves and edges. No fancy shaping tricks, just clean construction that rewards you with a polished result.
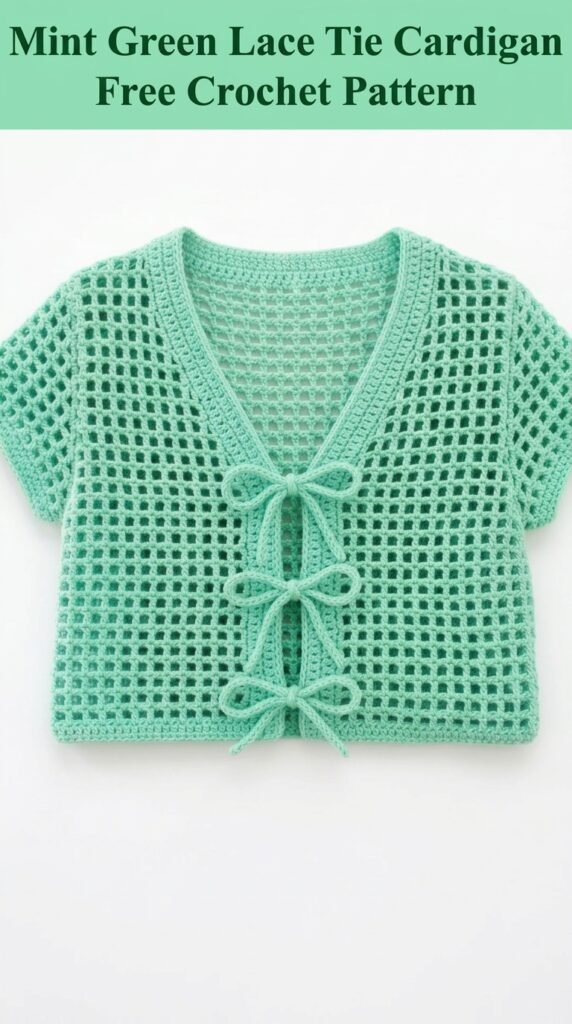
Skill level: Confident beginner to intermediate. If you know double crochet and can count stitches, you can make this.
Materials Needed
Yarn:
Around 600–800 yards of DK-weight yarn (category 3). Cotton or cotton-blend yarns shine here because they hold the open mesh shape and feel cool against the skin. Mint green looks fresh, but any soft shade works.
Hook:
4.0 mm (G/6). Swap sizes if your gauge drifts.
Notions:
Tapestry needle, stitch markers, scissors, measuring tape.
Gauge:
4 mesh squares ≈ 2 inches
4 rows ≈ 2 inches
Always swatch. Seriously. A slightly off gauge can turn a perfect crop into something that hits your hips or rides up to your ribs.
Stitch Abbreviations and Definitions
Here’s the short list of what you’ll actually use:
- Ch – Chain. Yarn over, pull through the loop. Foundation and the open spaces both start here.
- Sl st – Slip stitch. Insert, yarn over, pull through everything. Great for joining and tidy finishes.
- Sc – Single crochet. Insert, yarn over, pull up a loop, yarn over, pull through both. Used for the clean edging.
- Dc – Double crochet. Yarn over, insert, yarn over, pull up a loop, yarn over, pull through two, yarn over, pull through the last two. This is the backbone of the mesh.
- Sk – Skip. Leave the next stitch alone. That’s how the open squares appear.
Nothing fancy. Just the basics doing heavy lifting.
Understanding the Mesh Stitch Pattern
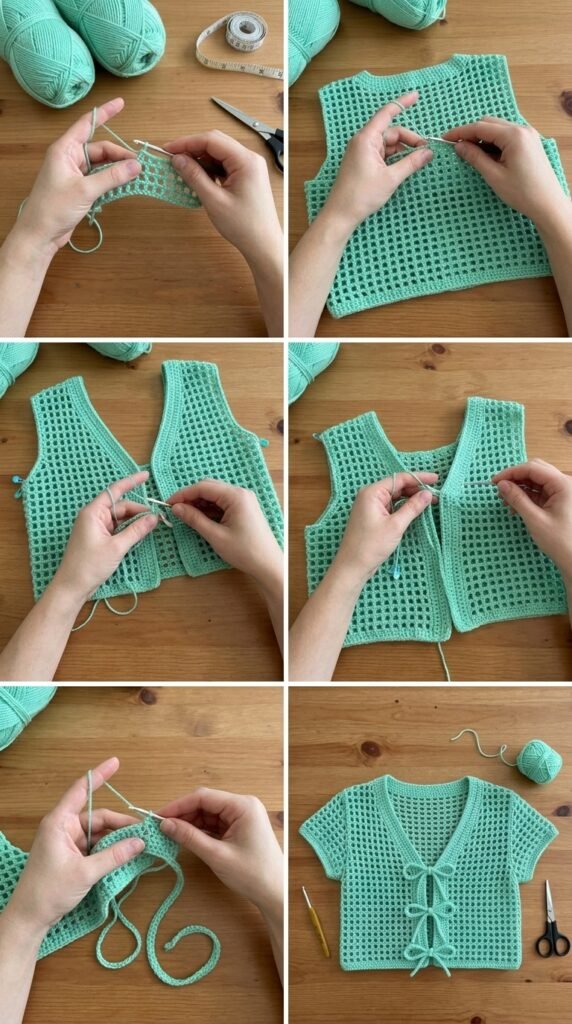
The lace comes from alternating double crochets with chain-1 spaces. Each “mesh square” is basically one dc, ch 1, skip 1, repeated. The double crochets stack neatly on top of each other so the grid stays crisp.
Want to test the feel before you commit yarn? Try this quick practice swatch:
Ch 22.
Row 1: Dc in 4th ch from hook, ch 1, sk 1, dc in next ch, repeat across.
Row 2: Ch 3 (counts as dc), turn, dc in next dc, ch 1, repeat, ending with dc in the top of the turning chain.
Keep repeating Row 2 until the motion feels automatic. Once the double crochets sit right on top of each other, you’re ready for the real thing.
Image limit reached
You’ve used your image generations. Please try again later.
Cardigan Sizing
This pattern aims for a relaxed, cropped fit.
Finished measurements (approx.):
Bust: 36–40 inches with natural give
Length from shoulder: 16 inches
Cap sleeve length: about 4 inches
Need a different size? Adjust the starting chain in multiples of 2 so the mesh pattern stays intact. Try the piece on as you go—way easier than frogging later.
How to Crochet the Lace Tie Cardigan
Back Panel
Work flat from the bottom up.
Foundation: Ch 74 (or adjust in multiples of 2 + 4 for the turning chain).
Row 1 (RS): Dc in 4th ch from hook, ch 1, sk 1, dc in next ch, repeat across.
Row 2: Ch 3 (counts as dc), turn. Dc in first ch-1 space, ch 1, dc in next ch-1 space, repeat, ending with dc in top of turning chain.
Rows 3–34: Repeat Row 2.
You should land around 16 inches tall. Fasten off and set aside.
Left Front Panel
Foundation: Ch 38.
Work the same mesh pattern as the back for 20 rows (18 mesh squares).
Begin V-neck shaping on Row 21: Work across only the first 16 mesh squares, leave the last two unworked.
Continue decreasing one mesh square at the neck edge every row until 10 mesh squares remain for the shoulder. Work even for the remaining rows to match the back length. Fasten off.
Right Front Panel
Mirror the left front exactly, just reverse the neck decreases so everything lines up when you seam.
Cap Sleeves
Seam the shoulders first (about 10 mesh squares on each side).
Join yarn at the underarm with right side facing.
Round 1: Ch 3, work roughly 36 dc evenly around the armhole, join with slip stitch.
Round 2: Switch to mesh pattern—dc, ch 1, sk 1—around.
Work a couple more rounds in mesh, then finish with a round of single crochet for a neat edge. Repeat for the other sleeve.
Neckline and Front Edging
Join at the bottom right front corner. Work single crochet evenly up the right front, around the V-neck, and down the left front. Aim for about 3 sc for every 2 rows so the edge stays flat. Do a second row of sc for a clean finish.
Bottom Hem Edging
Join at a side seam and single crochet all the way around the bottom edge, one sc in each dc and each ch-1 space. Join and fasten off.
Making the Bow Ties (Make 6)
Each bow needs two cords, so six cords total for three pairs.
For each cord: Ch 60. Slip stitch in the second chain from the hook and in every chain across. Fasten off, leaving a long tail for sewing.
They should measure roughly 8–9 inches. These little cords are fast and satisfying—perfect for binge-watching something while you finish them.
Attaching the Bow Ties
Space three pairs evenly down the front opening: one at the V-neck point, one at bust level, and one near the hem.
Thread the tail onto a tapestry needle and sew the center of each cord securely to the front edge. Make several passes so they stay put. Attach the matching cord to the opposite side at the same height.
When you wear it, just tie each pair into a soft bow. Don’t yank them tight—loose and slightly imperfect looks cuter.
Assembly Instructions
- Shoulder seams: With wrong sides together, whip stitch or mattress stitch the front shoulders to the back.
- Side seams: Starting at the bottom hem, seam up to the underarm on each side. Leave the armholes open.
- Weave in every last end. Take your time—stray tails love to poke through lace.
That’s it. The hard part is already behind you.
Finishing and Blocking
Blocking is non-negotiable with lace. It opens the mesh and makes everything look intentional.
Wet-block it: Soak in cool water with a drop of wool wash for 15 minutes. Gently squeeze (never wring). Lay flat on a blocking mat or towel. Pin out to measurements, gently stretching the mesh open. Let it dry completely.
The difference is night and day. Those little squares suddenly look crisp and even.
Styling Your Mint Lace Cardigan
This piece plays well with almost everything. Throw it over a tank and jeans for weekend errands. Pair it with a sundress for brunch or a garden party. The cropped length looks especially good with high-waisted skirts or trousers.
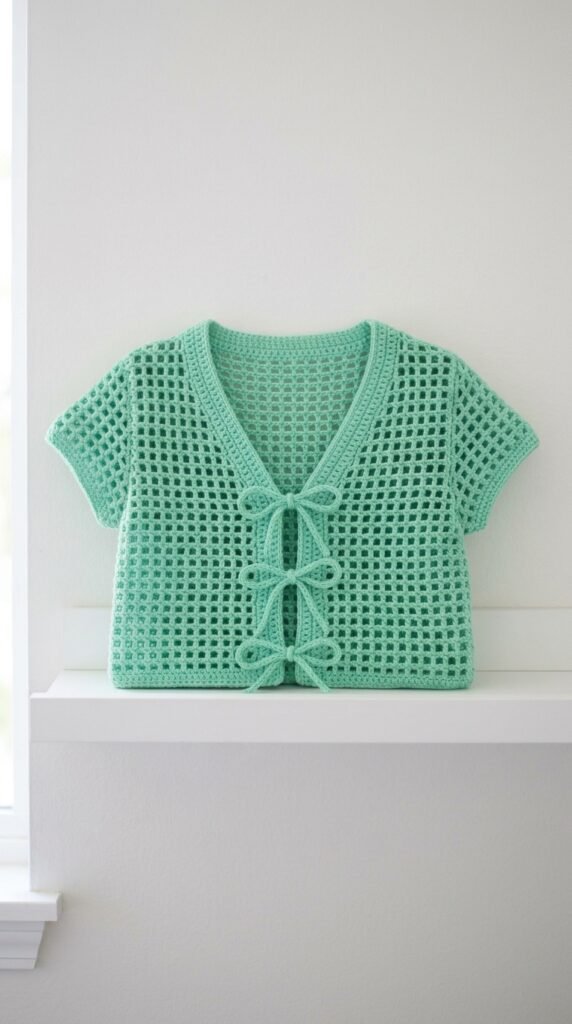
Mint green is perfect for spring and summer, but the pattern itself doesn’t care about color. Soft blush, crisp white, or even a deep navy all look elevated. IMO, the bows make any shade feel a little extra special.
Tips for Success
Keep your tension steady. Uneven tension shows up fast in open mesh.
Count stitches at the end of the first few rows—mistakes are cheaper to fix early.
Mark the right side with a scrap of yarn so you never have to guess.
Try the panels on as you go. Adjustments are way less painful when you’ve only made 10 rows instead of 30.
And if you mess up a decrease? Frog it. Lace is forgiving once you accept that frogging is just part of the process.
You Might Also Like
- Cream Ivory Bridal Lace Maxi Skirt Free Crochet Pattern
- Baby Blue Ribbon Crochet Vest Free Crochet Pattern
- Easter Bunny Hooded Poncho Free Crochet Pattern
- Caramel Autumn Bow Crochet Vest Free Crochet Pattern
- Butter Yellow Lace Mesh Crochet Shrug Free Pattern
FAQ’s
Can I make this cardigan longer?
Yes. Just add more rows to the back and fronts before you start the neck shaping. Stick to even numbers of rows so the pattern stays balanced.
What if my gauge is off?
Too big? Drop a hook size. Too small? Go up a size. Even half a millimeter can shift the finished measurements noticeably.
Can I use a different weight yarn?
You can, but expect size changes. Worsted will make a bigger, denser cardigan. Fingering will make a more delicate, smaller one. Adjust your starting chains and check gauge carefully.
How do I keep the edges from curling?
The single crochet border helps a lot. Blocking finishes the job. If your yarn is especially springy, a light steam after blocking can calm it further.
Do the bows stay tied?
They stay put pretty well if you sew the cords on securely and don’t yank them tight every time. A tiny dab of fabric glue on the knot (on the inside) works as extra insurance if you’re worried.
Final Thoughts
This mint green lace tie cardigan is one of those projects that feels special without demanding weeks of your life. The mesh is simple, the bows are charming, and the finished piece looks like you put in way more effort than you actually did. Grab your favorite DK cotton, settle in with a show, and enjoy the process. You’ll have a light, pretty layer ready for the next warm breeze—and those little ties will make you smile every time you put it on.

Leave a Reply
You must be logged in to post a comment.