


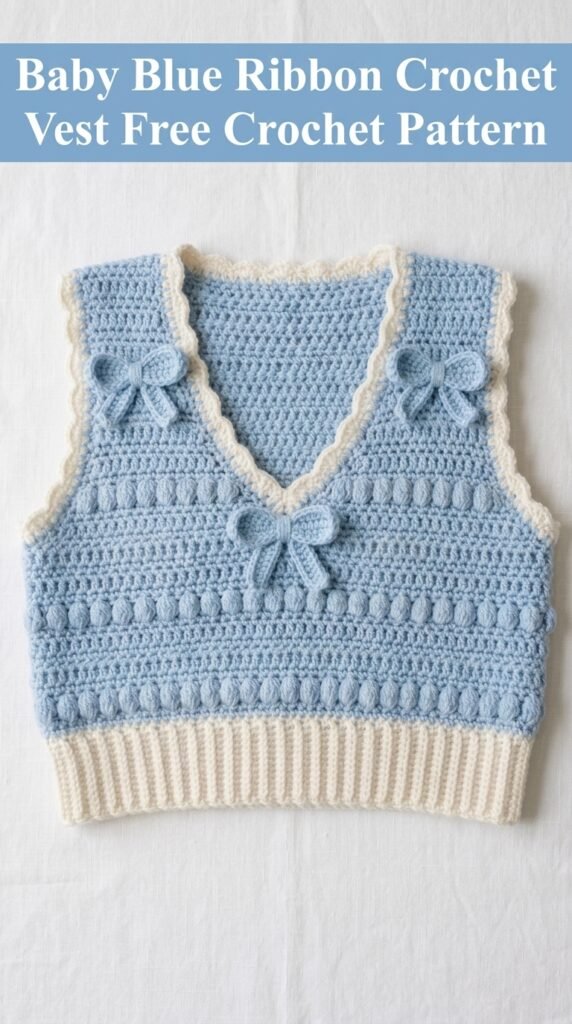
Ever spotted a vintage photo of someone in a sweet cropped vest with tiny bows and thought, “I need that in my life”? That’s exactly how this baby blue ribbon crochet vest came together. Soft puff stitches, a flattering V-neck, and those little handmade bows turn a simple project into something you’ll actually want to wear on repeat. Ready to grab your hook and make one that feels fresh and personal?

Why You Will Love This Crochet Vest Pattern
This vest sits right in that sweet spot where beginner skills meet “wow, you made that?” results. The body relies on basic stitches most of us already know, yet the textured rows and finished details make it look far more advanced.
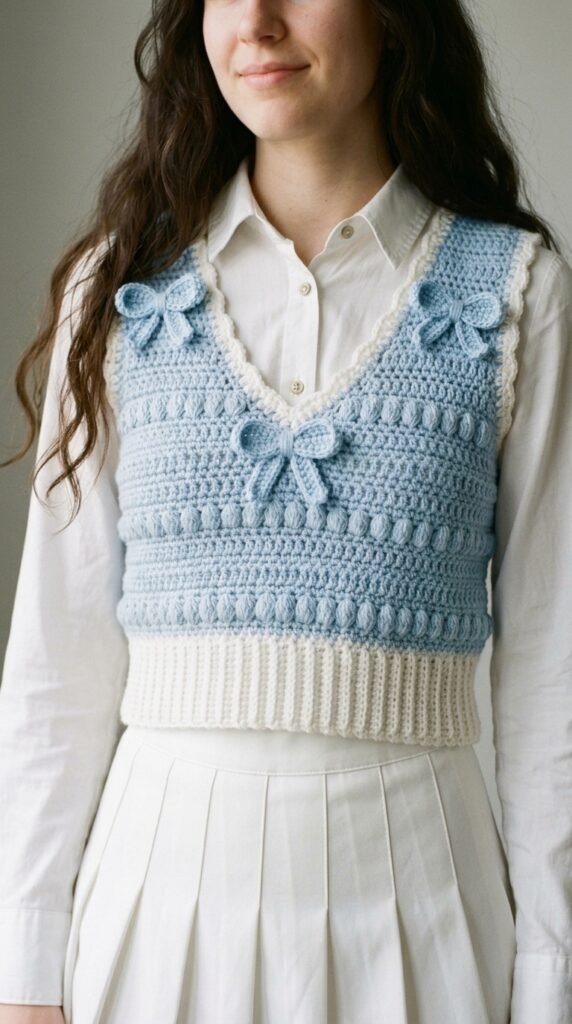
The cropped length plays nicely with almost anything. Layer it over a button-down for that polished cottagecore vibe, or toss it on with a simple tee when you want easy weekend style. The V-neck keeps everything balanced and wearable instead of trendy for five minutes.
And yes, the pattern walks you through every step. Even if garments still feel a little intimidating, this one builds confidence without the overwhelm.
Materials Needed
Gather your supplies first so you can stay in the flow once you start.
Yarn:
Main Color (MC): Soft baby blue worsted weight, about 280 yards for XS/S or 350 yards for M/L
Contrast Color (CC): Cream or off-white worsted weight, roughly 80 yards
A smooth acrylic or cotton blend works best here. You want clear stitch definition so those puffs really pop. Skip anything fuzzy.
Hooks:
5.0 mm (H/8) for the main body
4.5 mm (optional) for tighter ribbing
Notions:
Yarn needle
Stitch markers
Scissors
Measuring tape
That’s it. No fancy extras required.
Gauge
Yes, gauge matters on garments. Take the five minutes.
16 stitches and 14 rows = 4 inches in half double crochet.
Too big? Drop a hook size. Too small? Go up. Your finished vest will fit so much better if you check this now instead of later.
Finished Measurements
Written for XS/S with M/L in parentheses.
Bust: 32–34 inches (36–38 inches)
Length from shoulder: 16 inches (17 inches)
Hem width: 14 inches (16 inches)
Measure yourself against these numbers before you chain the first stitch. Patterns give guidelines, but your body gets the final say.
Abbreviations and Stitch Definitions
Here’s every stitch you’ll meet, explained plainly.
ch = chain: Yarn over, pull through loop.
sl st = slip stitch: Insert hook, yarn over, pull through both the stitch and the loop on your hook.
sc = single crochet: Insert, yarn over, pull up a loop, yarn over, pull through both.
hdc = half double crochet: Yarn over, insert, yarn over, pull up a loop (three loops), yarn over, pull through all three.
dc = double crochet: Yarn over, insert, yarn over, pull up a loop, yarn over, pull through two, yarn over, pull through two.
puff st = puff stitch: (Yarn over, insert, pull up a loop) three times in the same stitch (seven loops total), yarn over, pull through all seven, chain one to close.
sk = skip
BLO = back loop only
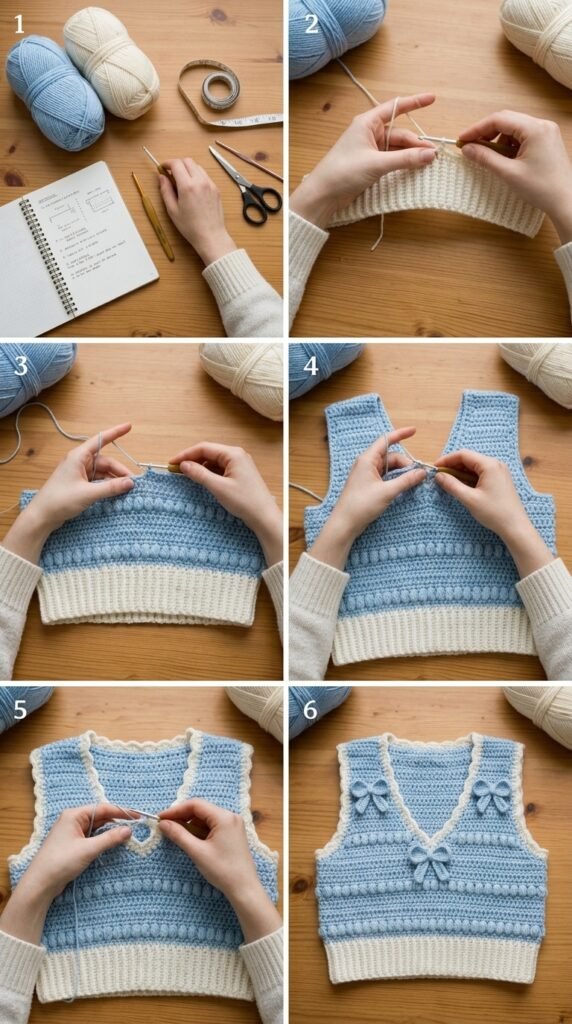
The puff stitch looks fancy but feels straightforward once you try it a couple of times. Keep your tension a little looser than usual so those loops slide through easily.
Understanding the Construction
You work two flat panels—front and back—then seam the shoulders and sides. The ribbed hem gets added afterward by picking up stitches along the bottom edge.
The front panel includes a V-neck shaped by working each side separately after you reach the center. It sounds more complicated than it is. Markers and row-by-row guidance keep it manageable.
Back Panel Instructions
Foundation: With MC, chain 65 (73) loosely.
Row 1: Hdc in third chain from hook (skipped chains count as first hdc), hdc across. Turn. 63 (71) stitches.
Row 2: Chain 2 (counts as hdc), hdc in each stitch across. Turn.
Rows 3–6: Repeat Row 2.
Row 7 (Puff Row): Chain 1, sc in first stitch, skip 1, puff stitch in next, skip 1, sc in next repeat across, ending with sc in last stitch. Turn.
Row 8: Chain 2, hdc in every stitch and puff stitch across. Turn.
Rows 9–12: Chain 2, hdc across.
Row 13: Repeat the puff row.
Row 14: Repeat Row 8.
Rows 15–18: Hdc across.
Row 19: Puff row again.
Row 20: Hdc across.
Continue in plain hdc until the panel measures about 10 inches from the foundation. Don’t fasten off yet.
Armhole Shaping
Slip stitch across the first 6 stitches, chain 2, hdc across until 6 stitches remain, leave those unworked. Turn. 51 (59) stitches.
Keep working in hdc for another 5 inches, or until the total length reaches 16 (17) inches. Fasten off.
Front Panel Instructions
Foundation and Rows 1–20 match the back panel exactly, including every puff row.
V-Neck Shaping (Right Side)
Row 21: Chain 2, hdc in the next 30 (34) stitches. Turn, leaving the rest unworked. 31 (35) stitches.
Row 22: Chain 2, skip the first stitch (neck decrease), hdc across. Turn.
Row 23: Chain 2, hdc until 2 stitches remain, hdc2tog. Turn.
Keep alternating decreases every other row until 22 (26) stitches remain. Work even until the length matches the back. Fasten off.
V-Neck Shaping (Left Side)
Join yarn at the center front.
Row 21: Chain 2, hdc across the remaining 31 (35) stitches. Turn.
Row 22: Chain 2, hdc until 2 stitches remain, hdc2tog. Turn.
Row 23: Chain 2, skip first stitch, hdc across. Turn.
Decrease the same way until you reach 22 (26) stitches. Match the right side length and fasten off.
Assembly
Block both pieces gently first. It makes seaming so much cleaner.
Shoulder seams: Use a yarn needle and mattress stitch or whip stitch, matching stitch for stitch. Leave the center open for the neckline.
Side seams: Start at the bottom and seam upward, leaving 7–8 inches open at the top for armholes.
Weave in ends before you move on.
Ribbed Hem
With CC and the smaller hook if you like tighter ribbing, join at one side seam along the bottom edge.
Row 1: Chain 9. Sc in second chain from hook and each chain across. Slip stitch to the vest edge to attach. Turn. 8 stitches.
Row 2: Skip the slip stitch, work sc in BLO across. Chain 1, turn.
Row 3: Sc in BLO across, slip stitch to the next stitch on the vest body. Turn.
Repeat Rows 2 and 3 all the way around. When you meet the start, slip stitch the first and last rows together. Fasten off.
Neckline Edging
Join CC at the center back neck.
Round 1: Sc evenly around the entire opening, placing about 3 sc for every 2 rows on the angled V sections. Join with slip stitch.
Round 2: Chain 3, skip 1, slip stitch in next, chain 3, skip 1, slip stitch in next around. Fasten off. Instant pretty scallop.
Armhole Edging
Work the same two rounds around each armhole. Clean edges make the whole vest look finished.
Crocheted Bow Embellishments (Make 3)
These little bows are the personality of the whole piece.
Center Piece: With MC, chain 6. Dc in fourth chain from hook and next two chains. Turn. Work three more rows of 3 dc. Fasten off, leaving a long tail.
Bow Loops: Chain 20, slip stitch into the first chain to form a loop. Chain 20 again and slip stitch into the same chain for the second loop. Fasten off.
Wrap the center piece tightly around the middle of both loops and secure with the tail. Stitch the finished bows to the shoulder straps and the center of the V-neck.
Finishing Touches
Give the completed vest a gentle steam block. Avoid pressing hard on the puff stitches—you want them to stay dimensional. Weave in any last ends and trim carefully.
Styling Your New Crochet Vest
This piece plays well with almost everything. Pair it with a crisp white shirt and a pleated skirt for soft preppy energy. Throw it over a plain tee and jeans for low-key days. The baby blue and cream combination feels light and fresh, but you can switch to deeper tones for fall or winter.
Want something bolder? Try solid black with matching bows, or mix contrasting colors on the bows for a playful twist. The pattern is flexible—make it yours.
Helpful Tips for Success
Puff stitches can feel bulky the first few times. Loosen your tension slightly and they slide through easier. If they look flat, add one extra yarn-over when building the stitch.
Mark your decrease rows on the V-neck with stitch markers or a quick note. No shame in tracking progress that way.
Measure yourself against the finished sizes before you start. A custom fit always beats forcing a number on the page.
You Might Also Like
- Ocean Wave Baby Romper Free Crochet Pattern
- Neutral Boho Baby Romper Free Crochet Pattern
- Lavender Dream Baby Romper Set Free Crochet Pattern
- Easter Bunny Hooded Poncho Free Crochet Pattern
FAQ’s
Can a true beginner make this vest?
Yes. The stitches stay basic, and the shaping is broken into clear steps. If you’ve made scarves or simple rectangles, you can handle this.
What yarn works best for the puff stitches?
Smooth worsted weight with good stitch definition. Acrylic or cotton blends show the texture clearly. Avoid fuzzy or highly textured yarns that hide the puffs.
How do I adjust the length?
Add or subtract plain hdc rows before the armhole shaping. Keep the puff rows spaced the same way so the texture stays balanced.
Do the bows need to be the same color?
Not at all. Matching the main color looks classic, but contrasting bows add fun personality. Experiment.
Can I skip the ribbed hem?
You can, but the ribbing gives a polished, fitted edge that makes the vest look more intentional. It’s worth the extra few minutes.
How should I wash the finished vest?
Follow your yarn label. Most acrylics handle a gentle machine wash and lay-flat dry. Steam block after washing to refresh the shape.
Final Thoughts
This baby blue ribbon vest turns simple stitches into something soft, textured, and full of charm. The puff rows give it quiet dimension, the V-neck keeps it flattering, and those little bows seal the deal. Once you finish one, you’ll start plotting the next color combination. Grab your yarn, take it row by row, and enjoy the process. Happy stitching.



Leave a Reply
You must be logged in to post a comment.