


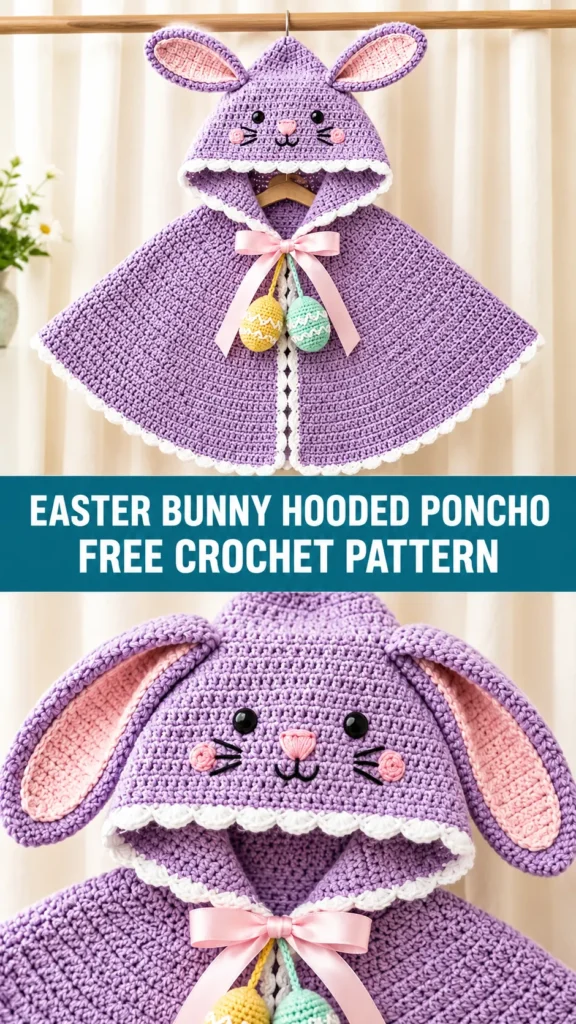
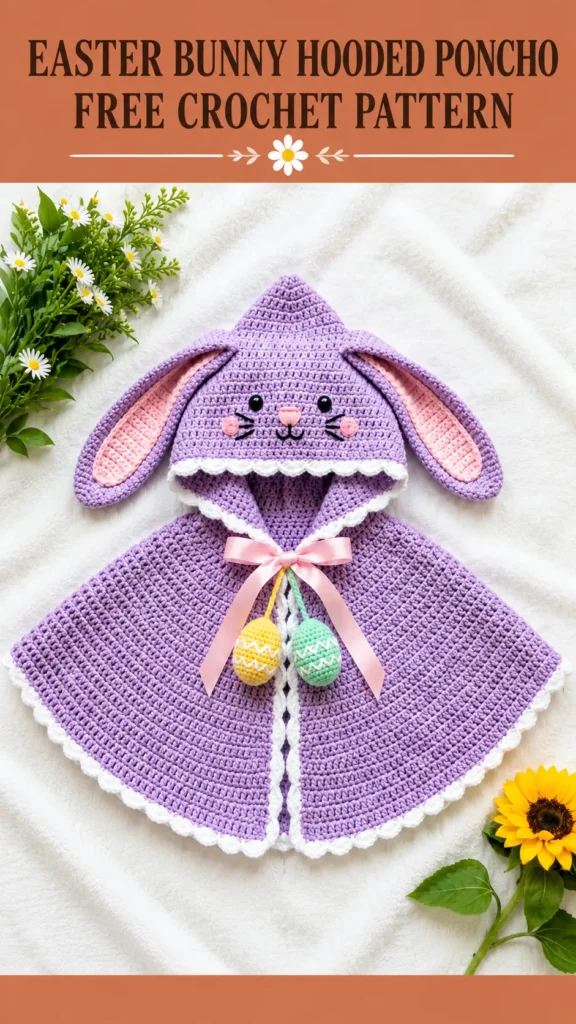
Last Easter my niece spilled grape juice all over a cheap store-bought bunny sweater and it pilled within minutes. I decided right then I could make something better—machine-washable, actually durable, and so cute that other parents at the egg hunt would ask where it came from. This Easter Bunny Hooded Poncho is the result: soft lavender body, floppy ears, little egg charms, and a crisp white picot edge. It looks fancy but works up with simple single crochet.
Pattern Overview and Skill Level
This pattern is rated intermediate. If you’ve completed two or three projects and feel comfortable with increases, working in rounds, and basic seaming, you’re ready.
The poncho body uses single crochet worked in continuous rounds from the neckline, then switches to rows to create the open front. The hood is a shaped panel with decreases that form a pointed peak. You’ll also make separate ear pieces and two little stuffed Easter egg charms.
Don’t let the intermediate label scare you. Every step is broken down, and checkpoints keep you on track.
Finished Measurements
This pattern fits toddlers approximately 2 to 4 years old (size 2T to 4T).
- Poncho body diameter (laid flat): approximately 22 inches / 56 cm
- Neckline circumference: approximately 18 inches / 46 cm
- Hood height from neckline seam to tip: approximately 9 inches / 23 cm
- Hood width at base: approximately 11 inches / 28 cm
- Total length from shoulder to hem (center back): approximately 12 inches / 30 cm
These numbers give a comfortable, drapey fit that still looks polished on a toddler.
Materials Needed
Yarn:
Yarn A (Main Color, Lavender): 550–600 yards worsted weight
Yarn B (Contrast Color, White): 80 yards
Yarn C (Inner Ear Color, Blush Pink): 30 yards
Yarn D (Egg Color 1, Yellow): 15 yards
Yarn E (Egg Color 2, Mint Green): 15 yards
Recommended brands: Lion Brand Pound of Love in Violet and White, Caron Simply Soft in Soft Violet and White, or Paintbox Yarns Simply DK held double.
Hooks: US size J / 6.0 mm (main), optional US size G / 4.0 mm for the eggs
Notions: Stitch markers, yarn needle, scissors, 6 mm black safety eyes or embroidery thread, blush pink thread for nose and whiskers, 1 yard pink satin ribbon, polyester fiberfill, sewing needle and thread.
Choose any smooth worsted that matches gauge. Machine-washable fibers are ideal for toddler wear.
Gauge
14 sc and 16 rows = 4 inches / 10 cm worked in single crochet with a 6.0 mm hook, blocked.
Chain 20 and work 20 rows of single crochet. Block the swatch and measure the center. Gauge matters—if it’s off, the neckline won’t fit and the whole poncho will be the wrong size. Adjust your hook as needed.
Abbreviations and Stitch Definitions
- ch = chain
- sl st = slip stitch
- sc = single crochet
- sc2tog = single crochet two together
- hdc = half double crochet
- dc = double crochet
- inc = increase (2 sc in same stitch)
- MR = magic ring
- pm = place marker
- RS / WS = right side / wrong side
- sk = skip
- rep = repeat
- rnd = round
- st(s) = stitch(es)
Special Stitches
Picot Stitch: Sc in the indicated stitch, chain 3, slip stitch into the first chain of those 3 chains. This creates the pretty little bumps along the white border.
Twisted Cord: Cut 6 strands of main color, fold in half, twist until it kinks, then fold again and let it twist on itself. Knot the ends. Finished cord is about 4–5 inches long and perfect for hanging the egg charms.
Pattern Notes Before You Begin
A few things to keep in mind:
- The poncho body is worked in continuous rounds from the neckline. Use a stitch marker to track the start of each round.
- The hood is worked separately in rows, then seamed and attached.
- The front opening is created by switching from rounds to rows—no cutting required.
- The white border is applied last, after all seaming is complete.
- A turning chain of 1 does not count as a stitch.
- Stitch counts appear in parentheses at the end of each row or round.
Step by Step Instructions
Section 1: Poncho Body
Start with a magic ring and increase steadily until the neckline circle measures about 18 inches around. Then switch to rows, turning at the end of each row, and continue increasing every other row until the body reaches the desired length. The open front forms automatically once you stop working in the round.
Section 2: Hood
Chain 39 and work even rows of single crochet until the rectangle is tall enough. Then decrease at both ends of every row to form the pointed peak. Fold the hood in half and seam the top edge. Pin and sew the base of the hood evenly around the neckline of the poncho, matching center backs.
Section 3: Bunny Ears
Make two outer ears in lavender and two smaller inner ears in blush pink. Center each inner ear on an outer ear, whip-stitch around the edges, and add a little fiberfill for dimension. Sew the finished ears to the top of the hood about 1–1.5 inches from the center seam.
Section 4: Easter Egg Charms
Using a smaller hook and yellow or mint yarn, work a small stuffed egg shape. Optionally add a zigzag of surface slip stitches in white for decoration. Make two eggs and set them aside for the twisted cord.
Section 5: Border
Join white yarn and work single crochet evenly around the entire outer edge of the poncho (hem, front edges, and neckline). Then work a picot round for that crisp, finished look. Repeat a similar picot border around the hood face opening.
Section 6: Bunny Face
Position the face on the front of the hood. Attach or embroider the eyes, add a small pink nose, three whiskers on each side, and soft blush cheeks. Instant bunny personality.
Section 7: Final Embellishments
Make the twisted cord, attach both egg charms to one end, and secure the other end inside the ribbon bow at center front. Thread the pink satin ribbon through the stitches at the neckline and tie a bow. The little hanging eggs are pure charm.
Size Customization Tips
To size up for 4T to 6: Work two extra increase rounds at the neckline, add a few more rows to the hood, and a few extra increase rows to the body.
To size down for 12 to 18 months: Convert to rows earlier, reduce the total body rows, and start the hood with a shorter chain and fewer plain rows before shaping.
Finishing and Care
Weave in every end securely. Wet-block by soaking in cool water, gently pressing out the moisture, and laying flat to dry. Machine wash cold on gentle cycle if you used acrylic; remove the ribbon first and reattach afterward. Lay flat to dry.
You Might Also Like
- Crochet Mint Daisy Baby Dress Free Pattern
- Fox Woodland Hooded Baby Poncho Free Crochet Pattern
- Woodland Creatures Bucket Hats Free Crochet Pattern
- Citrus Burst Daisy Granny Square Baby Blanket Free Crochet Pattern
- Classic Red Heart Valentine Baby Blanket Free Crochet Pattern
FAQ
Is this pattern really intermediate?
Yes, mainly because of the shaping and assembly. Every individual section is simple single crochet. Take it one piece at a time and you’ll be fine.
Can I embroider the eyes instead of using safety eyes?
Absolutely—and I recommend it for any gift intended for younger toddlers. Embroidered eyes are just as cute and completely safe.
Do the egg charms have to hang from a twisted cord?
No. You can sew them directly to the bow or skip them entirely. They’re a fun extra, not a structural necessity.
How do I keep the ears from flopping the wrong way?
A little fiberfill and firm stitching at the base usually does the trick. You can also steam them gently (held above the fabric) to help set the angle.
What if my gauge is slightly off?
Adjust your hook size before you start the neckline. The neck opening is the most important measurement—make sure it will fit comfortably over a toddler’s head.
Can I make this in different colors?
Of course. Soft gray with white, classic cream with pink, or even a pastel rainbow version all look adorable. Just keep the inner ears and face details in contrasting shades so they pop.
Conclusion
This Easter Bunny Hooded Poncho looks far more complicated than it actually is. Simple single crochet, smart shaping, and a few sweet embellishments create something that kids (and parents) go wild for. Once you’ve made one, you’ll probably want to make a whole litter of bunnies. Grab your lavender yarn, settle in, and enjoy every stitch. The little one who wears this is going to look absolutely irresistible at the next egg hunt. Happy crocheting!


Leave a Reply
You must be logged in to post a comment.