


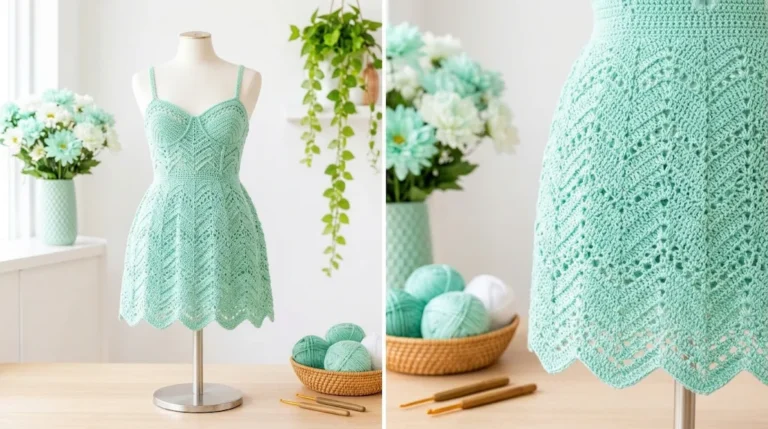
I’ve been obsessed with this mint-green daisy dress ever since I first sketched it. Soft granny-square yoke covered in little white daisies, a breezy fan-lace skirt, and a scalloped hem that actually moves when the baby does—what’s not to love? If you’re looking for a keepsake piece that still feels practical enough for everyday wear, this is the one. Let’s make it together.

About This Baby Dress Pattern
This mint green crochet dress fits babies around 12 to 18 months. The finished chest measures about 19 inches around, and the total length from shoulder to hem hits roughly 14.5 inches. Soft mint paired with white daisy motifs and pale yellow centers gives it that fresh springtime look perfect for photos or just everyday sweetness.
The skill level sits at intermediate. You should feel comfortable joining granny squares, reading repeating lace patterns, working in both rows and rounds, and handling basic garment construction. Confident beginners who have already tackled a few projects can absolutely handle this with patience.
Plan for roughly 18 to 25 hours total. The daisy squares alone take about 8 to 10 hours, so this works beautifully as an evening project over a couple of weeks.
Materials You Will Need
You need DK weight yarn throughout.
- Main Color (MC): Mint green, approximately 350 yards / 320 meters
- Contrast Color A (CA): White, approximately 150 yards / 137 meters
- Contrast Color B (CB): Pale yellow, approximately 20 yards / 18 meters
- Contrast Color C (CC): White, approximately 10 yards / 9 meters for ribbon (or substitute 36 inches of 3/8-inch satin ribbon)
Hooks:
US size E-4 / 3.5 mm (primary hook for squares and lace body)
US size D-3 / 3.25 mm (for neckline and armhole edging)
Notions: Tapestry needle, at least 8 stitch markers, 36 inches of 3/8-inch white satin ribbon, 4 small white buttons (optional), rust-proof pins for blocking.
Yarn Suggestions
Paintbox Yarns Simply DK works beautifully here. It is 100% acrylic with excellent stitch definition, machine washable, and budget-friendly. The Spearmint Green shade is nearly perfect.
Drops Safran gives you a cotton option for warmer weather. It creates a slightly denser fabric with lovely drape—just check your gauge carefully.
Lion Brand Pound of Love offers incredible value. One skein in mint covers all your main-color yardage with room to spare.
Use any DK weight that achieves gauge. Avoid fuzzy or textured novelty yarns because they hide those pretty daisy petals and lace details.
Gauge
With main color and the 3.5 mm hook:
One daisy granny square = 2.75 inches / 7 cm square after blocking
18 single crochet = 4 inches / 10 cm
One fan lace repeat (6 stitches) = approximately 1.25 inches / 3.2 cm wide
6 rows of fan lace = approximately 2 inches / 5 cm tall
Make and block one daisy square before you start the full project. If your square measures larger than 2.75 inches, drop one hook size. If smaller, go up one size. Gauge matters a lot for garment fit—don’t skip this step.
Abbreviations and Stitch Definitions
Here is every abbreviation you will meet, explained in plain English:
- ch = chain
- sl st = slip stitch
- sc = single crochet
- hdc = half double crochet
- dc = double crochet
- tr = treble crochet
- sp = space
- ch-sp = chain space
- st(s) = stitch(es)
- rep = repeat
- pm = place marker
- RS/WS = right side / wrong side
- MC/CA/CB/CC = Main Color / Contrast Colors as listed
- sk = skip
- yo = yarn over
- rnd = round
- BLO/FLO = back loop only / front loop only
Special Stitches
Fan Stitch: (dc, ch 1, dc, ch 1, dc, ch 1, dc, ch 1, dc) all worked into the same stitch or space. One fan occupies a 6-stitch repeat and creates the lacy skirt texture.
Scallop Edging: Sc in first st, skip 1 st, 5 dc in next st, skip 1 st, sc in next st. Each scallop uses 5 stitches.
Picot: Ch 3, slip stitch in the first chain of the ch-3 just made. Creates a tiny decorative bump.
Daisy Petal: Insert hook into the center ring, yarn over, pull up a loop to the height of a double crochet, yarn over, pull through both loops. Chain 1 to hold the petal shape. Repeat 12 times around the center for a full daisy.
Once those petals click, the squares become surprisingly meditative.
Step-by-Step Pattern Instructions
Daisy Square Module
Make 13 squares total: 9 for the yoke and 4 for the hem border.
Start with a magic ring in pale yellow and work 12 single crochet. Drop the yellow and attach white. Work 12 elongated daisy petals into the center ring, anchoring between the single crochets. Switch to mint green and build two rounds of granny clusters to square it off, then finish with a single-crochet edging round. Block each square to 2.75 inches. FYI, blocking before assembly makes the joining so much cleaner.
Yoke Assembly
Arrange 12 squares in a 4-wide by 3-tall grid (front and back each get six squares, two wide by three tall). Seam the vertical edges with single crochet, working through corresponding stitches. Join the front and back at the shoulders, leaving the center open for the neckline. Leave the topmost stitches open on the side seams for the armholes. Take your time here—neat joins make the whole dress look polished.
Waist Ribbon Channel
Join mint green at the bottom edge of the yoke and work evenly around until you hit exactly 84 stitches (divisible by 6 for the fan pattern). Create an eyelet round of double crochet and chain-1 spaces. This is where the ribbon will thread later.
Skirt Body
The skirt works in joined rounds using the fan lace stitch. Set up the fans, then alternate fan rounds with linking rounds for a total of 14 rounds of lace. The natural A-line flare of the fan stitch gives the dress its sweet silhouette—no extra increases needed. Trust the process.
Hem Border
Pick up 84 single crochet around the bottom edge. Mark four evenly spaced zones for the daisy squares. Attach the remaining four squares by single-crocheting through both layers. Fill the spaces between squares with scallop shells, then add scallop edging along the lower edges of the squares themselves. The daisies along the hem are pure magic.
Neckline Edging
Switch to the smaller hook and white yarn. Work a round of single crochet around the neckline, then a picot edging round for a delicate finish.
Armhole Edging
Repeat the same single-crochet and picot edging around each armhole. Clean, simple, and pretty.
Finishing Your Mint Daisy Baby Dress
Weave in every end securely, especially at the square joins and color changes. Wet-block the finished dress by soaking it in cool water, gently squeezing out the excess, and pinning it flat to the finished measurements. Let it dry completely—12 to 24 hours is typical.
Thread the white satin ribbon through the eyelet round at the waist and tie a neat bow at center front. Trim the ends at an angle and touch with a tiny bit of fabric glue if you want to prevent fraying. Optional: add a few button loops and buttons along the back opening if you prefer a more structured closure.
Size Customization Tips
To size up for 18 to 24 months, add one more daisy square column to the yoke so both front and back are three squares wide. Adjust the fan-stitch pickup round to 96 stitches and add a couple of extra fan rounds for length. The finished chest will measure about 21 inches.
Always keep the stitch counts divisible by 6 for the fan pattern to line up cleanly.
Tips for Success
Take your time with the daisy squares—they are the heart of this design. Blocking them before assembly makes joining so much easier. Mark your stitch counts every few rounds while working the skirt so mistakes get caught early.
The fan lace naturally creates the A-line shape, so resist the urge to add extra increases. When attaching the hem squares, pin them first and step back to check the spacing. A few minutes of measuring saves hours of frogging.
IMO the little daisies along the hem are what make people stop and stare. Don’t rush that part.

You Might Also Like
- Fox Woodland Hooded Baby Poncho Free Crochet Pattern
- Woodland Creatures Bucket Hats Free Crochet Pattern
- Citrus Burst Daisy Granny Square Baby Blanket Free Crochet Pattern
- Classic Red Heart Valentine Baby Blanket Free Crochet Pattern
- Mint Bunny Baby Cocoon Blanket Free Crochet Pattern
FAQ’s
Can a confident beginner make this dress?
Yes, if you already know how to join granny squares and work basic lace patterns. The individual techniques are straightforward—just take the daisy petals and fan setup slowly the first time.
Do I have to use mint green?
Not at all. Soft pink, butter yellow, or classic white all look gorgeous. Just keep the daisy petals in a contrasting color so they pop.
How do I keep the squares from looking uneven?
Block every square to the exact same measurement before you start joining. Consistent tension and blocking are the real secret.
Can I skip the hem daisy squares?
You can, but the hem looks much more special with them. If you want a simpler finish, just work a continuous scallop edging all the way around.
Is the ribbon necessary?
It adds a sweet adjustable waist and that classic heirloom touch. You can leave it out if you prefer a clean look, but most people love the bow.
What’s the best way to wash the finished dress?
Gentle machine wash in cold water inside a mesh bag, or hand wash. Always lay flat to dry so the lace keeps its shape.
Conclusion
This mint daisy baby dress turns a handful of granny squares and some lacy rounds into a true keepsake. The construction stays logical from top to bottom, and the finished piece photographs like a dream. Take your time with the squares and the blocking—those steps make all the difference. Happy stitching, and I hope the little one who wears this dress gets plenty of sunny days and sweet memories.



Leave a Reply
You must be logged in to post a comment.