

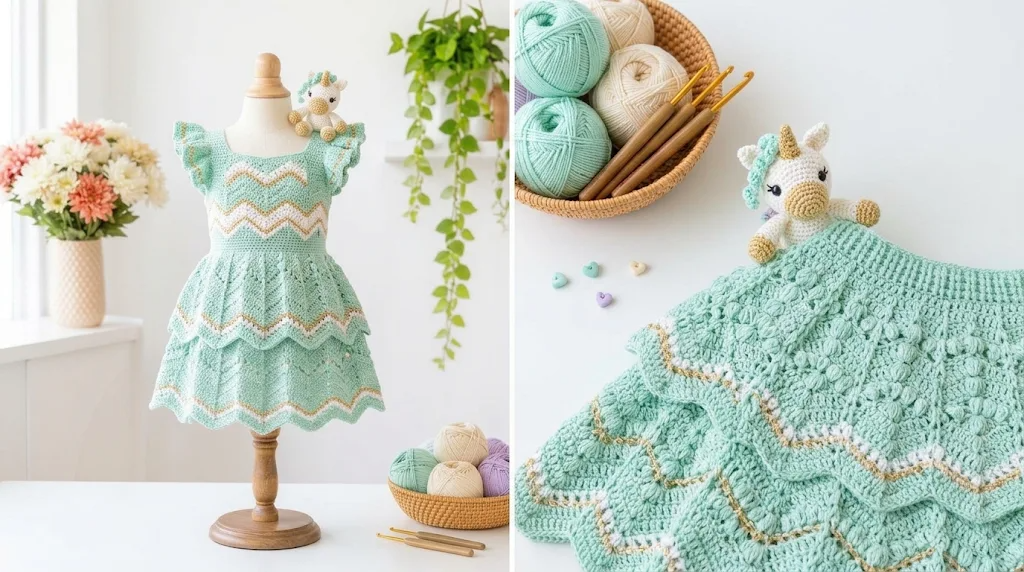
There is something especially sweet about crocheting a tiny outfit inspired by unicorns. Soft pastel colors, little rainbow details, and delicate handmade decorations can turn a simple baby dress into something truly magical. When I started planning this Mint Unicorn Baby Dress Set, I wanted a design that felt playful without becoming too busy.
Mint green seemed like the perfect starting point. It has a fresh, gentle appearance and pairs beautifully with white, blush pink, lavender, and soft rainbow shades. I imagined a comfortable little dress with a pretty flared skirt, a decorated bodice, and matching accessories that could be worn together for birthdays, photographs, or special family occasions.
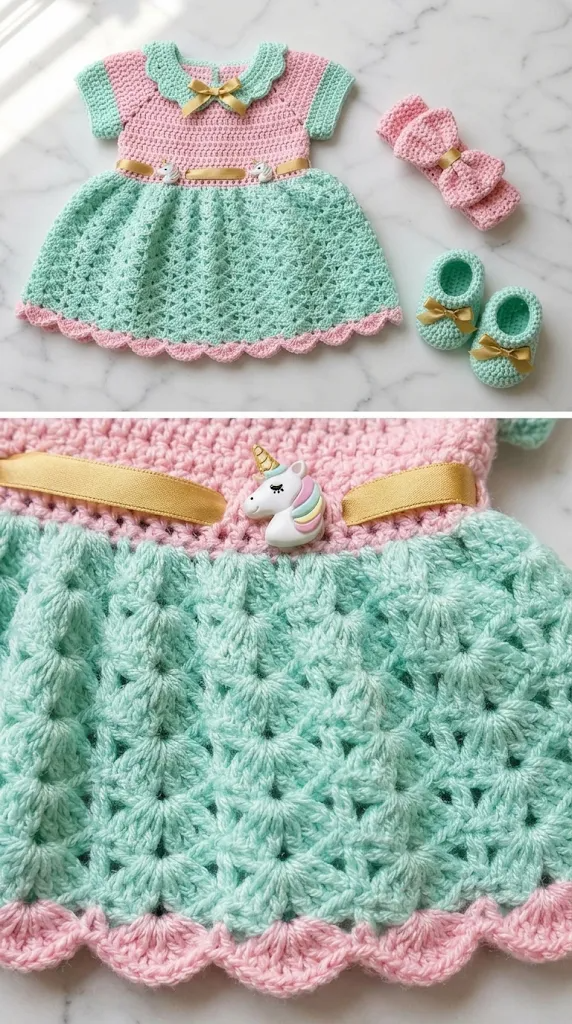
This Mint Unicorn Baby Dress Set Free Crochet Pattern includes a sleeveless dress, a unicorn-inspired appliqué, a matching headband, and tiny booties. The combination makes a lovely handmade gift for a baby girl.
About This Mint Unicorn Baby Dress Set Pattern
This pattern is designed as a coordinated four-piece crochet outfit.
The dress is worked from the neckline downward. The upper bodice is crocheted in rows, then joined into rounds after the armholes are formed. The skirt is worked downward in rounds, with gradual increases creating a comfortable flared shape.
The unicorn decoration features a white face, colorful mane, small ears, and a golden horn. The matching headband and booties use the same mint and pastel color combination.
Skill Level: Intermediate beginner to intermediate.
You should be comfortable with basic crochet stitches, working in rounds, increasing, decreasing, and changing colors.
Finished Sizes:
- 0–3 months: Chest 16 inches.
- 3–6 months: Chest 17 inches.
- 6–12 months: Chest 18 inches.
- 12–18 months: Chest 19 inches.
The dress is designed with approximately 1 inch of comfortable wearing ease. Always check the finished measurements against the baby before making the outfit.
Materials You’ll Need
Yarn
Use lightweight, soft baby yarn that feels comfortable against delicate skin.
- Color A – Mint Green: 180–250 yards for the dress.
- Color B – White: 60–80 yards for the unicorn face and decorative edging.
- Color C – Pale Pink: 20–30 yards for the cheeks and flower details.
- Color D – Lavender: 20–30 yards for the unicorn mane.
- Color E – Soft Yellow: 15–20 yards for the unicorn horn.
- Color F – Pastel Rainbow Shades: Small quantities for decorative details.
Yarn Weight: DK (Category 3), approximately 100% cotton or soft acrylic baby yarn.
Allow 15% extra yarn for gauge variation and individual adjustments.
Crochet Hooks
- 3.5 mm crochet hook for the dress.
- 3 mm crochet hook for the unicorn appliqué and small accessories.
- 3.25 mm crochet hook for the headband and booties if needed.
Additional Supplies
- Tapestry needle.
- Stitch markers.
- Measuring tape.
- Small scissors.
- Two small buttons for the back opening.
- Blocking mat and rust-resistant pins.
- Optional embroidery thread for facial details.
For baby safety, embroider the unicorn’s eyes rather than using plastic safety eyes. Secure every decorative component firmly and avoid loose beads or detachable embellishments.
Abbreviations and Terminology
This pattern uses US crochet terminology.
| Abbreviation | Meaning |
|---|---|
| ch | Chain |
| sl st | Slip stitch |
| sc | Single crochet |
| hdc | Half double crochet |
| dc | Double crochet |
| tr | Treble crochet |
| inc | Increase: 2 stitches in one stitch |
| dec | Decrease: work 2 stitches together |
| st | Stitch |
| sts | Stitches |
| sp | Space |
| sk | Skip |
| BLO | Back loop only |
| FO | Fasten off |
| RS | Right side |
| WS | Wrong side |
Basic Stitch Explanations
- Chain (ch): Yarn over and pull through the loop on your hook.
- Slip Stitch (sl st): Insert the hook, yarn over, and pull through both loops.
- Single Crochet (sc): Insert the hook, yarn over, pull up a loop, yarn over, and pull through both loops.
- Half Double Crochet (hdc): Yarn over, insert the hook, pull up a loop, yarn over, and pull through all three loops.
- Double Crochet (dc): Yarn over, insert the hook, pull up a loop, yarn over and pull through two loops twice.
- Treble Crochet (tr): Yarn over twice, insert the hook, pull up a loop, and work through two loops three times.
- Increase (inc): Work two stitches into the same stitch.
- Decrease (dec): Join two stitches into one.
Turning chains do not count as stitches unless a step specifically states otherwise.
Gauge
Gauge is important because the dress needs to fit comfortably.
Using the 3.5 mm hook and mint yarn, crochet a small swatch in half double crochet.
Gauge:
- 16 hdc stitches = 4 inches.
- 12 rows = 4 inches.
If your swatch is larger, try a smaller hook. If it is smaller, move up one hook size.
Wash and dry your swatch as you intend to care for the finished dress before measuring.
Main Pattern Instructions
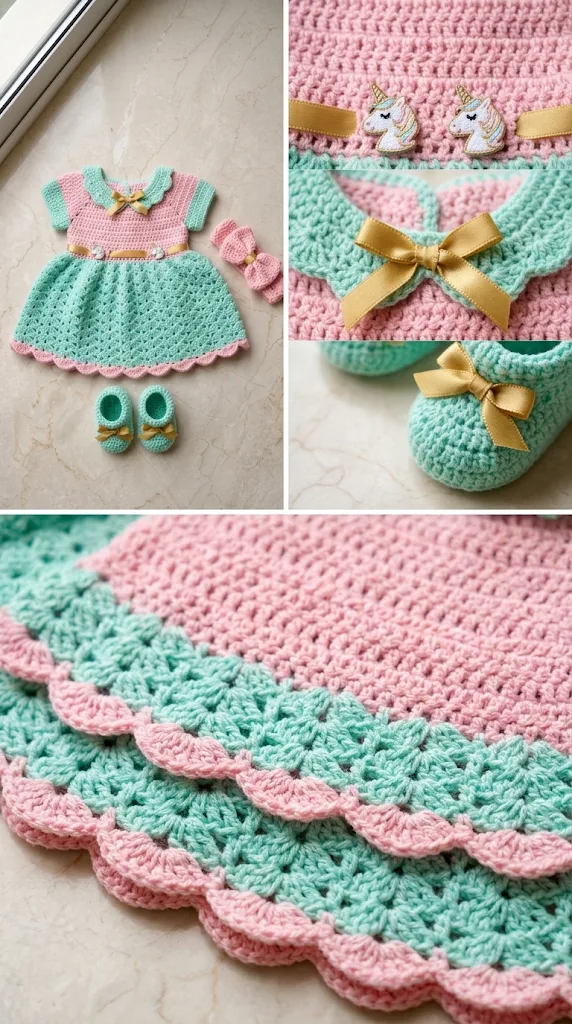
Part 1: Crochet Baby Dress Bodice
The bodice begins at the neckline and is worked in rows.
For the following instructions, the 3–6-month size is used as the main example. Adjust the starting chain using the size guide below.
Foundation Chain:
- 0–3 months: Ch 48.
- 3–6 months: Ch 52.
- 6–12 months: Ch 56.
- 12–18 months: Ch 60.
Row 1: Hdc in the third chain from the hook and in each remaining chain. Turn.
Row 2: Ch 2, hdc in each stitch across. Turn.
Row 3: Ch 2, hdc in the first 7 stitches, 2 hdc in the next stitch, hdc across until 7 stitches remain, 2 hdc in the next stitch, hdc in the final 7 stitches. Turn.
Row 4: Ch 2, hdc across. Turn.
Row 5: Ch 2, hdc across, increasing one stitch at each side. Turn.
Repeat Rows 4 and 5 until the bodice measures approximately 4 inches from the neckline for the 3–6-month size.
For larger sizes, continue until the bodice measures approximately 4.5 inches.
Creating the Armholes
Fold the bodice gently to identify the front and back sections.
Place stitch markers to divide the stitches into four sections:
- Left back.
- Left armhole.
- Front.
- Right armhole.
- Right back.
For the 3–6-month size, use approximately 10 stitches for each armhole and divide the remaining stitches evenly between the front and back.
Next Row: Ch 2, hdc across the back section, ch 10 for the first armhole, skip the marked armhole stitches, hdc across the front section, ch 10 for the second armhole, skip the remaining armhole stitches, and join the back section.
Check that both armholes are equal.
Part 2: Crochet the Flared Mint Skirt
The skirt is worked in joined rounds from the lower edge of the bodice.
Round 1: Ch 2, hdc in each stitch and each chain around. Join with a sl st.
Round 2: Ch 2, hdc in every stitch around. Join.
Round 3: Ch 2, *hdc in the next 5 stitches, 2 hdc in the next stitch.* Repeat around. Join.
Round 4: Ch 2, hdc in each stitch around. Join.
Round 5: Ch 2, *hdc in the next 6 stitches, 2 hdc in the next stitch.* Repeat around. Join.
Round 6: Ch 2, hdc around. Join.
Continue increasing every third round by adding one stitch between increases.
For example:
- Increase Round 1: 5 hdc, inc.
- Increase Round 2: 6 hdc, inc.
- Increase Round 3: 7 hdc, inc.
Work until the skirt measures approximately:
- 0–3 months: 6 inches.
- 3–6 months: 7 inches.
- 6–12 months: 8 inches.
- 12–18 months: 9 inches.
The gentle increases create a soft A-line shape without making the skirt excessively heavy.
Part 3: Decorative Unicorn Skirt Border
A scalloped border adds a delicate finish to the mint skirt.
Join white yarn at any stitch along the lower edge.
Round 1: Ch 1, sc around the entire skirt. Join with a sl st.
Round 2: *Sk 1 stitch, 5 dc in the next stitch, sk 1 stitch, sl st in the next stitch.* Repeat around.
This creates small rounded shells.
Fasten off and weave in all ends.
Special Techniques: Crochet Unicorn Appliqué
The unicorn decoration is the feature that makes this baby dress special.
Unicorn Face
Using white yarn and a 3 mm hook:
Round 1: Make a magic ring. Work 8 sc into the ring. Pull closed and join.
Round 2: Ch 1, work 2 sc in every stitch around. Join. (16 sts)
Round 3: Ch 1, *sc in the next stitch, 2 sc in the next stitch.* Repeat around. Join. (24 sts)
Round 4: Ch 1, *sc in the next 2 stitches, 2 sc in the next stitch.* Repeat around. Join. (32 sts)
Fasten off, leaving a long sewing tail.
Unicorn Horn
Using soft yellow yarn:
Row 1: Ch 5, sc in the second chain and across. (4 sts)
Row 2: Sc2tog, sc in the remaining 2 stitches. (3 sts)
Row 3: Sc2tog, sc in the next stitch. (2 sts)
Row 4: Sc2tog. (1 st)
Fasten off.
Sew the horn securely to the top center of the unicorn face.
Unicorn Ears
Make two ears using white yarn.
Row 1: Ch 5, sc in the second chain and across. (4 sts)
Row 2: Sc2tog, sc in the remaining 2 stitches. (3 sts)
Row 3: Sc2tog, sc in the next stitch. (2 sts)
Fasten off.
Fold the lower edge slightly and stitch each ear behind the upper sides of the face.
Colorful Unicorn Mane
Use lavender, pink, and pale yellow yarn.
Attach each color around the upper side of the face using small chains and slip stitches to create a curved mane.
For a textured appearance, make several small chain loops:
- Ch 6.
- Sl st into the next available stitch.
- Repeat with alternating colors.
Keep the loops small and secure them firmly.
Unicorn Facial Details
Using black embroidery thread, embroider two curved eyes.
Add two tiny pink cheek details using pale pink yarn.
Make sure all embroidery knots are secured on the back of the appliqué.
Matching Crochet Unicorn Headband
A matching headband completes the outfit beautifully.
Using mint yarn and a 3.25 mm hook:
Foundation: Ch 65 for an approximate 16-inch headband. Adjust the length to fit the baby’s head comfortably.
Row 1: Hdc in the third chain from the hook and across.
Row 2: Ch 2, hdc across.
Row 3: Ch 2, hdc across.
Fasten off, leaving a long tail.
Sew the short ends together to form a loop.
For the decorative center, make a small unicorn flower using white and pastel yarn. You can also create a miniature version of the unicorn face and attach it securely to the center.
Check that the headband is soft, flexible, and not tight.
Matching Crochet Baby Booties
These little booties use mint yarn with white edging.
Make two identical booties.
Bootie Sole
Using mint yarn:
Round 1: Ch 10. Work 2 hdc in the second chain from the hook, hdc in the next 7 chains, 5 hdc in the last chain. Continue along the opposite side of the foundation chain with hdc in the next 7 chains, then 3 hdc in the final chain. Join.
Round 2: Ch 2, 2 hdc in the next 2 stitches, hdc in the next 7 stitches, 2 hdc in the next 5 stitches, hdc in the next 7 stitches, 2 hdc in the final 3 stitches. Join.
Bootie Upper
Round 3: Ch 1, sc in BLO around. Join.
Rounds 4–5: Ch 1, sc in every stitch around. Join.
Shaping the Toe
Round 6: Sc around, decreasing evenly across the front toe section by working 5 sc2tog decreases.
Round 7: Sc around.
Fasten off.
Bootie Edging
Attach white yarn to the top edge.
Work one round of sc around the opening.
Make the second bootie in the same way.
For extra decoration, attach a small embroidered pastel flower to the front of each bootie. Keep the decorations flat and securely stitched.
Assembly and Finishing
Once all four pieces are complete, arrange the outfit before attaching the decorative elements.
Attaching the Unicorn Appliqué
Position the unicorn face at the center of the dress bodice.
Place it approximately 1 inch below the neckline.
Use a tapestry needle and white yarn to sew around the entire edge. Make small, even stitches so the appliqué lies flat.
Secure the horn, ears, and mane carefully.
Adding the Back Closure
For the back opening, attach two small buttons to one side of the upper bodice.
On the opposite side, create two small button loops using chains.
Check that the buttons are firmly secured and that the opening is easy for an adult to fasten.
Finishing the Accessories
Sew the headband decoration at the center front.
Check both booties for matching shape and size. Weave in all loose yarn ends.
Finally, inspect every seam and decorative detail.
Blocking and Care
Baby garments need gentle finishing.
For cotton or acrylic baby yarn, follow the yarn manufacturer’s care instructions.
If your yarn is suitable for wet blocking:
- Soak the dress in lukewarm water with a small amount of gentle detergent.
- Rinse carefully if required.
- Press out excess water using a clean towel.
- Lay the dress flat on a blocking mat.
- Gently shape the skirt and scalloped edging.
- Allow it to dry completely.
Never hang the dress while wet because the weight of the yarn can stretch the bodice and skirt.
Wash the finished outfit gently and dry it flat.
Fit and Troubleshooting Tips
The bodice feels too tight: Your gauge may be too small. Try a larger hook or add stitches to the foundation chain.
The skirt curls upward: Check your increase rounds. Too few increases can cause the skirt to pull inward.
The skirt looks too wavy: You may have added too many increases. Remove one increase round and check the shape again.
The unicorn appliqué curls: Block it gently before sewing it onto the bodice.
The armholes feel uncomfortable: Add one round of single crochet around each armhole to create a smoother edge.
The booties are different sizes: Compare both soles before completing the uppers and check your stitch counts.
For a longer dress, simply continue the skirt rounds before adding the decorative border.
Final Thoughts
This Mint Unicorn Baby Dress Set Free Crochet Pattern is a lovely way to combine soft colors, playful details, and handmade charm. The mint dress creates a beautiful base, while the little unicorn face, pastel mane, scalloped hem, and matching accessories give the outfit its magical personality.
I especially love how the different pieces work together. You can make the complete set for a baby shower, birthday celebration, first photoshoot, or a thoughtful handmade gift.
Take your time with the little details, especially the unicorn appliqué and skirt edging. Those finishing touches make the outfit feel special.
I hope you enjoy crocheting this sweet little unicorn set as much as I enjoyed designing it. Don’t forget to share your finished creation, leave a comment, or save the pattern on Pinterest so other crochet lovers can discover it too!




Leave a Reply
You must be logged in to post a comment.