


I still remember the quiet afternoon last winter when the light outside turned that soft, pale blue-gray that only happens right before snow. I was sitting with a cup of tea and an unfinished doll dress on my lap, watching the first flakes drift past the window. Something about that silvery light made me want a dress that felt like frost itself—delicate, layered, and quietly sparkling.
I started sketching ruffles that looked like tiny frozen waves and a bodice that sat close and neat, almost like a little ice-crystal corset. The yarn in my stash was already whispering the same story: soft white, a cool dusty blue, and a pale silver that caught the light just right. By the time the snow had settled on the garden, the first version of this dress was finished and sitting on my favorite doll, looking like she had stepped out of a winter fairytale.
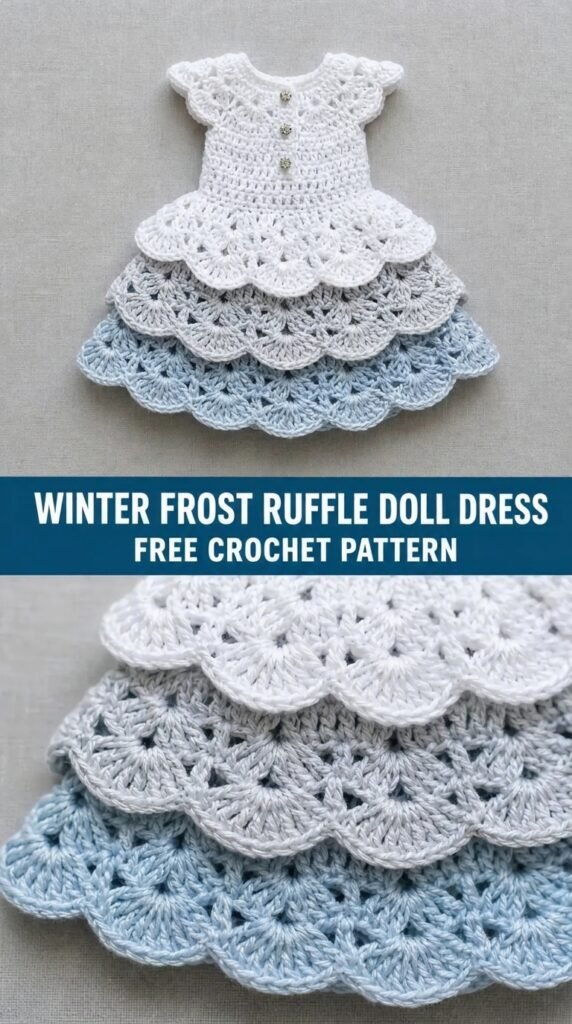
This is the Winter Frost Ruffle Doll Dress. It is a free crochet pattern designed for 18-inch dolls, with a fitted bodice, a full skirt of stacked ruffles, and just enough detail to feel special without becoming complicated. The ruffles move beautifully when the doll is held, and the soft color palette keeps everything calm and wintry.
About This Pattern
This dress is worked in pieces and then seamed. The bodice is crocheted flat from the bottom up and shaped with simple decreases. The skirt is made separately in three graduated ruffle layers that are attached to a waistband. A delicate picot edging finishes the neckline and armholes, and a small back opening with a button or snap makes dressing easy.
Skill level is intermediate. You should be comfortable with single crochet, half double crochet, double crochet, simple increases and decreases, and working in rows and rounds. The ruffles use a straightforward shell-and-chain combination that creates soft, overlapping layers.
Finished measurements (for a standard 18-inch doll):
- Chest circumference: approximately 11–11.5 inches
- Waist: approximately 10.5–11 inches
- Skirt length from waist to hem: approximately 6.5–7 inches
- Overall dress length from shoulder to hem: approximately 9.5–10 inches
The fabric has a soft drape. The ruffles add volume without stiffness, so the skirt hangs in gentle waves rather than standing out stiffly.
Quick Overview of the Main Steps
- Crochet the bodice flat from the bottom up, divide for armholes, and shape the neck.
- Seam the shoulders and add edging to the armholes and neckline.
- Make the waistband.
- Crochet three separate ruffle layers (bottom, middle, top) and join each into a tube.
- Attach the ruffles to the waistband in stacked order.
- Sew the waistband + ruffles to the bodice.
- Add a button or snap closure and weave in ends.
- Block lightly and finish.
Materials You’ll Need
Yarn (DK weight / light worsted, approximately 22–24 wpi)
- Color A (Main – soft white or ivory): 90–100 yards / 82–92 meters
- Color B (Accent – dusty ice blue): 70–80 yards / 64–73 meters
- Color C (Highlight – pale silver or light gray): 30–35 yards / 27–32 meters
Allow 15% extra for gauge variation and swatching.
A soft acrylic or acrylic-blend yarn works beautifully here because it holds the ruffle shape while remaining easy to wash. Cotton blends also work if you prefer a more natural fiber.
Hooks
- 3.5 mm (E/4) for the bodice and waistband (for a firm fabric)
- 4.0 mm (G/6) for the ruffle layers (for a softer drape)
Notions
- Tapestry needle
- Stitch markers (at least 4)
- 1 small button (10–12 mm) or sew-on snap
- Scissors
- Blocking mats and pins (optional but recommended)
Abbreviations and Terminology
All instructions use US crochet terminology.
- ch – chain
- sc – single crochet (insert hook, yarn over, pull up loop, yarn over, pull through both loops)
- hdc – half double crochet (yarn over, insert hook, yarn over, pull up loop, yarn over, pull through all three loops)
- dc – double crochet (yarn over, insert hook, yarn over, pull up loop, yarn over, pull through two loops, yarn over, pull through remaining two loops)
- sl st – slip stitch
- st(s) – stitch(es)
- sp – space
- sk – skip
- inc – increase (2 stitches in the same stitch)
- dec – decrease (work two stitches together)
- sc2tog – single crochet two together
- dc2tog – double crochet two together
- RS – right side
- WS – wrong side
Turning chains do not count as a stitch unless a step explicitly says they do. When a row begins with a turning chain, the first stitch is worked into the first stitch of the previous row.
Gauge
With 3.5 mm hook and Color A:
16 sc and 18 rows = 4 inches / 10 cm
Work a small swatch of 20 stitches by 22 rows in single crochet. Measure the center 4 inches. If your swatch is larger than 4 inches, go down a hook size. If it is smaller, go up a hook size. Gauge is moderately important for the bodice fit; the ruffles are more forgiving.
Main Pattern Instructions
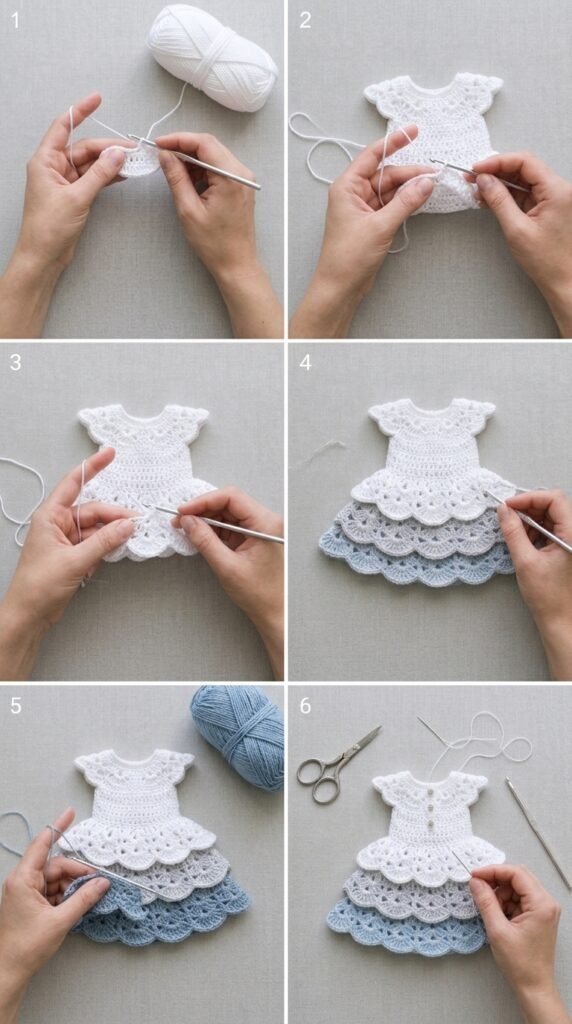
1. Bodice (Main Body)
The bodice is worked flat from the bottom edge up to the underarms, then the front and back are shaped separately.
With 3.5 mm hook and Color A, ch 45.
Row 1 (RS): Sc in 2nd ch from hook and in each ch across. (44 sc)
Turn.
Row 2: Ch 1, sc in each st across. (44 sc)
Turn.
Rows 3–12: Repeat Row 2.
Place markers in the 11th stitch from each end on Row 12. These markers indicate the side “seams.”
Row 13 (divide for armholes): Ch 1, sc in first 11 sts (left back), ch 2, sk next 2 sts, sc in next 18 sts (front), ch 2, sk next 2 sts, sc in last 11 sts (right back). (40 sc + 2 ch-2 spaces)
Turn.
Left Back
Row 14: Ch 1, sc in first 11 sts, turn. Leave remaining stitches unworked.
Rows 15–22: Ch 1, sc across. (11 sc)
Fasten off after Row 22, leaving a long tail for seaming later.
Front
Rejoin Color A at the first sc of the front section.
Row 14: Ch 1, sc in each of the 18 front stitches. (18 sc)
Rows 15–20: Ch 1, sc across. (18 sc)
Shape neck (Row 21): Ch 1, sc in first 6 sts, sk next 6 sts, sc in last 6 sts.
Work each side of the neck separately.
Left Front Neck:
Rows 22–24: Ch 1, sc in 6 sts. Fasten off after Row 24.
Right Front Neck:
Rejoin yarn at the first of the remaining 6 sts.
Rows 22–24: Ch 1, sc in 6 sts. Fasten off after Row 24.
Right Back
Rejoin Color A at the first sc of the right back section.
Rows 14–22: Ch 1, sc across. (11 sc)
Fasten off after Row 22, leaving a long tail.
2. Shoulder Seams
With right sides facing, whipstitch the front shoulder edges to the corresponding back shoulder edges (6 stitches on each side). Weave in ends.
3. Armhole and Neck Edging
With RS facing and 3.5 mm hook, join Color C at the base of one armhole.
Work evenly spaced sc around the entire armhole opening (approximately 28–30 sc). Join with sl st to first sc. Fasten off.
Repeat for the second armhole.
For the neckline: Join Color C at the center back neck edge. Work sc evenly around the entire neckline, placing 3 sc in each corner where the neck meets the shoulder. Join with sl st. Fasten off.
Optional picot finish: On the final round of both armholes and neckline, replace every 4th sc with (sc, ch 3, sc) in the same stitch for a delicate frosty edge.
4. Waistband
With 3.5 mm hook and Color A, ch 46.
Row 1: Sc in 2nd ch from hook and each ch across. (45 sc)
Rows 2–4: Ch 1, sc across. (45 sc)
Fasten off, leaving a long tail for seaming later.
5. Skirt Ruffle Layers
The skirt consists of three ruffle layers worked separately and then stacked. Each layer is worked in rows and then joined into a tube.
Bottom Ruffle (largest)
With 4.0 mm hook and Color B, ch 91.
Row 1 (RS): Dc in 4th ch from hook (counts as first dc), dc in each ch across. (89 dc)
Turn.
Row 2: Ch 3 (counts as dc), *sk 1 st, (dc, ch 1, dc) in next st; repeat from * across to last 2 sts, sk 1 st, dc in last st.
Turn.
Row 3: Ch 3, *(dc, ch 1, dc) in next ch-1 space; repeat from * across, dc in top of turning ch.
Turn.
Rows 4–6: Repeat Row 3.
Fasten off, leaving a long tail for joining.
Join the short ends with a whipstitch or mattress stitch to form a tube, matching the first and last stitches carefully. Weave in ends.
Middle Ruffle
With 4.0 mm hook and Color A, ch 76.
Row 1: Dc in 4th ch from hook and each ch across. (74 dc)
Rows 2–5: Work the same shell pattern as Rows 2–3 of the bottom ruffle.
Join into a tube. Fasten off.
Top Ruffle (smallest)
With 4.0 mm hook and Color C, ch 61.
Row 1: Dc in 4th ch from hook and each ch across. (59 dc)
Rows 2–4: Work the same shell pattern.
Join into a tube. Fasten off.
6. Attaching the Ruffles to the Waistband
Place the waistband flat with the right side facing up.
Position the top (smallest) ruffle so that its upper edge sits just below the top edge of the waistband. Using Color A and a tapestry needle, sew the top edge of the ruffle evenly around the waistband, gathering slightly as needed so the ruffle sits smoothly.
Next, attach the middle ruffle about ½ inch below the first, again gathering gently.
Finally, attach the bottom ruffle about ½ inch below the middle one.
The three layers should cascade downward, with the largest ruffle at the bottom. The slight gathering creates soft fullness without bulk.
7. Assembly and Finishing
Sew the waistband (with ruffles attached) to the lower edge of the bodice, matching the center front and back. The waistband is slightly larger than the bodice bottom edge; ease it in evenly while sewing. Use mattress stitch or whipstitch from the wrong side for a clean join.
Close the back opening of the bodice with a small button and button loop, or sew a snap fastener at the top of the back opening. If using a button, create a simple chain loop: attach yarn at the top of the left back edge, ch 6–8 (test size against your button), and secure with a slip stitch.
Weave in all remaining ends carefully on the wrong side.
Blocking and Care
Light wet-blocking improves the drape of the ruffles.
Fill a basin with cool water and a drop of mild wool wash or baby shampoo. Submerge the dress and gently press out air bubbles. Do not agitate or wring.
Lift the dress, support it from underneath, and press out excess water between clean towels.
Lay flat on blocking mats. Gently shape the bodice and arrange the ruffles so they fall in soft, even waves. Pin only the outer edges of the bottom ruffle if needed. Allow to dry completely away from direct heat or sunlight.
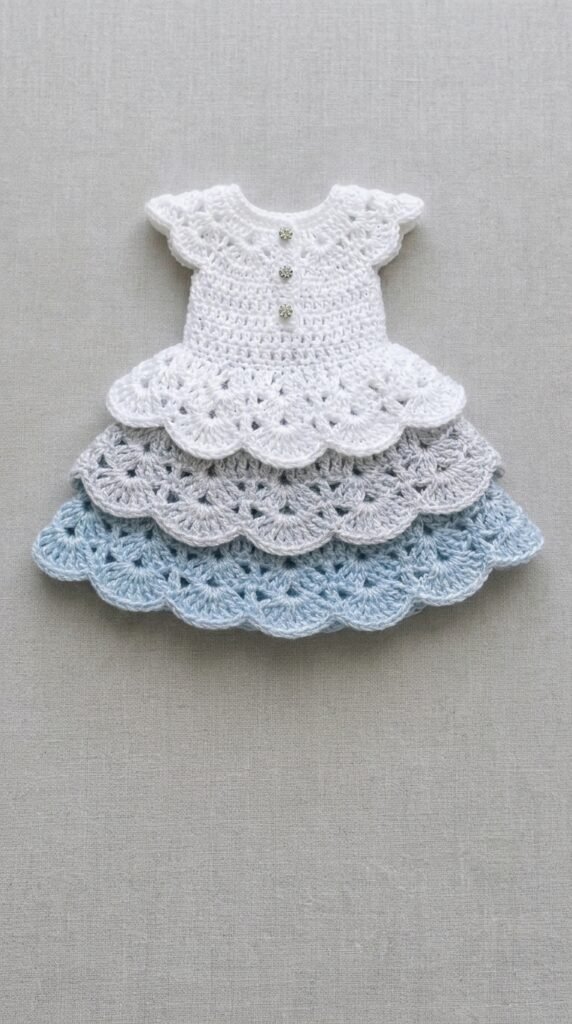
Care: Hand wash in cool water. Do not machine wash or tumble dry. Dry flat. Never hang the dress while wet, as the weight of the wet ruffles can stretch the bodice.
Fit and Troubleshooting Tips
If the bodice feels tight across the chest, go up half a hook size for the bodice only, or add 2–4 stitches to the starting chain (distributed evenly).
If the ruffles look sparse, you can add an extra row of shells to any layer.
If the waistband gapes, reduce the number of stitches in the waistband by 2–4 and ease the ruffles more tightly.
Cupping at the neckline is usually caused by working the neck decreases too tightly. Keep tension even and, if needed, add one extra sc on each side of the neck opening.
The dress is designed to sit at mid-thigh on most 18-inch dolls. If your doll has a longer torso, simply add 2–4 extra rows to the bodice before dividing for the armholes.
FAQ’s
What size doll is this pattern written for?
This pattern is designed for standard 18-inch dolls (such as American Girl, Our Generation, or similar). The finished chest is approximately 11–11.5 inches and the overall length is about 9.5–10 inches from shoulder to hem.
Can I make this dress for a smaller or larger doll?
Yes, with some adjustments. For a smaller doll (around 14–15 inches), try a 3.0 mm or 3.25 mm hook and reduce the starting chain by 6–8 stitches. For a slightly larger doll, go up to a 4.0 mm hook for the bodice and add a few extra stitches. Always measure against your specific doll as you go.
What yarn can I substitute?
Any soft DK or light worsted yarn that gives a similar gauge will work. Acrylic and acrylic blends are ideal because they hold the ruffle shape and are easy to wash. Cotton or cotton-blend yarns also look lovely if you prefer a more natural fiber. Avoid very fuzzy or slippery yarns for the first version, as they can make the shell stitches harder to see.
Is this pattern beginner-friendly?
It is written for intermediate crocheters. You should already be comfortable with single crochet, double crochet, simple increases and decreases, and basic seaming. The ruffle stitch is a straightforward shell pattern, so once you complete the first few rows it becomes repetitive and easy to follow.
How long does it take to make?
Most makers finish this dress in 6–10 hours, depending on experience and how carefully they work the ruffles. The bodice is relatively quick; the three ruffle layers take the most time.
Can I change the colors or make it in one color?
Absolutely. The three-color combination is only a suggestion. A single color looks elegant, or you can use two colors (for example, white bodice and blue ruffles). The pattern works beautifully in pastels, soft grays, or even deeper winter tones.
Do I need to block the dress?
Light wet-blocking is recommended. It softens the fabric, opens the shell stitches slightly, and helps the ruffles fall in even waves. If you prefer not to block, the dress will still look pretty—just a little less polished.
How do I care for the finished dress?
Hand wash in cool water with a mild detergent. Gently press out excess water between towels and dry flat. Never hang the dress while wet, and avoid the dryer. With proper care the ruffles will keep their shape for years.
Final Thoughts
There is something quietly satisfying about finishing a small dress that looks like it belongs in a winter story. When the last end is woven in and the ruffles settle into place, the whole piece has a soft, frosty elegance that feels worth the careful stitching.
I hope your Winter Frost Ruffle Doll Dress turns out just as lovely as the ones I have made. If you share photos of your finished dress, I would love to see the colors you chose and how the ruffles fell on your particular doll. Tag your makes or leave a comment—those little glimpses of other makers’ versions always make the pattern feel more alive.
Happy stitching, and may your winter projects stay soft and bright.


Leave a Reply
You must be logged in to post a comment.