


Ever scroll past a handmade bag and do a double-take because it looks store-bought? That’s exactly the vibe of this Icy Blue Winter Frost Bag. It’s got that frosty ombre glow, crisp vertical ribbing, and a silver chain strap that screams boutique. Best part? You can make it yourself this weekend with one simple stitch.
I’m breaking down the whole pattern below, step by step. Grab a coffee, pick your blues, and let’s get crocheting.
Why This Bag Is Worth Your Hook Time
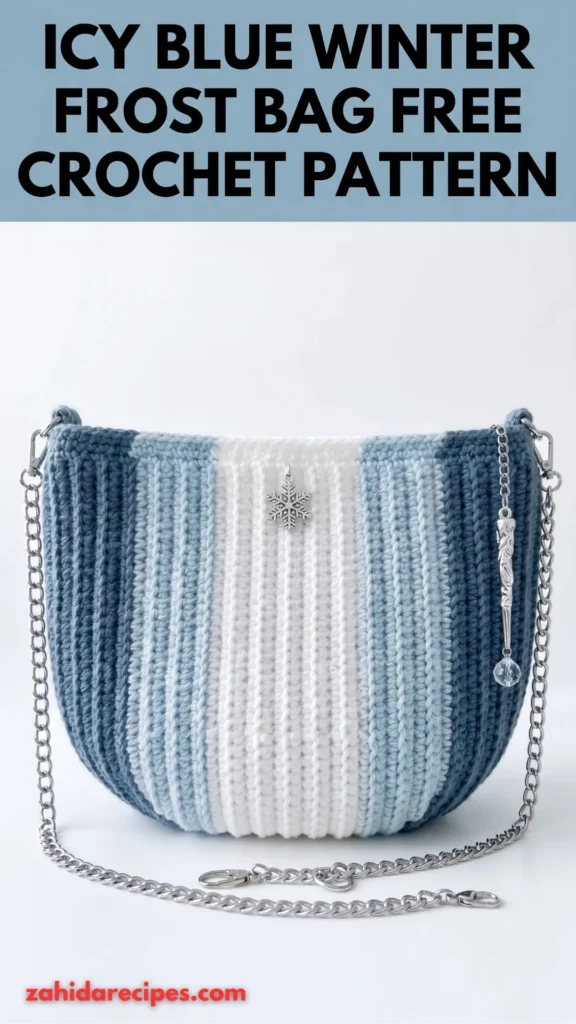
Let me be straight with you. Some crochet bags look handmade in the “my aunt made this in 1994” kind of way. This one doesn’t. It looks intentional, modern, and honestly a little expensive.
Here’s what makes it special:
- One main stitch does all the heavy lifting. No complicated colorwork, no shaping nightmares.
- Vertical ribbing gives the bag real structure. It won’t flop over like a sad pancake when you set it down.
- The ombre gradient moves from deep teal to soft blue to crisp white and back again. It looks fancy but it’s just stripes.
- It’s customizable. Swap the palette, change the charms, pick a different strap. Make it yours.
The half-moon shape holds its form beautifully thanks to that ribbed texture. FYI, this is the kind of project that makes people ask, “Wait, you MADE that?”
Skill Level: Who Should Tackle This?
This pattern sits at an intermediate level. That said, an adventurous beginner who knows their basic stitches can absolutely pull it off.
If you’ve made a few dishcloths or scarves and you’re ready to level up, this is a great first bag project. The trickiest bits are the color changes, the curved bottom shaping, and seaming the panels. None of these are hard once you see them done once.
Materials You’ll Need
Let’s talk supplies before we dive in. Getting everything ready first saves you a mid-project yarn run.
Yarn
Go with 100% cotton or a cotton blend. Cotton gives structure, holds shape, and shows off stitch definition like a champ. Acrylic works in a pinch, but it stretches over time and your bag might lose its nice shape.
Look for worsted weight (category 4) yarn. You’ll need about 200 yards total across three colors:
- Color A: Dark teal
- Color B: Light blue
- Color C: White
Hook and Notions
You may need to adjust your hook size to hit gauge (more on that below). You’ll also want a tapestry needle, a silver chain strap with lobster clasps, two D-rings, and optional charms like a snowflake or icicle.
Gauge and Finished Size
Gauge matters here. It decides whether your bag comes out structured or floppy.
18 stitches and 20 rows = 4 inches in single crochet worked in back loop only.
To check: chain 22, work 24 rows of sc in BLO, then measure the center of your swatch. Too small? Go up a hook size. Too big? Go down.
Stitches and Abbreviations Cheat Sheet
Bookmark this section. You’ll come back to it.
- Ch = Chain
- Sc = Single crochet
- BLO = Back loop only. Insert your hook under just the back loop of the stitch below. This creates the ribbing.
- Sl st = Slip stitch
- Sc2tog = Single crochet two together (a decrease)
- FO = Fasten off
Quick note on BLO: when you look at a stitch from above, you’ll see a “V.” The back loop is the one farther from you. Work under that one only and watch the texture appear.
How the Bag Comes Together
Here’s the big picture before we start stitching.
You make two identical panels, each worked side to side instead of bottom to top. That sideways construction is the secret sauce. It’s what makes your stripes run vertically.
Each panel flows through the colors in this order: dark teal, light blue, white, light blue, dark teal. Symmetric and gorgeous.
Once both panels are done, you seam them along the sides and curved bottom, leaving the top open. Then you add D-ring loops, clip on your chain, and you’re done. Simple, right?
Pattern Instructions
Panel One (Make 2)
Color A Section:
With Color A (dark teal), ch 32.
Row 1: Sc in 2nd ch from hook and in each ch across. (31 sc)
Row 2: Ch 1, turn. Sc in BLO of each st across. (31 sc)
Rows 3-12: Repeat Row 2. (31 sc each row)
You should see clear vertical lines forming. If your fabric looks flat, double check you’re working in the back loop only.
Color B Section:
At the end of Row 12, switch to Color B (light blue) on your final yarn over. This gives you a clean color change.
Rows 13-22: With Color B, ch 1, turn. Sc in BLO of each st across. (31 sc each row)
Cut Color A and weave in later for a neater finish.
Color C Section:
At the end of Row 22, switch to Color C (white).
Rows 23-34: With Color C, ch 1, turn. Sc in BLO of each st across. (31 sc each row)
This white center is slightly wider than the other sections. That’s on purpose. It creates a focal point right in the middle.
Back to Color B:
At the end of Row 34, switch to Color B.
Rows 35-44: With Color B, ch 1, turn. Sc in BLO of each st across. (31 sc each row)
Back to Color A:
At the end of Row 44, switch to Color A.
Rows 45-56: With Color A, ch 1, turn. Sc in BLO of each st across. (31 sc each row)
Fasten off and weave in all ends.
Your finished panel should measure about 10 inches wide and 8 inches tall. From left to right, the colors read: dark teal, light blue, white, light blue, dark teal.
Panel Two
Repeat everything above. You need two matching panels.
Shaping the Curved Bottom
Now we turn flat rectangles into that half-moon shape. You’ll decrease along the bottom edge of each panel.
Hold one panel with the foundation chain edge facing you. Join Color A to the bottom right corner with a sl st.
Shaping Round: Ch 1, sc in first 5 sts, sc2tog over next 2 sts, sc in next 17 sts, sc2tog over next 2 sts, sc in last 5 sts. (29 sc)
Fasten off. Repeat on the second panel.
Joining the Panels
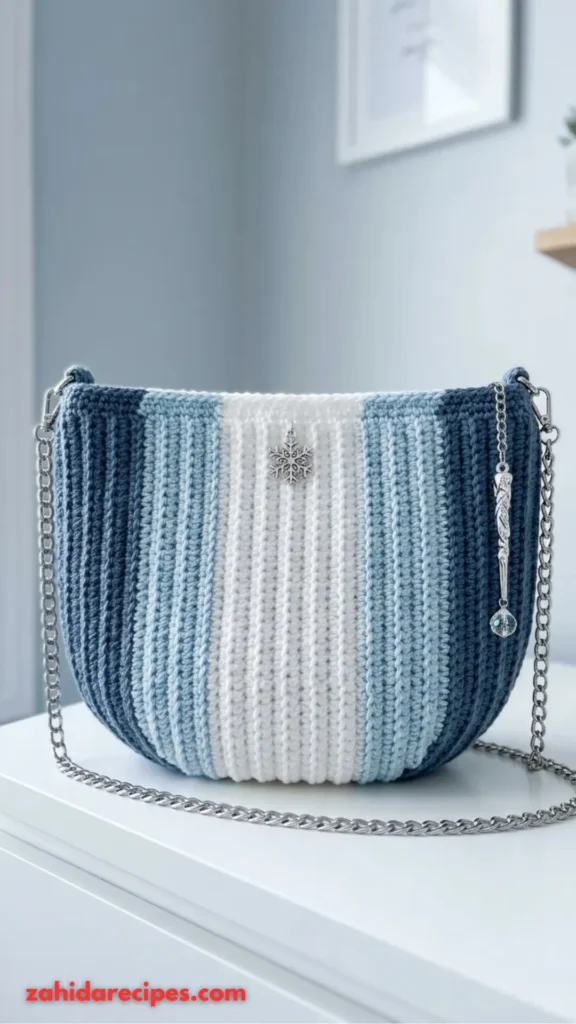
Place both panels together with wrong sides facing, so the right sides face out. Line up those color stripes.
Using Color A and a tapestry needle, whip stitch along both side edges and the curved bottom. Leave the top open.
Whip stitch: bring your needle through both layers from back to front, move forward about one stitch width, and repeat. Keep tension even.
Prefer a decorative ridge? Join with slip stitch crochet instead.
Making the Strap Attachment Points
At one top corner, join Color A with a sl st. Ch 10, then sl st in the same corner to form a loop. Cut yarn and pull tight. Repeat at the other top corner.
These loops should fit your D-rings snugly. Big enough to slide through, small enough that the ring won’t slip out.
Attaching Hardware
Slide one D-ring onto each corner loop. Clip your chain strap to the D-rings. If your chain has open ends, use small jump rings to close the connection.
Adding Charms (Optional)
The sample bag shows a snowflake charm on the white section and an icicle charm on the right side. Attach them with small jump rings wherever they look best to you.
Customization Ideas to Make It Yours

- Color schemes: Try blush pink to cream, or charcoal to silver for a moodier look.
- Lining: Cut fabric to match your bag shape plus seam allowance. Sew, slip inside, and hand stitch to the top edge.
- Closure: Sew a magnetic snap to the inside top edge before joining.
- Strap swap: Not a chain person? Try a crocheted strap, leather strap, or macramé cord.
Tips for a Flawless Finish
Keep your tension steady. Changes in tension show up as uneven stripe widths.
Count stitches every row for at least the first several rows. Fixing a mistake now beats ripping out ten rows later.
Weave in ends as you go. With all those color changes, you’ll have plenty. Handle them section by section.
Block your panels before joining if they look uneven. Soak them, squeeze out water, pin to shape, and let dry.
Why This Bag Makes an Amazing Gift
Handmade gifts hit different when they look this polished. The professional finish, practical size, and elegant design work for birthdays, holidays, or just because.
Most crocheters finish this in a weekend of focused crafting or a relaxed week. Customize the colors to match the recipient’s style, add a charm they’d love, and you’ve made something personal they’ll actually use.
You Might Also Like:
- Forest Jewel Tone Shell Crossbody Free Crochet Pattern
- Mint Seafoam Mermaid Amigurumi Free Crochet Pattern
- Ocean Ombre Dragonfly Top Crochet Pattern
Final Thoughts
Simple techniques, stunning results. That’s the whole magic of this Icy Blue Winter Frost Bag. The back loop only ribbing gives you structure and texture. The gradient color blocking adds sophistication without fuss. And that silver chain? Chef’s kiss.
Whether you make this for yourself or someone lucky, enjoy every stitch. There’s real satisfaction in watching those stripes build into something beautiful and functional.
If you make this bag, I’d love to see it. Tag Sumara Patterns so I can celebrate your work. Happy crocheting!



Leave a Reply
You must be logged in to post a comment.