

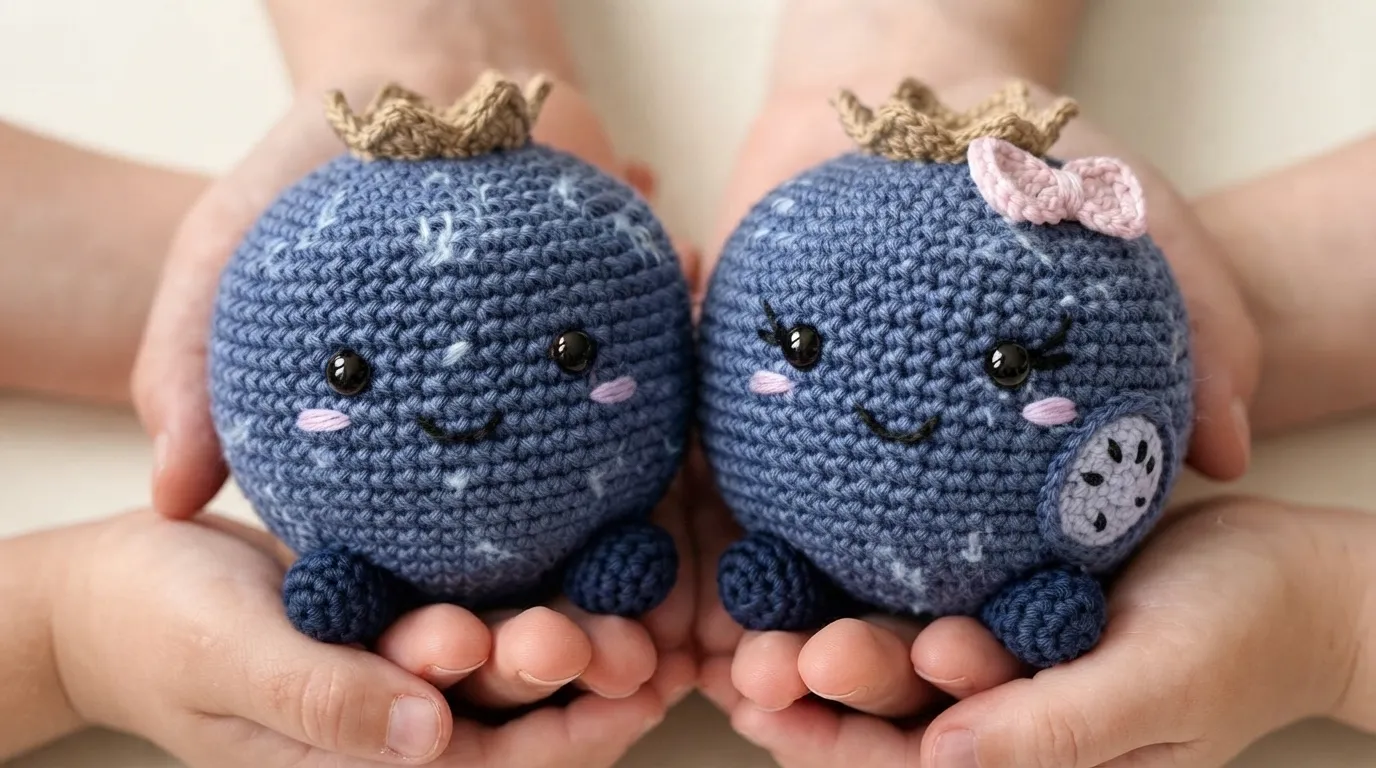
Ever wanted to make a crochet project that’s equal parts adorable and quick? Meet the blueberry couple—two squishy, round berries with sweet little faces and leafy tops. This free amigurumi pattern works up fast, uses basic stitches, and gives you two charming plushies that look great on a shelf, in a gift bag, or as a market item.
Whether you’re a beginner looking for your first amigurumi or a seasoned crocheter wanting a no-brainer project for a cozy afternoon, this one’s for you. Let’s dive in.
What You’ll Need for Your Blueberry Duo

Before you start, gather your supplies. Nothing here is hard to find, and you probably already have some of it in your stash.
<strong>Materials:</strong>
- Yarn: Chunky or super bulky yarn in navy blue (for the berries) and green (for the leaves). Cotton or acrylic both work.
- Crochet hook: 5.0 mm to 5.5 mm—whatever gives you a tight fabric with no gaps.
- Safety eyes: 10–12 mm, or you can embroider the eyes with black yarn if you prefer.
- Stuffing: Polyester fiberfill.
- Tools: Darning needle, stitch marker, scissors.
Abbreviations you’ll see:
- MR = Magic Ring
- SC = Single Crochet
- INC = Increase (2 SC in same stitch)
- DEC = Decrease (SC 2 together)
- FLO = Front Loop Only
- DC = Double Crochet
- SL ST = Slip Stitch
- FO = Fasten Off
Don’t worry if those terms look like alphabet soup right now. You’ll pick them up as you go.
Making the Blueberry Body
The body is a simple sphere worked in continuous rounds. You’ll start at the top, work down, and stuff as you go. Easy peasy.
Round 1: Make a magic ring, work 6 SC into it. (6)
Round 2: INC in each stitch around. (12)
Round 3: (SC, INC) repeat 6 times. (18)
Round 4: (SC 2, INC) repeat 6 times. (24)
Round 5: (SC 3, INC) repeat 6 times. (30)
Rounds 6–10: SC in each stitch around. (30)
At this point, your blueberry is taking shape. It should look like a little bowl. Don’t stuff yet—that comes later.
Round 11: (SC 3, DEC) repeat 6 times. (24)
Round 12: (SC 2, DEC) repeat 6 times. (18)
Now it’s time to stuff. Fill the berry firmly but not so much that it bulges. You want a nice, round shape.
Round 13: (SC, DEC) repeat 6 times. (12)
Add a little more stuffing if needed.
Round 14: DEC around until the hole closes. FO and weave in the end.
A quick tip: If you’re using safety eyes, insert them between Rounds 8 and 9, about 4 stitches apart. If you’d rather embroider the face, you can do that after the body is complete.
Adding the Frilly Blueberry Top
Here’s where the blueberry gets its signature look. Those little ruffles at the crown make it instantly recognizable as a berry.
Find the front loops from Round 3 or 4 (the unused loops that stick out slightly). Insert your hook into one of those front loops and attach your blue yarn.
Round 1: Chain 2, then work 3 DC into each front loop around. Join with a SL ST to the first DC.
FO and weave in the ends. The frill should flare out nicely, giving your blueberry that cute “crown” effect.
If you used a different color for the frill, this is a great spot to add contrast. Some makers use a lighter blue or even a soft purple for extra charm.
Crocheting the Leaves
Every blueberry needs a couple of leaves on top. This pattern uses two small leaves that you’ll sew onto the crown.
Leaf Pattern (make 2):
Round 1: MR, 6 SC into the ring. (6)
Round 2: SC around. (6)
Round 3: (SC, INC) repeat 3 times. (9)
Round 4: (SC 2, INC) repeat 3 times. (12)
Round 5: SC around. (12)
Round 6: (SC 2, DEC) repeat 3 times. (9)
Round 7: (SC, DEC) repeat 3 times. (6)
FO, leaving a long tail for sewing. Don’t stuff the leaves—they should stay flat.
Sew the leaves onto the top of the blueberry, right in the center of the frill. Position them side by side, forming a little “V” shape. Add a stitch or two at the base to keep them lifted and not completely flat against the berry.
Assembling the Blueberry Couple

Now you have two options: make a second blueberry exactly the same way, or switch things up slightly for variety.
For the second berry:
- Change the yarn color slightly (a darker navy or a lighter blue).
- Make the leaves a different shade of green.
- Give it a different expression by changing the eye placement or embroidering a tiny smile.
Once both berries are done, you’ve got yourself a couple. They can sit side by side, hold hands (if you’re feeling extra), or just hang out looking cute.
Finishing touches:
- Embroider a small “U” shape under the eyes for a smile, using black yarn.
- Add tiny pink cheeks with a bit of blush-colored yarn or fabric paint.
- Weave in all ends securely so nothing unravels.
Tips for Beginners (and a Few for the Pros)
For beginners:
- Use a stitch marker to keep track of your rounds. It’s a lifesaver.
- Count your stitches after each round. It’s boring, but it prevents wonky shapes.
- Don’t overstuff. A firm berry is nice, but too much stuffing makes the stitches stretch and show gaps.
For experienced crocheters:
- Try yarn under single crochet for a tighter, neater fabric.
- Experiment with different yarn weights. Chunky yarn gives you a big, huggable berry. Fine cotton gives you a tiny keychain buddy.
- Add a keychain loop at the top if you want a functional accessory.
Common mistakes to avoid:
- Working too loosely. Amigurumi needs tight stitches so the stuffing doesn’t peek through.
- Forgetting to move your stitch marker. Trust me, you’ll lose your place.
- Sewing the leaves too flat. Give them a little lift for a more natural look.
Why This Pattern Rocks for Gifts and Markets
Blueberry couple plushies are seriously versatile. They work as:
- Gifts: Baby showers, birthdays, or just-because presents.
- Market items: Small, quick to make, and super photogenic.
- Desk buddies: Who doesn’t want a tiny berry watching them work?
- Keychains: Add a ring and you’ve got a cute accessory.
- Fruit collections: Pair them with a crochet strawberry or banana for a whole produce section.
Plus, they use up scrap yarn. That half-skein of navy blue sitting in your stash? Perfect.
You Might Also Like:
- Icy Blue Winter Frost Bag Free Crochet Pattern
- Forest Jewel Tone Shell Crossbody Free Crochet Pattern
- Mint Seafoam Mermaid Amigurumi Free Crochet Pattern
Conclusion
There you have it—a complete free pattern for the blueberry couple. Two round, squishy berries with frilly tops and leafy crowns. The stitches are basic, the assembly is straightforward, and the result is absolutely adorable.
Grab your hook, pick your yarn, and make a pair. Then make another pair. Then another. (It happens.)
Happy crocheting!


Leave a Reply
You must be logged in to post a comment.