

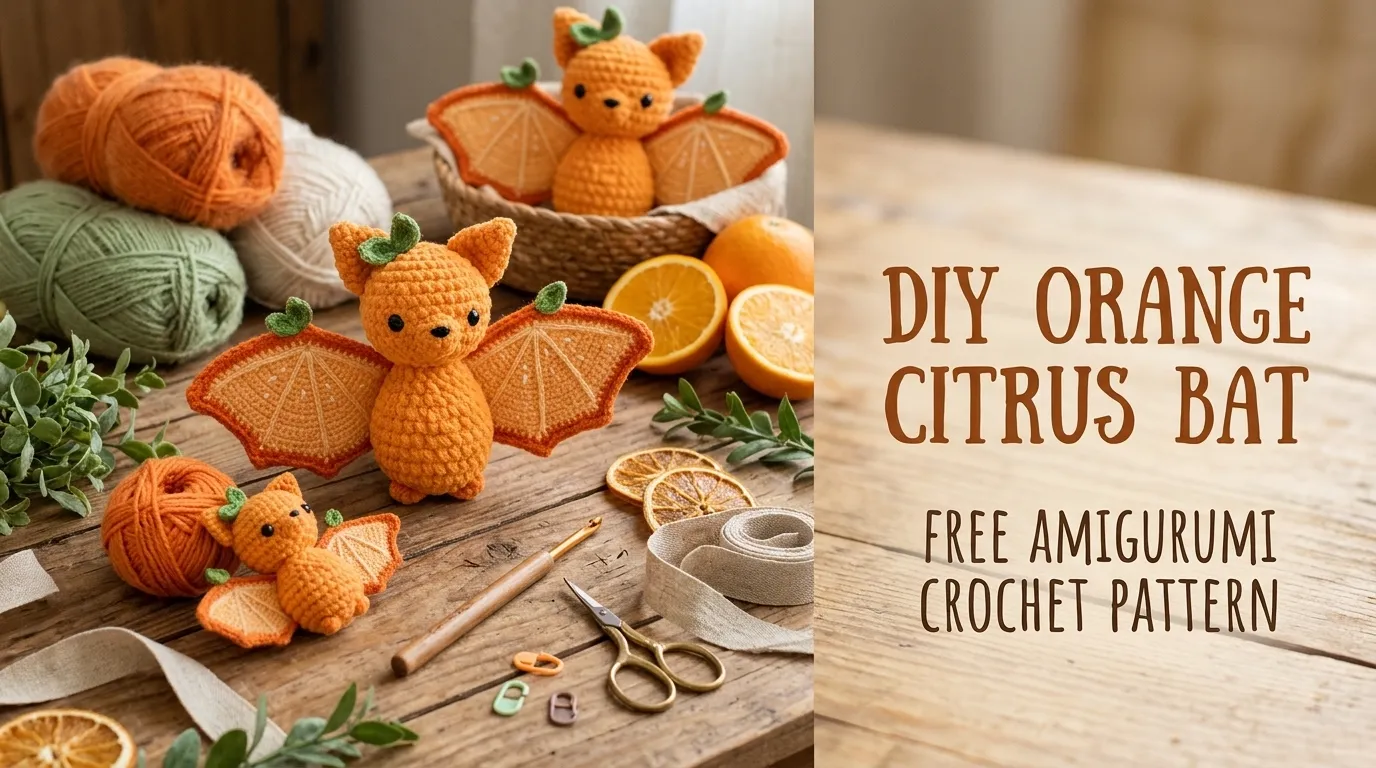
Some crochet projects are cute, some are colorful, and then there are those little creations that make you smile the moment you finish them. This Orange Citrus Bat Amigurumi is definitely one of those projects!
I wanted to create something that combined the playful charm of a tiny Halloween bat with the cheerful colors of a fresh orange. The result is a round, squishy little creature with bright orange wings, adorable pointed ears, a sweet embroidered face, and tiny green citrus leaves.
What makes this design especially fun is that it doesn’t need complicated shaping or dozens of separate pieces. The main body is crocheted in continuous rounds, while the wings, ears, feet, and citrus decorations are added afterward.
This Orange Citrus Bat Amigurumi Free Crochet Pattern is a delightful project for anyone who loves whimsical handmade plushies.
About This Orange Citrus Bat Amigurumi Pattern
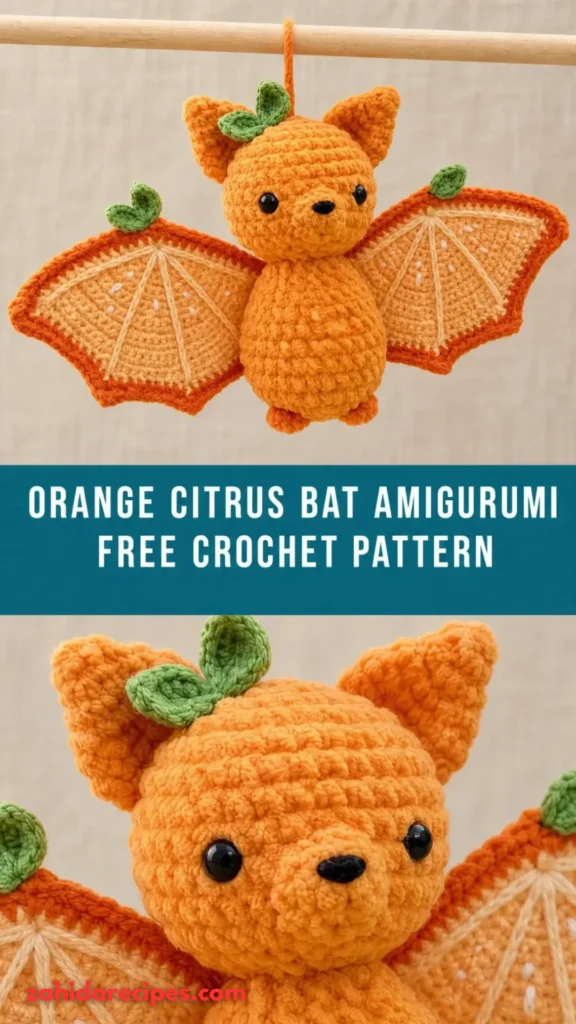
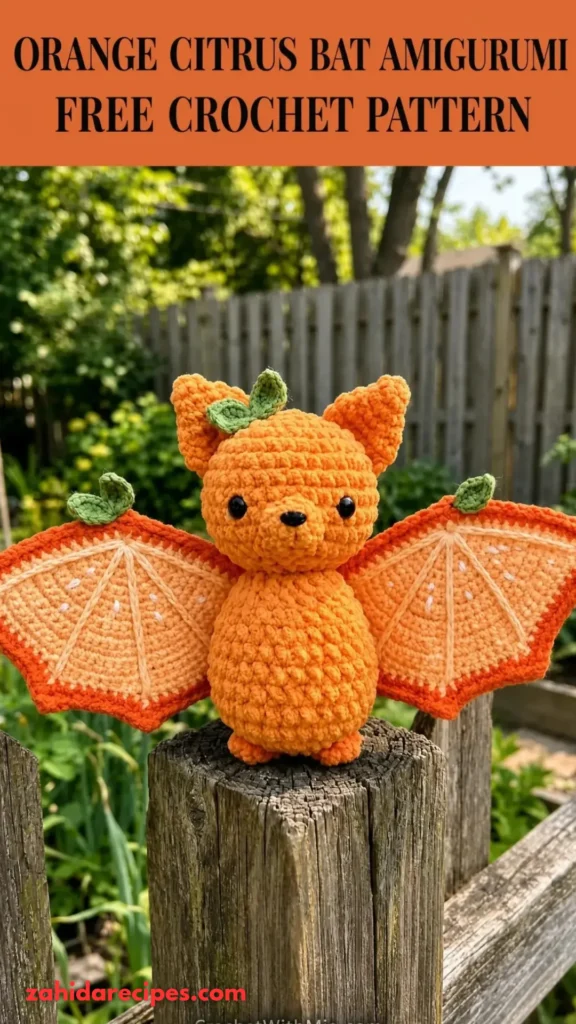
This pattern creates a small, rounded bat with a citrus-inspired appearance. Its body is shaped like a little orange, with two pointed ears, curved wings, and a tiny green leaf detail.
The construction is beginner-friendly in its basic stitches, but some shaping, sewing, and working into small spaces make it more suitable for confident beginners or intermediate crocheters.
Finished measurements:
- Height: Approximately 4.5 inches (11.5 cm).
- Width with wings: Approximately 7 inches (18 cm).
- Body width: Approximately 3.5 inches (9 cm).
The finished size may vary depending on your yarn, tension, and hook.
The body is intentionally plump and rounded, while the wings give the bat its recognizable silhouette. I recommend using a firm crochet tension so the stuffing stays hidden.
Materials You’ll Need
Yarn
Use worsted-weight (Category 4) cotton or acrylic yarn.
- Color A – Bright Orange: Approximately 55 yards (50 meters) for the body and wings.
- Color B – Light Orange: Approximately 12 yards (11 meters) for the belly and citrus details.
- Color C – Leaf Green: Approximately 8 yards (7 meters) for leaves and decorative accents.
- Color D – Dark Brown or Black: A small amount for facial embroidery.
- Color E – Cream: A small amount for the muzzle, if desired.
Allow approximately 15% extra yarn if your tension is different from the recommended gauge.
Crochet Hooks
- 3.0 mm crochet hook for the main amigurumi pieces.
- 2.5 mm crochet hook for smaller details and leaves.
Additional Supplies
- 6 mm black safety eyes (or black embroidery thread for a child-safe version).
- Polyester fiberfill stuffing.
- Tapestry needle.
- Stitch markers.
- Scissors.
- Pins for positioning pieces.
- Optional: Blush-colored embroidery thread for rosy cheeks.
Safety note: Safety eyes are not suitable for toys intended for children under three years old. Use securely embroidered eyes instead.
Abbreviations and Terminology
This pattern uses standard US crochet terminology.
| Abbreviation | Meaning |
|---|---|
| MR | Magic ring |
| sc | Single crochet |
| inc | Increase (2 sc in one stitch) |
| dec | Invisible decrease |
| sl st | Slip stitch |
| ch | Chain |
| hdc | Half double crochet |
| dc | Double crochet |
| st(s) | Stitch(es) |
| FO | Fasten off |
| BLO | Back loops only |
| FLO | Front loops only |
| rep | Repeat |
Basic Stitch Explanations
- Single crochet (sc): Insert the hook into the stitch, yarn over, pull up a loop, yarn over again, and pull through both loops.
- Increase (inc): Work two single crochet stitches into the same stitch.
- Invisible decrease (dec): Insert the hook into the front loop of the next two stitches, yarn over, pull through both loops, yarn over, and pull through the remaining loops.
- Slip stitch (sl st): Insert the hook, yarn over, and pull through the stitch and the loop on your hook.
- Half double crochet (hdc): Yarn over, insert the hook, pull up a loop, yarn over, and pull through all three loops.
- Double crochet (dc): Yarn over, insert the hook, pull up a loop, yarn over and pull through two loops, then yarn over and pull through the remaining two loops.
Important: Work the body in continuous spiral rounds unless instructed otherwise. Do not join rounds with slip stitches. Place a stitch marker in the first stitch of every round. Turning chains do not count as stitches unless a step explicitly says they do.
Gauge
Gauge is important because you want the stuffing to remain inside the body without showing through the stitches.
Using your 3.0 mm hook and orange yarn, crochet a small practice square.
Target gauge: 22 single crochet stitches and 24 rows should measure approximately 4 x 4 inches (10 x 10 cm).
If your swatch is too large or loose, try a smaller hook. If it is too small or tight, move up one hook size.
For amigurumi, slightly tight stitches are preferable to loose stitches.
Main Pattern Instructions
1. Crochet the Orange Bat Body
The body is worked from the top down in continuous rounds. Use Color A (Bright Orange) and your 3.0 mm hook.
Start with a magic ring.
Round 1: Work 6 sc into the MR. (6)
Round 2: Inc in each stitch around. (12)
Round 3: *Sc in next stitch, inc in next stitch.* Rep around. (18)
Round 4: *Sc in next 2 sts, inc in next stitch.* Rep around. (24)
Round 5: *Sc in next 3 sts, inc in next stitch.* Rep around. (30)
Round 6: *Sc in next 4 sts, inc in next stitch.* Rep around. (36)
Rounds 7–12: Sc in each stitch around. (36)
The body should now look like a small rounded orange. Insert the safety eyes between Rounds 9 and 10, leaving approximately 7 stitches between them.
If you’re embroidering the eyes, wait until the body is finished so you can position them accurately.
Round 13: *Sc in next 4 sts, dec.* Rep around. (30)
Round 14: Sc in each stitch around. (30)
Round 15: *Sc in next 3 sts, dec.* Rep around. (24)
Begin stuffing the body with small amounts of polyester fiberfill. Add stuffing gradually and distribute it evenly.
Round 16: *Sc in next 2 sts, dec.* Rep around. (18)
Round 17: *Sc in next stitch, dec.* Rep around. (12)
Add more stuffing if needed. The body should feel soft but firm.
Round 18: Dec around. (6)
FO, leaving a long tail. Thread the tail through the remaining front loops and pull tightly to close the opening.
Weave in the yarn end securely.
2. Create the Citrus Belly Patch
The light-orange belly gives the bat a lovely citrus-inspired appearance.
Using Color B and your 2.5 mm hook:
Round 1: Work 6 sc into a MR. (6)
Round 2: Inc around. (12)
Round 3: *Sc in next stitch, inc.* Rep around. (18)
Round 4: *Sc in next 2 sts, inc.* Rep around. (24)
Sl st into the next stitch and FO, leaving a long sewing tail.
Flatten the small circle gently. It should resemble a little orange slice.
Using Color C, embroider three short radial lines from the center toward the outer edge to suggest citrus segments.
Pin the belly patch onto the front of the body, centered below the eyes. Sew around the outer edge with small, neat stitches.
3. Crochet the Bat Wings
The wings are the most recognizable feature of this design. They should have a slightly pointed, scalloped silhouette rather than looking like simple flat triangles.
Make two wings using Color A.
Foundation: Ch 12.
Row 1: Sc in second ch from hook, sc in next 3 ch, hdc in next 3 ch, dc in next 4 ch, 5 dc in last ch. (16 stitches worked around the end)
Continue along the opposite side of the foundation chain: dc in next 4 ch, hdc in next 3 ch, sc in next 4 ch. Sl st to first sc. (24 stitches approximately around the wing)
Row 2: Ch 1. Sc in next 5 sts, hdc in next 3 sts, 2 dc in next st, ch 2, sl st in same st, 2 dc in next st, hdc in next 3 sts, sc in remaining stitches.
FO, leaving a long sewing tail.
Repeat for the second wing.
The wings should look slightly curved, with three small points along the outer edge. If they curl too much, lightly block them before attaching.
4. Crochet the Pointed Bat Ears
Make two ears using Color A.
Row 1: Ch 5.
Row 2: Starting in second ch from hook, sc in next 4 ch. (4)
Row 3: Ch 1, turn, dec, sc in next 2 sts. (3)
Row 4: Ch 1, turn, dec, sc in next st. (2)
Row 5: Ch 1, turn, dec. (1)
FO, leaving a long sewing tail.
Make the second ear in the same way.
The ears should have a triangular shape with slightly rounded bases. Fold the bottom edge inward just a little before sewing them onto the head.
5. Crochet the Tiny Feet
Use Color A.
Make two small feet.
Round 1: Work 5 sc into a MR. (5)
Round 2: Sc around. (5)
Sl st and FO, leaving a sewing tail.
Do not stuff the feet. Flatten them gently and sew them to the bottom front of the body, approximately one stitch apart.
6. Make the Citrus Leaves
The little green leaves make this design look like a cheerful orange-themed bat.
Using Color C:
Row 1: Ch 7.
Row 2: Sl st in second ch from hook, sc in next ch, hdc in next 2 ch, dc in next ch, 3 dc in last ch.
Continue along the opposite side: dc in next ch, hdc in next 2 ch, sc in next ch, sl st in final ch.
FO, leaving a sewing tail.
Make two leaves.
Pinch the bottom ends together and sew them near the top center of the bat’s head. Angle one leaf slightly to the left and the other slightly to the right.
This creates a little citrus crown.
Special Techniques and Additional Details
Embroider the Bat’s Face
A sweet expression makes a huge difference to the finished character.
If you used safety eyes, add a tiny embroidered smile underneath them using dark brown or black embroidery thread.
Bring the needle out below one eye, make a small curved stitch, and secure the thread inside the body.
For extra cuteness, add two tiny blush marks beneath the eyes using pink or peach thread.
Add Citrus Segment Details
Use Color B or cream embroidery thread to add three or four short lines to the belly patch.
Keep the lines evenly spaced. They should resemble the natural sections of an orange slice.
You can also add a tiny green stem between the leaves if you want a more decorative finish.
Optional Wing Veins
For extra detail, use a strand of slightly darker orange yarn to embroider three lines across each wing.
Start near the wing’s base and work outward toward the scalloped edges.
These little lines make the wings look more defined without making them stiff.
Assembly and Finishing
Now comes the fun part: turning all those little crochet pieces into one adorable citrus bat!
Before sewing anything permanently, arrange the pieces with pins. This lets you adjust their positions until you’re happy with the overall expression.
- Attach the wings: Position one wing on each side of the body, approximately between Rounds 8 and 14. The upper edge should sit slightly behind the body, with the pointed edges facing outward. Sew securely along the inner edge.
- Attach the ears: Place the ears on top of the head, approximately between Rounds 5 and 7. Angle them slightly outward to create a playful bat silhouette.
- Attach the feet: Sew the two flattened feet to the bottom front of the body. Make sure they are positioned symmetrically.
- Attach the leaves: Sew the two green leaves onto the top center of the head, just between the ears.
- Check the belly: Make sure the citrus patch is centered and securely attached. Add a few additional stitches if any edges are lifting.
- Finish the face: Check the embroidered smile and cheeks. Hide all loose yarn ends inside the body.
Give your finished bat a gentle squeeze. It should feel soft, rounded, and evenly stuffed.
Blocking and Care
Amigurumi usually doesn’t require aggressive blocking, but the wings and leaves may benefit from a little shaping.
For acrylic yarn, use your hands to smooth the pieces into position. If necessary, lightly steam the flat components from a safe distance without allowing the iron or steamer to touch the yarn.
For cotton yarn, you can lightly dampen the wings and leaves, shape them, and let them dry completely.
Caring for Your Citrus Bat
- Spot-clean small marks with a damp cloth.
- Hand wash gently in cool water when necessary.
- Avoid harsh detergents and bleach.
- Never wring or twist the stuffed body.
- Press excess water out with a clean towel.
- Allow the bat to dry completely on a flat surface.
- Never hang it while wet because the stuffing may shift.
If you use safety eyes, avoid machine washing unless the manufacturer’s instructions specifically allow it.
Fit and Troubleshooting Tips
Even a small amigurumi project can have a few frustrating moments. Here are some simple fixes.
My Body Has Visible Stuffing Between Stitches
Your tension may be too loose. Try a smaller crochet hook and use invisible decreases to keep the stitches neat.
The Body Looks More Like a Ball Than a Bat
That’s completely normal before assembly! The wings and pointed ears create the recognizable bat shape. Make sure the wings are positioned outward rather than directly behind the body.
My Wings Are Curling Inward
Check your tension, especially around the curved foundation chain. Lightly shape the wings before sewing them onto the body.
The Citrus Patch Looks Uneven
Pin the patch in place before sewing. Start with the top center, then secure the bottom and sides before stitching around the entire edge.
My Bat Looks Too Small
Try a 3.5 mm hook with the same yarn weight. Remember that changing your hook size will also affect the amount of stuffing needed.
The Leaves Won’t Stay Upright
Use a few extra stitches at their bases and angle them slightly toward each other. You can also embroider a small central vein to help define their shape.
Easy Customization Ideas
One of my favorite things about this design is how easily you can change its personality.
- Blood Orange Bat: Replace bright orange with deep red-orange yarn and use burgundy details.
- Lemon Bat: Use sunny yellow yarn with pale yellow citrus segments.
- Lime Bat: Choose fresh green yarn and darker green leaves.
- Pumpkin Spice Bat: Use burnt orange yarn, brown wings, and cream-colored details.
- Mini Citrus Bat: Use sport-weight yarn and a smaller hook to create a tiny keychain-sized version.
You can even experiment with different facial expressions. A sleepy face, little fangs, or tiny embroidered eyebrows can completely change the character.
Frequently Asked Questions
1. Is This Orange Citrus Bat Amigurumi Suitable for Beginners?
Yes, confident beginners can make this project. You should know how to crochet single crochet stitches, increases, decreases, and work in continuous rounds. Sewing the smaller pieces together requires a little patience.
2. Can I Use Chenille Yarn?
Yes! Chenille yarn creates a wonderfully soft and squishy bat. However, the small leaves and wing details may be harder to see. Use a slightly larger hook suitable for your yarn and adjust your tension to prevent stuffing from showing.
3. How Much Yarn Do I Need?
Approximately 75–85 yards of combined yarn should be enough for the basic project, depending on your tension and the size of your decorative details.
4. Can I Make the Bat Without Safety Eyes?
Absolutely. Embroidered eyes are a lovely alternative and are recommended for toys intended for young children. Use securely fastened embroidery thread and avoid small detachable decorations.
5. Can I Turn This Pattern Into a Keychain?
Yes! Make a smaller version with sport-weight yarn and a suitable hook. Attach a securely fastened keychain ring through the top of the body, making sure the attachment is strong enough for regular handling.
Final Thoughts
There is something special about making a tiny handmade character that has its own personality. This Orange Citrus Bat Amigurumi brings together the playful look of a Halloween bat and the cheerful colors of fresh citrus in one little crochet creation.
I especially love how the green leaves and orange wings transform a simple rounded amigurumi body into something completely different. It’s a fun project for autumn decorating, handmade gifts, craft fairs, or simply adding another adorable character to your crochet collection.
Don’t worry if your first bat looks a little different from mine. Handmade crochet has its own charm, and small variations are part of what makes every creation special.
Try experimenting with different citrus colors, embroidery details, and facial expressions. I’d love to see what you create!
Happy crocheting! 🍊🦇



Leave a Reply
You must be logged in to post a comment.