

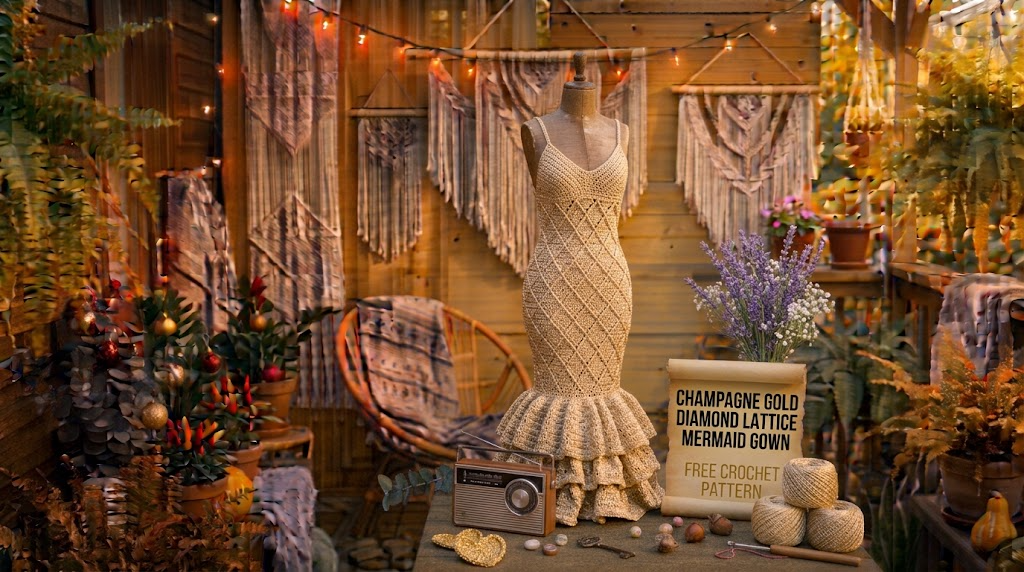
There is something special about a beautifully fitted crochet gown. I wanted to create a design that felt elegant enough for an evening celebration but still showcased the handmade texture that makes crochet so beautiful. Champagne gold immediately came to mind. It has a soft metallic warmth without looking overly flashy.
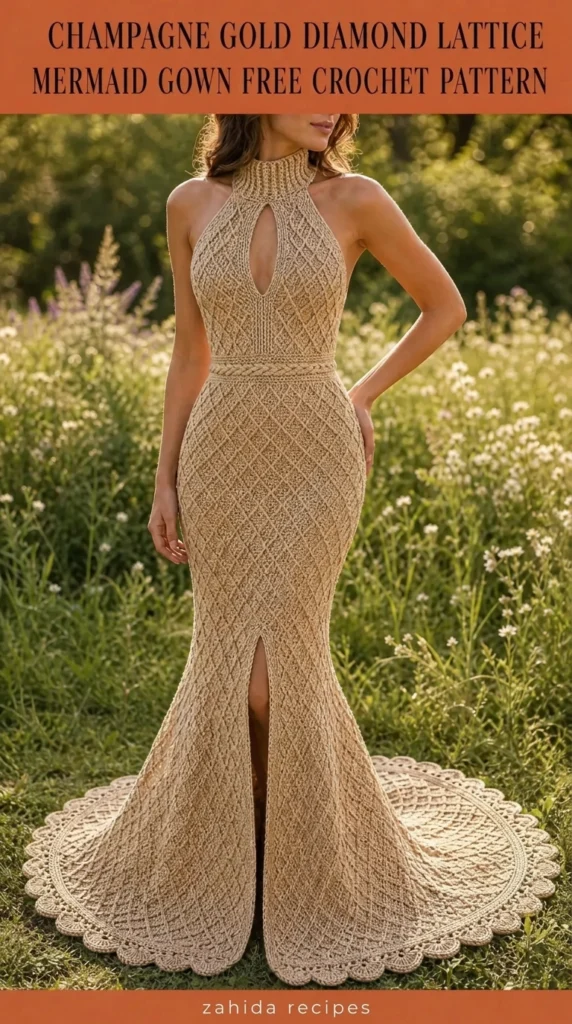
For this design, I imagined a fitted silhouette with a delicate diamond lattice pattern running through the bodice and upper skirt. The lower skirt gradually opens into a dramatic mermaid flare, creating movement whenever you walk.
The result is the Champagne Gold Diamond Lattice Mermaid Gown Free Crochet Pattern, a statement-making crochet dress featuring elegant shaping, openwork diamonds, and a graceful flared hem.

About This Pattern
This mermaid gown is worked primarily from the waist upward and downward in joined rounds, with separate finishing around the neckline and armholes.
The bodice uses a combination of solid double crochet sections and open diamond lattice stitches. The fitted waist transitions into a gently shaped hip section before expanding into a dramatic flared skirt.
The diamond lattice creates small geometric openings that allow the fabric to feel lighter while maintaining an elegant appearance.
Skill Level: Intermediate to Advanced.
You should be comfortable with double crochet, chain spaces, increases, decreases, working in joined rounds, and maintaining stitch patterns.
Finished Sizes: S, M, L, XL.
| Size | Bust | Waist | Hip | Length |
| S | 34 in | 28 in | 38 in | 54 in |
| M | 38 in | 32 in | 42 in | 55 in |
| L | 42 in | 36 in | 46 in | 56 in |
| XL | 46 in | 40 in | 50 in | 57 in |
These measurements are approximate finished garment measurements. Choose a size with appropriate ease for your preferred fit.
Materials You’ll Need
Yarn
Choose a smooth, lightweight yarn with a beautiful drape.
- Color A – Champagne Gold: Approximately 1,900–2,500 yards (1,737–2,286 meters), sport-weight cotton and viscose blend.
- Color B – Soft Metallic Gold: Approximately 100–150 yards (91–137 meters), sport-weight metallic yarn for optional decorative edging.
Allow 15% extra yarn if you are making a longer gown or adjusting the skirt flare.
Crochet Hooks
- 3.5 mm crochet hook for the main gown.
- 3.0 mm crochet hook for neckline and armhole finishing.
- 4.0 mm hook for the optional practice swatch if you naturally crochet tightly.
Additional Supplies
- Stitch markers.
- Tapestry needle.
- Measuring tape.
- Sharp scissors.
- Blocking mats and rustproof pins.
- Sewing needle and matching thread.
- Optional lightweight dress lining.
A lining is recommended because the diamond lattice creates open spaces throughout the fabric.
Abbreviations and Terminology
This pattern uses US crochet terminology.
- ch: Chain. Yarn over and pull through the loop.
- sl st: Slip stitch. Insert hook, yarn over, and pull through both loops.
- sc: Single crochet. Insert hook, yarn over, pull up a loop, yarn over, and pull through both loops.
- dc: Double crochet. Yarn over, insert hook, pull up a loop, yarn over and pull through two loops twice.
- tr: Treble crochet. Yarn over twice, insert hook, pull up a loop, then work through two loops three times.
- ch-sp: Chain space created by chain stitches.
- sk: Skip the indicated stitch.
- rep: Repeat.
- inc: Increase by working two stitches into one stitch.
- dec: Decrease by combining two stitches into one.
- st(s): Stitch or stitches.
- rnd: Round.
- RS: Right side.
- WS: Wrong side.
Important Notes:
- Turning chains do not count as stitches unless stated otherwise.
- Join rounds with a slip stitch.
- Place a stitch marker at the beginning of each round.
- Count stitches after every shaping round.
- Measurements should be checked against your body before completing the full gown.
Gauge
Gauge is especially important for this fitted crochet mermaid gown.
Using the 3.5 mm hook, work the following swatch:
- Ch 32.
- Row 1: Dc in fourth ch from hook and in each remaining ch.
- Row 2: Ch 3, turn, dc across.
- Row 3: Ch 3, turn, dc across.
After blocking, your swatch should measure approximately:
20 dc stitches × 11 rows = 4 × 4 inches.
If your swatch is larger, try a smaller hook. If it is smaller, move up one hook size.
For the diamond lattice section, make a second swatch measuring approximately 4 inches wide to check that the chain spaces remain even.
Main Pattern Instructions
1. Waist Foundation
The gown begins at the natural waist.
Choose the starting stitch count according to your size:
| Size | Foundation Chains |
| S | 140 |
| M | 160 |
| L | 180 |
| XL | 200 |
Join with a slip stitch, making sure the chain does not twist.
Round 1: Ch 3, dc in each chain around. Join.
Round 2: Ch 3, dc in each stitch around. Join.
Round 3: Ch 3, dc around. Join.
Work two additional rounds of double crochet.
The solid waistband provides structure and helps the gown sit securely at the waist.
2. Diamond Lattice Stitch
This is the signature texture of the gown.
The pattern creates an open geometric design using chain spaces and alternating treble crochet stitches.
Round 1: Ch 4, sk 1 st, tr in next st, ch 1, sk 1 st, tr in next st. Repeat around. Join.
Round 2: Ch 4, tr in the first ch-1 space, ch 1, tr in the next ch-1 space. Repeat around. Join.
Round 3: Ch 4, tr around the post of the next tr from the previous round, ch 1, sk the next ch-sp. Repeat around.
Round 4: Repeat Round 2.
Continue alternating the lattice placement to create a repeating diamond appearance.
Work approximately 6–8 rounds for the upper bodice texture.
Design tip: Keep the chain spaces consistent. Uneven chain tension can make the diamond pattern look distorted.
3. Shaping the Bodice
The upper bodice should follow the natural shape of your torso.
Divide the total stitch count into front and back sections.
Place stitch markers at both side positions.
Work the front and back sections separately for the neckline and armhole shaping.
Back Bodice
Row 1: Ch 3, dc across the back section. Turn.
Row 2: Ch 3, dc across. Turn.
Row 3: Ch 3, dc2tog at each end, dc across the remaining stitches. Turn.
Repeat the decrease row once more if necessary for your chosen size.
Front Bodice
Work the same number of rows as the back.
For the neckline, divide the front stitches into two equal sections.
Work each shoulder separately, decreasing one stitch at the neckline edge every other row until the desired neckline depth is reached.
Fasten off.
4. Shoulder Straps
For each shoulder strap:
Row 1: Join yarn at the outer shoulder edge. Ch 3 and dc across 8 stitches.
Rows 2–10: Ch 3, turn, dc across.
Adjust the strap length to suit your shoulder measurement.
Sew the straps securely to the corresponding back shoulder positions.
Try on the bodice before completing the skirt to check the fit.
5. Mermaid Skirt Construction
The skirt creates the dramatic silhouette that makes this gown special.
Rejoin Color A at the waist.
Work in joined rounds, keeping the diamond lattice pattern aligned with the bodice.
Upper Hip Section
Round 1: Ch 3, dc in each stitch around.
Round 2: Dc around.
Round 3: Work 2 dc in every 10th stitch, with dc in all remaining stitches.
Round 4: Dc around.
Round 5: Work the lattice stitch pattern.
Work approximately 8–10 rounds without increasing.
The upper skirt should remain relatively fitted around the hips.
Lower Mermaid Flare
The flare begins around the knee area.
Gradually increase the number of stitches to create a flowing skirt.
- Flare Round 1: Increase 8 stitches evenly.
- Flare Round 2: Work evenly.
- Flare Round 3: Increase 12 stitches evenly.
- Flare Round 4: Work evenly.
- Flare Round 5: Increase 16 stitches evenly.
- Flare Round 6: Work evenly.
- Flare Round 7: Increase 20 stitches evenly.
Continue the diamond lattice stitch between increase rounds.
For larger sizes, distribute the increases across the round rather than placing them in one area.
Count check: If your original skirt contains 160 stitches, the seven increase rounds add 56 stitches, giving you 216 stitches.
Continue until the skirt reaches your preferred length.
Special Techniques and Additional Elements
Champagne Gold Decorative Edging
To give the gown a polished appearance, use the optional metallic gold yarn.
Join Color B at the hem.
Round 1: Ch 1, sc in each stitch around. Join.
Round 2: Ch 1, *sc in next stitch, ch 3, sk 1 stitch*. Repeat around.
Round 3: Work 3 dc into each ch-3 space, separated by a slip stitch.
This creates a delicate scalloped edge that complements the diamond lattice texture.
Optional Waist Detail
For a more defined waistline, add a narrow decorative band.
Ch 8.
Row 1: Sc in second ch from hook and across. Turn.
Rows 2–60: Ch 1, sc across. Turn.
Adjust the length to fit the waist circumference.
Sew the band around the waist seam, keeping the stitching neat and flexible.
Decorative Diamond Accents
For additional sparkle, sew small champagne-colored beads at selected lattice intersections.
I recommend using lightweight beads and spacing them evenly.
Avoid adding too many. The beauty of this gown comes from its delicate texture rather than heavy embellishment.
Assembly and Finishing
Before sewing the final seams, lay the gown flat and check the overall measurements.
- Sew the shoulder straps securely to the back bodice.
- Check that both armholes are symmetrical.
- Join any remaining open bodice seams using a tapestry needle.
- Weave in all loose yarn ends.
- Attach the decorative waist band if desired.
- Add the metallic gold edging to the skirt hem.
- Check the diamond lattice sections for missed stitches.
- Add the optional lining.
For the lining, choose a lightweight champagne or nude fabric. The lining should follow the shape of the gown without restricting movement.
Blocking and Care
Blocking helps the diamond lattice pattern open beautifully.
For a cotton-viscose blend, gently hand wash the gown in cool water with mild detergent.
Remove excess water by pressing the gown between clean towels. Never twist or wring it.
Lay the gown flat on blocking mats and gently arrange the diamond openings into an even shape.
Allow it to dry completely before removing the pins.
Care recommendations:
- Hand wash in cool water.
- Avoid harsh detergents and bleach.
- Dry flat.
- Never hang the gown while wet.
- Store folded in a clean, dry space.
- Avoid excessive heat when ironing or steaming.
Fit and Troubleshooting Tips
The waist feels too tight: Check your gauge and compare the foundation circumference with your actual waist measurement. Add stitches in multiples that preserve the lattice repeat.
The diamond pattern looks uneven: Check your chain tension and make sure you are working into the correct chain spaces.
The skirt flares too early: Remove the extra increase rounds and keep the hip section straight for longer.
The hem curls upward: Try a slightly larger hook for the edging or add another round of single crochet before the scalloped border.
The gown feels too heavy: Use a lighter yarn blend and avoid excessive bead embellishment.
The straps slide off your shoulders: Shorten the straps slightly and reposition them closer to the neckline.
The skirt feels restrictive: Add more evenly distributed increases around the lower skirt.
Always try on the gown during construction. Small adjustments are much easier before the final finishing work.
Final Thoughts
This Champagne Gold Diamond Lattice Mermaid Gown Free Crochet Pattern is designed for crocheters who enjoy creating something truly special. Its fitted bodice, delicate diamond texture, and flowing mermaid skirt combine to create an elegant handmade evening gown.
I especially love how the champagne gold shade catches the light while the open lattice stitches give the dress movement and texture.
Take your time with the shaping, check your measurements as you work, and enjoy watching the gown develop round by round.
Every handmade gown has its own character, and yours will be completely unique. If you make this pattern, share your finished creation, your color choices, and any personal adjustments with other crochet lovers.
Happy crocheting!




Leave a Reply
You must be logged in to post a comment.