

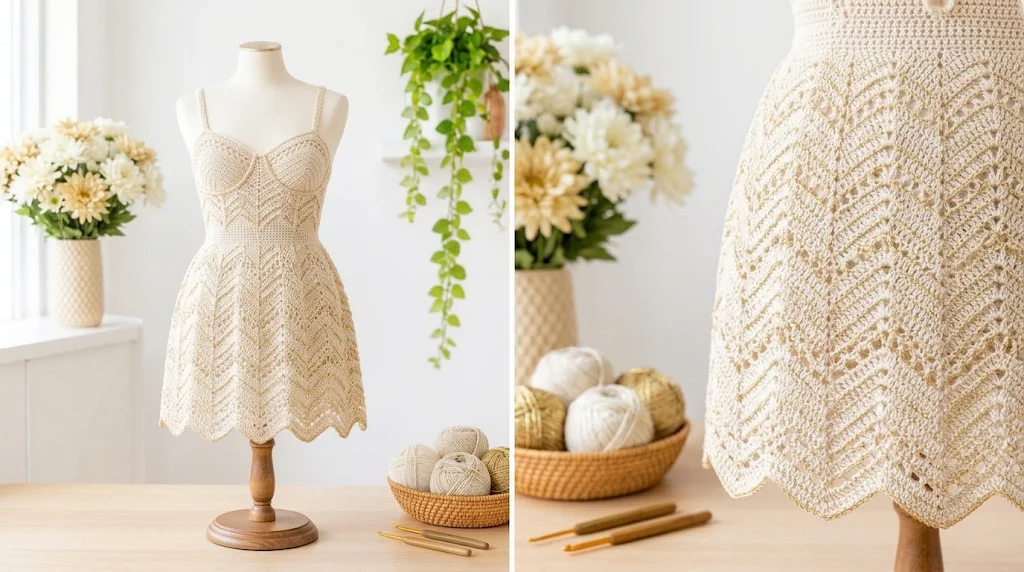
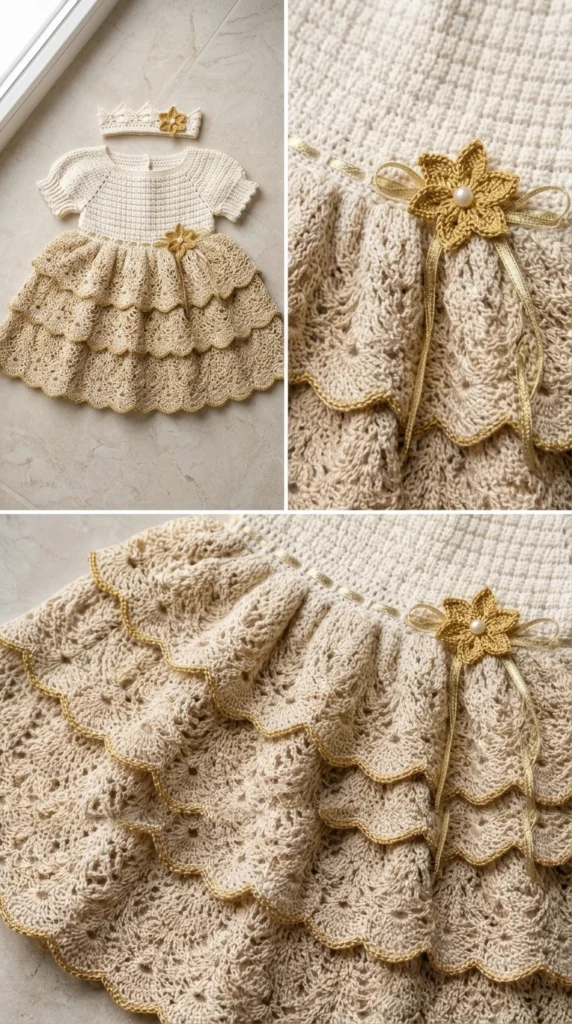
Some crochet projects are especially lovely because of the little details that make them feel special. I wanted this baby dress to have a soft, delicate appearance without looking overly complicated. Cream yarn gives it a timeless, gentle finish, while the gold accents add just enough warmth to make the design feel elegant.
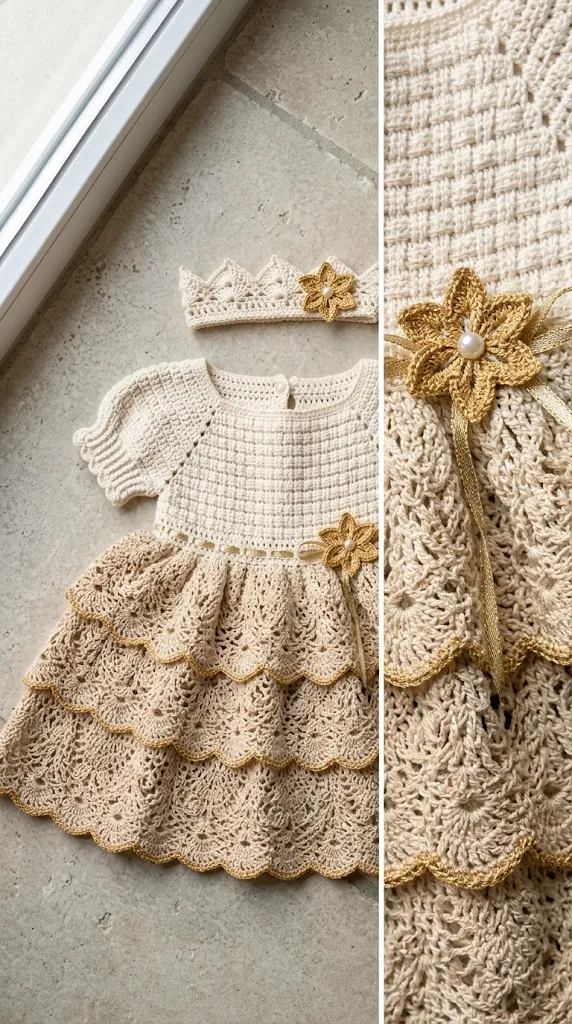
The idea behind this dress was to create something suitable for birthdays, family photographs, baby showers, and other memorable occasions. I particularly love how the golden waist detail stands out against the cream fabric. The textured skirt adds movement, and the simple bodice keeps the overall design balanced.
This Cream and Gold Baby Dress Free Crochet Pattern features a comfortable crochet bodice, a gently flared skirt, decorative gold edging, and a beautiful waist accent. It is designed to be practical enough for a little one while still having that special handmade charm.
About This Pattern
This baby dress is worked from the neckline downward, beginning with a rectangular yoke. The yoke is shaped using four increases to create the front, back, and armhole sections.
Once the yoke reaches the required depth, the sleeves are separated from the body. The front and back sections are joined, and the skirt is worked continuously in rounds.
The skirt uses alternating double crochet rounds and textured shell-stitch rounds. Gold yarn is introduced around the waist and hem to create delicate decorative details.
Skill Level: Intermediate beginner.
You should be comfortable with chain stitches, single crochet, double crochet, working in rounds, and basic increases.
Finished Sizes:
| Size | Approx. Chest | Dress Length |
|---|---|---|
| 0–3 months | 16 in | 13 in |
| 3–6 months | 17 in | 14 in |
| 6–12 months | 18 in | 15 in |
| 12–18 months | 19 in | 16.5 in |
The dress has a relaxed fit. For the best result, measure the baby’s chest and allow approximately 1–2 inches of positive ease.
Materials You’ll Need
Yarn
Choose a soft, baby-friendly yarn that feels comfortable against delicate skin.
- Color A – Soft Cream: Approximately 300–450 yards of lightweight DK yarn.
- Color B – Warm Gold: Approximately 60–90 yards of DK yarn for the waist, decorative edging, and flower details.
Yardage varies depending on size, tension, and skirt length. Allow 15% extra for gauge variation.
Crochet Hooks
- 4.0 mm crochet hook for the main dress.
- 3.5 mm crochet hook for decorative edging and neckline finishing.
Additional Supplies
- Tapestry needle.
- Stitch markers.
- Measuring tape.
- Scissors.
- Three small, baby-safe buttons.
- Blocking mat and rustproof pins.
Avoid loose beads, detachable decorations, and small embellishments that could become choking hazards.
Abbreviations and Terminology
This pattern uses US crochet terminology.
- ch: Chain – Yarn over and pull through the loop.
- sl st: Slip stitch – Insert hook, yarn over, and pull through both loops.
- sc: Single crochet – Insert hook, yarn over, pull up a loop, yarn over, and pull through both loops.
- hdc: Half double crochet – Yarn over, insert hook, pull up a loop, yarn over, and pull through all three loops.
- dc: Double crochet – Yarn over, insert hook, pull up a loop, yarn over and pull through two loops twice.
- sk: Skip the indicated stitch.
- sp: Space between stitches.
- st/sts: Stitch/stitches.
- rep: Repeat.
- RS: Right side.
- WS: Wrong side.
- BLO: Back loop only.
- FO: Fasten off.
Shell: Work 5 dc into the same stitch.
V-stitch: Work 1 dc, ch 1, and 1 dc into the same stitch or space.
Increase: Work two stitches into the same stitch.
Turning chains do not count as stitches unless a step explicitly says otherwise.
Gauge
Gauge is important because the bodice needs to fit comfortably around the baby’s chest.
Using the 4.0 mm hook and cream yarn, work:
- 15 dc stitches across.
- 9 rows high.
Your swatch should measure approximately 4 × 4 inches.
If your swatch is too wide, try a smaller hook. If it is too narrow, use a larger hook.
Wash and dry your swatch before measuring because some yarns relax after washing.
Main Pattern Instructions
Part 1: Crochet the Bodice Yoke
The bodice begins at the neckline and is worked in rows.
The foundation chain varies by size.
| Size | Foundation Chain |
|---|---|
| 0–3 months | 52 |
| 3–6 months | 56 |
| 6–12 months | 60 |
| 12–18 months | 64 |
For the following instructions, the stitch placement is based on the 3–6-month size. Adjust the foundation and section counts proportionally for the other sizes, checking the finished chest measurements.
Row 1: With cream yarn, ch 56. Dc in the fourth ch from the hook and in each remaining chain. Turn. (53 dc, including the initial skipped-chain equivalent.)
Row 2: Ch 2. Dc in the first 7 sts, 3 dc in the next st, dc in the next 10 sts, 3 dc in the next st, dc in the next 15 sts, 3 dc in the next st, dc in the next 10 sts, 3 dc in the next st, dc in the final 7 sts. Turn.
Row 3: Ch 2. Dc in each stitch, working 3 dc into the center stitch of each increase group. Turn.
Row 4: Repeat Row 3.
Row 5: Ch 2. Dc across, increasing once at each of the four marked corners. Turn.
Continue in this manner until the yoke measures approximately:
- 4 inches for 0–3 months.
- 4.5 inches for 3–6 months.
- 5 inches for 6–12 months.
- 5.5 inches for 12–18 months.
Place stitch markers at the four corner increase points. This makes it much easier to maintain consistent shaping.
Part 2: Separate the Sleeves
Now you will create the armholes and connect the front and back sections.
For the 3–6-month size:
Next Row: Ch 2. Dc across the first front section until you reach the first sleeve marker. Skip all stitches between the first and second markers. Ch 6 for the underarm. Continue working across the back section until you reach the third marker.
Skip the stitches between the third and fourth markers. Ch 6 for the second underarm, then join to the beginning of the round with a sl st.
The front and back are now connected, creating two armholes.
Count check: The body should form one continuous opening below the armholes. Try the yoke against the baby’s measurements before continuing.
Part 3: Crochet the Cream Skirt
The skirt is worked in joined rounds.
Round 1: Ch 2. Dc in every stitch around, including each underarm chain. Join with a sl st.
Round 2: Ch 2. Dc around. Place one increase after every 8 stitches. Join.
Round 3: Ch 2. Dc in each stitch around. Join.
Round 4: Ch 2. Work 5 dc into the next stitch, sk 2 sts, sc in the next st, sk 2 sts. Repeat from * around. Join with a sl st.
This creates the first decorative shell row.
Round 5: Ch 2. Dc in each stitch around, working 1 dc into the center of each shell and into each sc between shells. Join.
Round 6: Ch 2. Dc around, increasing one stitch after every 10 stitches. Join.
Round 7: Repeat Round 5.
Round 8: Repeat Round 4.
Continue alternating the plain double crochet rounds and shell rounds until the skirt measures approximately 8–11 inches from the underarm, depending on the selected size.
For a fuller skirt, add one additional increase round before the final shell section.
Special Techniques and Decorative Elements
Golden Waistband
The gold waistband creates the main decorative feature of this dress.
Join gold yarn at the waist, where the bodice meets the skirt.
Round 1: Ch 1. Sc in each stitch around. Join with a sl st.
Round 2: Ch 1. Sc in BLO around. Join.
Round 3: Repeat Round 2.
Fasten off neatly.
The back-loop stitches create subtle horizontal ridges that make the gold waistband look more defined.
Golden Scalloped Hem
A gold scalloped edge adds a delicate finishing touch to the bottom of the skirt.
Join gold yarn at the hem.
Round 1: Ch 1. Sc evenly around the skirt edge. Join.
Round 2: Ch 1. Sk 1 st, work 5 dc into the next st, sk 1 st, sl st into the next st. Repeat around.
If the final repeat does not fit perfectly, adjust the spacing slightly so the scallops remain evenly distributed.
Fasten off and weave in the ends.
Decorative Golden Flower
A small crochet flower can be added to the waist or shoulder.
With gold yarn:
Round 1: Make a magic ring. Ch 1 and work 6 sc into the ring. Join.
Round 2: Ch 2, work 3 dc into the next st, sl st into the following st. Repeat around to create six petals.
Pull the magic ring closed securely.
Fasten off, leaving a long tail for sewing.
For baby clothing, securely stitch the flower flat rather than attaching it with a loose button or detachable pin.
Sleeve Edging
The sleeves are finished with a simple cream and gold border.
Join cream yarn at the underarm.
Round 1: Ch 1. Sc evenly around the armhole. Join.
Round 2: Switch to gold yarn. Ch 1. Sc around. Join.
Repeat for the second sleeve.
Keep your stitches relaxed around the armholes so the edges do not pull tightly against the baby’s arms.
Neckline Finishing
Join cream yarn at the back neckline.
Round 1: Ch 1. Work sc evenly around the neckline, placing stitches carefully around the corners.
Round 2: Switch to gold yarn and work sc around.
Fasten off and weave in the ends.
For a neat back opening, crochet two narrow button loops along one back edge and sew three small, securely attached buttons along the opposite edge. Check that the buttons are firmly secured and cannot be pulled loose.
Assembly and Finishing
Although this dress is mostly worked in one piece, a few finishing details help it look professionally made.
- Check the neckline and make sure the back opening is centered.
- Weave in all loose yarn ends using a tapestry needle.
- Attach the golden flower securely at the center of the waistband.
- Check that both sleeves have matching edging.
- Inspect the hem for uneven scallops.
- Close the back opening with the buttons and check that it opens comfortably.
I recommend trying the dress on a suitable baby-sized dress form or measuring it against the intended baby’s clothing before finalizing the button placement.
Blocking and Care
Gentle blocking helps the shell stitches open up and gives the skirt a more attractive drape.
If you use cotton or a washable acrylic blend, follow the yarn manufacturer’s care instructions.
For wet blocking:
- Soak the dress in cool or lukewarm water.
- Gently press out excess water without twisting.
- Place it flat on a clean towel.
- Arrange the skirt and scalloped hem evenly.
- Allow the dress to dry completely.
Never hang the dress while wet because the skirt can stretch under its own weight.
For future washing, use a gentle detergent and wash according to the yarn label. Dry flat whenever possible.
Fit and Troubleshooting Tips
The neckline feels too tight: Use a larger hook for the neckline or add a few stitches to the foundation chain.
The skirt looks narrow: Add an increase round before the next shell section.
The skirt has unwanted ruffles: Reduce the number of increases. Too many increases can make the skirt wave excessively.
The shell stitches look uneven: Check that you are consistently working five double crochets into each shell stitch and keeping the skipped stitches consistent.
The waistband pulls inward: Use a slightly larger hook for the gold waistband or avoid tightening your slip stitches.
The sleeves feel uncomfortable: Add a few stitches to the underarm chain when separating the sleeves.
The gold yarn looks too bright: Choose a muted champagne, antique gold, or soft honey shade for a more subtle appearance.
Final Thoughts
This Cream and Gold Baby Dress Free Crochet Pattern is a lovely project when you want to create something delicate, meaningful, and memorable. The cream fabric gives the dress a classic appearance, while the golden waistband, scalloped hem, and little flower add beautiful handmade details.
I especially love how the textured skirt moves naturally without requiring complicated shaping. You can also experiment with different shades of gold, adjust the skirt length, or make the decorative flower slightly larger to create your own version.
Take your time with the stitch counts, check the measurements as you work, and enjoy watching the dress come together.
Most importantly, remember that handmade baby clothing carries a little extra love in every stitch. I hope you enjoy making this dress and that it becomes a treasured piece for a special little one. ❤️


Leave a Reply
You must be logged in to post a comment.