

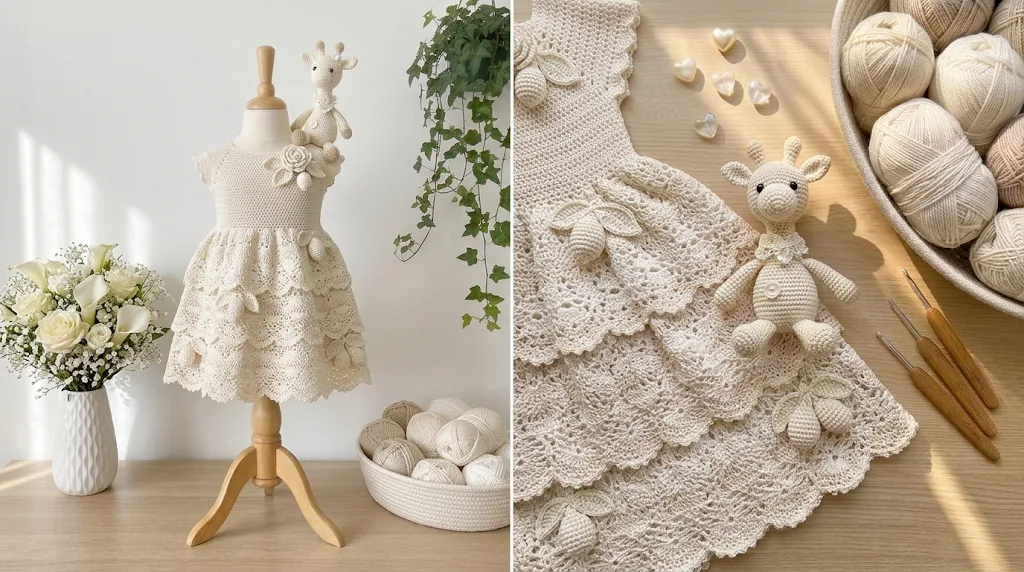
There is something incredibly special about a handmade bridal dress. Every stitch carries patience, creativity, and a little piece of the person who made it. When I started designing this cream white bridal crochet lace dress, I wanted something romantic and timeless, with delicate lace details that would feel appropriate for a wedding, engagement celebration, bridal photoshoot, or another meaningful occasion.
I imagined a softly fitted bodice, a graceful waistline, and a flowing skirt decorated with open lace motifs. I also wanted the dress to have enough structure to feel comfortable rather than looking like a delicate piece that could only be admired from a distance.
The result is a beautiful combination of traditional crochet lace and modern bridal styling. This Cream White Bridal Crochet Lace Dress Free Pattern features floral-inspired lace panels, elegant shaping, a flattering neckline, and a gently flared skirt.
Let’s make it together!
About This Pattern
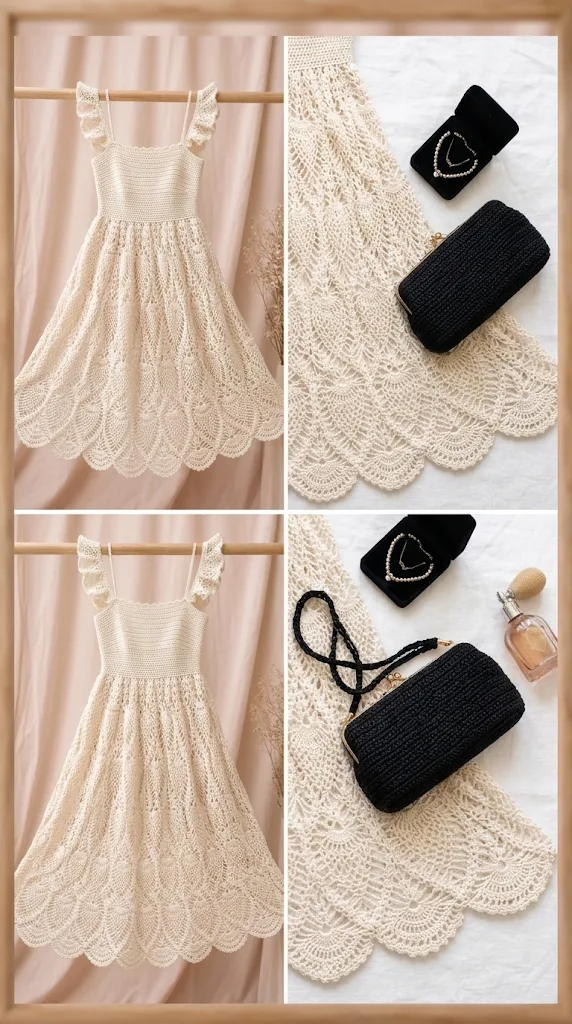
This bridal crochet dress is designed as a fitted, sleeveless garment with a decorative lace bodice and flowing skirt.
The construction uses separate front and back bodice panels, which are joined at the shoulders and sides. The skirt is then worked downward in joined rounds from the waist.
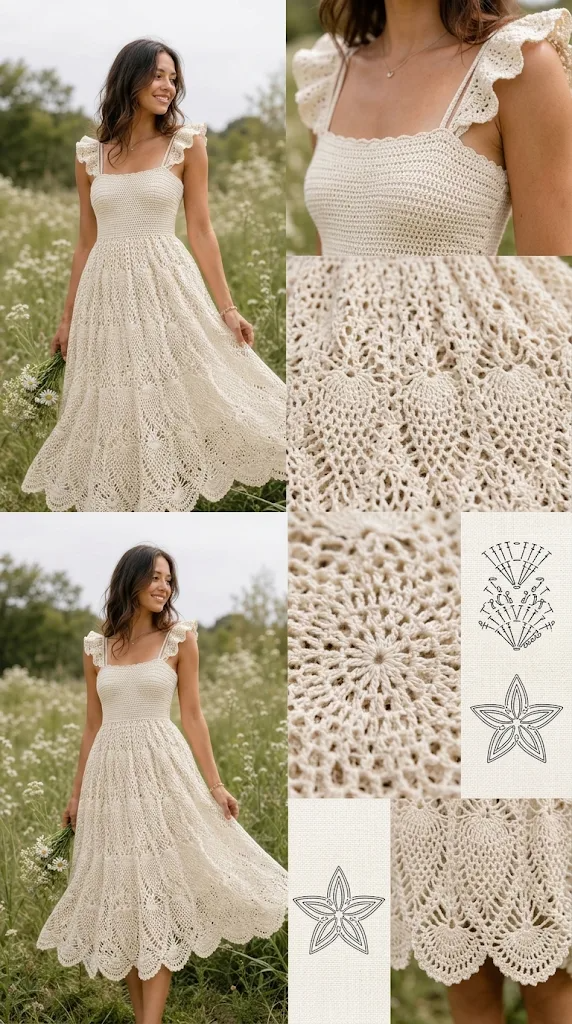
The lace pattern combines double crochet stitches, chain spaces, and decorative shell groups. These create a delicate openwork texture that allows the cream white yarn to form beautiful floral-inspired patterns.
Skill Level: Intermediate
You should be comfortable with basic crochet stitches, working from stitch counts, following lace repeats, and joining garment pieces.
Finished Measurements
| Size | Bust | Waist | Hip | Length |
| XS | 32 in | 26 in | 36 in | 42 in |
| S | 34 in | 28 in | 38 in | 43 in |
| M | 36 in | 30 in | 40 in | 44 in |
| L | 40 in | 34 in | 44 in | 45 in |
| XL | 44 in | 38 in | 48 in | 46 in |
The sample instructions below are written for size M, with adjustment notes for other sizes.
The finished dress has a soft drape and a romantic silhouette. Because the lace fabric is naturally open, I recommend wearing a suitable cream or nude-colored lining underneath.
Materials You’ll Need
Yarn
Choose a smooth cotton-blend or mercerized cotton yarn with a gentle sheen. This helps define the lace stitches while keeping the dress comfortable.
- Color A – Cream White: Approximately 1,800–2,200 yards (1,645–2,012 meters) of sport-weight yarn for the bodice and skirt.
- Color B – Matching Cream: Approximately 150 yards (137 meters) for decorative edging and finishing.
You can use the same yarn for both colors if you prefer a consistent appearance.
Allow 15% extra yarn for gauge variation, longer hems, or individual sizing adjustments.
Crochet Hooks
- 3.5 mm hook for the main dress.
- 3.0 mm hook for neckline, armholes, and waist edging.
- 2.5 mm hook for optional decorative finishing.
Notions
- Tapestry needle
- Stitch markers
- Measuring tape
- Sharp scissors
- Blocking mats
- Rust-resistant blocking pins
- Sewing needle and matching thread
- Lightweight cream lining fabric
- Optional small fabric-covered buttons
Abbreviations and Terminology
This pattern uses US crochet terminology.
- ch: Chain – Yarn over and pull through the loop.
- sl st: Slip stitch – Insert hook, yarn over, and pull through the stitch and loop on hook.
- sc: Single crochet – Insert hook, yarn over, pull up a loop, yarn over, and pull through both loops.
- hdc: Half double crochet – Yarn over, insert hook, pull up a loop, yarn over, and pull through all three loops.
- dc: Double crochet – Yarn over, insert hook, pull up a loop, yarn over and pull through two loops twice.
- tr: Treble crochet – Yarn over twice, insert hook, pull up a loop, and work off two loops at a time three times.
- sk: Skip – Leave the indicated stitch unworked.
- sp: Space – The opening created by chain stitches.
- rep: Repeat.
- RS: Right side.
- WS: Wrong side.
- st(s): Stitch(es).
- rnd: Round.
- FO: Fasten off.
Special Stitches
Shell: Work 5 dc into the same stitch or chain space.
Lace Fan: Work 3 dc, ch 2, and 3 dc into the same chain space.
Picot: Ch 3, then sl st into the first chain.
Important Note: Turning chains do not count as stitches unless a specific instruction says otherwise.
Gauge
Gauge is especially important for a fitted bridal dress. A small difference in stitch tension can affect the waist, bust, and overall length.
Using the 3.5 mm hook:
- 20 dc = approximately 4 inches.
- 10 rows of dc = approximately 4 inches.
For the lace pattern, 4 repeats should measure approximately 6 inches across, depending on your yarn and tension.
Make a small lace swatch before beginning.
If your swatch is wider than the measurement, try a smaller hook. If it is narrower, move up one hook size.
Wash and block your swatch before measuring because cotton-blend lace can relax after washing.
Main Pattern Instructions
Part 1: Front Bodice
The front bodice is worked from the bottom upward.
For size M, begin with Color A and a 3.5 mm hook.
Foundation: Ch 91.
Row 1: Dc in the fourth ch from hook and in each remaining ch. Turn. (89 dc)
Row 2: Ch 3, dc in each stitch across. Turn. (89 dc)
Row 3: Ch 3, dc in the next 2 sts, *ch 1, sk 1 st, dc in the next 3 sts; rep from * across. Turn.
Row 4: Ch 3, dc in each dc and work 1 dc into each ch-1 space. Turn.
Row 5: Ch 3, *sk 2 sts, work a shell in the next st, sk 2 sts, sc in the next st; rep from * across. Adjust the final repeat to finish evenly. Turn.
Row 6: Ch 1, sc in the first st, *ch 3, sc in the center dc of the next shell, ch 3, sc in the next sc; rep across. Turn.
Row 7: Ch 3, work 2 dc in each ch-3 space, placing 1 dc in each sc between spaces. Turn.
Row 8: Ch 3, dc across. Turn.
Repeat Rows 3–8 once more for the decorative lower bodice section.
Bust Shaping
Now begin shaping the upper bodice.
Row 15: Ch 3, dc2tog over the first 2 stitches, dc across until 3 stitches remain, dc2tog over the next 2 stitches, dc in the final stitch. Turn.
Row 16: Ch 3, dc across. Turn.
Repeat Rows 15–16 three more times.
This creates gentle shaping toward the upper chest.
Continue working even in dc until the bodice measures approximately 10 inches from the foundation.
Neckline Shaping
Divide the remaining stitches into two front sections, leaving approximately 15 center stitches unworked.
Work one shoulder section at a time.
Row 1: Attach yarn at the outer edge. Ch 3, dc across the shoulder stitches. Turn.
Row 2: Ch 3, dc2tog at the neckline edge, dc across. Turn.
Repeat the decrease every second row until the shoulder measures approximately 3 inches.
Work even until the shoulder section reaches approximately 12 inches from the bottom of the bodice.
Fasten off.
Repeat for the opposite shoulder, reversing the neckline shaping.
Part 2: Back Bodice
The back bodice is worked in the same way as the front, using Color A.
Foundation: Ch 91.
Rows 1–14: Repeat the front bodice instructions.
Continue with the bust shaping, but keep the back neckline higher.
Once the bodice measures approximately 12 inches, divide the stitches into two shoulder sections, leaving approximately 25 center stitches unworked.
Work each shoulder separately for approximately 1 inch.
Fasten off.
The higher back neckline provides comfortable coverage and helps the dress sit securely on the shoulders.
Part 3: Joining the Bodice
Place the front and back bodice pieces together with the right sides facing inward.
Use a tapestry needle and matching yarn to join the shoulders.
Next, join the side seams, leaving approximately 7.5 inches open at the top for each armhole.
Turn the bodice right side out.
Try it on and check the fit around the bust and waist before beginning the skirt.
Part 4: Bridal Crochet Lace Skirt
The skirt is worked in joined rounds from the bottom edge of the bodice.
Attach Color A at the waist seam.
For size M, evenly work 180 dc around the waist.
Make sure the stitches are distributed evenly across the front and back.
Join each round with a sl st.
Round 1: Ch 3, dc in each stitch around. Join. (180 dc)
Round 2: Ch 3, dc in the next 4 sts, 2 dc in the next st; repeat around. Join. (216 dc)
Round 3: Ch 3, dc around. Join.
Round 4: Ch 3, *ch 1, sk 1 st, dc in the next 2 sts; rep from * around. Join.
Round 5: Ch 3, dc in each dc and work 1 dc into each ch-1 space. Join.
Round 6: Ch 1, sc in the first st, *ch 3, sk 2 sts, sc in the next st; rep around. Join.
Round 7: Sl st into the first ch-3 space, ch 3, work 4 dc into the same space, sc in the next ch-3 space, *5 dc in the next ch-3 space, sc in the next ch-3 space; rep around. Join.
These shell groups create the first decorative lace band.
Round 8: Ch 3, dc in each stitch around. Join.
Repeat Rounds 4–8 until the skirt measures approximately 24 inches from the waist.
For a more flowing bridal silhouette, increase the stitch count gradually.
Every fourth round, work the following increase:
Increase Round: Dc in the next 14 sts, 2 dc in the next st; repeat around.
Work an even dc round after each increase round.
Continue until the skirt reaches your preferred length.
For the sample dress, the total skirt length is approximately 30 inches from the waist.
Special Techniques and Additional Elements
Part 5: Decorative Bridal Lace Motifs
The floral-inspired lace motifs give the dress its delicate bridal appearance.
You can add these motifs to the skirt in evenly spaced vertical columns.
Make 12 motifs using Color A.
Round 1: Ch 5 and join with a sl st to form a ring.
Round 2: Ch 3, work 11 dc into the ring. Join. (12 dc)
Round 3: Ch 1, *sc in the next st, ch 4, sk 1 st; rep around. Join.
Round 4: Sl st into the first ch-4 space, ch 3, work 4 dc into the same space, ch 2, work 5 dc into the same space. Repeat in every ch-4 space. Join.
Round 5: Ch 1, sc in the first stitch, ch 3, sc between the next two dc groups; repeat around. Join and fasten off.
Each motif should have a soft flower-like appearance with open spaces between the petals.
Block the motifs gently before attaching them.
Motif Placement
Arrange the motifs in four vertical columns, with three motifs in each column.
Position each column evenly around the skirt.
Leave approximately 2–3 inches between motifs, depending on the finished skirt length.
Attach each motif with small, neat stitches, following its outer edge.
Avoid pulling the yarn too tightly because the skirt should maintain its natural drape.
Scalloped Bridal Hem
The scalloped hem gives the dress a polished, romantic finish.
Attach Color B at the bottom edge.
Round 1: Ch 1, sc evenly around the hem. Join.
Round 2: Ch 1, *sk 1 st, work 5 dc in the next st, sk 1 st, sl st in the next st; rep around.
This creates a row of soft scallops.
If the scallops begin to pull the hem inward, increase the spacing between groups.
Neckline Edging
Using the 3.0 mm hook, attach Color B at the back neckline.
Work sc evenly around the neckline.
At each corner, work 2 sc to prevent pulling.
Join with a sl st and fasten off.
For an especially delicate finish, add a second round of picot edging.
Picot Edging: Sc in the next 2 sts, picot, sc in the next 2 sts.
Repeat around.
Armhole Edging
Attach yarn at the underarm seam.
Work one round of sc evenly around each armhole.
Keep your stitches relaxed so the edges remain comfortable against the skin.
Finish with a sl st and weave in the ends.
Assembly and Finishing
Once all the crochet sections are complete, take time to inspect the dress carefully.
First, check the shoulder seams and side seams. Make sure the joining stitches are secure and that both sides of the dress have matching measurements.
Next, arrange the lace motifs and check their placement from the front, back, and sides.
Use a tapestry needle to secure any loose motif edges.
Weave in all yarn ends carefully, hiding them inside the stitches rather than leaving visible knots.
Adding the Bridal Lining
Because this design uses open lace stitches, I recommend adding a lightweight lining.
Choose a soft, breathable fabric in cream, ivory, or a shade close to your natural skin tone.
The lining should follow the dress silhouette without pulling against the crochet fabric.
A professional tailor can help create a fitted slip lining with a comfortable neckline and suitable length.
Keep the lining separate from the crochet dress wherever possible so the crochet fabric can move naturally.
For a wedding look, you can also add a narrow satin ribbon at the waist or a small fabric-covered button detail at the back.
These additions are optional, but they complement the handmade lace beautifully.
Blocking and Care
Blocking makes a noticeable difference to bridal crochet lace.
It helps open the lace patterns, smooth uneven stitches, and give the skirt a more graceful shape.
For cotton-blend yarn, use gentle wet blocking.
- Fill a clean basin with cool water.
- Add a small amount of mild wool-safe or delicate-fabric detergent.
- Submerge the dress carefully.
- Let it soak for approximately 10–15 minutes.
- Lift it out without twisting or stretching.
- Roll it in a clean towel to remove excess water.
- Lay it flat on blocking mats.
- Arrange the skirt and lace motifs into their intended shapes.
- Pin the scalloped hem evenly.
- Allow the dress to dry completely.
Avoid hanging the dress while wet because the weight of the yarn can stretch the skirt.
For long-term care, hand wash gently in cool water and dry flat.
Store the dress folded in a clean, breathable garment bag.
Fit and Troubleshooting Tips
The bodice feels too tight.
Check your gauge before changing the pattern. If your stitches are smaller than specified, use a larger hook or add stitches to the foundation.
The skirt looks too narrow.
Add another increase round. Make sure the increases are distributed evenly rather than concentrated in one section.
The lace motifs curl.
This usually happens when the stitches are too tight. Block each motif gently before attaching it.
The hem ruffles excessively.
Reduce the number of stitches in the scalloped edging or use a smaller hook.
The neckline stretches.
Use the smaller 3.0 mm hook and work a firm round of single crochet around the edge.
The dress feels heavy.
Cotton crochet garments can become heavier than expected. Choose a lightweight sport-weight yarn and avoid adding too many decorative layers.
The dress is too transparent.
Use a properly fitted lining underneath. This is particularly important for a bridal garment.
Final Thoughts
Creating a Cream White Bridal Crochet Lace Dress is a special project that rewards patience and attention to detail. From the delicate floral motifs to the flowing lace skirt, every section contributes to a timeless handmade design.
I especially love how the cream white shade highlights the texture of the crochet stitches. It gives the finished dress a soft, romantic appearance without needing excessive decoration.
Take your time with the shaping, check your measurements regularly, and enjoy watching the lace pattern develop.
Most importantly, remember that handmade clothing is special because it carries the time and care you put into it.
I’d love to see how your bridal crochet lace dress turns out. Share your finished creation, experiment with your favorite cream or ivory shades, and save your favorite design details on Pinterest.
Happy crocheting!



Leave a Reply
You must be logged in to post a comment.