

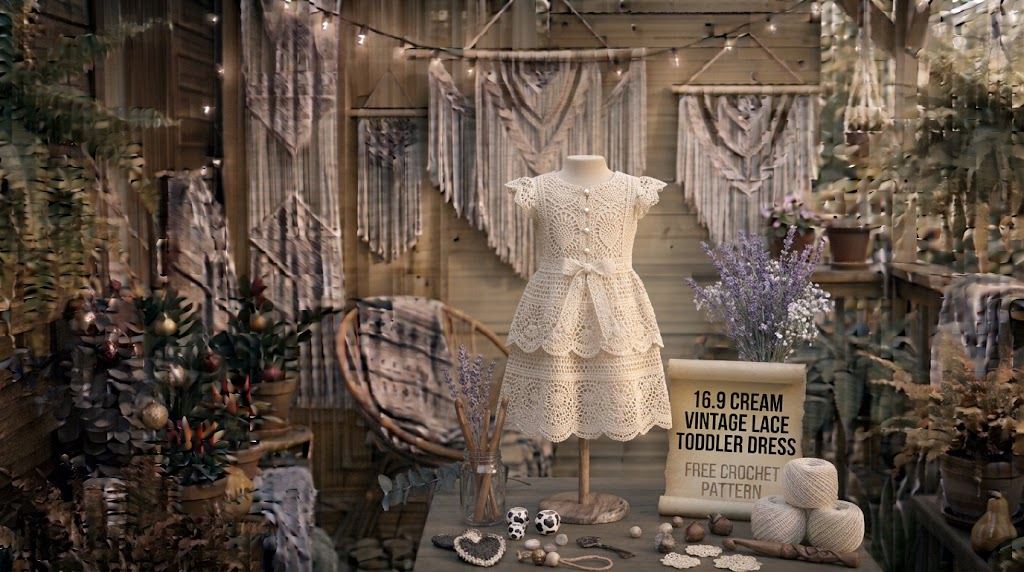
There is something especially sweet about a little cream-colored crochet dress. It reminds me of vintage family photographs, handmade heirlooms, and the beautiful clothing that was carefully saved for birthdays, family gatherings, and special occasions. I wanted to create a dress that captured that timeless feeling while remaining comfortable enough for a toddler to wear.
For this design, I chose a soft cream shade, a simple fitted bodice, delicate lace details, and a gently flared skirt. The combination creates a lovely vintage appearance without making the dress feel overly complicated or uncomfortable.
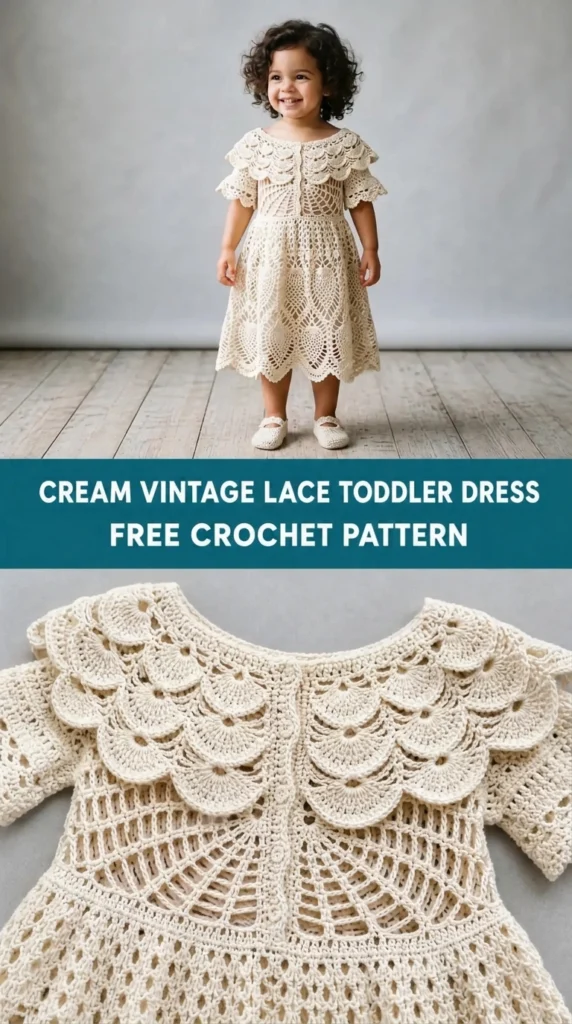
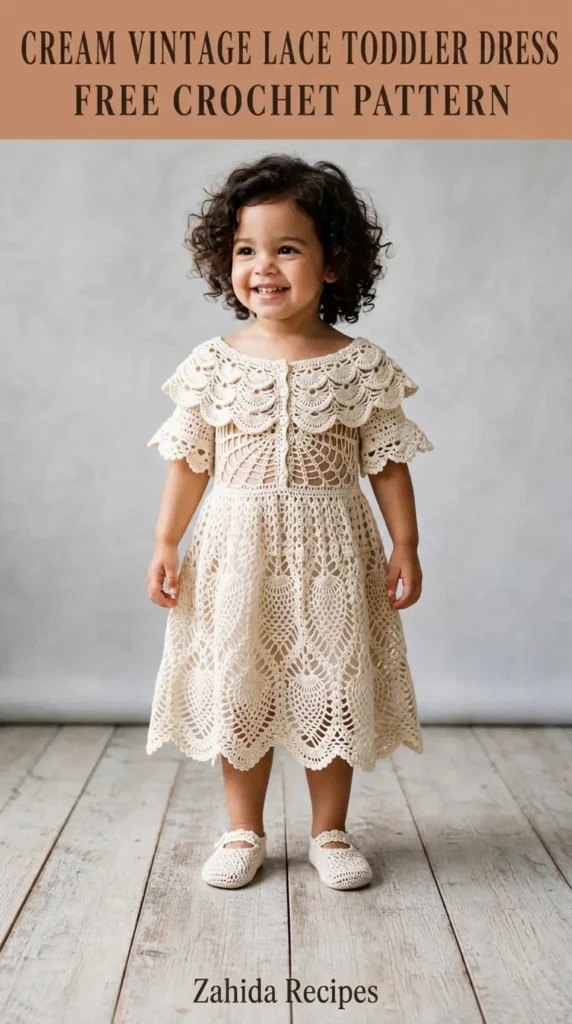
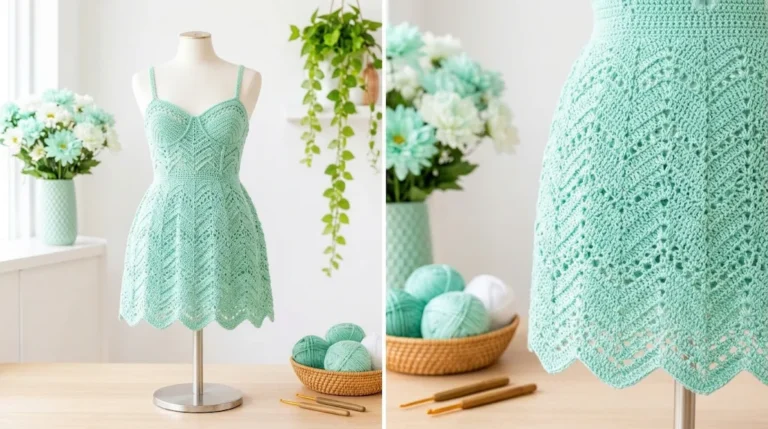
This Cream Vintage Lace Toddler Dress Free Crochet Pattern features a top-down bodice, a decorative waistline, and a beautiful openwork skirt. It is a charming project for crocheters who enjoy textured stitches and classic handmade clothing.
About This Cream Vintage Lace Toddler Dress Pattern
This dress is designed for toddlers approximately 2–4 years old. It has a comfortable upper bodice, short lace-inspired sleeves, and a flared skirt that falls just above the knee.
The construction begins at the neckline and works downward in joined rounds. The bodice is shaped with increases at four raglan-style points. Once the yoke reaches the required width, the sleeves are separated from the body, and the skirt continues in rounds.
The skirt uses a repeating lace pattern made from double crochet stitches and chain spaces. These open spaces create a delicate fabric that resembles traditional vintage crochet lace.
Pattern details:
- Skill level: Intermediate
- Construction: Top-down, seamless bodice with joined skirt rounds
- Sizes: Toddler 2T–4T
- Finished chest: Approximately 21–23 inches
- Finished waist: Approximately 20–22 inches
- Finished length: Approximately 19–21 inches
- Sleeve style: Short decorative sleeves
- Main color: Warm cream or ivory
The dress has a relaxed fit, allowing enough room for movement. For everyday wear, I recommend placing a lightweight cotton slip underneath because the lace skirt has intentional openings.
Materials You’ll Need
Yarn
Choose a soft, breathable cotton or cotton-blend yarn. A smooth yarn will help the lace stitches stand out beautifully.
- Color A – Cream: Approximately 450–550 yards (410–503 meters) of DK-weight cotton yarn for the bodice, sleeves, and skirt.
- Color B – Soft Ivory (optional): Approximately 30–40 yards (27–37 meters) for decorative edging and waist details.
For a completely traditional vintage appearance, you can use one shade of cream throughout.
Allow approximately 15% extra yarn if your gauge tends to vary.
Crochet Hooks
- 3.5 mm hook: Bodice and waist shaping.
- 4.0 mm hook: Openwork skirt for softer drape.
- 3.0 mm hook: Decorative edging, if needed.
Additional Supplies
- Tapestry needle
- Stitch markers
- Measuring tape
- Scissors
- Blocking mat and rust-resistant pins
- Four small buttons
- Lightweight cotton lining or slip (optional)
Abbreviations and Terminology
This pattern uses US crochet terminology.
| Abbreviation | Meaning |
| ch | Chain |
| sl st | Slip stitch |
| sc | Single crochet |
| hdc | Half double crochet |
| dc | Double crochet |
| tr | Treble crochet |
| sk | Skip |
| sp | Space |
| st | Stitch |
| sts | Stitches |
| rep | Repeat |
| rnd | Round |
| RS | Right side |
| WS | Wrong side |
Basic Stitch Explanations
- Chain (ch): Yarn over and pull through the loop on your hook.
- Slip stitch (sl st): Insert the hook, yarn over, and pull through both the stitch and the loop on your hook.
- Single crochet (sc): Insert the hook, yarn over, pull up a loop, yarn over again, and pull through both loops.
- Half double crochet (hdc): Yarn over, insert the hook, pull up a loop, yarn over, and pull through all three loops.
- Double crochet (dc): Yarn over, insert the hook, pull up a loop, yarn over and pull through two loops twice.
- Treble crochet (tr): Yarn over twice, insert the hook, pull up a loop, and work through two loops three times.
- Chain space (ch-sp): The opening created by one or more chain stitches.
Turning chains do not count as stitches unless specifically stated.
Gauge
Gauge is important because toddler clothing needs a comfortable fit without becoming too tight around the chest or shoulders.
Using the 3.5 mm hook and DK cotton yarn, work a small swatch in double crochet.
Gauge target:
- 18 dc = 4 inches
- 10 rows = 4 inches
For the lace skirt, using the 4.0 mm hook:
- 4 lace shell repeats = approximately 4 inches wide.
Wash and dry your swatch before measuring.
If your swatch is too small, move to a larger hook. If it is too large, use a smaller hook.
Main Pattern Instructions
Part 1: Neckline and Bodice Foundation
Using Color A and the 3.5 mm hook, chain 64.
Join with a slip stitch to form a ring, being careful not to twist the chain.
Round 1: Ch 1, sc in each chain around. Join with sl st to the first sc. (64 sc)
Round 2: Ch 2, dc in each stitch around. Join. (64 dc)
Round 3: Ch 2, dc in the next 7 sts, 2 dc in the next st, place marker. Repeat this increase arrangement around the neckline, distributing four increase points evenly. Join.
The markers identify the four raglan shaping areas.
Round 4: Ch 2, dc in each stitch until you reach a marked stitch. Work 2 dc in the marked stitch. Move marker to the second dc of the increase. Repeat at all four markers. Join.
Round 5: Repeat Round 4.
Continue increasing at the four marked points until the yoke measures approximately 5 inches from the neckline.
For a larger toddler, work one or two additional increase rounds if necessary.
Part 2: Separating the Sleeves
The next step creates the armholes and connects the bodice.
Round 1: Ch 2, dc across the front section until the first sleeve section. Skip all sleeve stitches and chain 6 for the underarm. Continue dc across the back section. Skip the second sleeve section and chain 6 again. Join.
You now have a continuous body round.
Round 2: Ch 2, dc in every stitch and underarm chain around. Join.
Round 3: Ch 2, dc around. Join.
Continue working double crochet rounds until the bodice measures approximately 4 inches from the underarm.
The lower bodice should sit comfortably around the waist without pulling.
Part 3: Decorative Vintage Waistband
To create a subtle vintage detail, work a textured waistband before beginning the lace skirt.
Round 1: Ch 1, sc in each stitch around. Join.
Round 2: Ch 2, dc in each stitch around. Join.
Round 3: Ch 1, *sc in next st, ch 1, sk next st*, repeat around. Join.
This creates a delicate row of small openings.
Round 4: Ch 1, sc in every sc and in every chain space around. Join.
The waistband creates a clear transition between the fitted bodice and the flowing skirt.
Part 4: Vintage Lace Skirt
Switch to the 4.0 mm hook.
The skirt is worked in a repeating shell-and-chain pattern. The additional hook size gives the fabric a softer drape.
Round 1: Ch 3 (counts as dc), dc in the same stitch, ch 2, skip 2 sts, 2 dc in next st. Repeat around. Join.
Round 2: Ch 3, work 2 dc in each chain-2 space around, ch 2 between shell groups. Join.
Round 3: Ch 3, 2 dc in the first ch-2 space, ch 3, skip the next shell group, 3 dc in the next ch-2 space. Repeat around. Join.
Round 4: Ch 3, 3 dc in each ch-3 space around. Join.
The combination of shell clusters and open chain spaces gives the skirt its lace appearance.
Round 5: Ch 3, *dc in next shell, ch 3, skip 2 sts, dc in next st, ch 3*, repeat around. Join.
Round 6: Ch 3, work 3 dc in each chain-3 space around. Join.
Repeat Rounds 3–6 to create the desired skirt length.
For the recommended toddler size, work approximately 10–12 inches from the waist.
Keep your chain spaces consistent. If you crochet them too tightly, the lace skirt may pull inward instead of hanging naturally.
Part 5: Adding Gentle Skirt Shaping
For a fuller vintage silhouette, add small increases at regular intervals.
On every fourth repeat round, work an additional shell cluster into selected spaces.
Distribute these extra shells evenly around the skirt.
Avoid adding too many increases at once. A gentle flare looks more balanced and allows the lace to hang beautifully.
Special Techniques and Additional Elements
Short Lace Sleeves
Return to the sleeve openings and attach Color A with a slip stitch.
Round 1: Ch 2, dc evenly around the armhole opening. Join.
Round 2: Ch 1, sc in every stitch around. Join.
Round 3: Ch 3, skip 1 st, sc in next st, repeat around to form small decorative openings.
Round 4: Work 3 dc in each chain space around. Join.
Fasten off.
Repeat for the second sleeve.
Scalloped Vintage Hem
The scalloped hem gives the dress a delicate finishing detail.
Attach Color A at the bottom edge of the skirt.
Round 1: Ch 1, sc evenly around. Join.
Round 2: Ch 1, *skip 1 st, 5 dc in next st, skip 1 st, sl st in next st*. Repeat around.
This creates small rounded shells along the bottom edge.
If the final repeat does not fit perfectly, adjust the spacing slightly so the scallops remain evenly distributed.
Optional Waist Ribbon
For a classic finishing touch, crochet a simple decorative cord.
Chain approximately 90–100 stitches.
Work one slip stitch into each chain, fasten off, and weave the cord through the waistband openings.
Tie a small bow at the back or side.
For toddler safety, avoid long loose cords and removable decorative pieces. Secure any ribbon ends carefully and supervise the child while wearing the dress.
Assembly and Finishing
Although the bodice and skirt are worked together, a few finishing steps make the dress look professionally completed.
- Weave in all yarn ends securely using a tapestry needle.
- Check the underarm joins for small gaps and close them with matching yarn.
- Inspect the neckline and sleeve edges for loose stitches.
- Attach four small buttons along the back opening if you prefer a decorative button detail. Secure them firmly and ensure they cannot become choking hazards.
- Check the scalloped hem to make sure every shell is evenly spaced.
- Add a lightweight cotton lining if the dress will be worn for special occasions.
I recommend trying the dress on before completing the final blocking. This gives you a chance to check the neckline, armholes, and skirt length.
Blocking and Care
Blocking helps the lace pattern open up and gives the scalloped hem a more polished appearance.
For cotton yarn, gently soak the dress in cool or lukewarm water with a small amount of mild detergent.
Do not wring or twist the fabric.
Press out excess water using a clean towel, then place the dress flat on a blocking mat.
Arrange the lace shells carefully and pin the scallops into an even shape.
Allow the dress to dry completely before removing the pins.
For regular care:
- Hand wash in cool water when possible.
- Use a gentle detergent.
- Avoid bleach.
- Do not hang the dress while wet.
- Dry flat to preserve its shape.
- Store folded rather than hanging for long periods.
Always follow the yarn manufacturer’s care instructions.
Fit and Troubleshooting Tips
The Bodice Feels Too Tight
If the chest feels restrictive, check your gauge first. You may need a larger hook or additional yoke increase rounds.
The Skirt Curls Inward
This usually happens when the chain spaces are too tight or the stitch count is inconsistent.
Try using the larger hook and check that your lace repeats are evenly distributed.
The Skirt Looks Too Wide
Reduce the number of additional shell increases. The skirt should flare gradually rather than become excessively gathered.
The Sleeves Feel Uncomfortable
Make sure the underarm chains are not too short. Add one or two chains when joining the body if needed.
The Lace Looks Uneven
Count your shell groups after each round. Blocking can improve small differences, but it cannot correct major stitch-count mistakes.
Adjusting the Dress Length
For a shorter dress, stop repeating the lace pattern earlier. For a longer dress, add more complete lace repeats before working the scalloped hem.
Final Thoughts
I love how the Cream Vintage Lace Toddler Dress Free Crochet Pattern combines a simple cream color with delicate openwork details. It has that timeless handmade charm that makes crochet clothing feel special, especially when you create it for a little one.
The fitted bodice, gentle skirt flare, decorative sleeves, and scalloped hem work together to create a sweet vintage-inspired outfit. You can keep it traditional in warm ivory or experiment with soft blush, dusty rose, or pale sage for a different look.
Take your time with the lace rounds, check your measurements as you work, and enjoy watching the dress come together.
Most importantly, remember that handmade clothing does not need to be perfectly identical to a store-bought garment. The little details created by your own hands are what make it memorable.
I’d love to see your finished toddler dress! Share your crochet creation in the comments or save the pattern on Pinterest so you can return to it whenever you’re ready for another beautiful project.



Leave a Reply
You must be logged in to post a comment.