


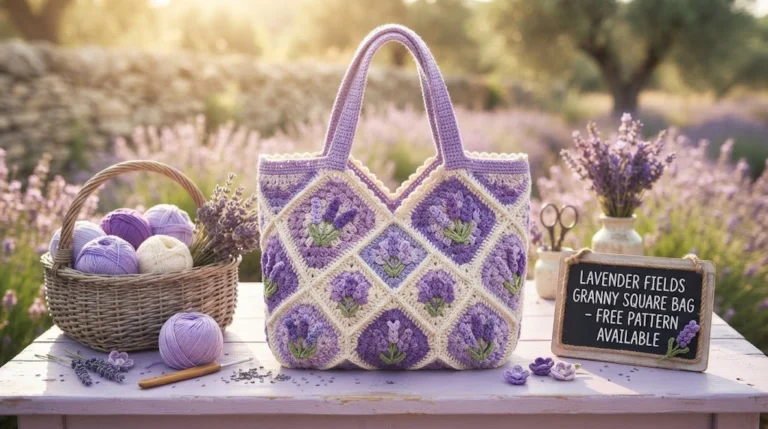
Some crochet projects are simply practical, while others make you smile every time you pick them up. This Lavender Fields Crochet Tote is definitely the second kind!
I wanted to create a bag that felt soft, romantic, and inspired by beautiful summer gardens. Think delicate lavender flowers, gentle purple shades, and a lovely textured body that makes an ordinary tote feel a little more special.
The best part? This bag is roomy enough for everyday errands, shopping trips, books, or even your current crochet project. I designed it with a sturdy rectangular base, textured sides, decorative lavender sprigs, and comfortable handles.
This Lavender Fields Crochet Tote Free Pattern is a lovely project for crocheters who enjoy working with texture and small decorative motifs.
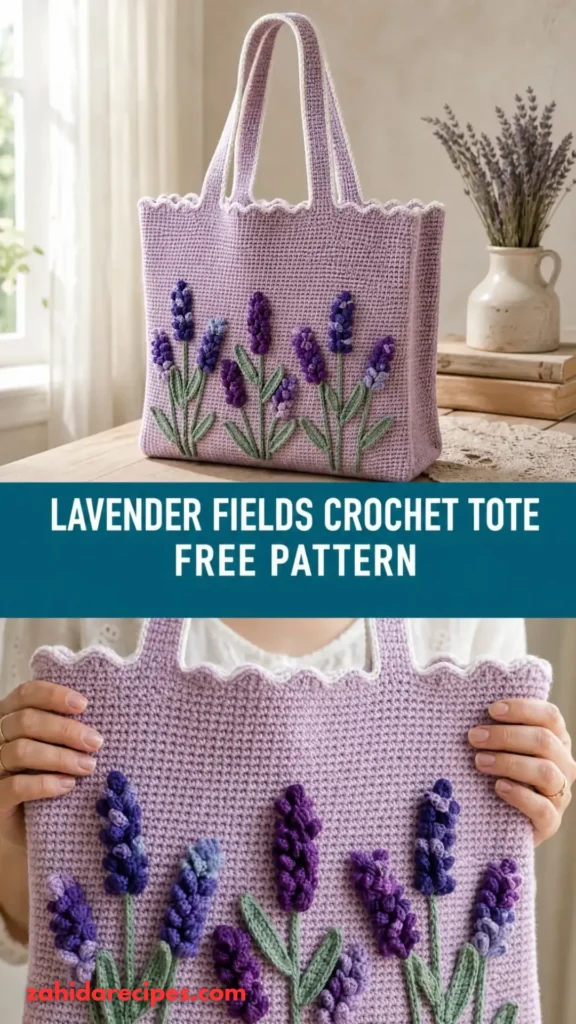
About This Lavender Fields Crochet Tote Pattern
This tote bag is worked from the bottom up, beginning with a rectangular base. Once the base reaches the desired length, the body is crocheted in joined rounds to create a roomy shopping bag.
The main body features a combination of single crochet and textured puff stitches. These stitches create a beautiful fabric with a little extra thickness, making the bag feel substantial without becoming too stiff.
Small lavender-inspired flower sprigs are crocheted separately and attached to the front of the finished bag.
Skill Level: Intermediate
Construction: Rectangular base, worked-up body, separate handles, and decorative flower appliqués.
Finished Measurements:
- Width: Approximately 14 inches (35.5 cm)
- Height: Approximately 13 inches (33 cm)
- Base depth: Approximately 4 inches (10 cm)
- Handle drop: Approximately 10 inches (25.5 cm)
You can easily adjust the dimensions by adding or removing base rows and body rounds.
Materials You’ll Need
Yarn
Choose a sturdy cotton or cotton-blend yarn. Cotton holds its shape beautifully and is especially useful for everyday tote bags.
- Color A – Lavender Purple: Approximately 220 yards (201 meters), worsted-weight cotton yarn. Used for the main body and flower details.
- Color B – Soft Cream: Approximately 120 yards (110 meters), worsted-weight cotton yarn. Used for the base, decorative accents, and flower centers.
- Color C – Sage Green: Approximately 60 yards (55 meters), worsted-weight cotton yarn. Used for leaves and stems.
Allow approximately 15% extra yarn if your tension is loose or you plan to add additional decorative details.
Crochet Hooks
- 4.5 mm crochet hook for the main tote.
- 4 mm crochet hook for flowers and decorative details.
- 5 mm crochet hook for the foundation chain if you tend to crochet tightly.
Other Supplies
- Yarn needle
- Stitch markers
- Scissors
- Measuring tape
- Removable fabric lining (optional)
- Sewing needle and matching thread (optional)
- Blocking mat and rust-resistant pins
Abbreviations and Terminology
This pattern uses US crochet terminology.
- ch: Chain – yarn over and pull through the loop.
- sl st: Slip stitch – insert hook, yarn over, and pull through both loops.
- sc: Single crochet – insert hook, yarn over, pull up a loop, yarn over, and pull through both loops.
- hdc: Half double crochet – yarn over, insert hook, pull up a loop, yarn over, and pull through all three loops.
- dc: Double crochet – yarn over, insert hook, pull up a loop, yarn over and pull through two loops twice.
- puff st: Puff stitch – yarn over, insert hook, pull up a loop several times in the same stitch, yarn over, and pull through all loops.
- inc: Increase – work two stitches into the same stitch.
- st(s): Stitch(es).
- rep: Repeat.
- FO: Fasten off.
Important Notes:
- Turning chains do not count as stitches unless specifically mentioned.
- Work in US crochet terminology throughout.
- Place a stitch marker at the beginning of each round.
- Keep your tension consistent, especially when working the puff stitches.
Gauge
Before starting the bag, make a small practice swatch.
Work 16 sc stitches across and 18 rows using your 4.5 mm crochet hook.
Your finished swatch should measure approximately 4 x 4 inches (10 x 10 cm).
If your swatch is too small, move up one hook size. If it is too large, move down one hook size.
Gauge matters because a loose fabric can stretch considerably when you place heavier items inside the tote.
Main Pattern Instructions
Part 1: Crochet the Rectangular Base
Begin with Color B (Soft Cream).
Foundation: Ch 31.
Row 1: Sc in the second ch from the hook and in each remaining ch across. (30 sc)
Row 2: Ch 1, turn, sc in each stitch across. (30 sc)
Rows 3–10: Repeat Row 2.
You should now have a rectangular piece measuring approximately 4 x 14 inches.
If you prefer a wider tote, add more foundation chains in multiples of two.
Part 2: Create the Base Border
Do not fasten off.
Round 1: Ch 1. Work 30 sc along the first long edge, 3 sc into the corner, 10 sc across the short edge, 3 sc into the next corner, 30 sc along the opposite long edge, and 3 sc into the final corner. Work 10 sc along the remaining short edge, then join with a sl st.
Round 2: Ch 1. Sc in each stitch around, working 3 sc into each marked corner stitch. Join with a sl st.
Your base should have a neat rectangular shape with softly rounded corners.
Part 3: Build the Tote Body
Switch to Color A (Lavender Purple).
For the body, work in joined rounds.
Round 1: Ch 1, sc in the back loop only of every stitch around. Join with a sl st.
This creates a subtle ridge that separates the base from the body.
Round 2: Ch 1, sc in each stitch around. Join.
Round 3: Ch 1, sc in each stitch around. Join.
Round 4: Ch 1, sc in the first stitch, puff st in the next stitch, *sc in the next stitch, puff st in the next stitch*. Repeat around. Join with a sl st.
Round 5: Ch 1, sc in each stitch around. Join.
Round 6: Ch 1, sc in the first two stitches, puff st in the next stitch, *sc in the next two stitches, puff st in the next stitch*. Repeat around. Join.
Round 7: Repeat Round 5.
Rounds 8–24: Repeat Rounds 4–7, maintaining the established texture pattern.
Continue until the body measures approximately 12 inches from the base.
Count Check: Your stitch count should remain unchanged throughout the body. Do not accidentally increase or decrease stitches while working the puff stitches.
Part 4: Create the Top Edge
Switch to Color B.
Round 25: Ch 1, sc in every stitch around. Join.
Round 26: Ch 1, hdc in every stitch around. Join.
Round 27: Ch 1, sc in every stitch around. Join.
Fasten off and weave in the loose ends.
The cream border creates a lovely finishing detail while helping the top edge maintain its shape.
Special Techniques: Lavender Flower Appliqués
Now comes my favorite part!
The little lavender flowers give this tote its signature garden-inspired appearance.
You will make several small flower clusters and attach them to the front of the bag.
Small Lavender Flower
Using Color A, create a slip knot.
Round 1: Ch 4 and join with a sl st to form a ring.
Round 2: Ch 1, work 5 sc into the ring. Join with a sl st.
Round 3: *Ch 3, sl st into the next sc.* Repeat around to create five small loops.
Fasten off, leaving a long tail for sewing.
Flower Center
Using Color B:
Round 1: Make a magic ring and work 5 sc into the ring.
Pull the ring closed and join with a sl st.
Fasten off, leaving a sewing tail.
Attach the cream center to the middle of the lavender flower.
Crochet Lavender Leaves
Using Color C:
Foundation: Ch 7.
Row 1: Sl st in the second ch from the hook, sc in the next ch, hdc in the next two ch, sc in the next ch, and sl st in the final ch.
Fasten off.
Make 8–10 leaves, depending on how full you want your floral arrangement to look.
Lavender Flower Stems
With Color C, create several small stems using surface slip stitches.
Insert your hook into the front of the tote and pull up a loop of green yarn.
Work a line of slip stitches approximately 2–3 inches long.
Make four or five stems at slightly different angles.
Sew the lavender flowers near the top of each stem and attach the leaves along the sides.
You can arrange the flowers in a small garden-inspired cluster or spread them across the front panel.
Crochet Tote Bag Handles
A comfortable handle makes all the difference in an everyday tote.
Make two identical handles using Color A.
Foundation: Ch 61.
Row 1: Sc in the second ch from the hook and across. (60 sc)
Row 2: Ch 1, turn, sc in each stitch across. (60 sc)
Rows 3–6: Repeat Row 2.
Fasten off, leaving a long sewing tail.
Each handle should measure approximately 1.5 inches wide and 15 inches long before attachment.
For extra strength, fold each handle lengthwise and sew the long edges together to create a thicker strap.
Alternatively, leave the handles flat for a softer appearance.
Assembly and Finishing
Once all the individual components are ready, it’s time to bring everything together.
Attach the Handles
Lay your tote flat with the front facing you.
Position the first handle approximately 2.5 inches from the left side seam and the second end approximately 2.5 inches from the right side seam.
Make sure the handle is not twisted.
Use your yarn needle to sew each handle end securely to the inside of the top edge.
Repeat the process for the second handle on the opposite side.
For additional strength, sew a small square around each handle attachment point, then stitch an X through the square.
This helps distribute the weight when carrying groceries or books.
Attach the Lavender Flowers
Arrange your lavender flowers across the upper-middle portion of the front panel.
I recommend placing the stems at slightly different angles so the arrangement looks natural rather than perfectly symmetrical.
Use the long yarn tails to sew each flower and leaf securely.
Avoid pulling the stitches too tightly, as this can cause the fabric to pucker.
Weave in Loose Ends
Use a tapestry needle to weave every loose end into the wrong side of the fabric.
Take a few different directions with each yarn tail to prevent unraveling.
Trim excess yarn carefully.
Blocking and Care
Because this tote is designed for everyday use, blocking helps the finished fabric look neat and balanced.
For cotton yarn, I recommend gentle wet blocking.
- Fill a basin with cool water.
- Add a small amount of gentle detergent.
- Submerge the tote and allow it to soak for approximately 10 minutes.
- Remove it carefully without twisting or wringing.
- Roll it inside a clean towel to remove excess water.
- Lay it flat on a blocking mat.
- Shape the rectangular base and straighten the handles.
- Allow the bag to dry completely.
Avoid hanging the tote while wet because the weight of the water can stretch the handles and body.
Care Tips:
- Hand wash whenever possible.
- Use cool water.
- Avoid bleach.
- Dry flat.
- Store in a clean, dry place.
Fit and Troubleshooting Tips
My tote bag looks too floppy. What should I do?
Try using a smaller crochet hook or adding a fabric lining. Cotton yarn also provides better structure than many soft acrylic yarns.
The rectangular base is curling.
Check your stitch count and make sure you are working the correct number of stitches into each corner. Blocking can also help flatten the base.
My puff stitches look uneven.
Try pulling each loop to a similar height. Keep the tension consistent and avoid tightening the final pull-through too much.
The handles are stretching.
Reinforce the attachment points with extra stitching. You can also sew a strip of cotton fabric inside the handles for additional support.
Can I make the tote larger?
Absolutely! Add more foundation chains and base rows to increase the width and length. You can also add additional body rounds for a taller bag.
Just remember that a larger bag will require more yarn and stronger handles.
Can I change the flower colors?
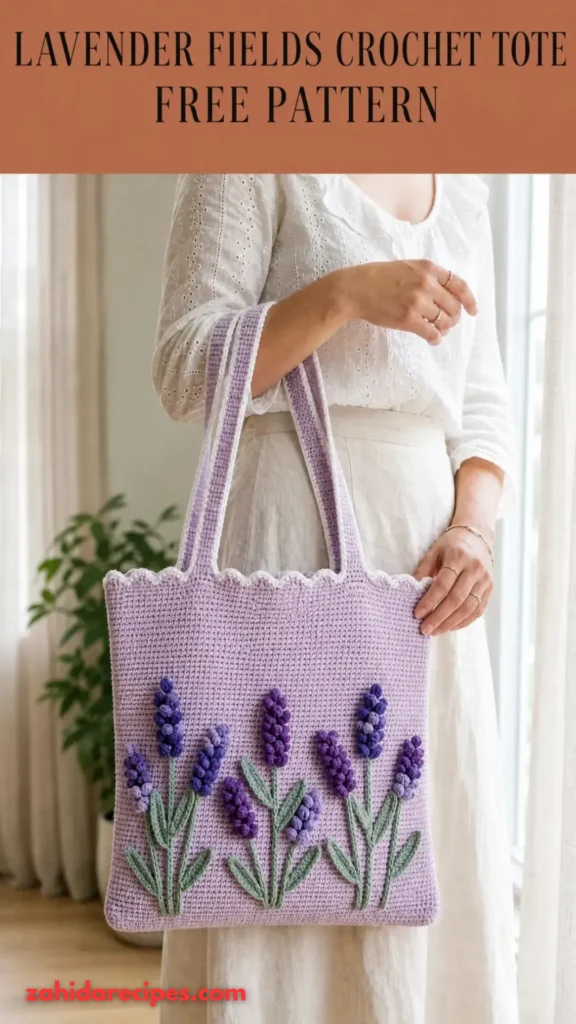
Of course. Soft pink, dusty blue, cream, and pale yellow all look beautiful with lavender-inspired designs.
Final Thoughts
I absolutely love how this Lavender Fields Crochet Tote brings together practical construction and delicate floral details.
The textured purple body gives the bag a beautiful handmade appearance, while the little lavender flowers make it feel like something special rather than an ordinary shopping tote.
You can carry it to the farmers’ market, take it to the beach, use it for library trips, or fill it with your current crochet supplies.
Don’t be afraid to experiment with different flower arrangements and color combinations. Every handmade bag has its own personality, and that’s part of the fun!
I hope you enjoy making this Lavender Fields Crochet Tote Free Pattern as much as I enjoyed designing it. If you create your own version, share your finished project and inspire another crocheter to pick up their hook and make something beautiful!


Leave a Reply
You must be logged in to post a comment.