


I still remember the afternoon the idea for this set arrived. I was walking through a small lavender field near my sister’s house, the air heavy with that clean, slightly sweet scent that only real lavender has. My niece had just announced she was expecting, and I wanted to make something that felt like a quiet promise of soft days and gentle evenings. Not a loud, bright primary-color set, but something soft and a little dreamy. Something that looked like it had been gathered from the edges of those purple rows.
I came home, pulled out every lavender and soft lilac yarn in my stash, and started sketching. What emerged was this three-piece set: a simple cardigan with a light textured yoke, a matching hat with a delicate shell brim, and the tiniest pair of booties with a picot edge. Everything is worked in the same stitch family so the pieces feel like they belong together, yet each one has its own small detail.
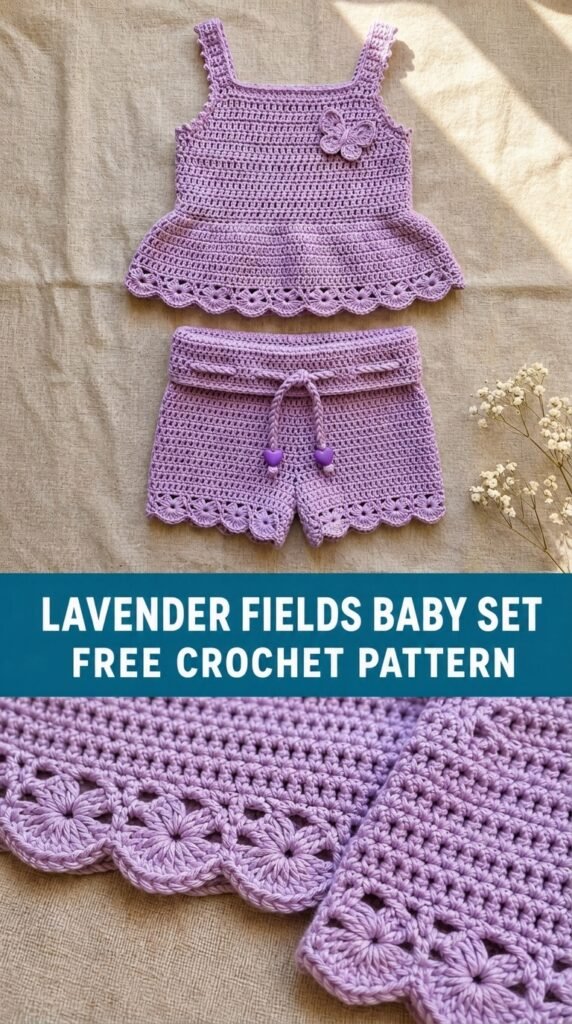
This is the Lavender Fields Baby Set. It is meant to be soft against new skin, easy to dress a wiggly baby in, and pretty enough to photograph for those first-month pictures. I hope it becomes one of the pieces you reach for when you want to make something that feels special without being fussy.
About This Pattern
This is a three-piece baby set: a top-down cardigan with a lightly textured yoke, a matching hat, and a pair of booties. All three pieces use the same main stitch pattern so they coordinate beautifully. The cardigan is worked from the neckline down with raglan increases, the hat is worked in the round from the crown, and the booties are worked from the sole up.
Skill level is intermediate. You should be comfortable with working in the round, increasing, decreasing, and following simple stitch patterns that include clusters and shells. Nothing is extremely complex, but the texture does require attention to stitch placement on the first few rows of each piece.
Finished sizes are designed for approximately 0–3 months (cardigan chest 16–17 in / 40–43 cm, hat circumference 13–14 in / 33–35.5 cm, bootie sole 3.5 in / 9 cm). The cardigan has a little positive ease so it can be worn over a onesie. The fabric has a soft drape and a gentle stretch, which makes dressing easier.
Materials You’ll Need
Yarn
Soft DK-weight yarn (approximately 100 g / 250–270 m per skein). I used a merino-cotton blend that is machine-washable on gentle.
- Color A (main lavender): 2 skeins (approx. 480–500 m / 525–545 yds)
- Color B (soft lilac accent): 1 skein (approx. 200 m / 220 yds)
Allow 15 % extra for gauge variation and swatching.
Hooks
- 4.0 mm (G/6) – main fabric for cardigan, hat, and booties
- 3.5 mm (E/4) – optional tighter edging if you prefer a neater finish
Notions
- Tapestry needle
- Stitch markers (at least 4)
- Scissors
- Blocking mats and pins (or steam iron)
- Optional: 3–4 small buttons (10–12 mm) for the cardigan
Abbreviations and Terminology
All instructions use US crochet terminology.
- ch – chain
- sc – single crochet (insert hook, yarn over, pull up loop, yarn over, pull through both loops)
- hdc – half double crochet (yarn over, insert hook, yarn over, pull up loop, yarn over, pull through all three loops)
- dc – double crochet (yarn over, insert hook, yarn over, pull up loop, yarn over, pull through two, yarn over, pull through remaining two)
- sl st – slip stitch
- st(s) – stitch(es)
- sp – space
- rep – repeat
- sk – skip
- inc – increase (work two stitches in the same stitch or space)
- cl – cluster (yarn over, insert hook, yarn over, pull up loop, yarn over, pull through two; repeat twice more in same place, yarn over, pull through all four loops on hook)
- shell – (dc, ch 1, dc, ch 1, dc) in the same stitch or space
- picot – ch 3, sl st in the first of those three chains
Turning chains do not count as a stitch unless a step explicitly says they do. When working in the round, join with a slip stitch to the first stitch of the round unless otherwise noted.
Gauge
Work a 4 × 4 in (10 × 10 cm) swatch in the main textured stitch (rows of sc, hdc, and clusters as used in the cardigan yoke).
With 4.0 mm hook:
16 sts and 12 rows = 4 in (10 cm) in the textured pattern after light blocking.
If your swatch is smaller, go up a hook size. If it is larger, go down a half size. Baby garments need a soft fabric, so avoid going too tight.
Main Pattern Instructions
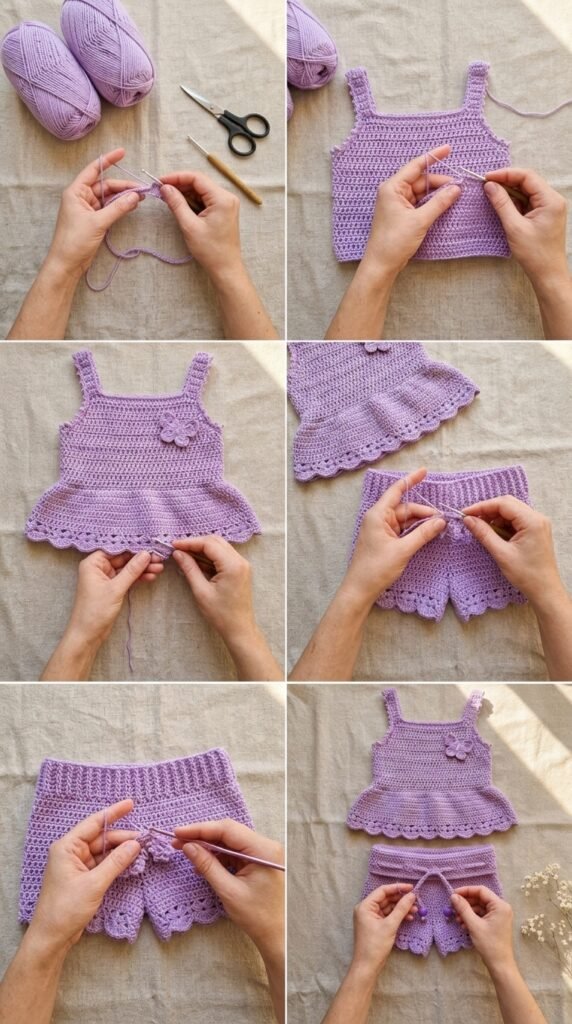
Cardigan
The cardigan is worked top-down in one piece. The yoke is worked flat with raglan increases. Once the yoke is complete, the body is worked flat and the sleeves are worked in the round.
Yoke
With Color A and 4.0 mm hook, ch 52.
Row 1 (RS): Sc in 2nd ch from hook and in each ch across. Turn. (51 sc)
Row 2: Ch 1, sc in first 7 sts, (hdc, ch 1, hdc) in next st (first raglan), sc in next 8 sts, (hdc, ch 1, hdc) in next st (second raglan), sc in next 11 sts, (hdc, ch 1, hdc) in next st (third raglan), sc in next 8 sts, (hdc, ch 1, hdc) in next st (fourth raglan), sc in last 7 sts. Turn.
Place a marker in each ch-1 space. These are your raglan points.
Row 3: Ch 1, sc in each st to next marker, (hdc, ch 1, hdc) in marked ch-1 space; move marker up; rep from * three more times, sc in each remaining st. Turn.
Row 4: Ch 1, sc in each st to next marker, (sc, ch 1, sc) in marked ch-1 space; move marker up; rep from * three more times, sc in each remaining st. Turn.
Rows 5–16: Continue alternating Row 3 and Row 4, working the increases in the marked spaces as established. You will have 16 rows of yoke.
At the end of Row 16 you should have approximately 147 stitches (including the four ch-1 spaces). Count carefully: 7 front, increase, 32 sleeve, increase, 43 back, increase, 32 sleeve, increase, 7 front (exact numbers may vary by 1–2 sts depending on how you count the increase stitches; the important thing is that the four sections remain balanced).
Divide for Body and Sleeves
Row 17: Ch 1, sc across the first front to the first marker, sc in the ch-1 space, skip the entire sleeve section (remove marker), sc in the next ch-1 space, sc across the back to the next marker, sc in the ch-1 space, skip the second sleeve section, sc in the last ch-1 space, sc across the remaining front. Turn. You now have the body stitches only.
Body
Rows 18–36: Ch 1, sc in each st across. Turn.
Work even until the body measures approximately 5.5–6 in (14–15 cm) from the underarm, or desired length.
On the final row, switch to Color B for the last two rows if you want a soft lilac hem.
Button Band / Front Edging
With Color B (or Color A if preferred), work a neat sc border along both front edges and the neckline. Place three evenly spaced button loops on the right front (for a girl) or left front (for a boy) by working (sc, ch 2, sk 1 st, sc) at the desired button positions. Fasten off and weave in ends.
Sleeves
Join Color A at the underarm of one sleeve opening.
Round 1: Sc evenly around the armhole, joining the underarm gap with 2–3 sc. Aim for 36–38 sts. Join with sl st to first sc.
Rounds 2–18: Ch 1, sc in each st around. Join.
Continue until sleeve measures approximately 5.5–6 in (14–15 cm) from underarm.
On the last two rounds switch to Color B if desired. Fasten off.
Repeat for the second sleeve.
Hat
Worked in the continuous round from the crown.
With Color A and 4.0 mm hook, make a magic ring (or ch 4 and join).
Round 1: 8 sc into ring. Do not join; work in continuous spiral. Place marker in first st of each round. (8)
Round 2: 2 sc in each st. (16)
Round 3: *Sc in next st, 2 sc in next st; rep from * around. (24)
Round 4: *Sc in next 2 sts, 2 sc in next st; rep from * around. (32)
Round 5: *Sc in next 3 sts, 2 sc in next st; rep from * around. (40)
Round 6: *Sc in next 4 sts, 2 sc in next st; rep from * around. (48)
Rounds 7–16: Sc in each st around.
Round 17 (shell brim): *Sk 1 st, shell in next st, sk 1 st, sc in next st; rep from * around. Join with Color B if desired.
Round 18: Sc in each dc and each ch-1 space around, working 1 sc into each sc of the previous round. Fasten off.
Booties (make 2)
Worked from the sole up.
Sole
With Color A, ch 12.
Round 1: Sc in 2nd ch from hook and in next 9 ch, 3 sc in last ch. Working along the opposite side of the foundation chain, sc in next 9 ch, 2 sc in last ch. Join. (24)
Round 2: Ch 1, 2 sc in first st, sc in next 9 sts, 2 sc in next 3 sts, sc in next 9 sts, 2 sc in last 2 sts. Join. (30)
Round 3: Ch 1, sc in each st around. Join. (30)
Sides
Rounds 4–8: Ch 1, sc in each st around. Join.
Instep shaping
Round 9: Ch 1, sc in next 9 sts, [sc2tog] 6 times, sc in remaining sts. Join. (24)
Round 10: Ch 1, sc in next 8 sts, [sc2tog] 4 times, sc in remaining sts. Join. (20)
Rounds 11–13: Ch 1, sc in each st around. Join.
Picot cuff
Round 14: *Sc in next st, picot, sk 1 st; rep from * around. Join with Color B if desired. Fasten off.
Special Techniques
Cluster stitch (cl)
Yarn over, insert hook into indicated stitch, yarn over and pull up a loop, yarn over and pull through two loops. Repeat this twice more in the same stitch. You now have four loops on the hook. Yarn over and pull through all four loops. This creates a small, dense bobble that sits neatly on the fabric.
Shell
(Dc, ch 1, dc, ch 1, dc) all worked into the same stitch or space. The shell forms the soft scalloped edge on the hat and can be used as a decorative border elsewhere if you wish.
Picot
Chain 3, then slip stitch into the first of those three chains. This creates a tiny pointed loop that looks delicate on the bootie cuff.
Assembly and Finishing
Weave in all ends securely on the wrong side.
Sew three small buttons onto the cardigan opposite the button loops. Choose buttons that are smooth and have no sharp edges.
If the sleeves or hat feel slightly open, you can run a simple length of matching yarn through the last round of the sleeve or the base of the hat brim and tie a small bow for a gentle gather. This is optional.
Lightly steam or wet-block the cardigan flat, shaping the fronts and sleeves. Block the hat over a small bowl or balloon so the crown stays rounded. Shape the booties by stuffing them lightly with tissue while they dry.
Blocking and Care
For best results, wet-block the finished pieces. Soak in lukewarm water with a little wool wash for 15–20 minutes, gently squeeze out excess water (do not wring), and lay flat on a blocking mat. Pin the cardigan to the finished measurements, shape the hat crown, and gently form the bootie soles. Allow to dry completely.
Care: Hand wash or machine wash on a gentle/delicate cycle in a mesh bag. Dry flat. Never hang a wet baby garment, as the weight of the water can stretch the fabric. Store folded rather than on hangers.
Fit and Troubleshooting Tips
If the cardigan feels tight across the chest, add two extra increase rows in the yoke before dividing for the body.
If the hat sits too high on the head, work two additional even rounds before the shell brim.
Cupping at the neckline is usually caused by working the first few rows too tightly. Go up half a hook size for the yoke only if needed.
The booties should fit snugly but not tightly. If the sole is too short, add two chains to the foundation and adjust the increase rounds accordingly.
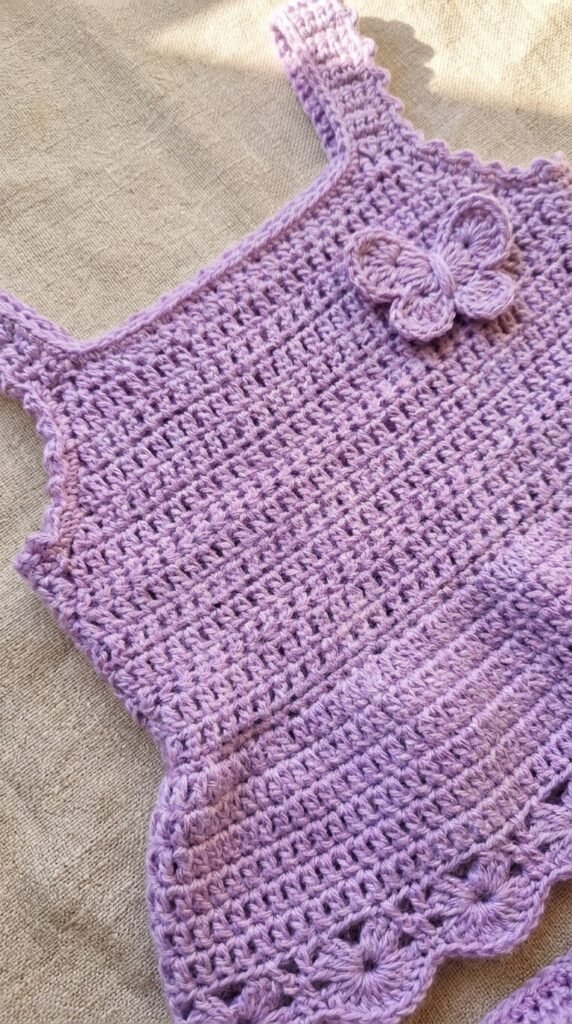
If the textured sections look uneven, check that you are always working into the correct stitch and not accidentally skipping or adding stitches at the raglan points. Counting at the end of every increase row saves time later.
FAQ’s
Can I use a different weight of yarn?
Yes, but you will need to adjust your hook size and check your gauge carefully. A lighter yarn (sport or fingering) will create a more delicate fabric and may require extra rows or stitches for the same finished size. A heavier yarn (worsted) will produce a bulkier, warmer set and will need fewer stitches. Always make a gauge swatch and compare it to the given measurements.
Is this pattern suitable for beginners?
It is written for intermediate crocheters. If you are comfortable with single crochet, increasing, decreasing, and working in the round, you should be able to follow it. The textured sections and raglan shaping require a bit more attention than a simple rectangle, so take your time with the first few rows of the yoke.
How do I make the set larger for a 3–6 month baby?
Add two extra increase rows in the cardigan yoke before dividing for the body and sleeves. Work two additional even rounds on the hat before the shell brim, and add two chains to the bootie foundation plus one extra increase round on the sole. Check the finished measurements against a ready-made garment of the desired size.
Can I substitute the merino-cotton blend with acrylic or another fiber?
Absolutely. Any soft DK-weight yarn that is gentle on baby skin will work. Look for yarns labeled “baby” or “superwash” if you want easy care. Just make sure the yarn has good stitch definition so the texture shows clearly.
Do the buttons need to be sewn on, or can I use snaps?
Buttons are traditional and look lovely, but snaps or even a simple tie closure work just as well for newborns. If you use buttons, choose ones that are securely attached and have no sharp edges. Always supervise babies with any closures.
My stitch counts are off after the yoke increases. What should I do?
Count at the end of every increase row and mark the four raglan points clearly. Small differences of 1–2 stitches are common and usually even out once you divide for the body. If the difference is larger, frog back to the last correct row and re-work the increases carefully.
Can I make just one piece of the set?
Of course. The cardigan, hat, and booties are written so each can stand alone. Many makers start with the hat or booties to get comfortable with the stitch pattern before tackling the cardigan.
Final Thoughts
There is something deeply satisfying about finishing a matching set for a new baby. When the three pieces sit together — the soft cardigan, the little hat with its shell edge, the tiny booties with their picot cuffs — they look like they were always meant to be a family. I hope this Lavender Fields set brings you the same quiet pleasure it brought me while I was designing and testing it.
If you make it, I would love to see your version. Share a photo in the comments or tag it so other makers can find inspiration. And if this is your first baby set, take it slowly, enjoy the rhythm of the stitches, and know that every soft little garment is a gift of time and care.
Happy crocheting.



Leave a Reply
You must be logged in to post a comment.