


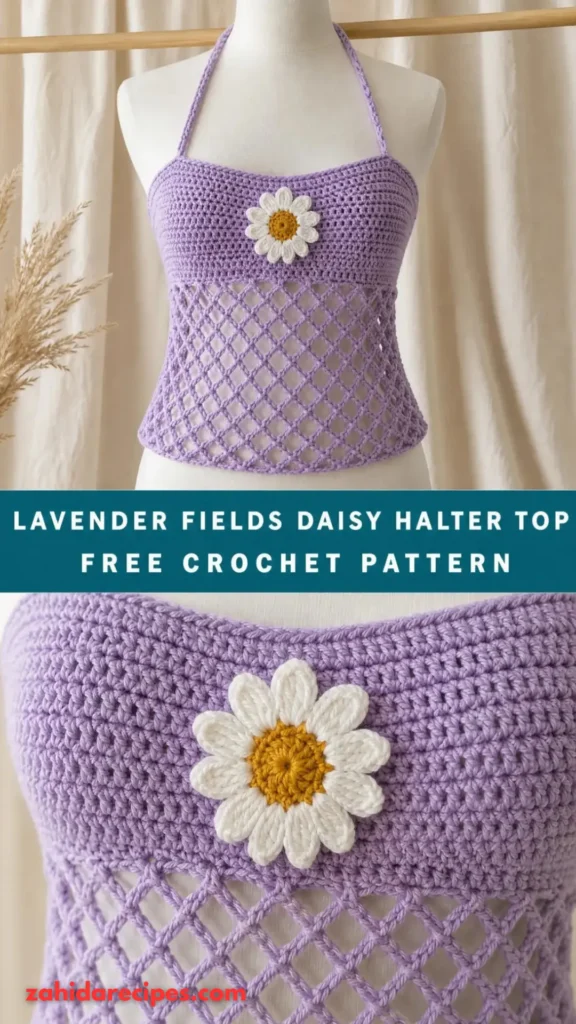
Some crochet projects are practical, while others make you smile the moment you see them. For me, floral summer tops belong firmly in the second category. There is something wonderfully cheerful about tiny daisies, soft lavender petals, and a handmade garment that feels like a little piece of summer.
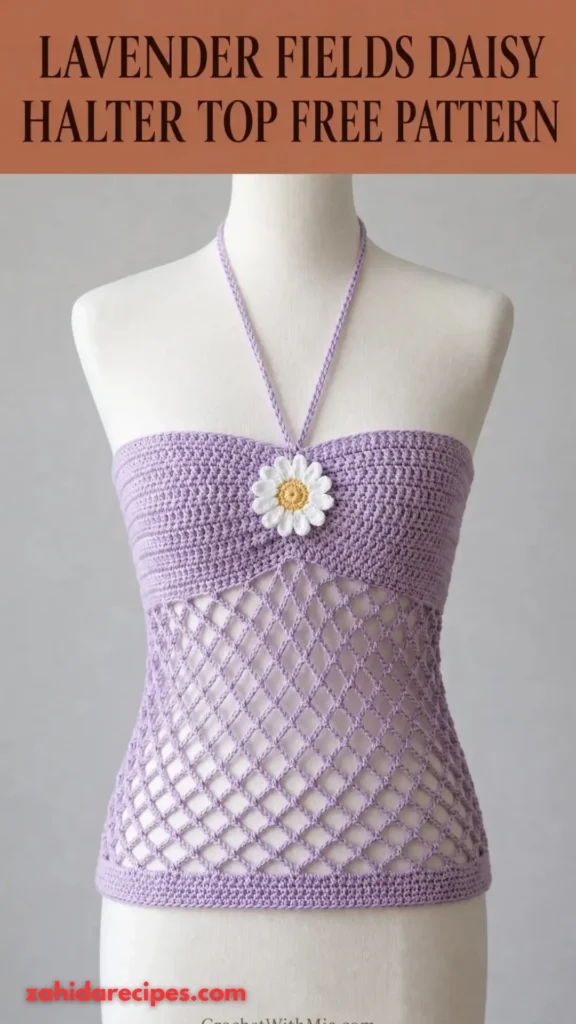
I wanted this design to capture that relaxed, cottagecore feeling without making the top too complicated to wear or style. The result is a floral halter top built from individual daisy motifs, joined into a flattering bodice and finished with adjustable ties.
This Lavender Fields Daisy Halter Top Free Crochet Pattern combines sweet floral details with a comfortable, customizable fit. It is a lovely project for confident beginners ready to learn motif construction and intermediate crocheters who enjoy making wearable pieces.
The pattern below includes sizing guidance, stitch counts, flower instructions, assembly, and finishing tips so you can create a top that feels personal from the first stitch to the last.
About This Pattern
The Lavender Fields Daisy Halter Top features soft purple-and-white flowers with sunny yellow centers, textured green-inspired accents if desired, and a simple crocheted border that ties everything together.
Instead of making one large piece of fabric, you will crochet two floral cups, shape them for a comfortable fit, and connect them with a matching lower band. Long ties at the neck and back allow you to adjust the fit without complicated closures.
- Skill level: Intermediate
- Construction: Two floral cups, a lower band, and adjustable ties
- Terminology: US crochet terms
- Sizes: XS/S, M, L, and XL
- Finished bust circumference: Approximately 28–40 inches, depending on cup size and tie adjustment
- Fit: Fitted, with adjustable ties
- Style: Cottagecore, boho, floral summerwear
The measurements are approximate because crochet tension and yarn choice affect the finished size. This design is intended as a decorative summer garment; use a comfortable lining or suitable undergarment if you prefer additional coverage.
Materials You’ll Need
Yarn
Choose a soft, breathable cotton yarn. Cotton holds floral details beautifully and is comfortable in warm weather.
| Color | Purpose | Approximate amount |
|---|---|---|
| A: Lavender | Daisy petals and accents | 100–130 yd (91–119 m) |
| B: Cream or white | Flower centers and cup details | 80–100 yd (73–91 m) |
| C: Soft yellow | Daisy centers | 20–30 yd (18–27 m) |
| D: Light lavender or cream | Borders, band, and ties | 150–200 yd (137–183 m) |
- Yarn weight: DK, category 3
- Fiber: 100% cotton or a cotton blend
- Total estimated yarn: 350–460 yd (320–420 m)
Allow 15% extra yarn if your gauge varies or you plan to lengthen the band and ties.
Crochet hooks
- 3.5 mm hook: Daisy motifs and floral details
- 4.0 mm hook: Cups, band, and ties, if needed for a softer fabric
- Smaller hook: Optional, for tighter edges
Notions
- Tapestry needle
- Stitch markers
- Scissors
- Measuring tape
- Rust-resistant pins and blocking mat
- Optional lightweight lining fabric or bra cups
Abbreviations and Terminology
All instructions use US crochet terminology.
- ch: Chain. Yarn over and pull through the loop on your hook.
- sl st: Slip stitch. Insert the hook into the stitch, yarn over, and pull through both loops.
- sc: Single crochet. Insert the hook, yarn over and pull up a loop, yarn over and pull through both loops.
- hdc: Half double crochet. Yarn over, insert the hook, pull up a loop, yarn over and pull through all three loops.
- dc: Double crochet. Yarn over, insert the hook, pull up a loop, yarn over and pull through two loops twice.
- tr: Treble crochet. Yarn over twice, insert the hook, pull up a loop, then work off two loops at a time three times.
- sp: Space, such as the opening formed by a chain.
- st(s): Stitch or stitches.
- sk: Skip a stitch or stitches.
- rep: Repeat.
- RS: Right side, the public-facing side of the fabric.
- WS: Wrong side, the inside-facing side of the fabric.
- FO: Fasten off by cutting the yarn and pulling the tail through the final loop.
Turning chains do not count as stitches unless an instruction explicitly says otherwise.
Special stitch: Daisy petal cluster
A petal cluster is worked into the same stitch or space.
- Chain 3.
- Work 2 incomplete treble crochets into the same space, leaving the final loop of each on the hook.
- Yarn over and pull through all loops on the hook.
- Chain 3 to finish the petal.
This creates a raised, rounded petal cluster.
Gauge
Gauge matters because the cups need to fit comfortably rather than stretch excessively or feel stiff.
With the 3.5 mm hook, make a small swatch using the same yarn and double crochet stitches.
Target gauge: Approximately 18 dc and 10 rows = 4 inches (10 cm).
To check your gauge:
- Chain 21.
- Dc in the third chain from the hook and across.
- Chain 2, turn, and dc across for approximately 10 rows.
- Measure the central 4-inch section.
If you have more stitches than the target, try a larger hook. If you have fewer stitches, try a smaller hook.
Daisy motifs may naturally vary slightly in width. Block one motif before making the rest so you can use it as your size reference.
Main Pattern Instructions
Step 1: Crochet the Daisy Flower Center
Use Color C, soft yellow.
Round 1: Make a magic ring. Ch 1, work 8 sc into the ring, and sl st into the first sc. Pull the ring closed.
Count: 8 sc.
FO Color C.
Join Color B, cream or white, into any sc.
Round 2: Ch 2. Work 2 dc into each sc around. Sl st into the first dc.
Count: 16 dc.
FO Color B.
The yellow center should be compact and circular, with the cream round forming a neat base for the petals.
Step 2: Add the Lavender Daisy Petals
Join Color A into any dc from Round 2.
Round 3: Ch 3, work one petal cluster into the next dc, ch 3, sl st into the following dc. Repeat around until you have eight petals. Adjust the final slip stitch if needed to keep the flower evenly spaced.
Count: 8 petal clusters.
FO Color A and weave in the ends.
Gently arrange the petals with your fingers. If the flower looks crowded, loosen your chain tension slightly on the next motif.
Step 3: Turn the Daisy Into a Square
Join Color D into a gap between two petals.
Round 4: Ch 3, then work 2 dc into the same gap. Ch 2. Work 3 dc into the next gap, ch 2, and repeat around. At four evenly spaced corners, work 3 dc, ch 2, 3 dc into the corner space. Sl st to join.
If the petal spacing does not naturally create four evenly spaced corners, place stitch markers at the four corners before working this round. Work the side groups between those marked corner spaces.
Round 5: Sl st across to the first corner space. Ch 3, work 2 dc, ch 2, and 3 dc into that corner. Work 3 dc into each side space. At each remaining corner, work 3 dc, ch 2, and 3 dc.
Sl st to join and FO.
Your square should lie flat and measure approximately 4.5–5.5 inches (11.5–14 cm), depending on yarn and tension.
Make two floral squares for the front cups. If you want flowers to continue into the lower band, make additional squares as decorative accents, but keep the front cups symmetrical.
Step 4: Shape the Two Halter Cups
Each cup is shaped individually to create a gently tapered top.
Place one square with the right side facing you and one corner pointing upward. The square will sit like a diamond.
Row 1: Ch 2, work hdc evenly along the two lower edges of the square, working 2 hdc into each dc group and 3 hdc into each corner space where necessary. Turn.
Row 2: Ch 2, hdc across until you reach the final 2 stitches. Hdc2tog over the last 2 stitches. Turn.
Row 3: Ch 2, hdc2tog over the first 2 stitches, hdc across to the final 2 stitches, hdc2tog. Turn.
Row 4: Repeat Row 3.
Continue decreasing at both ends of every row until the upper edge is narrow enough to sit comfortably toward the neckline. If your motif is already tapered, work fewer decrease rows.
FO, leaving a long tail for sewing if necessary.
Repeat for the second cup. Make sure both cups have the same number of rows and comparable measurements.
Fit check: Hold the cups against your body or a well-fitting bra. The inner edges should meet without excessive stretching. Add or remove shaping rows as needed before joining the cups.
Step 5: Join the Cups
Lay both cups with their right sides facing up.
Position them side by side, with their inner edges meeting at the center front. Overlap the edges slightly if you prefer a closer neckline.
Using Color D and a tapestry needle, sew the inner edges together with small whip stitches. Alternatively, slip stitch through corresponding edge stitches with the crochet hook.
Keep the seam flexible. A very tight seam can distort the cups and make the top uncomfortable.
Try the top on again before proceeding.
Crochet the Lower Band
The lower band stabilizes the cups and gives the top a finished edge.
With Color D, join yarn at the bottom outer edge of the left cup.
Row 1: Ch 2 and work hdc evenly across the lower edge of the left cup, across the center join, and along the lower edge of the right cup. Turn.
Rows 2–4: Ch 2, hdc in every stitch across. Turn after each row.
For a firmer band, work the last row in sc instead of hdc.
If you want a longer top, add more rows before finishing. For a cropped style, three rows may be enough.
Count check: Your stitch count should remain consistent from Row 1 onward. If the edge flares, you may have added too many stitches around the cup corners. If it pulls inward, add a few evenly spaced stitches.
Adjustable Neck and Back Ties
The ties make the halter top easier to customize.
Neck ties
Make two ties, one at each upper outer corner of the cups.
For each tie: Ch 70–90, depending on your preferred length. Sl st into the second chain from the hook and across the remaining chains, or leave the chain unworked for a softer tie.
FO and attach securely to the upper cup corners. Weave the yarn tail through several stitches.
Back ties
Join Color D at the outer end of the lower band.
Ch 80–110, then sl st back along the chain if you want a firmer cord. FO.
Repeat on the opposite side.
Tie the cords in a bow at the back. Adjust the lengths to suit your body and preferred fit.
For additional security, reinforce each attachment point with a tapestry needle and several passes of yarn. Do not rely on a single loose knot to hold a tie in place.
Special Techniques and Decorative Details
Optional daisy edging
For a more romantic finish, add small scallops along the top edge.
Join yarn at one end of the neckline.
Edging round: Sc in the next stitch, sk 1 stitch, work 5 dc in the next stitch, sk 1 stitch. Repeat where the spacing permits. Finish with a sl st and FO.
Adjust the spacing if the edge begins to ruffle. The scallops should sit flat rather than curl outward.
Optional green leaf accents
If you have leftover green yarn, make tiny leaves for the spaces near the flower centers.
Ch 6. Sl st in the second chain from the hook, sc in the next chain, hdc in the next, dc in the next, and work 3 sc in the final chain. Turn and work back along the opposite side of the chain with dc, hdc, sc, and sl st.
FO, leaving a tail for sewing.
Attach the leaves sparingly around the flowers or lower band. Keep them away from the cup seams and tie attachment points so they do not interfere with the fit.
Assembly and Finishing
Before weaving in every remaining end, try the top on and check the fit.
- Check cup alignment. Both cups should sit at the same height and angle.
- Secure the center seam. Add a few extra stitches if the seam pulls apart when the cups are gently stretched.
- Attach the ties. Reinforce each attachment point, then tug gently to check that it feels secure.
- Weave in loose ends. Thread each tail through several stitches on the wrong side, changing direction once to help prevent unraveling.
- Check coverage. Make sure the cups overlap or meet as intended. Add shaping rows or a small lining if necessary.
- Test the band. It should lie comfortably against your body without digging in.
A removable lining can improve comfort and coverage while allowing the floral crochet to remain the star of the design.
Blocking and Care
Blocking helps the flower petals and square edges look neat.
Wet blocking for cotton yarn
- Fill a basin with cool or lukewarm water and a small amount of gentle detergent.
- Submerge the finished top and allow it to soak for 10–15 minutes.
- Lift it carefully, supporting the weight of the wet garment.
- Press out excess water without wringing.
- Roll the top in a clean towel.
- Lay it flat on a blocking mat and gently arrange the petals, cups, band, and ties.
- Pin the edges in place and allow the top to dry completely.
Avoid stretching the cups too aggressively, since this can alter the fit.
Washing and storage
- Hand wash in cool water when possible.
- Avoid bleach and harsh detergents.
- Do not wring or twist the garment.
- Dry flat rather than hanging it while wet.
- Store folded in a drawer to protect the flower shapes.
If you use a cotton blend, check the yarn label for its specific care requirements.
Fit and Troubleshooting Tips
The cups feel too small
Add shaping rows or use a larger hook for the cup section. You can also make the initial floral squares larger by adding another granny-style round.
The cups gape at the top
Add an extra decrease row or tighten the neck ties slightly. Make sure the cups are positioned correctly before sewing the center seam.
The lower band curls
Check your stitch count and work one additional row of sc. If the fabric is still curling, block it gently and reassess the tension.
The flower petals look uneven
Try to keep your chain lengths and petal clusters consistent. Blocking and gently arranging the petals while damp can improve the overall appearance.
The ties stretch too much
Use a smaller hook for the ties or work slip stitches back along the chain. Reinforce the attachment points with extra sewing stitches.
You need a larger size
Increase the floral square size, add cup shaping rows where needed, and lengthen the back ties. Adjust one component at a time and check the fit before completing the second cup.
Remember that the listed bust range is approximate. Cup depth, body shape, yarn stretch, and preferred coverage all affect the final result.
You Might Also Like:
- Mustard Yellow Autumn Tote Free Crochet Pattern
- Winter White Camellia Crochet Bracelet Free Pattern
- Midnight Navy Classic Granny Backpack Free Crochet Pattern
- Monochrome Gray Granny Square Tote Free Crochet Pattern
Final Thoughts
There is something special about wearing a piece you made yourself, especially when it is covered in tiny daisies. The Lavender Fields Daisy Halter Top Free Crochet Pattern brings together cheerful flowers, soft lavender tones, and adjustable details for a handmade summer piece that feels both playful and personal.
Take your time with the shaping, check the fit as you go, and don’t worry if your first flower isn’t perfectly symmetrical. Handmade details are part of the charm.
You can experiment with lilac and cream, add green leaves, or try a pastel palette that feels like your own little garden. Once your top is finished, share your version with fellow crocheters or save it to your crochet inspiration board.
Happy crocheting, and may your summer be full of flowers, sunshine, and beautiful handmade things!


Leave a Reply
You must be logged in to post a comment.