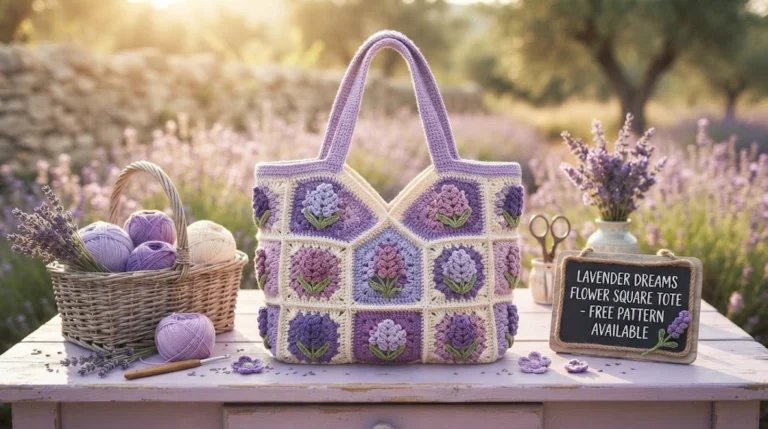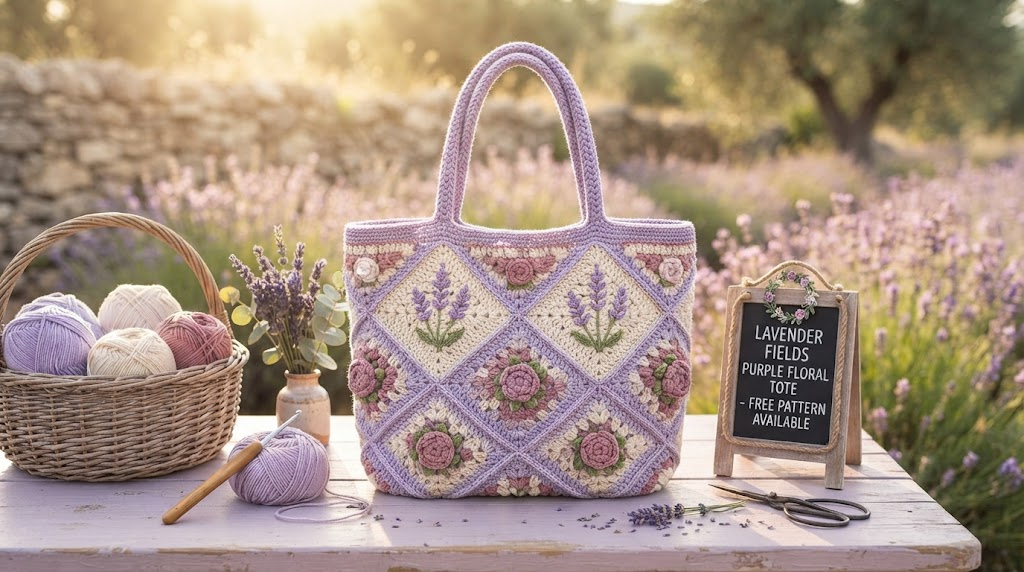
Lavender Fields Purple Floral Tote Free Crochet Pattern
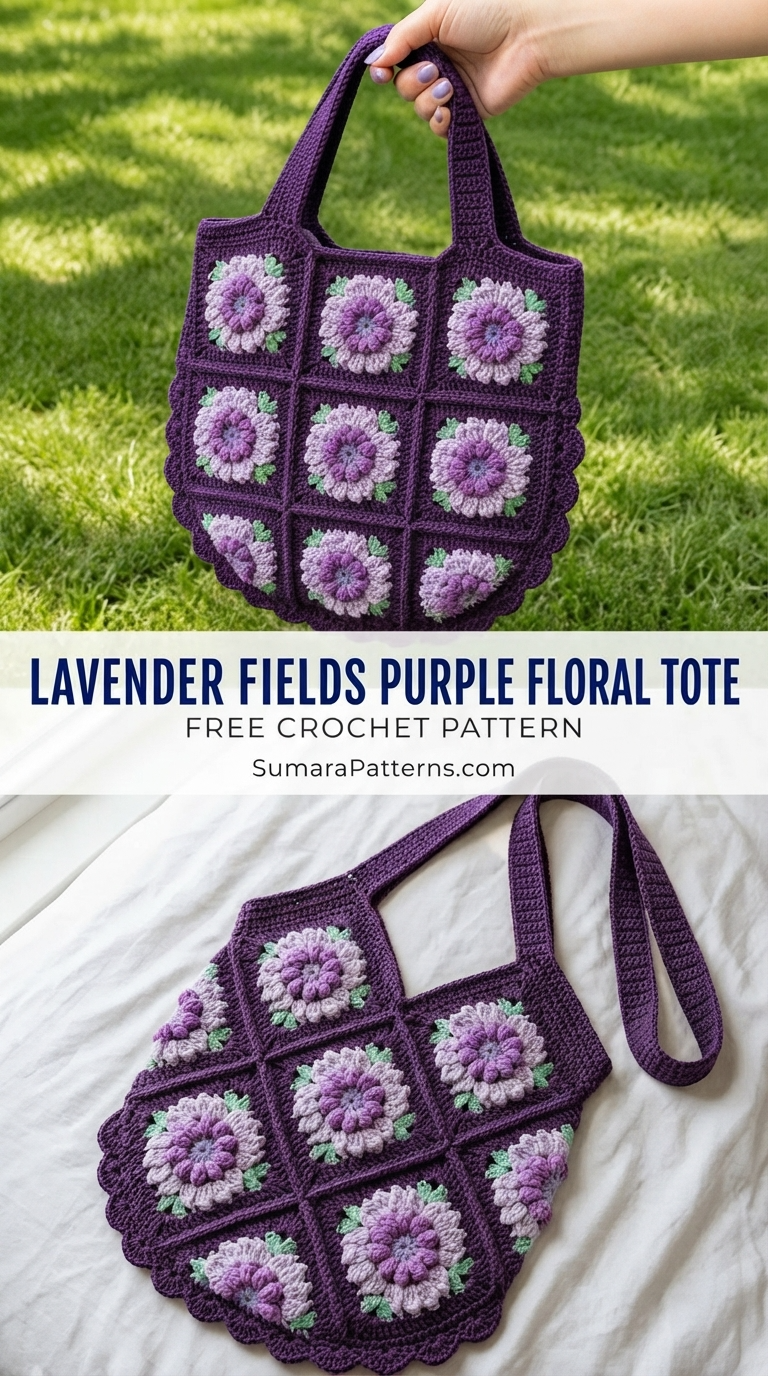
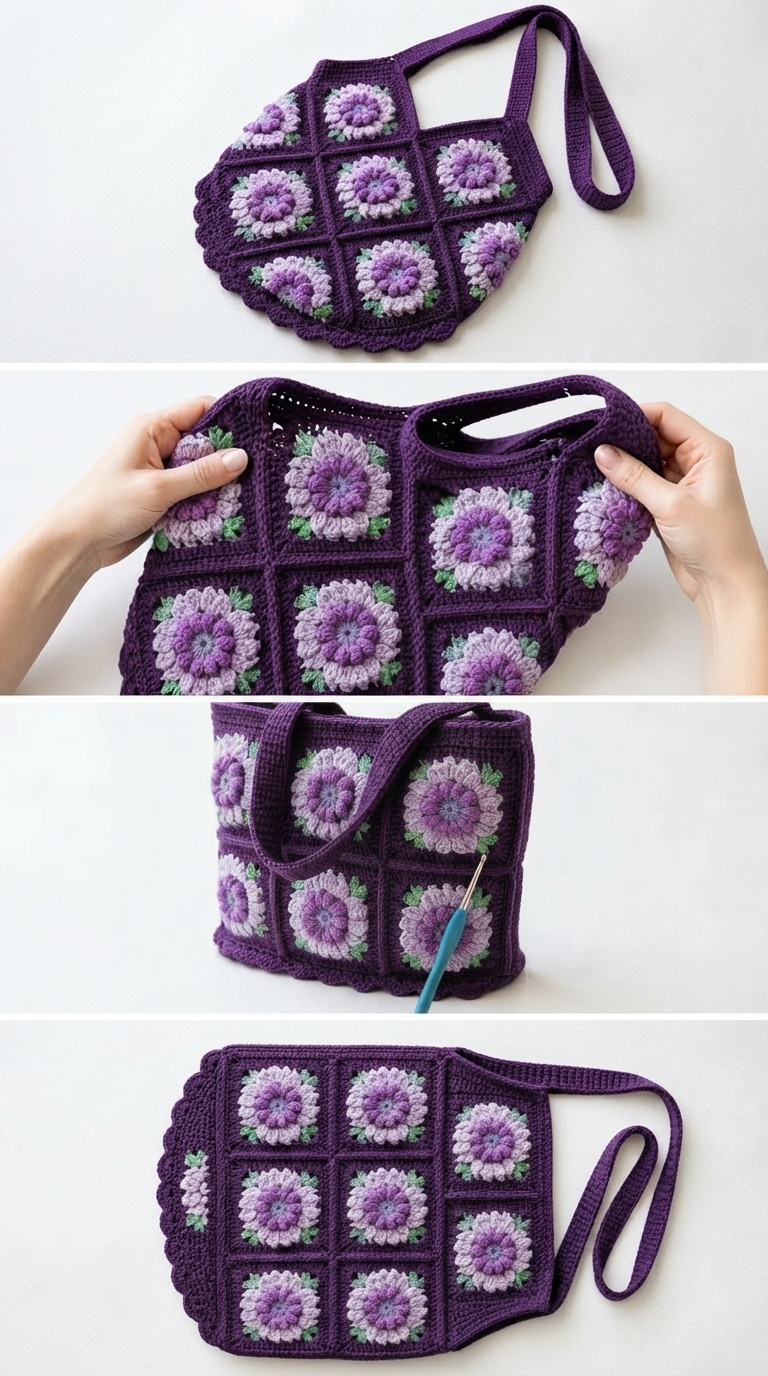
Ready to stitch something that looks fancy but feels totally doable? This lavender fields purple floral tote brings raised puff-stitch flowers, soft mint leaves, and a rich purple frame together in one sturdy bag. You get eighteen floral granny squares, a deep gusset, a scalloped bottom edge, and a long shoulder strap that actually holds up to real life. Grab your hook and let’s make a tote that turns heads every time you carry it.
Why This Floral Tote Stands Out
Most granny-square bags look flat. This one does not. The puff-stitch centers sit up off the fabric like real flower heads, while the mint-green leaf loops give each square a fresh, spring-field feel. The deep purple outer rounds form a clean grid once you join everything, so the whole bag looks intentional instead of piecy.
You end up with a structured tote that measures about 14 inches wide by 13 inches tall (not counting the strap) and has a solid 3-inch depth. Perfect for market runs, library books, or just looking put-together on a weekend outing.
Skill Level and Time Commitment
Call this intermediate. You need to know basic granny squares, work in rounds, change colors cleanly, and handle a simple flat join. The puff stitch is the only “new” move, and once you nail the even height on those loops, it becomes muscle memory.
Plan on 20–30 hours total. Each square takes 30–45 minutes. Joining, the gusset, scallops, and strap add another 6–8 hours. Spread it over a couple of weeks and it never feels like a slog.
Finished Size and Materials
Finished bag: roughly 14″ wide × 13″ tall × 3″ deep (35.5 × 33 × 7.5 cm).
Each square: 4.5″ (11.5 cm) after blocking.
Yarn (worsted weight / category 4):
- Color A (deep purple) – about 800 yards (730 m)
- Color B (light lavender) – about 400 yards (365 m)
- Color C (medium purple) – about 150 yards (137 m)
- Color D (dusty lilac or pale lavender-pink) – about 100 yards (91 m)
- Color E (soft mint green) – about 100 yards (91 m)
Hook: US J-10 / 6.0 mm
Other stuff: yarn needle, scissors, at least 6 stitch markers, rust-proof pins for blocking. Optional lining fabric (14″ × 14″) plus sewing supplies if you want a fabric interior.
Smooth worsted works best. Fuzzy yarns hide the puffs. Cotton or cotton blends give extra structure and wash easily.
Gauge
One finished square = 4.5″ (11.5 cm) square, blocked.
In single crochet: 14 sc and 16 rows = 4″ (10 cm).
Swatch and switch hooks if needed so your squares match.
Abbreviations and Special Stitches
US terms throughout.
beg = beginning • ch = chain • ch-sp = chain space • dc = double crochet • hdc = half double crochet • ps = puff stitch • rep = repeat • rnd = round • RS = right side • sc = single crochet • sk = skip • sl st = slip stitch • sp = space • st(s) = stitch(es) • WS = wrong side • yo = yarn over
Puff stitch (ps)
- Yo, insert hook into stitch or space, yo, pull up a loop to the height of a dc (3 loops).
- Yo, insert hook into same place, yo, pull up a loop to the same height (5 loops).
- Yo, insert hook into same place again, yo, pull up a loop (7 loops).
- Yo, draw through all 7 loops.
Keep every loop the same height so the puffs stay plump and even.
3-dc cluster
Yo, insert, yo, pull up, yo, draw through 2 (2 loops left).
Repeat twice more in the same stitch (4 loops left).
Yo, draw through all 4.
Scallop stitch
Sk 2 sts, work 5 dc into next st, sk 2 sts, sl st into next st. One scallop spans 6 stitches.
Flat join
Hold two squares RS facing each other. Insert hook through both layers of corresponding stitches, draw up Color A, ch 1, then sc through both layers across the edge. You get a neat purple ridge on the right side.
Pattern Notes
All rounds are worked on the right side unless the instructions say otherwise.
Ch 3 at the start of a dc round counts as the first dc.
Ch 2 at the start of an hdc round counts as the first hdc.
Change colors by pulling the new color through the last two loops of the old stitch.
Fasten off and weave ends after every color change unless told to carry the yarn.
Puff stitches sit in chain spaces so they pop up off the fabric.
Block every square before you join them.
Step-by-Step Instructions
Granny Square (Make 18)
Start with Color B and a magic ring (or ch 4 and join).
Round 1 (Color B): Ch 1 (does not count as st), 8 sc into the ring. Join with sl st to first sc. Fasten off. (8 sc)
Round 2 (Color C): Join with sl st to any sc. Ch 1. Work 1 ps into the same sc, ch 1. (1 ps, ch 1) into each sc around. Join to top of first ps. Fasten off. (8 puff stitches, 8 ch-1 spaces)
Round 3 (Color D): Join with sl st to any ch-1 sp. Ch 2 (counts as first hdc), 2 hdc into same sp. 3 hdc into each ch-1 sp around. Join to top of beg ch-2. Fasten off. (24 hdc)
Round 4 (Color B): Join with sl st to the space between any two 3-hdc groups. Ch 3 (counts as first dc), 2 dc into same space, ch 1. (3 dc, ch 1) into each space between groups around. Join to top of beg ch-3. Fasten off. (8 groups of 3 dc, 8 ch-1 spaces)
Round 5 (Color E): Join with sl st to any ch-1 sp. Ch 1. (1 sc, ch 3, 1 sc) into each ch-1 sp around. Join to first sc. Fasten off. (16 sc, 8 ch-3 leaf loops)
Round 6 (Color B): Join with sl st to the top of any dc from Round 4, working behind the leaf loops. Ch 3 (counts as first dc). Working behind the leaf loops the whole way: 1 dc into each of the next 2 dc, 1 dc into the ch-1 sp, 1 dc into each of the next 3 dc, 1 dc into the next ch-1 sp. Repeat around. Join to top of beg ch-3. Fasten off. (32 dc)
Checkpoint: motif measures about 2.75″ (7 cm). Leaves stand up, puffs are raised.
Round 7 (Color A): Join with sl st to any dc. Ch 3, 1 dc into each of next 3 dc. (2 dc, ch 2, 2 dc) into next dc for corner. 1 dc into each of next 4 dc. Repeat corner and side around. Join. (48 dc, 4 ch-2 corners)
Note: the 32 dc divide into four groups of 8. Place a corner in the 4th dc of every group.
Round 8 (Color A): Sl st into next dc. Ch 3, dc in each dc to corner ch-2, (2 dc, ch 2, 2 dc) into corner. Repeat around. Join. (64 dc, 4 ch-2 corners) – 14 dc per side.
Round 9 (Color A): Same as Round 8. (80 dc, 4 ch-2 corners) – 18 dc per side.
Fasten off, weave ends, block to 4.5″ (11.5 cm). Make 18 identical squares.
Joining the Squares into Panels
Each panel is a 3 × 3 grid (about 13.5″ square before the gusset).
Arrange nine squares RS up. You can line up the leaf points for a tidy look or mix them for a relaxed vibe.
Vertical joins first: hold two squares RS together. With Color A and the flat-join method, sc through both layers along the shared edge (about 20 sc including corners). Do this for all three rows (six seams per panel).
Horizontal joins next: join the rows the same way (two seams per panel).
Make a second panel the same way for the back.
Gusset Strip
Color A, ch 12.
Row 1: sc in 2nd ch from hook and each ch across, ch 1, turn. (11 sc)
Rows 2 onward: sc across, ch 1, turn.
Keep going until the strip measures 68″ (173 cm). Fasten off. Width stays about 3″ (7.5 cm).
Assembling the Bag Body
Pin the gusset strip around three sides of the front panel (right side, bottom, left side), RS out. Sc the strip to the panel edge with Color A, working 3 sc at the bottom corners for ease. Fasten off.
Attach the back panel the same way to the opposite long edge of the gusset. Top stays open.
You now have a three-dimensional bag roughly 14″ × 13″ × 3″.
Scallop Border
Join Color A at the bottom-right corner seam.
Round 1: ch 1, sc evenly around the lower perimeter (aim for a multiple of 6 plus 1; 120 sc works well). Join.
Round 2: ch 1, sl st in first sc. Sk 2, 5 dc in next, sk 2, sl st in next. Repeat around for 20 scallops. Fasten off.
Strap
Color A, ch 15.
Row 1: sc in 2nd ch and each across, ch 1, turn. (14 sc)
Rows 2–140 (or until strip is 44″ / 112 cm long): sc across, ch 1, turn.
Fold the strip in half lengthwise. Whipstitch or slip-stitch the long open edge closed so the strap is about 2″ (5 cm) wide and 44″ long.
Attaching the Strap and Top Edge
Fold each strap end back 3″ to form a loop. Pin the loops to the inside top edge of the front and back panels, centered. Sew firmly with a box stitch (rectangle plus diagonal cross) using Color A and a yarn needle.
Join Color A at the top-right corner of the opening.
Round 1: ch 1, sc evenly around the entire top edge (about 92 sc). Join.
Round 2: ch 1, hdc in each sc around. Join and fasten off. You get a clean, sturdy rim.
Optional Lining and Size Tweaks
Cut two 14.5″ × 13.5″ pieces and one 3.5″ × 68″ strip of fabric. Sew with ½″ seams, insert, and slip-stitch the top edge just under the hdc rim.
Want bigger? Go 4 × 4 squares per panel. Smaller clutch? Try 2 × 2. Change the gusset starting chain to adjust depth. Switch to DK yarn and a smaller hook for tinier squares.
Finishing, Blocking, and Care
Wet-block every square to 4.5″ before joining. After the bag is complete, lightly mist and reshape; stuff with towels so it dries rectangular.
Acrylic: gentle machine wash cold, lay flat. Wool: hand wash cool, reshape, lay flat. Never iron the puff centers—you’ll squash the flowers. Store folded or on a wide hanger.
Related Articles:
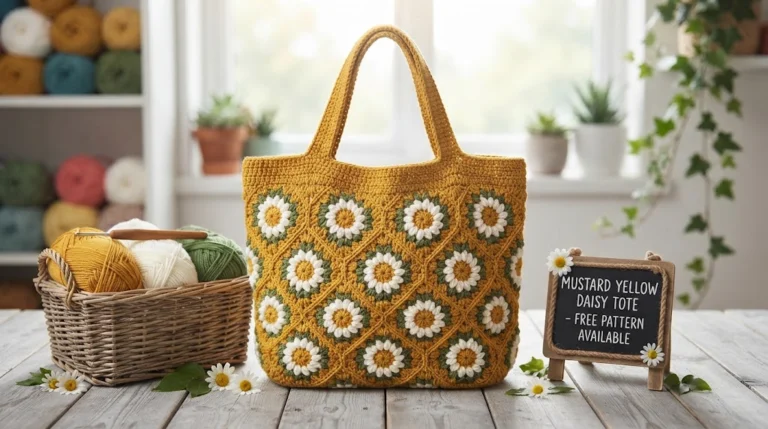
- Mustard Yellow Daisy Tote Free Crochet Pattern
- Monochrome Minimalist Jellyfish Free Crochet Pattern
- Lavender Purple Jellyfish Keychain Free Crochet Pattern
You Did It!
Eighteen little purple flowers, a solid gusset, scalloped hem, and a strap that can handle a full day’s haul. That is a tote worth showing off. Drop a photo of your finished bag somewhere I can see it—color swaps are always fun to look at. Happy stitching, and may your next project be just as satisfying.