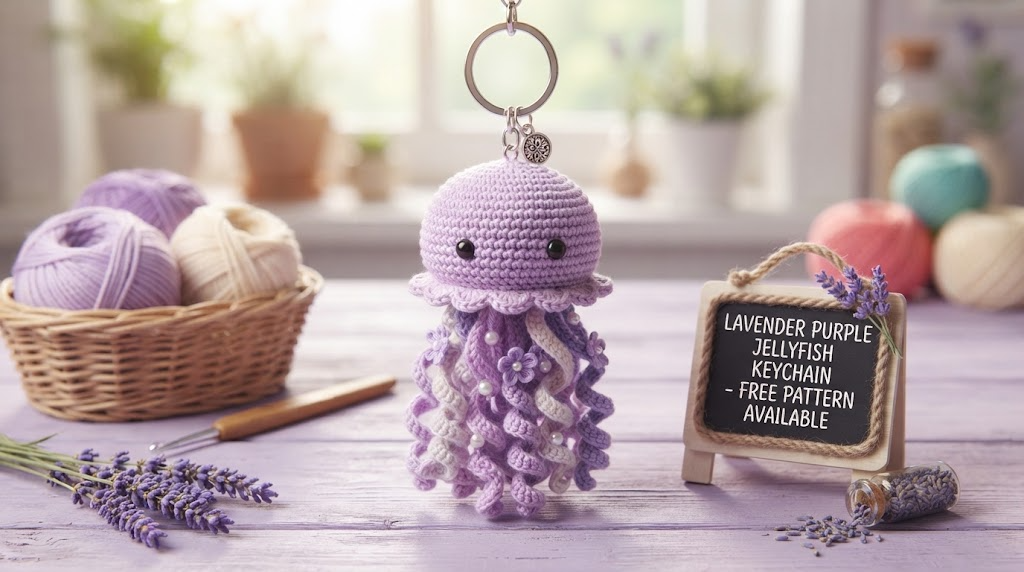
Lavender Purple Jellyfish Keychain Free Crochet Pattern
Amigurumi jellyfish look tricky, right? All those curly tentacles and the pretty ruffled edge can make anyone pause. Here’s the real talk though—if you can single crochet in a circle and make a basic chain, you can nail this cute lavender jellyfish keychain. It works up fast, uses tiny bits of yarn, and turns out looking way fancier than the effort you put in.
This little sea buddy hangs perfectly from keys, bags, or zippers. Soft purple tones mixed with white and mauve give it that dreamy ocean vibe. Ready to hook one up? Let’s break it all down so it feels easy from the first stitch.
Why This Jellyfish Keychain Wins Every Time
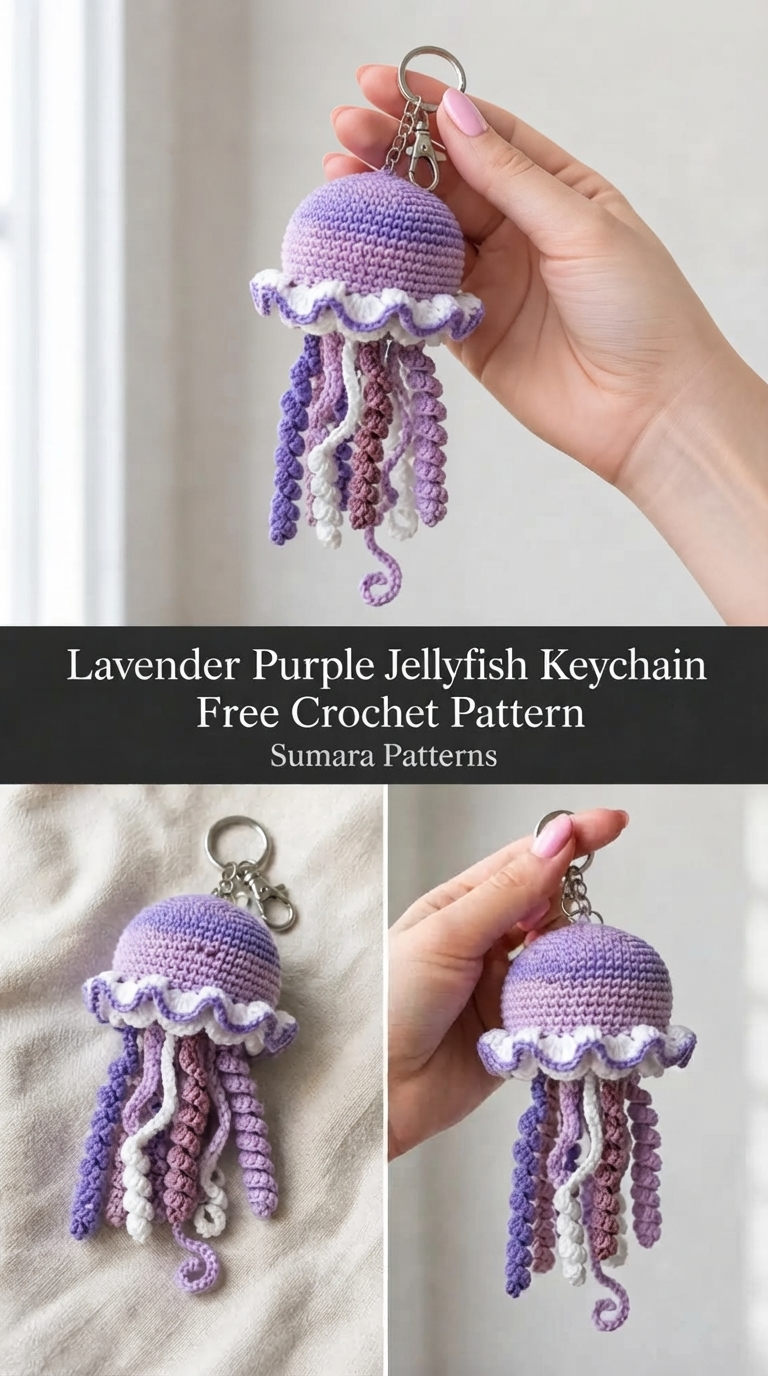
This project hits the sweet spot between cute and practical. The finished jellyfish measures about 2.5 inches across the bell and stretches 5.5 to 6 inches long once you add the tentacles. Small enough to clip onto your bag without weighing it down, but detailed enough that people will stop and ask where you got it.
The color mix uses soft lavender, white, medium purple, mauve, and pale lilac. You only need scraps of each shade, so dig into those leftover mini skeins you’ve been saving. Construction stays simple: crochet the bell, add the ruffle right onto it, make the tentacles separately, then sew them on. No weird joins or advanced shaping tricks.
IMO, projects like this are perfect when you want something fun that still feels productive. One afternoon and you’ve got a finished keychain ready to gift or keep.
Grab These Materials Before You Start
You won’t need much. Gather everything first so you can stay in the flow.
Yarn (DK or Fingering Weight):
- Color A: Light Purple or Lavender – about 25 yards
- Color B: White – about 10 yards
- Color C: Medium Purple or Violet – about 15 yards
- Color D: Mauve or Dusty Rose – about 10 yards
- Color E: Pale Lilac or Light Mauve – about 8 yards
Hook: US size D/3 (3.25 mm)
Notions:
- Small amount of polyester fiberfill stuffing
- Yarn needle for weaving ends
- Scissors
- Stitch marker (locking style works best)
- One silver-tone keychain ring with lobster clasp
- One small 8 mm split ring or jump ring (optional but helpful)
Yarn Ideas That Work Great
Lion Brand Bonbons packs are perfect here. The purple-heavy color sets match all five shades without buying full skeins. Paintbox Yarns Simply DK also offers solid options like Pansy Purple, Dusty Rose, White, and Lilac at a friendly price. Prefer cotton? Scheepjes Catona gives a slightly stiffer finish that holds up well on a keychain that gets handled a lot.
Stick with fingering to DK weight. Skip anything bulky or super textured—those yarns hide the pretty stitch definition and make the ruffle look messy.
Gauge Check (Yes, It Matters)
Aim for 7 single crochet stitches = 1 inch / 2.5 cm
7 rows or rounds = 1 inch / 2.5 cm
Make a quick test circle: magic ring, 6 single crochet, then keep increasing until you hit about 24 stitches. Measure across the flat circle. Change hook size until the numbers match.
Why bother? Loose stitches let stuffing peek through. Tight stitches make it hard to insert your hook. A few minutes now saves frustration later.
Abbreviations and What They Mean
Here’s every abbreviation you’ll see so nothing slows you down:
- ch = chain: Yarn over, pull through the loop on your hook.
- sl st = slip stitch: Insert hook into stitch, yarn over, pull through both the stitch and the loop on your hook.
- sc = single crochet: Insert hook, yarn over, pull up a loop, yarn over, pull through both loops.
- sc2tog = single crochet two together (invisible decrease): Insert hook into front loop only of next stitch, then front loop only of the following stitch. Yarn over, pull through both loops, yarn over, pull through remaining two loops.
- inc = increase: Work 2 single crochet into the same stitch.
- MR = magic ring: Adjustable loop that closes tight with no hole in the center.
- st/sts = stitch/stitches
- rnd = round
- rep = repeat
- BLO = back loop only
- FLO = front loop only
Special Techniques That Make the Magic Happen
Two little tricks create the best details on this jellyfish.
The Spiral Tentacle Method
Chain the number listed, then work 3 single crochet into each chain stitch going back. Packing three stitches into every chain forces the strip to spiral automatically. Keep tension even so the curls stay consistent. Too loose? Tighten up. No spiral at all? Double-check that you’re really putting three single crochets in each chain.
The Ruffled Collar Method
Join yarn to the right round on the finished bell. Work (slip stitch, chain 2, 3 single crochet, chain 2, slip stitch) all into the same stitch, then move to the next stitch and repeat. Crowding that many stitches onto one foundation round makes the ruffles bunch and fan out naturally.
Pattern Notes to Read First
- The bell works in continuous rounds. You spiral upward without joining. Mark the first stitch of each round and move the marker as you go.
- Do not chain 1 at the start of rounds unless the pattern says so.
- Keep the right side facing out the whole time. The little V shapes of the single crochet should face you.
- Make the keychain loop at the crown of the bell while the piece is still open. Skipping it makes life harder later.
- Leave a 6-inch tail when you fasten off for sewing. Leave a 10-inch tail for attaching tentacles.
- Stuff the bell firmly but not rock-hard. Think of a soft stress ball—solid with a little give.
Step-by-Step Instructions
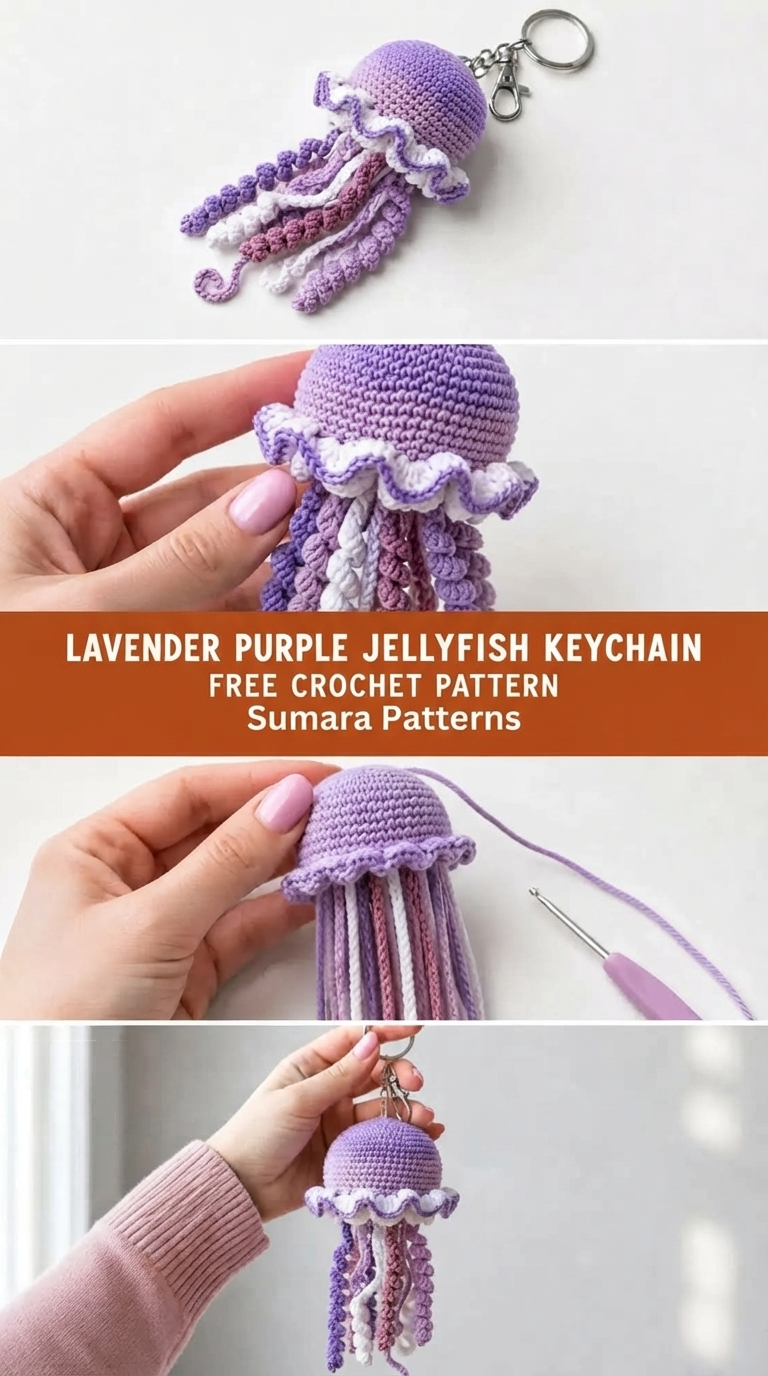
Time to crochet! Follow each part in order and you’ll have a finished jellyfish before you know it.
Part One: The Bell (Color A, Lavender)
Round 1: Make a magic ring. Work 6 sc into the ring. Pull the ring closed. (6 sc)
Round 2: Inc in each stitch around. (12 sc)
Round 3: (Sc in next st, inc in next st) repeat 6 times. (18 sc)
Round 4: (Sc in next 2 sts, inc in next st) repeat 6 times. (24 sc)
Round 5: (Sc in next 3 sts, inc in next st) repeat 6 times. (30 sc)
Round 6: (Sc in next 4 sts, inc in next st) repeat 6 times. (36 sc)
Round 7: (Sc in next 5 sts, inc in next st) repeat 6 times. (42 sc)
Round 8: Sc in each st around. (42 sc)
Round 9: Sc in each st around. (42 sc)
Round 10: Sc in each st around. (42 sc)
Round 11: Sc in each st around. (42 sc)
Checkpoint: Your bell should measure about 2.5 inches across at the widest point. It should look like a domed hemisphere with the open edge facing down.
Round 12: (Sc in next 5 sts, sc2tog) repeat 6 times. (36 sc)
Round 13: (Sc in next 4 sts, sc2tog) repeat 6 times. (30 sc)
Round 14: (Sc in next 3 sts, sc2tog) repeat 6 times. (24 sc)
Important: Stuff the bell now. Push fiberfill into the dome evenly. Leave the bottom open for now.
Round 15: (Sc in next 2 sts, sc2tog) repeat 6 times. (18 sc)
Round 16: (Sc in next st, sc2tog) repeat 6 times. (12 sc)
Round 17: Sc2tog 6 times. (6 sc)
Fasten off, leaving a 6-inch tail. Thread the tail onto your yarn needle, run it through the front loops of all 6 remaining stitches, pull tight to close, and weave in. This spot becomes the bottom center and will hide under the tentacles.
Creating the Keychain Loop
Before you fully close Round 17, cut a 10-inch piece of Color A yarn. Fold it in half so the loop measures about 1 inch. Thread both tails down through the center of the crown (the original magic ring point) from outside to inside. Tie the tails securely inside the bell with a square knot. Trim the ends to about 1 inch.
The folded loop should stick up roughly 0.75 inch above the bell. Slide your lobster clasp and keychain ring onto this loop. Adding a metal jump ring for extra strength is optional but smart.
Part Two: The Collar Ruffle
The collar sits on Round 11 of the bell—the last even round before decreases start. That’s the widest part of the dome.
Join Color B (White) with a slip stitch to any stitch of Round 11.
Foundation Ruffle Round: Working into Round 11 stitches, (sl st into next st, ch 3, 4 sc into the 3rd ch from hook, sl st into the same st of Round 11) repeat around all 42 sts. Join with sl st to first sl st. (42 ruffle petals)
Each petal shares its base stitch with the slip stitches. The petals will fold and bunch together for a full ruffle look.
Collar Edging Round: Join Color A (Lavender) with a sl st to the top of any petal. (Sl st, ch 1, sl st) into the tip of each petal around. Join. Fasten off and weave in ends.
This lavender outline along the white edge adds a pretty two-tone finish.
Part Three: Making the Tentacles
Every tentacle uses the spiral method. Work each one separately and leave a long tail for sewing. Different chain lengths create natural movement when they hang together.
Color A (Lavender), make 4:
- Tentacle A1: Ch 20. Work 3 sc in each ch across. Fasten off with 10-inch tail. (60 sc)
- Tentacle A2: Ch 24. Work 3 sc in each ch across. Fasten off with 10-inch tail. (72 sc)
- Tentacle A3: Ch 18. Work 3 sc in each ch across. Fasten off with 10-inch tail. (54 sc)
- Tentacle A4: Ch 22. Work 3 sc in each ch across. Fasten off with 10-inch tail. (66 sc)
Color C (Medium Purple), make 3:
- Tentacle C1: Ch 22. Work 3 sc in each ch across. Fasten off with 10-inch tail. (66 sc)
- Tentacle C2: Ch 20. Work 3 sc in each ch across. Fasten off with 10-inch tail. (60 sc)
- Tentacle C3: Ch 18. Work 3 sc in each ch across. Fasten off with 10-inch tail. (54 sc)
Color D (Mauve), make 3:
- Tentacle D1: Ch 24. Work 3 sc in each ch across. Fasten off with 10-inch tail. (72 sc)
- Tentacle D2: Ch 20. Work 3 sc in each ch across. Fasten off with 10-inch tail. (60 sc)
- Tentacle D3: Ch 22. Work 3 sc in each ch across. Fasten off with 10-inch tail. (66 sc)
Color E (Pale Lilac), make 2:
- Tentacle E1: Ch 20. Work 3 sc in each ch across. Fasten off with 10-inch tail. (60 sc)
- Tentacle E2: Ch 18. Work 3 sc in each ch across. Fasten off with 10-inch tail. (54 sc)
Color B (White), make 2:
- Tentacle B1: Ch 20. Work 3 sc in each ch across. Fasten off with 10-inch tail. (60 sc)
- Tentacle B2: Ch 24. Work 3 sc in each ch across. Fasten off with 10-inch tail. (72 sc)
You end up with 14 tentacles total. That full cluster looks lush and complete.
Part Four: Attaching the Tentacles
Thread each tentacle tail onto a yarn needle. Insert the needle up through the closed bottom of the bell, spacing the tentacles evenly around the underside. Bring the needle out and back in a couple of times to lock each one in place. The free spiral ends should hang down.
Arrangement tip: Put Color A and Color C tentacles toward the front and sides. Cluster Color D and Color E more toward the middle. Space the white ones evenly so they pop from every angle. The mixed lengths create depth on their own.
Once everything is attached, weave the remaining tails securely inside the bell. Give the tentacles a gentle shake so they settle naturally.
Final Checkpoint: Your finished jellyfish should measure about 5.5 to 6 inches from the top of the keychain loop to the tip of the longest tentacle.
Want to Customize the Size?
Easy tweaks let you make it bigger or smaller.
For a larger jellyfish: Work 2 to 3 extra even rounds between Rounds 11 and 12. Add 6 stitches to each tentacle starting chain. Keep the ruffle on the last even round before decreases.
For a smaller jellyfish: Stop increasing after Round 5 (30 stitches) instead of Round 7. Work 3 even rounds, then start decreasing. Subtract 4 to 6 chains from each tentacle.
For different yarn weights: Use fingering weight and a US B/1 (2.25 mm) hook for a tiny 1.5-inch charm. Use worsted weight and a US G/6 (4.0 mm) hook for a bigger 4-inch bag charm.
Related Articles:
- Sage Garden Granny Square Tote Free Crochet Pattern
- Pastel Rainbow Jellyfish Amigurumi Free Crochet Pattern
- Blueberry Bat Amigurumi Free Crochet Pattern
You Did It!
Look at that adorable lavender jellyfish hanging from your keyring. The curly tentacles, soft ruffle, and perfect little dome all came together with basic stitches and a few smart tricks. This project proves amigurumi can be quick, fun, and totally doable even if you’re still building confidence.
Clip it to your bag, gift it to a friend, or make a whole school of them in different color combos. Either way, you just made something cute with your own two hands—and that always feels pretty great.
Happy stitching from the Sumara Patterns team!