Sage Garden Granny Square Tote Free Crochet Pattern
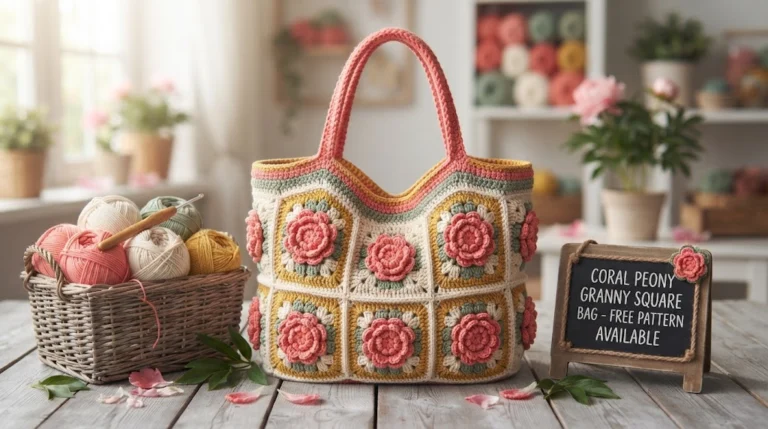
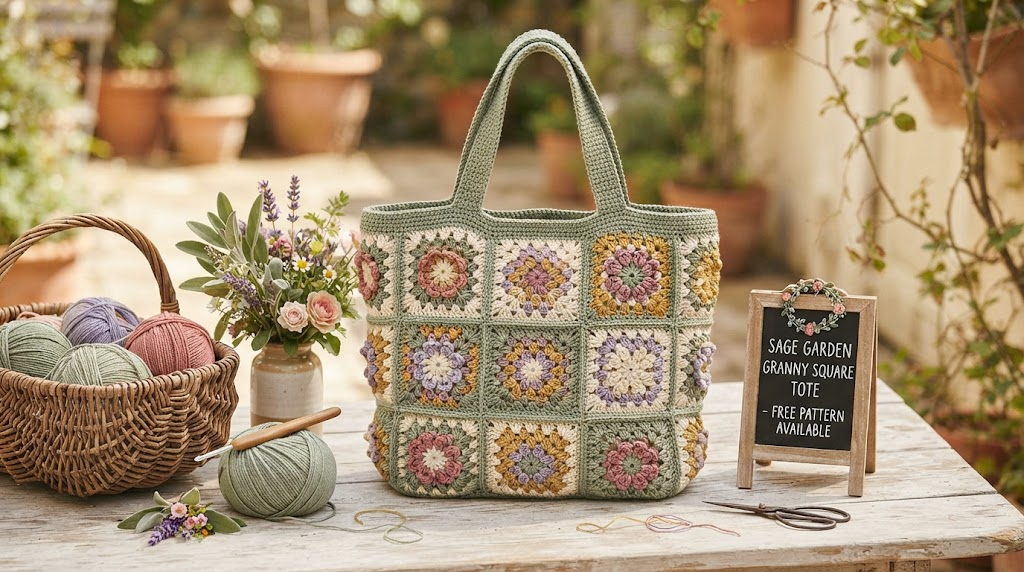
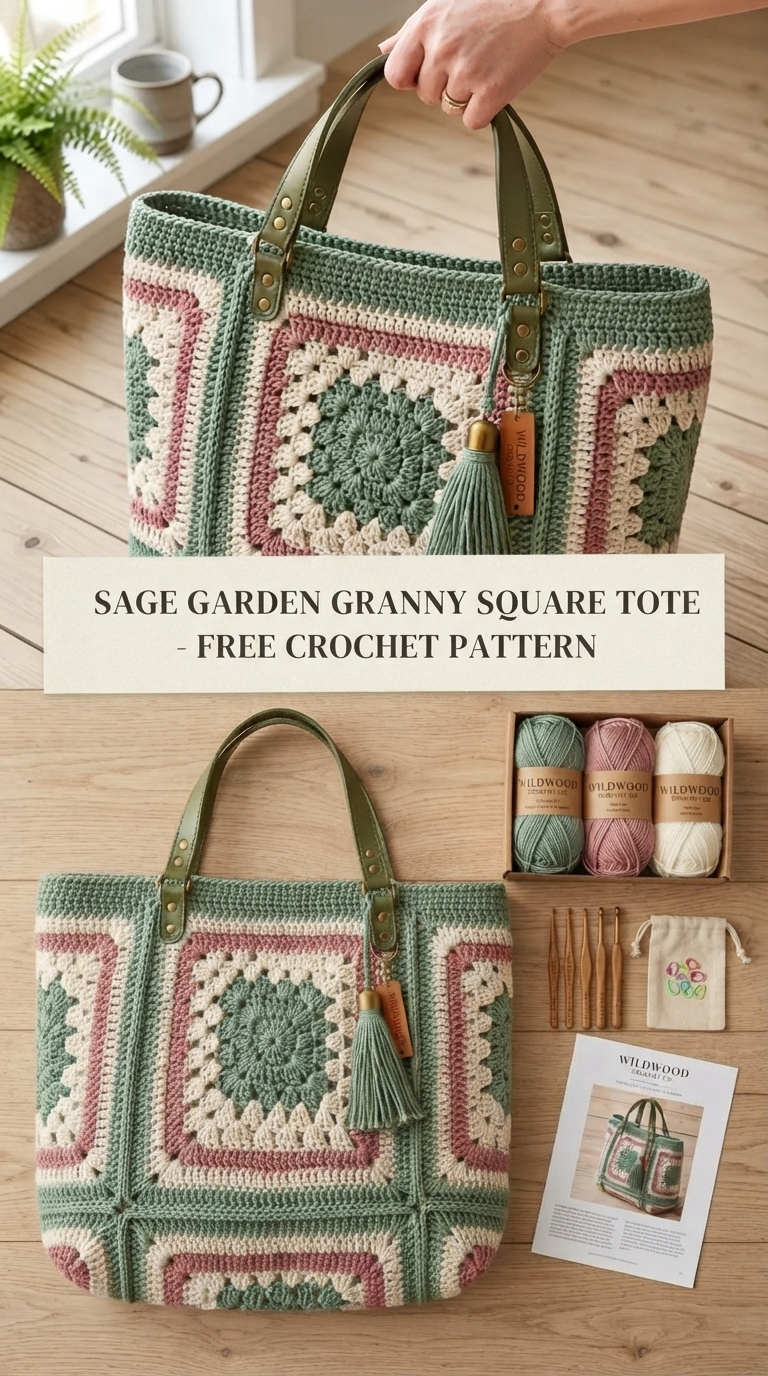
Ever spotted a vintage bag at a flea market and immediately wanted to recreate it in yarn? That’s exactly how this Sage Garden Granny Square Tote came to life. Soft sage green, dusty rose, and creamy neutrals come together in classic granny squares that look polished and practical at the same time. This free crochet pattern gives you a structured tote that stands up on its own, holds your everyday stuff, and feels just fancy enough to carry around town.
Why This Tote Feels Special
The design mixes traditional granny square motifs with solid half-double crochet panels. You get pretty texture on the front and back, plus a sturdy base and side gussets that keep everything looking neat. No floppy bag syndrome here.
It’s roomy enough for a wallet, phone, keys, a book, and maybe a snack or two. The olive-toned leather handles add a nice finished touch without requiring complicated sewing skills.
Skill level sits right between advanced beginner and intermediate. If you can work multi-round granny squares, join motifs, and seam pieces together, you can handle this. Expect 12–18 hours if you’re already comfortable with motif work. Newer crocheters might need 20–25 hours—totally fine, just go at your own pace.
Finished size comes in at about 15 inches wide, 11.5 inches tall (body only), and 5 inches deep. Handle drop measures around 9 inches, so it sits comfortably on your shoulder or in your hand.
Materials You’ll Actually Need
Grab DK weight yarn in three colors. Cotton or a cotton blend works best because it gives good stitch definition and helps the bag hold its shape.
- Color A (Sage Green): 310 yards / 284 meters
- Color B (Dusty Rose): 180 yards / 165 meters
- Color C (Cream/Natural): 220 yards / 201 meters
Total yardage lands around 710 yards. Some solid options include Lion Brand 24/7 Cotton, Paintbox Yarns Simply DK, or Drops Safran. Skip anything fuzzy—those hide the lovely granny texture.
Hooks: US G-6 / 4.0 mm for the motifs and body, plus a slightly smaller US F-5 / 3.75 mm just for the top border.
Notions are simple: yarn needle, scissors, 6–8 locking stitch markers, blocking mats, and rust-proof pins. A spray bottle of water helps with blocking.
For the hardware, pick up one pair of olive green vegan or genuine leather handles (22–24 inches total length) with antique brass D-rings or rivets. You’ll also need 4 antique brass Chicago screws or rivets (0.25-inch post), one 0.75-inch antique brass lobster clasp, and an optional small leather hang tag.
Optional extras: plastic canvas or firm craft foam cut to 14.5 x 4.5 inches for a base insert, plus woven cotton lining fabric if you want a finished interior.
Gauge and Abbreviations
Gauge matters here. Using the G-6 hook and DK cotton, one large granny square through Round 7 should measure 7 x 7 inches after blocking. For the solid half-double crochet fabric, aim for 16 hdc and 12 rows in 4 inches.
Block a test square first so your finished bag matches the dimensions.
Abbreviations stay standard:
- ch – chain
- sl st – slip stitch
- sc – single crochet
- hdc – half double crochet
- dc – double crochet
- sp – space
- ch-sp – chain space
- sk – skip
- st(s) – stitch(es)
- RS – right side
- WS – wrong side
- rep – repeat
- MR – magic ring
- PM – place marker
Special Stitches You’ll Use
Granny Cluster (3-dc cluster): Yarn over, insert hook into the designated chain space, pull up a loop. Yarn over and pull through 2 loops. Repeat this two more times in the same space so you have 4 loops on the hook. Yarn over and pull through all 4. That’s one cluster.
Corners use (3-dc cluster, ch 2, 3-dc cluster). Sides use (3-dc cluster, ch 1, 3-dc cluster).
Flat Join: This makes nearly invisible seams. Instead of chaining, insert your hook into the matching chain space on the finished neighboring motif, draw up a loop, and pull it through the loop on your hook. Keep working the current motif.
Pattern Notes Before You Start
You’ll make 4 large granny squares and 4 half-triangles. Join them into front and back panels, then add a solid hdc base and two side gussets.
Color sequence for the granny squares stays consistent:
Round 1: Color A (Sage)
Round 2: Color C (Cream)
Round 3: Color B (Dusty Rose)
Round 4: Color C (Cream)
Round 5: Color A (Sage)
Round 6: Color B (Dusty Rose)
Round 7: Color A (Sage)
Fasten off and change color after every round.
Making the Large Granny Squares (Make 4)
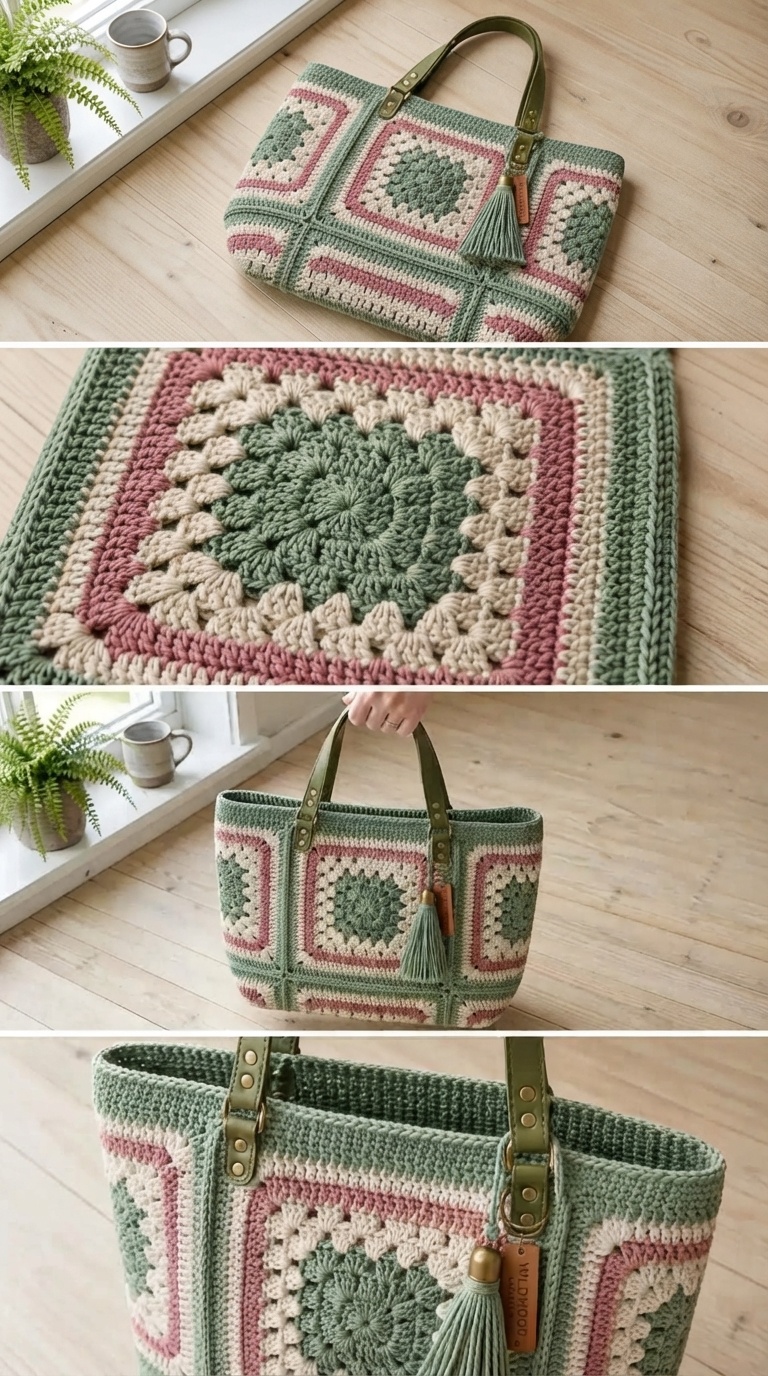
Start with Color A and the G-6 hook. Make a magic ring.
Round 1 (Color A): Ch 3 (counts as first dc), work 2 dc into ring, ch 2, (3 dc into ring, ch 2) 3 times, sl st to top of beg ch-3. Fasten off. (4 clusters, 4 ch-2 corner spaces)
Round 2 (Color C): Join Color C with sl st into any ch-2 corner sp. Ch 3, 2 dc into same sp, ch 2, 3 dc into same sp (corner made), ch 1, (3 dc, ch 2, 3 dc into next ch-2 sp, ch 1) 3 times, sl st to top of beg ch-3. Fasten off. (8 clusters, 4 ch-2 corner sps, 4 ch-1 side sps)
Round 3 (Color B): Join Color B with sl st into any ch-2 corner sp. Ch 3, 2 dc into same sp, ch 2, 3 dc into same sp, ch 1, 3 dc into ch-1 side sp, ch 1, (3 dc, ch 2, 3 dc into next ch-2 corner sp, ch 1, 3 dc into ch-1 side sp, ch 1) 3 times, sl st to top of beg ch-3. Fasten off. (12 clusters, 4 ch-2 corner sps, 8 ch-1 side sps)
Round 4 (Color C): Join Color C into any ch-2 corner sp. Ch 3, 2 dc into same sp, ch 2, 3 dc into same sp, (ch 1, 3 dc into next ch-1 sp) twice, ch 1, (3 dc, ch 2, 3 dc into ch-2 corner sp, (ch 1, 3 dc into next ch-1 sp) twice, ch 1) 3 times, sl st to top of beg ch-3. Fasten off. (16 clusters, 4 ch-2 corner sps, 12 ch-1 side sps)
Round 5 (Color A): Join Color A into any ch-2 corner sp. Ch 3, 2 dc into same sp, ch 2, 3 dc into same sp, (ch 1, 3 dc into next ch-1 sp) 3 times, ch 1, (3 dc, ch 2, 3 dc into ch-2 corner sp, (ch 1, 3 dc into next ch-1 sp) 3 times, ch 1) 3 times, sl st to top of beg ch-3. Fasten off. (20 clusters, 4 ch-2 corner sps, 16 ch-1 side sps)
Round 6 (Color B): Join Color B into any ch-2 corner sp. Ch 3, 2 dc into same sp, ch 2, 3 dc into same sp, (ch 1, 3 dc into next ch-1 sp) 4 times, ch 1, (3 dc, ch 2, 3 dc into ch-2 corner sp, (ch 1, 3 dc into next ch-1 sp) 4 times, ch 1) 3 times, sl st to top of beg ch-3. Fasten off. (24 clusters, 4 ch-2 corner sps, 20 ch-1 side sps)
Round 7 (Color A): Join Color A into any ch-2 corner sp. Ch 3, 2 dc into same sp, ch 2, 3 dc into same sp, (ch 1, 3 dc into next ch-1 sp) 5 times, ch 1, (3 dc, ch 2, 3 dc into ch-2 corner sp, (ch 1, 3 dc into next ch-1 sp) 5 times, ch 1) 3 times, sl st to top of beg ch-3. Fasten off. (28 clusters, 4 ch-2 corner sps, 24 ch-1 side sps)
Checkpoint: Each blocked square should measure exactly 7 inches by 7 inches.
Half-Granny Triangles (Make 4)
These fill the side corners of each panel.
Using Color A and G-6 hook:
Foundation: Ch 6.
Row 1 (WS, Color A): In 4th ch from hook: (3 dc, ch 2, 3 dc) for corner, ch 1, 3 dc into last ch. Turn. Fasten off. (2 clusters, 1 ch-2 sp, 1 ch-1 sp)
Row 2 (RS, Color C): Join Color C to top of turning ch. Ch 3, 2 dc into same st, ch 1, (3 dc, ch 2, 3 dc) into ch-2 sp, ch 1, 3 dc into top of ch-3. Turn. Fasten off. (4 clusters, 1 ch-2 sp, 2 ch-1 sps)
Row 3 (WS, Color B): Join Color B to top of ch-3. Ch 3, 2 dc into same st, ch 1, 3 dc into ch-1 sp, ch 1, (3 dc, ch 2, 3 dc) into ch-2 center corner, ch 1, 3 dc into ch-1 sp, ch 1, 3 dc into top of ch-3. Turn. Fasten off. (6 clusters, 1 ch-2 sp, 4 ch-1 sps)
Row 4 (RS, Color C): Join Color C to top of ch-3. Ch 3, 2 dc into same st, (ch 1, 3 dc into next ch-1 sp) twice, ch 1, (3 dc, ch 2, 3 dc) into ch-2 center corner, ch 1, (3 dc into next ch-1 sp, ch 1) twice, 3 dc into top of ch-3. Fasten off. (8 clusters, 1 ch-2 sp, 6 ch-1 sps)
Checkpoint: Each triangle spans about 3.5 inches across its widest row.
Assembling the Panels and Building the Body
Layout for each panel: one half-triangle on the left, one large granny square in the center, one half-triangle on the right. Align top and bottom edges.
Use the flat join method or single crochet through both layers to attach the vertical edges of the triangles to the square.
Panel Strip Border: After joining, work a border around the whole panel.
Border Rounds 1–3 (Color B): Join Color B. Work 1 sc into each dc, 1 sc into each ch-1 sp, 2 sc into each ch-2 corner sp. Work (sc, ch 1, sc) into each outer corner. Continue for 3 rounds, keeping the corners neat.
Border Rounds 4–5 (Color A): Switch to Color A and work 2 rounds of sc, still maintaining corners. Fasten off both panels.
Checkpoint: Each panel should measure roughly 15 inches wide by 8 inches tall.
Base Rectangle: Using Color A and G-6 hook, ch 61.
Row 1: Hdc in 2nd ch from hook and in each ch across. Turn. (60 hdc)
Rows 2–20: Ch 2 (counts as first hdc), hdc in each st across. Turn. (60 hdc per row)
Fasten off after Row 20, leaving a 36-inch sewing tail. Base should measure 15 inches wide by 5 inches tall.
Side Gusset Panels (Make 2): Using Color A and G-6 hook, ch 21.
Row 1: Hdc in 2nd ch from hook and in each ch across. Turn. (20 hdc)
Rows 2–36: Ch 2, hdc in each st across. Turn. (20 hdc per row)
Fasten off after Row 36, leaving a 36-inch sewing tail. Each gusset should measure 5 inches wide by 11.5 inches tall.
Assembling the Bag Body:
Step 1: Hold front panel and base rectangle with RS together. Sc through both layers along the bottom edge (about 60 sc).
Step 2: Repeat on the opposite long edge to attach the back panel.
Step 3: Attach side gussets. Sc the short bottom edge of each gusset to the short edge of the base. Then sc up each long edge to join the front and back panels.
Step 4: Reinforce all corners with 2–3 extra slip stitches. Turn the bag right side out.
Top Border, Handles, and Finishing Touches
Switch to Color A and the F-5 / 3.75 mm hook.
Round 1: Join Color A. Work 1 sc in each st around the top opening, working (sc, ch 1, sc) at each corner. Join. (168 sc)
Round 2: Ch 1, sc in each sc, (sc, ch 1, sc) into each corner sp. Join. (176 sc)
Round 3: Ch 1, sc in each sc, (sc, ch 1, sc) into each corner sp. Join. Fasten off. (184 sc)
Handle Placement: Mark positions 4 inches in from each upper corner on both front and back. Thread the handle ends through the border at the marked spots. Secure with Chicago screws or rivets.
Tassel Loop: At the right front corner, join Color A. Ch 5, sl st back into the same sp. Fasten off. Attach the lobster clasp through this loop.
Tassel: Cut 30 strands of Color A, each 12 inches long. Hold them together and fold in half twice. Tie a strand tightly around the bundle about 0.75 inch from the top to form the head. Loop a separate strand through the top for hanging. Trim the ends to 4.5 inches.
Weave in all ends securely. Wet block by submerging the bag in cool water for 10 minutes, then press out excess moisture. Lay flat to dry and shape it to the finished dimensions. If you made a base insert, slip the plastic canvas or foam inside.
Final Thoughts
This Sage Garden Tote turns classic granny squares into something you can actually use every day. The color mix feels calm and a little vintage at the same time, and the structure keeps it looking sharp even when it’s full. Once you finish those last few ends and attach the handles, you’ll have a bag that feels like it came from a boutique—except you made it yourself.
Grab your yarn, pull out that G-6 hook, and start with the first magic ring. You’ll be surprised how quickly those squares start looking like a real tote. Happy stitching!