

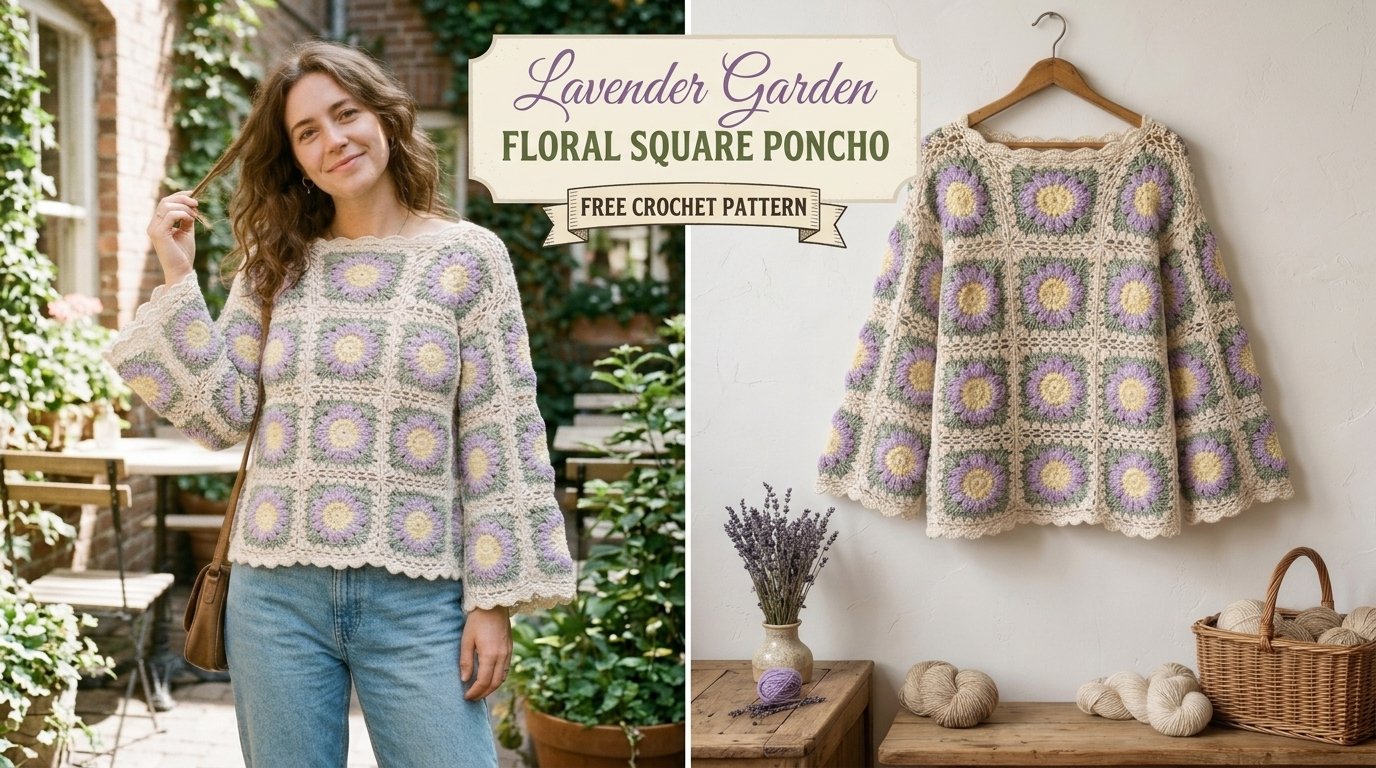
I still remember the afternoon the idea for this poncho settled in. I had been walking the narrow path behind the community garden where the lavender was just beginning to open. The air smelled clean and slightly sweet, and the soft purple spikes were swaying against the silvery-green leaves. I stood there longer than I meant to, watching the light change, and suddenly I could see the whole piece in my mind: a poncho made of quiet floral squares that felt like a little garden resting on the shoulders.
I wanted something that draped easily, that could be worn over a simple dress or a long-sleeved tee, and that carried that same calm feeling of walking among the flowers. The result is the Lavender Garden Floral Square Poncho. It is worked as individual floral squares that are joined as you go, then shaped into a gentle V-front poncho with a soft lace edge. The flowers sit at the center of each square, surrounded by open petal rounds and a quiet solid border that lets the motifs breathe.
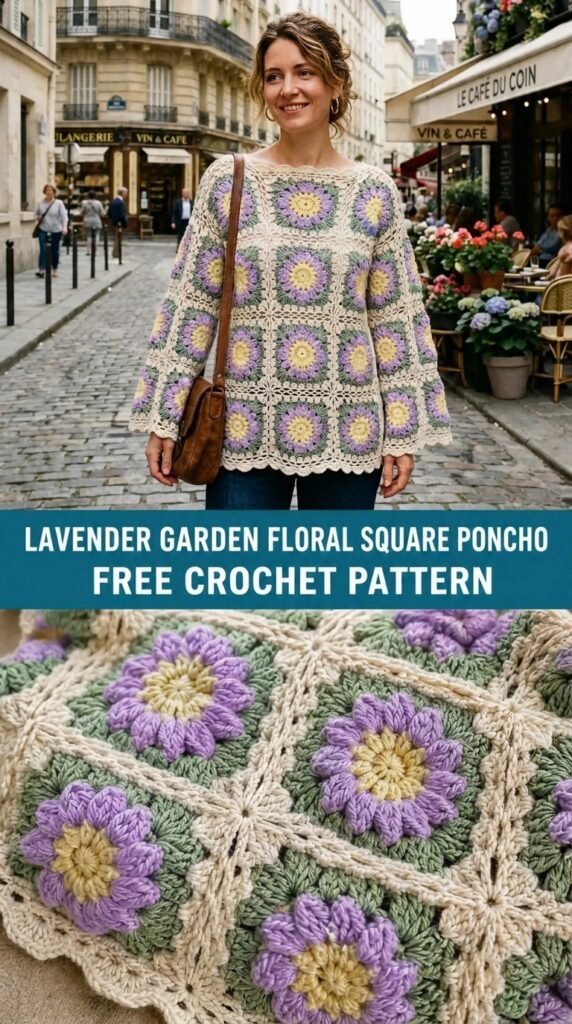
This is an intermediate pattern. The individual squares are straightforward once you settle into the rhythm, but the join-as-you-go process and the shaping of the neckline require a bit of attention. If you are comfortable with basic granny-square construction, reading stitch counts, and working into chain spaces, you will be fine. I have written every step as clearly as I can so you can enjoy the process rather than second-guess it.
About This Pattern
The poncho is built from 32 floral squares (plus two half-squares for the front neckline shaping). Each square begins with a small flower center, then expands through open petal rounds and a solid border. Squares are joined in a simple grid that forms a large rectangle with a V-shaped neck opening. The lower edge and the neckline receive a delicate lace border that softens the geometry of the squares.
Finished measurements (after blocking):
- Width across shoulders: approximately 48–50 inches (122–127 cm)
- Length from shoulder to lower edge: approximately 26–28 inches (66–71 cm)
- Front neck depth: about 8 inches (20 cm)
The fabric has a soft, open drape. It is not heavy, so it layers nicely without feeling bulky. The floral centers create gentle texture that catches the light, while the solid borders keep the overall shape stable.
Materials You’ll Need
Yarn
I used a light worsted / DK weight yarn with good stitch definition and a soft hand. Approximate amounts (allow 15% extra for gauge variation and personal tension):
- Color A (soft lavender – main flower centers and petals): 650 yards / 595 meters
- Color B (pale sage green – petal tips and square borders): 480 yards / 440 meters
- Color C (creamy ivory – joining and lace edging): 520 yards / 475 meters
Any similar weight yarn that blocks well will work. Choose fibers that feel soft against the skin; the poncho sits close to the neck and upper arms.
Hooks
- 4.5 mm (US 7) – for the floral squares and joining
- 4.0 mm (US G/6) – for the lace edging (gives a slightly firmer finish)
Notions
- Tapestry needle
- Stitch markers (at least 8)
- Blocking mats and pins (or wires if you prefer)
- Scissors
Abbreviations and Terminology
All instructions use US crochet terminology.
- ch – chain
- sc – single crochet (insert hook, yarn over, pull up loop, yarn over, pull through both loops)
- hdc – half double crochet (yarn over, insert hook, yarn over, pull up loop, yarn over, pull through all three loops)
- dc – double crochet (yarn over, insert hook, yarn over, pull up loop, yarn over, pull through two loops, yarn over, pull through remaining two loops)
- tr – treble crochet (yarn over twice, insert hook, yarn over, pull up loop, [yarn over, pull through two loops] three times)
- sl st – slip stitch
- sp – space
- st(s) – stitch(es)
- sk – skip
- rep – repeat
- beg – beginning
- RS – right side
- WS – wrong side
Turning chains do not count as a stitch unless a step explicitly says they do. When a round begins with “ch 3 (counts as dc)”, the chain does count as the first stitch.
Gauge
Work one complete floral square and measure after light blocking.
Target: one floral square measures 6 inches (15 cm) from side to side after blocking.
If your square is smaller, try a 5.0 mm hook for the squares. If it is larger, drop to a 4.0 mm hook. Consistent tension matters more than exact gauge because the join-as-you-go process will even out minor differences, but staying close to 6 inches keeps the finished dimensions accurate.
Main Pattern Instructions

Floral Square (make 32)
With Color A and 4.5 mm hook.
Round 1 (Flower center):
Make a magic ring. Ch 3 (counts as dc), 11 dc into ring. Join with sl st to top of beg ch-3. (12 dc)
Pull ring tight.
Round 2 (Petal bases):
Ch 1, sc in same st, *ch 3, sk next st, sc in next st; rep from * around, ending with ch 3, join with sl st to first sc. (6 ch-3 sps)
Round 3 (Petals):
Sl st into first ch-3 sp, (ch 3, 2 dc, ch 2, 3 dc) in same sp, * (3 dc, ch 2, 3 dc) in next ch-3 sp; rep from * around. Join with sl st to top of beg ch-3. Fasten off Color A. (6 petals)
Round 4 (Petal tips – Color B):
Join Color B with sl st in any ch-2 sp. Ch 1, *(sc, hdc, dc, tr, dc, hdc, sc) in ch-2 sp, sc in next 3 dc, sk next 3 dc; rep from * around. Join with sl st to first sc. Fasten off Color B.
Round 5 (Solid border – Color B):
Join Color B with sl st in any tr at the tip of a petal. Ch 3 (counts as dc), dc in next 2 sts, ch 1, sk next sc, dc in next 6 sts, ch 1, sk next sc, dc in next 3 sts (the tr and two surrounding sts form the corner group); continue this way, placing 3 dc around each petal tip and adjusting skips so you have a clean square shape. Aim for 4 clear corner groups of (dc, ch 2, dc) and even side stitches. Exact count after this round should be 12 dc along each side between corner ch-2 spaces. Fasten off Color B.
Round 6 (Final square border – Color C):
Join Color C with sl st in any corner ch-2 sp. Ch 3 (counts as dc), (dc, ch 2, 2 dc) in same sp (corner made), *dc in each dc and ch-1 sp across to next corner, (2 dc, ch 2, 2 dc) in corner ch-2 sp; rep from * around, join with sl st to top of beg ch-3. Fasten off, leaving a 12-inch tail if you prefer to sew joins later, or weave in ends if using join-as-you-go.
Each finished square should measure approximately 6 inches after light steaming or wet blocking.
Half Squares for Front Neckline (make 2)
Work Rounds 1–4 of the floral square as written.
On Round 5, work only three sides of the square so you create a triangle that will sit along the V-neck. Fasten off after the third side. These half-squares will be placed at the center front of the neckline.
Joining the Squares (Join-as-You-Go Method)
Arrange the squares in a grid that forms a large rectangle approximately 4 squares wide by 8 squares long, leaving a V-shaped opening at the center front for the neck. The two half-squares fill the lower points of the V.
To join:
Hold two squares with right sides facing you and edges aligned. Work through the corresponding stitches of both squares at the same time using Color C and the 4.5 mm hook:
Sc in both corner ch-2 spaces together, ch 1, sc in next pair of corresponding stitches; continue across the side, ending with sc in the next pair of corner spaces.
Work this way for all vertical joins first, then the horizontal joins. When you reach the neckline edges, leave those sides free. The join creates a nearly invisible seam that looks like part of the border.
After all squares are joined, you will have a large fabric with a V-neck opening at the front and a straight edge at the back.
Special Techniques / Additional Elements
Lace Edging (worked around entire outer edge and neckline)
With Color C and 4.0 mm hook, join with sl st in any corner of the outer edge.
Round 1: Ch 1, sc evenly around the entire outer perimeter and the neckline, placing 3 sc in each outer corner and 1 sc in each available stitch or space. Aim for a multiple of 6 stitches along the long sides if possible. Join with sl st to first sc.
Round 2: Ch 1, sc in same st, *ch 3, sk 2 sts, sc in next st; rep from * around, adjusting at corners by working (sc, ch 3, sc) in the corner stitch. Join with sl st to first sc.
Round 3: Sl st into first ch-3 sp, ch 1, *(sc, hdc, dc, hdc, sc) in ch-3 sp, sc in next sc; rep from * around. At the neckline points, work an extra (sc, ch 2, sc) to keep the V soft. Join with sl st to first sc. Fasten off.
This simple lace gives a soft, garden-like finish without adding weight.
Assembly and Finishing
Once all squares are joined and the lace edging is complete, weave in every end carefully on the wrong side. Pay special attention to the flower centers so the color changes stay tidy.
There is no additional seaming required beyond the join-as-you-go work. The neckline is already shaped by the placement of the half-squares and the lace edging.

If you prefer a slightly wider neck opening, you may omit one full square on each side of the V and adjust the half-squares accordingly. Mark the changes with stitch markers before joining so the proportions stay balanced.
Blocking and Care
Wet-block the finished poncho for the best drape and to open the lace.
- Soak the piece in lukewarm water with a mild wool wash for 15–20 minutes.
- Gently press out excess water (do not wring).
- Lay flat on blocking mats. Pin the outer edges to the finished measurements given earlier, gently stretching the floral centers so the petals open. Pin the neckline V so it sits smoothly.
- Allow to dry completely.
Care: Hand wash in cool water, roll in a towel to remove moisture, and dry flat. Never hang the wet poncho; the weight of the water can stretch the joins. Store folded or rolled rather than on a hanger.
Fit and Troubleshooting Tips
- If the squares cup slightly, your tension on the petal rounds may be tighter than the border. Try going up half a hook size for Rounds 2–4 only.
- If the fabric ruffles at the joins, you may have too many stitches along the sides. Reduce by one stitch on each side of Round 6 before joining.
- The poncho is intentionally oversized through the shoulders. If you want a narrower fit, remove one vertical column of squares (four full squares) and adjust the neckline half-squares.
- Heavy floral centers can sometimes pull the square out of shape. Blocking solves most of this, but you can also work the flower center with a slightly smaller hook.
Final Thoughts
When I finished the first sample of this poncho, I wore it the very next morning while walking the same garden path. The soft lavender squares moved with me, and the lace edge caught the early light. It felt exactly as I had hoped — like carrying a little piece of the garden on my shoulders.
I hope this Lavender Garden Floral Square Poncho brings you the same quiet pleasure while you make it and when you wear it. Take your time with the flower centers; they are the heart of the piece. When you finish, I would love to see how your version turns out — share a photo in the comments or tag your project so others can find inspiration too.
Happy crocheting, and may your stitches feel as calm as a lavender afternoon.



Leave a Reply
You must be logged in to post a comment.