

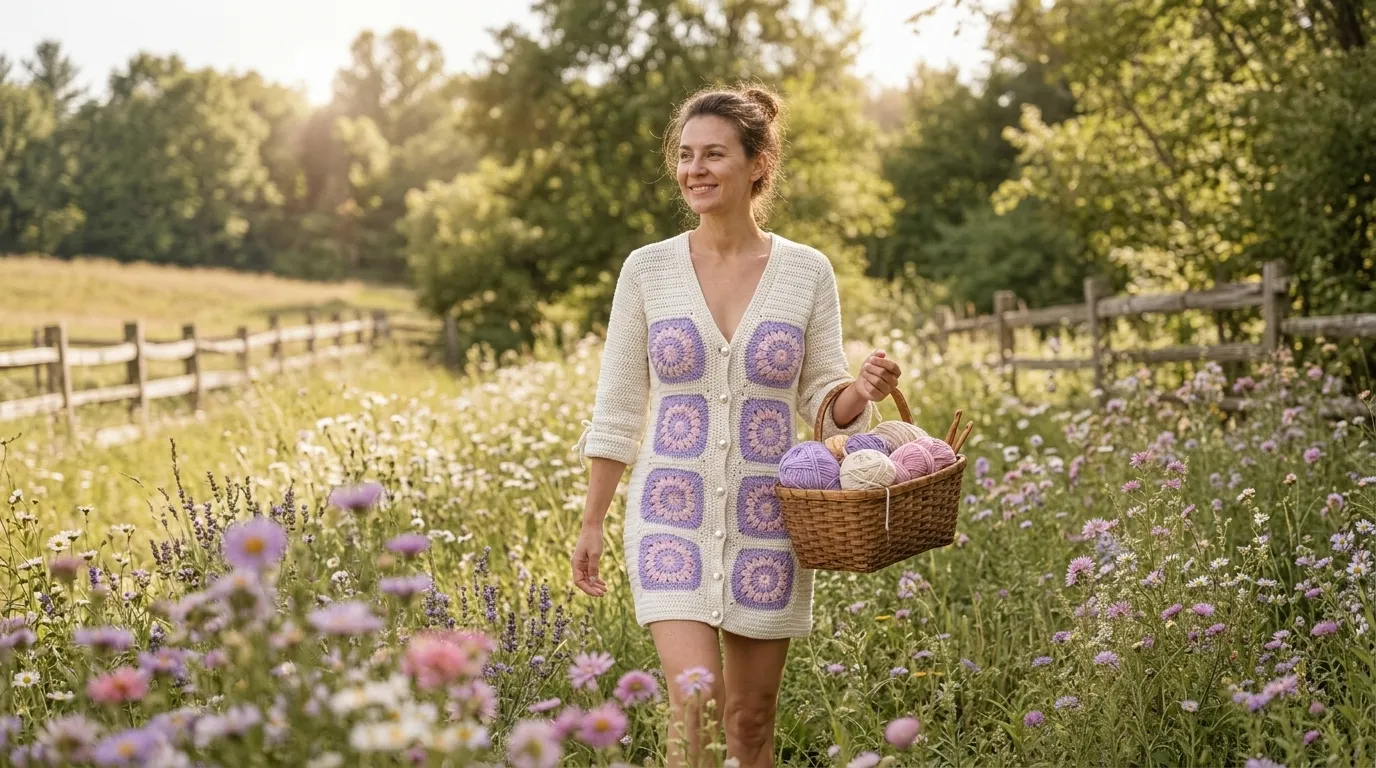
There is something about spring that makes me want to put away the heavy winter projects and reach for soft colors, pretty flowers, and lightweight yarn. I wanted to create a cardigan that felt like a little garden you could wear, with delicate lavender shades and cheerful floral details.
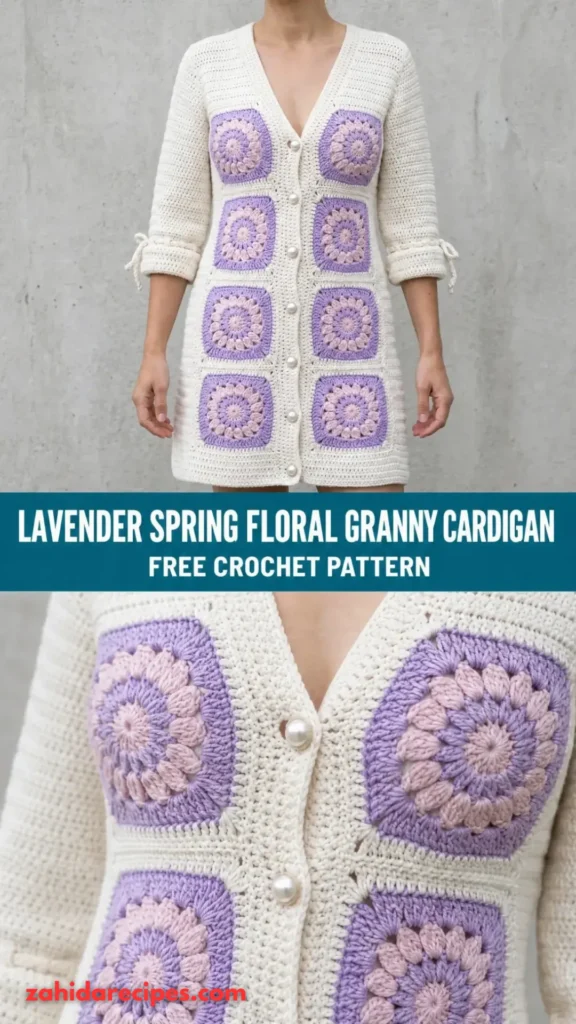
About This Pattern
This cardigan is made from individual floral granny squares joined together to create the back, front panels, and sleeves. Each square features a raised flower in the center, surrounded by lavender and cream rounds.
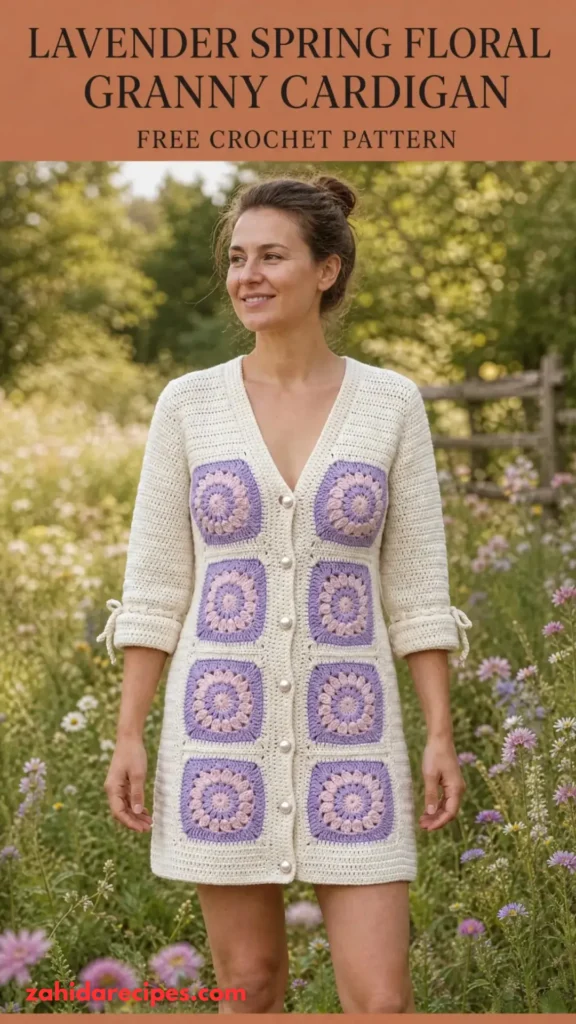
The finished garment has a relaxed silhouette, an open front, slightly dropped shoulders, and comfortable sleeves. A simple ribbed hem, cuffs, and front edging give the cardigan a polished finish.
- Skill Level: Intermediate
- Construction: Individual floral granny squares joined into panels, followed by sleeve construction and ribbed edging.
- Finished Sizes: S, M, L, XL, and 2XL.
- Fit: Relaxed fit with approximately 4–6 inches of positive ease.
You should be comfortable with basic stitches, working in the round, changing colors, joining motifs, and following simple repeat instructions.
| Size | Bust Circumference | Body Length |
|---|---|---|
| S | 36 in | 20 in |
| M | 40 in | 21 in |
| L | 44 in | 22 in |
| XL | 48 in | 23 in |
| 2XL | 52 in | 24 in |
The measurements are approximate. The cardigan is designed with 4–6 inches of positive ease for a comfortable, slightly oversized fit.
Materials You’ll Need
Yarn
Choose a soft DK-weight yarn with good stitch definition. Cotton-acrylic blends are especially lovely because they provide comfortable drape without making the cardigan too heavy.
- Color A – Soft Lavender: Approximately 550–750 yards for the main granny square backgrounds.
- Color B – Cream: Approximately 350–450 yards for flower petals and decorative rounds.
- Color C – Pale Lilac: Approximately 200–300 yards for flower centers and contrast details.
- Color D – Sage Green: Approximately 150–200 yards for small leaves and accents.
- Color E – Deep Lavender: Approximately 350–500 yards for joining, borders, and ribbing.
Total yarn required: Approximately 1,600–2,200 yards, depending on size and individual tension.
Allow 15% extra for gauge variation.
Crochet Hooks
- 4.0 mm crochet hook for granny squares.
- 3.5 mm crochet hook for ribbing.
- 4.5 mm crochet hook for a softer, looser flower center if needed.
Notions
- Tapestry needle
- Stitch markers
- Scissors
- Measuring tape
- Blocking mats and rustproof pins
- Optional small buttons
- Removable stitch markers for panel assembly
Abbreviations and Terminology
All instructions use US crochet terminology.
| Abbreviation | Meaning |
|---|---|
| ch | Chain |
| sl st | Slip stitch |
| sc | Single crochet |
| hdc | Half double crochet |
| dc | Double crochet |
| tr | Treble crochet |
| st | Stitch |
| sts | Stitches |
| sp | Space |
| ch-sp | Chain space |
| sk | Skip |
| rep | Repeat |
| rnd | Round |
| RS | Right side |
| WS | Wrong side |
Basic Stitch Explanations
- Chain (ch): Yarn over and pull through the loop on your hook.
- Slip stitch (sl st): Insert hook into the stitch, yarn over, and pull through both the stitch and the loop on your hook.
- Single crochet (sc): Insert hook, yarn over and pull up a loop, yarn over and pull through both loops.
- Half double crochet (hdc): Yarn over, insert hook, pull up a loop, yarn over and pull through all three loops.
- Double crochet (dc): Yarn over, insert hook, pull up a loop, yarn over and pull through two loops twice.
- Treble crochet (tr): Yarn over twice, insert hook, pull up a loop, then work through two loops three times.
- Magic ring: Wrap yarn around your fingers to create an adjustable loop, then crochet into the center and pull tight.
Important notes:
- Turning chains do not count as stitches unless specifically stated.
- Join each granny square round with a slip stitch to the first stitch or indicated space.
- Change colors in the final yarn-over of the previous stitch for cleaner transitions.
- Work all flower motifs with the right side facing you.
Gauge
Gauge matters because your granny squares determine the overall cardigan size.
Using a 4.0 mm hook and DK-weight yarn, one completed floral granny square should measure approximately 5 x 5 inches (12.7 x 12.7 cm).
To check your gauge:
- Make one complete floral granny square.
- Block it gently and allow it to dry.
- Measure from edge to edge.
- Compare the result with the recommended measurements.
If your square is smaller than 5 inches, try a larger hook. If it is larger, switch to a smaller hook.
Try not to stretch your squares aggressively during blocking. You want them to remain naturally square.
Lavender Spring Floral Granny Cardigan Pattern Instructions
Part 1: Making the Floral Granny Squares
Each square begins with a small flower center, followed by rounded petals and traditional granny square corners.
For the main cardigan, make the following:
| Size | Total Squares |
|---|---|
| S | 32 |
| M | 36 |
| L | 40 |
| XL | 44 |
| 2XL | 48 |
Use Color C for flower centers, Color B for petals, Color A for the background, and Color E for the final decorative round.
Flower Center
With Color C, make a magic ring.
Round 1: Ch 1 (does not count as a stitch). Work 12 sc into the ring. Pull the ring closed and join with a sl st to the first sc.
Count: 12 sc.
Fasten off Color C.
Flower Petals
Attach Color B to any sc.
Round 2: Ch 2. Work 2 dc into the same stitch. Work 3 dc into each remaining stitch around. Join with a sl st to the first dc.
Count: 36 dc.
This creates a soft, rounded flower shape with six visible petal groups. The petals will sit slightly raised against the background.
Fasten off Color B.
Creating the Granny Square Background
Attach Color A in the space between any two groups of three dc.
Round 3: Ch 3 (counts as dc). Work 2 dc in the same space. Ch 2.
Work 3 dc in the next space between petal groups, ch 2. Repeat around. Join with a sl st to the top of the beginning ch-3.
You should have six groups of 3 dc separated by ch-2 spaces.
Round 4: Sl st across to the nearest corner ch-2 space. Ch 3, 2 dc, ch 2, 3 dc in the same corner.
Work 3 dc in each side space. At each corner, work (3 dc, ch 2, 3 dc).
Join with a sl st.
Round 5: Continue the granny square pattern. Work 3 dc into every side space and (3 dc, ch 2, 3 dc) into each corner.
Join and fasten off.
The square should now measure close to 5 inches.
Decorative Final Round
Attach Color E to any corner.
Round 6: Ch 1, work (sc, ch 2, sc) in the corner space. Work 1 sc into each stitch along the sides. At the next corner, work (sc, ch 2, sc).
Repeat around and join with a sl st.
Fasten off and weave in the ends.
Designer tip: Keep your lavender and cream color changes consistent across all squares. This gives the finished cardigan a coordinated floral appearance.
Part 2: Adding the Little Leaf Details
The sage green accents add a lovely garden-inspired touch.
You can add one or two tiny leaves to selected flower squares rather than decorating every motif. This keeps the design balanced.
Simple Crochet Leaf
With Color D, ch 6.
Row 1: Starting in the second ch from the hook, work:
- 1 sc
- 1 hdc
- 1 dc
- 1 hdc
- 1 sc
Ch 2 and turn the work to crochet along the opposite side of the foundation chain.
Work 1 sc, 1 hdc, 1 dc, 1 hdc, and 1 sc.
Join with a sl st at the starting point.
Fasten off, leaving a long tail for sewing.
Make approximately 8–12 leaves for the entire cardigan.
Sew each leaf beside a flower petal, positioning it slightly diagonally so it looks like a natural flower arrangement.
Part 3: Planning the Cardigan Panels
Once your squares are complete, arrange them on a flat surface before joining.
The cardigan consists of three main body sections:
- One back panel.
- Two front panels.
- Two sleeves made from smaller rectangular arrangements.
For the recommended 5-inch squares, use the following layout:
| Size | Back Panel | Each Front Panel | Each Sleeve |
|---|---|---|---|
| S | 4 x 4 | 2 x 4 | 2 x 4 |
| M | 4 x 4 | 2 x 4 | 2 x 5 |
| L | 4 x 4 | 2 x 5 | 2 x 5 |
| XL | 4 x 5 | 2 x 5 | 2 x 5 |
| 2XL | 4 x 5 | 2 x 5 | 2 x 6 |
These layouts are starting guides. Adjust the number of motifs or add a partial border if your blocked squares or preferred ease differ from the target measurements.
The total motif count should match the size table.
Part 4: Joining the Granny Squares
I recommend the slip-stitch join for this cardigan. It creates a subtle raised seam that complements the floral texture.
Slip-Stitch Joining Method
- Place two squares together with their right sides facing outward.
- Insert your hook through the corresponding back loops of both squares.
- Yarn over and pull through all loops.
- Repeat along the entire edge.
- Keep your tension relaxed so the seam does not pull the fabric inward.
Join the squares into horizontal strips first.
Next, connect the strips to complete the back and front panels.
For a softer, flatter finish, you can use the mattress stitch with a tapestry needle instead.
Important: Count the joining stitches along every seam. Match corner to corner and avoid skipping stitches, especially around the flower motifs.
Part 5: Constructing the Cardigan Body
Lay the completed back panel flat with the right side facing upward.
Place one front panel on each side of the back panel.
Join the shoulder seams using Color E, leaving the center front edges open.
For a relaxed neckline, leave approximately 7–8 inches open between the front panels at the top. Adjust this opening to suit your preferred neckline.
Join the side seams from the bottom upward, stopping approximately 7–8 inches below the shoulder to create armholes.
Try the body on before completing the seams.
The cardigan should hang comfortably without pulling across the shoulders or bust.
Part 6: Crocheting the Sleeves
The sleeves are made from joined granny squares, creating a slightly relaxed shape.
Arrange the sleeve squares into a rectangular panel according to your selected size.
Join the squares using the same slip-stitch method.
Fold each panel in half lengthwise, with the right side facing inward, and join the long edge to create a sleeve tube.
Keep the upper edge open.
Attaching the Sleeves
Turn the cardigan body inside out.
Position each sleeve inside its armhole, matching the sleeve seam with the cardigan side seam.
Pin the sleeve evenly around the armhole before joining.
Use Color E and sl st through both layers around the opening.
Check that the sleeve sits smoothly without puckering.
Repeat for the second sleeve.
Part 7: Creating the Ribbed Cuffs
The ribbed cuffs provide a comfortable finish and prevent the sleeves from looking too loose.
Using the 3.5 mm hook, attach Color E to the bottom edge of a sleeve.
Round 1: Ch 1. Work sc evenly around the sleeve opening. Join with a sl st.
Count: Your stitch count should be an even number.
Round 2: Ch 1. Work 1 sc in each stitch around. Join.
Round 3: Ch 1. Work 1 hdc in each stitch around. Join.
Continue with alternating front-post and back-post double crochet stitches for the ribbed texture.
For a simple rib:
- Ch 2.
- Work 1 fpdc around the next stitch.
- Work 1 bpdc around the following stitch.
- Repeat around.
Continue for 4–5 rounds or until the cuff measures approximately 1.5–2 inches.
Fasten off and weave in the end.
Repeat for the second sleeve.
Part 8: Adding the Cardigan Hem
The bottom hem helps the cardigan sit neatly around your waist.
With Color E and the 4.0 mm hook, attach yarn at one bottom corner.
Round 1: Ch 1 and work sc evenly along the entire bottom edge. Work 3 sc at each outer corner if needed to keep the edge flat.
Round 2: Ch 2. Work hdc in each stitch around.
Round 3: Work alternating fpdc and bpdc stitches to create ribbing.
Continue for 3–4 additional rounds, depending on your preferred hem depth.
Fasten off.
For a slightly longer cardigan, add extra rows of hdc before starting the ribbed section.
Part 9: The Front Opening and Neckline Border
This is one of my favorite finishing details because it gives the cardigan a more complete, polished appearance.
Attach Color E at the lower front corner.
Round 1: Ch 1. Work sc evenly up the first front edge, around the neckline, and down the opposite front edge.
Keep your stitches evenly spaced.
Round 2: Ch 1. Work sc in each stitch around.
Round 3: Ch 2. Work hdc in each stitch around.
For a more substantial border, repeat Round 3 once more.
Do not pull the front edging too tightly. It should lie flat without curling inward.
Optional Button Detail
If you would like a cardigan that can be partially closed, add three or four small buttons to one front edge.
Create corresponding button loops on the opposite side using short chain spaces.
Space them evenly, checking that the front panels overlap naturally.
The cardigan also looks beautiful without buttons, especially when worn open over a simple top.
Assembly and Finishing
Before declaring your cardigan finished, take time to check the small details.
- Weave in all remaining yarn tails securely.
- Check that every flower motif is facing the correct direction.
- Inspect the sleeve seams for loose stitches.
- Make sure both cuffs have approximately the same length.
- Check that the front edging is even.
- Secure the decorative leaves with small, discreet stitches.
Try the cardigan on and check the shoulder placement, sleeve length, and overall drape.
A little finishing work makes a tremendous difference to the final appearance.
Blocking and Care
Blocking helps your floral granny squares settle into their intended shape.
For acrylic yarn, use gentle steam blocking only if the yarn manufacturer’s instructions permit it. Keep the iron or steamer away from direct contact with the fibers.
For cotton or suitable natural-fiber blends, wet blocking is a good option.
Wet-Blocking Instructions
- Fill a basin with cool or lukewarm water.
- Add a small amount of gentle wool wash if appropriate for your yarn.
- Submerge the cardigan carefully.
- Allow it to soak for approximately 10–15 minutes.
- Remove it without wringing.
- Press excess water out using a clean towel.
- Lay it flat on blocking mats.
- Gently arrange the edges, sleeves, and floral motifs.
- Allow the cardigan to dry completely.
Never hang the cardigan while wet. The weight of the yarn can stretch the granny squares and distort the shape.
For regular care, follow the yarn label. Hand washing and drying flat are good choices for many delicate crochet garments.
Fit and Troubleshooting Tips
My Granny Squares Are Different Sizes
This usually happens because of changing tension or inconsistent yarn thickness.
Check your gauge after every few squares. If the difference is noticeable, adjust your hook before making more motifs.
The Cardigan Looks Too Stiff
Your yarn may be too heavy, or your stitches may be too tight.
Try a larger hook for the granny square sections. A soft DK-weight yarn will generally give a more comfortable spring cardigan.
The Front Edges Curl
Curling can happen when the border tension is too tight.
Try working the next edging round with a slightly larger hook. Blocking can also help straighten the front panels.
The Sleeves Feel Too Wide
Reduce the sleeve width by using fewer motifs or adjusting the joining layout.
For a more fitted appearance, add a few gradual decreases in the cuff rounds.
The Floral Motifs Look Uneven
Make sure you are placing your stitches consistently in the spaces between the petal groups.
Count the stitches in each round and avoid pulling the flower centers too tightly.
I Want a Longer Cardigan
Add an additional row of granny squares to the body panels or extend the hem with extra hdc rounds.
Remember that adding length will increase yarn requirements.
Final Thoughts
I absolutely love how the Lavender Spring Floral Granny Cardigan brings together traditional crochet techniques and delicate spring colors. Every little flower adds personality, and the combination of lavender, cream, and sage green creates a soft garden-inspired look.
Although joining several granny squares takes patience, the result is worth the effort. You get a handmade cardigan that feels personal, comfortable, and full of charm.
Don’t worry if your first few flower motifs aren’t perfectly identical. Handmade pieces have their own character, and those little differences are part of what makes crochet special.
I’d love to see how you customize your cardigan. Experiment with different flower colors, add extra leaves, or make the sleeves longer to suit your style.
Most importantly, enjoy every stitch and have fun creating your own little piece of spring! 💜


Leave a Reply
You must be logged in to post a comment.