

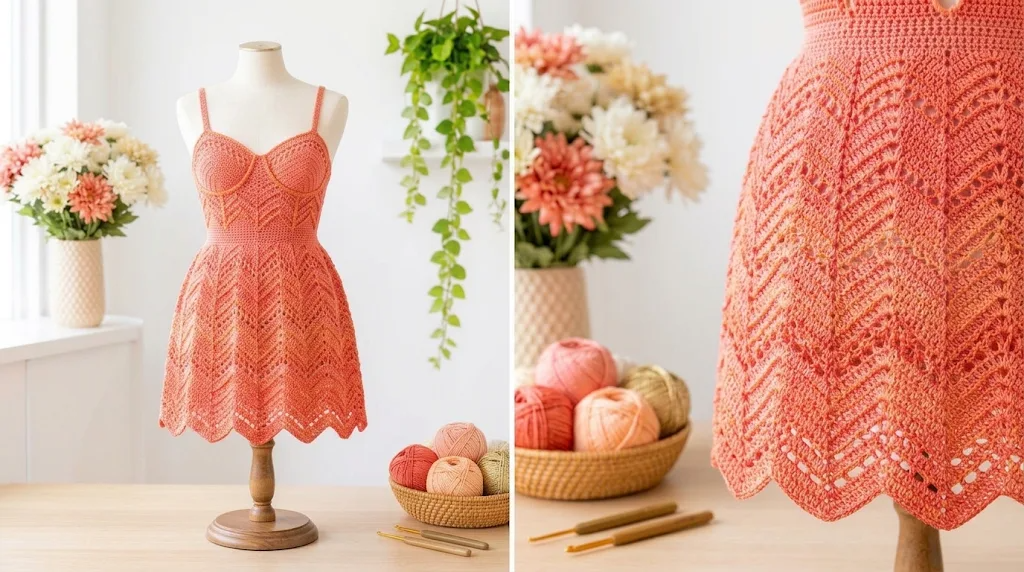
There is something especially sweet about a little handmade baby dress. I love the way soft yarn, delicate stitches, and gentle colors can turn a simple crochet project into something memorable. When I started imagining this design, I kept thinking about the warm colors of a summer sunset: coral pink, peach, and a touch of creamy ivory.
I wanted a dress that looked special without becoming too complicated to wear or make. A comfortable bodice, a gently gathered-looking skirt, and a decorative shell-stitch border seemed like the perfect combination.
The Coral Sunset Baby Dress Free Crochet Pattern features a sleeveless bodice, a softly flared skirt, and pretty textured details. It is designed for special occasions, birthday celebrations, family photographs, and everyday summer outfits.
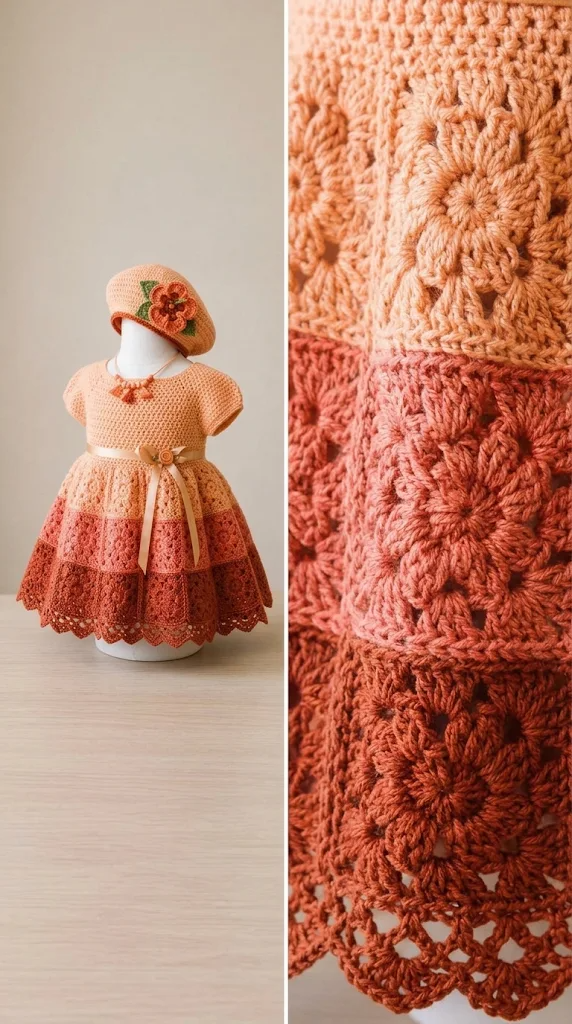
About This Coral Sunset Baby Dress Crochet Pattern
This baby dress is worked from the top down. You will begin with a rectangular yoke, shape the armholes, and join the body before working the skirt in rounds.
The bodice uses simple double crochet stitches for a smooth, comfortable fabric. The skirt introduces alternating coral and peach sections, followed by decorative shell stitches along the hem.
The finished design has a lovely balance of simplicity and detail.
Skill level: Confident beginner to intermediate.
Construction: Top-down, seamless skirt with a back opening.
Sizes included:
- 0–3 months
- 3–6 months
- 6–12 months
- 12–18 months
Finished chest measurements:
| Size | Chest | Dress Length |
|---|---|---|
| 0–3 months | 16 inches | 13 inches |
| 3–6 months | 17 inches | 14 inches |
| 6–12 months | 18 inches | 15 inches |
| 12–18 months | 19 inches | 16 inches |
These measurements are approximate. Check the baby’s measurements before choosing a size.
The skirt is designed with comfortable ease, allowing room for movement without making the dress excessively loose.
Materials You’ll Need
Yarn
Choose a soft, breathable cotton or cotton-blend DK yarn suitable for baby clothing.
- Color A – Coral Pink: 180–250 yards (165–229 meters), depending on size. Used for the bodice and main skirt.
- Color B – Peach: 100–150 yards (91–137 meters). Used for decorative skirt stripes.
- Color C – Cream: 40–60 yards (37–55 meters). Used for the waist detail and shell edging.
Allow approximately 15% extra yarn for gauge variation and individual differences.
Crochet Hooks
- 4.0 mm hook for the bodice.
- 4.5 mm hook for the skirt to create a softer drape.
- 3.5 mm hook for optional button loops and decorative details.
Additional Supplies
- Tapestry needle
- 3 small baby-safe buttons
- Stitch markers
- Measuring tape
- Scissors
- Blocking mat and rust-resistant pins
Choose securely attached buttons and avoid small decorative pieces that could become choking hazards.
Abbreviations and Terminology
This pattern uses US crochet terminology.
| Abbreviation | Meaning |
|---|---|
| ch | Chain |
| sl st | Slip stitch |
| sc | Single crochet |
| hdc | Half double crochet |
| dc | Double crochet |
| sk | Skip |
| sp | Space |
| st | Stitch |
| sts | Stitches |
| rep | Repeat |
| RS | Right side |
| WS | Wrong side |
| FO | Fasten off |
Chain (ch): Yarn over and pull through the loop on your hook.
Slip stitch (sl st): Insert the hook, yarn over, and pull through both the stitch and the loop on your hook.
Single crochet (sc): Insert the hook, yarn over, pull up a loop, yarn over again, and pull through both loops.
Half double crochet (hdc): Yarn over, insert the hook, pull up a loop, yarn over, and pull through all three loops.
Double crochet (dc): Yarn over, insert the hook, pull up a loop, yarn over and pull through two loops twice.
Shell: Work 5 dc into the same stitch or space.
Important notes:
- Turning chains do not count as stitches unless stated otherwise.
- Join rounds with a slip stitch.
- Check stitch counts at the end of each shaping section.
- Work all measurements after gently laying the fabric flat.
Gauge
Gauge is important because baby clothing needs to fit comfortably.
Using the 4.0 mm hook and Color A, work a small double crochet swatch.
Target gauge:
- 16 dc = 4 inches (10 cm)
- 9 rows = 4 inches (10 cm)
If your swatch is too large, try a smaller hook.
If your swatch is too small, move up one hook size.
Wash and dry your swatch as you intend to care for the finished dress before measuring it.
Main Pattern Instructions
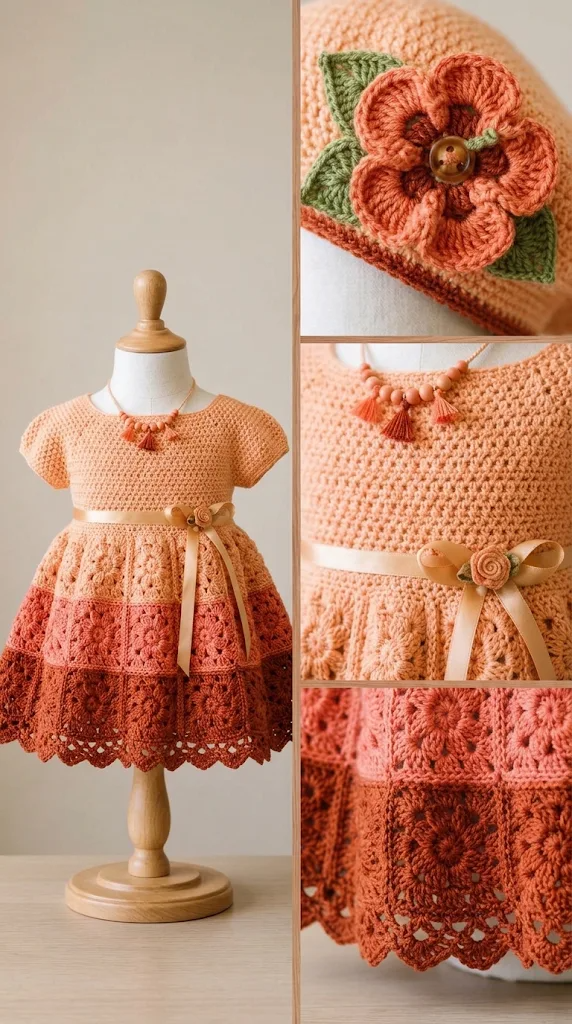
The dress is worked in separate bodice and skirt sections. The bodice is crocheted flat, then seamed at the sides and shoulders. The skirt is attached around the lower edge and worked downward in joined rounds.
This construction makes it easier to adjust the bodice length and skirt fullness.
1. Crochet the Bodice
Use the 4.0 mm hook and Color A (Coral Pink).
The bodice is designed with a small opening at the back to make dressing easier.
Foundation chain
| Size | Foundation Chain |
|---|---|
| 0–3 months | 66 |
| 3–6 months | 70 |
| 6–12 months | 74 |
| 12–18 months | 78 |
Row 1: Dc in the fourth chain from the hook and in each remaining chain across. Turn.
Count: 64, 68, 72, or 76 dc.
Row 2: Ch 3 (does not count as a stitch). Dc in each stitch across. Turn.
Rows 3–10: Repeat Row 2.
Continue until the bodice measures approximately 4½–5½ inches from the foundation edge, depending on size.
For the larger sizes, add rows until the desired bodice depth is reached.
Bodice length guide:
- 0–3 months: approximately 4½ inches
- 3–6 months: approximately 4¾ inches
- 6–12 months: approximately 5 inches
- 12–18 months: approximately 5½ inches
Fasten off, leaving a long tail for seaming.
2. Shape the Back Opening
The back opening allows the dress to fit over the baby’s head comfortably.
Lay the bodice flat with the right side facing you.
Mark the center of the upper edge.
Using Color A, attach yarn to one side of the upper edge.
Row 1: Ch 3, dc evenly along the first half of the neckline edge. Turn.
Rows 2–3: Ch 3, dc across. Turn.
Repeat on the opposite side, keeping both sides the same length.
You should now have two small back extensions that overlap slightly when buttoned.
3. Join the Bodice
Place the front and back edges together with the right sides facing inward.
Use a tapestry needle to sew the shoulder sections together.
Leave approximately 3 inches open for the neckline, adjusting slightly for the selected size.
Next, sew the side seams from the bottom upward, leaving approximately 3½ inches open for each armhole.
Turn the bodice right side out.
Try to keep the seams soft and flat. Avoid pulling the yarn too tightly, as this can make the armholes uncomfortable.
4. Add the Waist Foundation
Switch to the 4.5 mm hook.
Join Color A at the lower edge of the bodice.
Work around the entire lower edge, placing approximately one dc into each stitch and one dc into the end of each row where needed.
Keep the stitches evenly distributed.
Join with a sl st.
Round 1: Ch 3, dc around. Join with sl st.
If necessary, increase evenly so the total stitch count becomes a multiple of 6.
- 0–3 months: 72 stitches
- 3–6 months: 78 stitches
- 6–12 months: 84 stitches
- 12–18 months: 90 stitches
These counts provide a starting point for the skirt. If your actual edge count differs, distribute increases evenly to reach the appropriate multiple of 6.
5. Crochet the Flared Skirt
The skirt is the most eye-catching part of this design.
Alternating coral and peach creates a soft sunset effect, while the gradual increases give the dress a comfortable flare.
Keep the right side facing outward throughout the joined rounds.
Round 1: Ch 3, dc in each stitch around. Join.
Round 2: Ch 3, *dc in next 5 sts, 2 dc in next st; rep from * around. Join.
Round 3: Ch 3, dc in each stitch around. Join.
Round 4: Repeat Round 2, working the increase after every 6 stitches instead of 5.
Round 5: Ch 3, dc around. Join.
Change to Color B (Peach).
Round 6: Ch 3, dc around. Join.
Round 7: Ch 1, sc around. Join with sl st.
Change back to Color A.
Round 8: Ch 3, dc around. Join.
Round 9: Dc around, increasing evenly at approximately 8 equally spaced points.
Round 10: Ch 3, dc around. Join.
Change to Color B.
Round 11: Ch 3, dc around. Join.
Round 12: Ch 1, sc around. Join.
Change to Color A.
Rounds 13–18: Ch 3, dc around, joining at the end of each round.
If you want a fuller skirt, add another increase round after Round 15.
For a shorter dress, stop earlier. For a longer dress, continue repeating plain double crochet rounds until the desired length is reached.
Important count check: After every increase round, count your stitches and make sure the skirt remains evenly distributed. The skirt should widen gradually without developing large waves.
6. Create the Coral and Peach Sunset Stripes
To make the color transitions more decorative, work two additional narrow accent bands.
- Work 1 round of Peach in dc.
- Work 1 round of Coral in sc.
- Work 1 round of Peach in dc.
Keep the yarn carried neatly on the inside only when the color change is very short. For longer color sections, fasten off and weave in the ends.
The alternating colors create a soft striped effect rather than a harsh division between sections.
Special Techniques and Additional Elements
1. Crochet Shell Stitch Border
The shell border adds a delicate finish to the skirt.
Use Color C (Cream) and the 4.5 mm hook.
Border Round 1: Join yarn at the hem. Ch 1, sc in the first stitch, *sk 2 sts, 5 dc in next st, sk 2 sts, sc in next st; rep from * around.
Adjust the spacing slightly at the end if needed to keep the shell pattern balanced.
Join with a sl st.
Border Round 2: Sl st into the center stitch of the first shell. Ch 1, sc in the center of each shell, placing 5 dc in each single crochet between shells. Join.
This creates alternating shells that form a softly scalloped edge.
Fasten off and weave in the ends.
2. Decorative Waistband
The waistband is a simple detail that visually separates the bodice from the fuller skirt.
Use Color C.
Join yarn at the waist seam.
Round 1: Ch 1, sc evenly around the waist seam. Join.
Round 2: Ch 1, sc in each stitch around. Join.
Fasten off.
For a slightly raised appearance, work the second round in the back loops only.
3. Optional Crochet Flower
A small flower can be added to the waist or shoulder.
Using Color C:
Foundation: Ch 4 and join with a sl st to form a ring.
Round 1: Ch 1, work 6 sc into the ring. Join.
Round 2: *Ch 3, sl st in next sc; rep from * around.
Fasten off, leaving a long sewing tail.
Attach the flower securely to the front waistband, away from the baby’s mouth and hands. For clothing worn by very young babies, I recommend leaving detachable embellishments off entirely.
4. Armhole and Neckline Edging
Use the 3.5 mm hook and Color C.
Join yarn at the underarm seam.
Work sc evenly around the armhole opening. Avoid placing too many stitches in the curved sections.
Join with a sl st and fasten off.
Repeat around the second armhole.
For the neckline, work one round of sc evenly around the opening. Keep the stitches relaxed so the neckline remains comfortable.
Assembly and Finishing
Once all the crochet sections are complete, take a few minutes to finish the dress carefully.
- Weave in all loose yarn ends using a tapestry needle.
- Check the shoulder seams and side seams for gaps.
- Make sure the armhole edges are smooth and comfortable.
- Align the waist seam and decorative waistband.
- Position the shell border so the scallops hang evenly.
- Attach the buttons to one back extension and make small button loops on the opposite side.
For the button loops, use the 3.5 mm hook.
Attach yarn at the top corner of the back opening, ch 5, and join with a sl st to form a loop. Secure the yarn and repeat for the remaining buttons.
Place the buttons to match the loops and sew them firmly.
Button safety: Always check that buttons cannot be pulled loose. Avoid decorative buttons that could present a choking risk.
Blocking and Care
Blocking helps the dress look neat and gives the shell border a more balanced appearance.
For cotton or cotton-blend yarn, gentle wet blocking is usually suitable.
- Fill a basin with cool or lukewarm water.
- Add a small amount of gentle wool or fabric wash.
- Submerge the dress and allow it to soak briefly.
- Remove it carefully without twisting or squeezing.
- Press excess water out using a clean towel.
- Lay the dress flat on a blocking mat.
- Gently arrange the skirt, straighten the waistline, and shape the shell edging.
- Allow it to dry completely before removing the pins.
Care instructions:
- Hand wash in cool water when possible.
- Avoid harsh detergents and bleach.
- Do not wring or twist the dress.
- Dry flat rather than hanging it.
- Store in a clean, dry place.
Always follow the yarn manufacturer’s care instructions.
Fit and Troubleshooting Tips
Even when you follow the pattern carefully, small adjustments may be necessary.
1. The bodice feels too tight.
Your gauge may be smaller than the recommended measurement. Try a larger hook or add a few stitches to the foundation chain.
2. The skirt looks wavy.
Too many increases can create excessive fullness. Check your stitch count and reduce the number of increases in the next round.
3. The skirt looks stiff.
Try a larger hook for the skirt section. A softer cotton blend can also improve the drape.
4. The shell border curls inward.
Check that you are not pulling the stitches too tightly. Blocking can help the shells sit naturally.
5. The neckline stretches too much.
Use a smaller hook for the edging and avoid adding unnecessary stitches around the neckline.
6. The dress is too short.
Add additional plain double crochet rounds before beginning the decorative hem.
7. The dress is too long.
Remove a few plain skirt rounds before adding the shell border.
Important Pattern Construction and Stitch-Count Checks
For accuracy, keep these two details in mind while making your dress:
- The foundation chains for the four bodice sizes should be 67, 71, 75, and 79, respectively, to produce the intended 64, 68, 72, and 76 double crochet stitches when working into the fourth chain.
- The bodice is one flat panel. Do not sew shoulder seams. Sew the side edges together, leaving the armholes open, and make a short vertical opening at the center back for the button closure.
These adjustments keep the construction consistent with the intended design.
Final Thoughts
I absolutely love how the Coral Sunset Baby Dress brings together soft coral, warm peach, and delicate cream details. The combination gives the dress a cheerful summer appearance while keeping the overall design sweet and timeless.
The simple bodice makes the dress comfortable, while the flared skirt and shell-stitch border add the special handmade details that make baby crochet projects so enjoyable.
You can experiment with different sunset-inspired colors, adjust the skirt length, or create a softer pastel version using peach, ivory, and blush pink.
Most importantly, take your time with the finishing details. Neat seams, comfortable edges, and carefully secured closures make a big difference in the finished garment.
I hope you enjoy making this Coral Sunset Baby Dress Free Crochet Pattern as much as I enjoyed designing it. If you create your own version, share your finished dress in the comments or on Pinterest. I’d love to see the beautiful color combinations you choose!
Happy crocheting! ❤️


Leave a Reply
You must be logged in to post a comment.