


There is something special about coral-colored crochet projects. The shade reminds me of warm summer evenings, glowing sunsets, and the beautiful colors that appear just before the sun disappears below the horizon. I wanted to capture that feeling in a wearable design, so I created this Coral Sunset Summer Dress.
I imagined a comfortable dress with a fitted upper section, a gently shaped waist, and a flowing skirt that moves naturally when you walk. Instead of making the entire dress complicated, I combined simple stitches with delicate openwork details to create a balanced design.
This Coral Sunset Summer Dress Free Crochet Pattern is perfect if you enjoy handmade clothing with a feminine summer look. The pattern includes adjustable sizing, a breathable stitch design, and a pretty scalloped hem that gives the finished dress its special character.
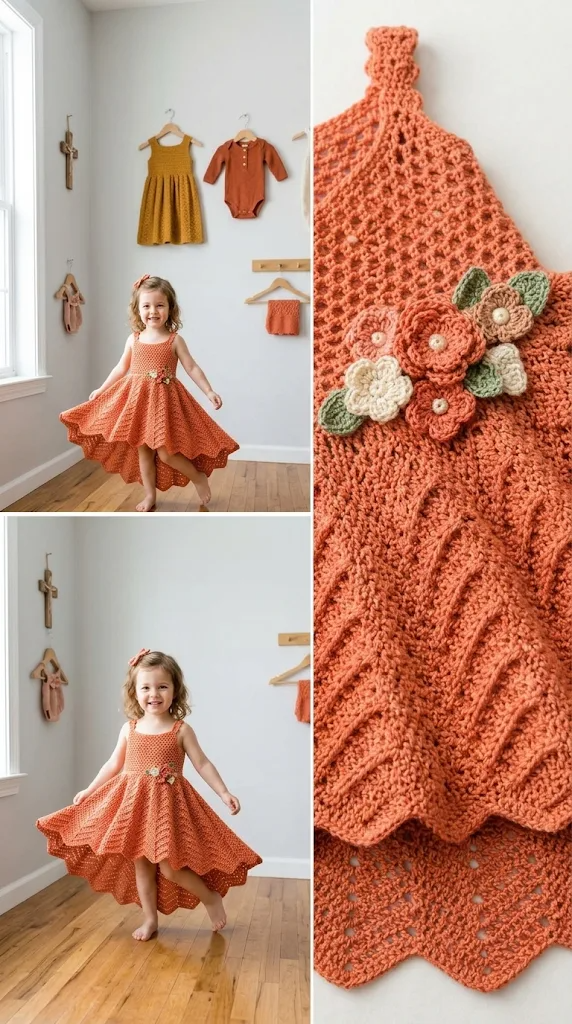
About This Pattern
The Coral Sunset Summer Dress is a two-panel garment designed to create a flattering, comfortable silhouette without complicated shaping.
The front and back panels are crocheted separately from the bottom upward. Each panel features a gently flared skirt, a textured waist section, and a breathable upper bodice. The panels are then seamed along the sides and shoulders, leaving openings for the arms and neckline.
The skirt uses alternating double crochet and chain spaces. This creates a light lace effect without making the fabric too transparent. The waist features textured stitches that add definition, while the scalloped hem provides a soft, feminine finish.
| Detail | Information |
| Skill level | Intermediate |
| Construction | Two panels, seamed |
| Sizes | XS, S, M, L, XL, 2XL, 3XL |
| Dress length | Approximately 90–98 cm |
| Fit | Comfortable, slightly fitted |
| Main color | Coral sunset |
| Stitch style | Double crochet, mesh, textured waist |
The pattern is customizable. You can make the skirt longer, adjust the waist, or add additional lace rows to create your preferred summer silhouette.
Materials You’ll Need
Yarn
Choose a soft cotton or cotton-blend yarn that feels comfortable against your skin.
- Color A – Coral: Approximately 1,500–2,000 yards (1,372–1,829 meters), depending on size.
- Color B – Soft Peach: Approximately 100–150 yards (91–137 meters) for decorative accents and edging.
Use lightweight DK cotton yarn (Category 3). Cotton gives the dress a lovely stitch definition and helps it maintain its shape.
Allow 15% extra yarn for gauge variation, longer skirts, and individual fitting adjustments.
Crochet Hooks
- 4 mm crochet hook for the main dress.
- 3.5 mm crochet hook for waist detailing and edging.
Additional Supplies
- Tapestry needle
- Locking stitch markers
- Measuring tape
- Scissors
- Blocking mats and rustproof pins
- Sewing needle and matching thread, if adding a lining
Abbreviations and Terminology
This pattern uses US crochet terminology.
| Abbreviation | Meaning |
| ch | Chain |
| sl st | Slip stitch |
| sc | Single crochet |
| hdc | Half double crochet |
| dc | Double crochet |
| tr | Treble crochet |
| sk | Skip |
| sp | Space |
| st | Stitch |
| sts | Stitches |
| rep | Repeat |
| RS | Right side |
| WS | Wrong side |
| BLO | Back loop only |
| FO | Fasten off |
Stitch Explanations
- Chain (ch): Yarn over and pull through the loop on your hook.
- Slip stitch (sl st): Insert hook, yarn over, and pull through the stitch and loop on your hook.
- Single crochet (sc): Insert hook, yarn over, pull up a loop, yarn over, and pull through both loops.
- Half double crochet (hdc): Yarn over, insert hook, pull up a loop, yarn over, and pull through all three loops.
- Double crochet (dc): Yarn over, insert hook, pull up a loop, yarn over and pull through two loops twice.
- Treble crochet (tr): Yarn over twice, insert hook, pull up a loop, then work through two loops three times.
- Back loop only (BLO): Work into the back loop of each stitch to create a raised ribbed texture.
Important: Turning chains do not count as stitches unless specifically stated. Always count your stitches at the end of each shaping row.
Gauge
Gauge is especially important for a wearable crochet dress. If your fabric is too tight, the skirt may feel stiff. If it is too loose, the dress may stretch more than expected.
Using your 4 mm hook and DK cotton yarn, work a small swatch in double crochet.
Gauge target:
- 16 dc stitches = 10 cm
- 9 rows = 10 cm
For the mesh pattern, work a second swatch to check that the fabric has a comfortable drape.
If you have more than 16 stitches across 10 cm, try a larger hook. If you have fewer stitches, use a smaller hook.
Wash and dry your swatch before measuring because cotton yarn can relax after washing.
Main Pattern Instructions
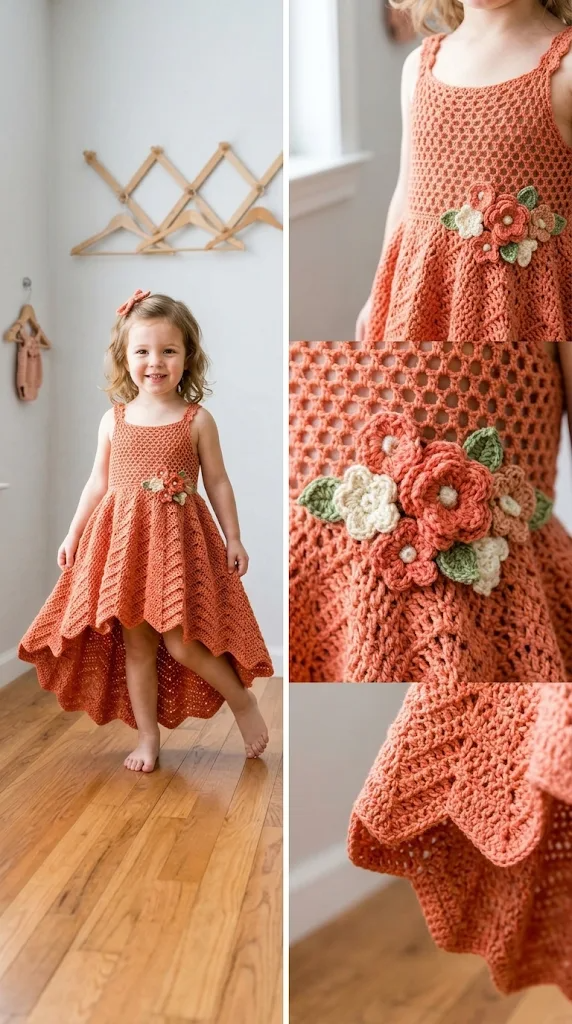
Size Guide
The following measurements are approximate finished garment measurements.
| Size | Bust | Suggested foundation stitches |
| XS | 84 cm | 64 |
| S | 94 cm | 72 |
| M | 104 cm | 80 |
| L | 114 cm | 88 |
| XL | 124 cm | 96 |
| 2XL | 134 cm | 104 |
| 3XL | 144 cm | 112 |
The foundation stitch count is for each panel. With the target gauge, the two panels create approximately the listed finished bust circumference.
For a comfortable fit, choose a size with approximately 4–8 cm of positive ease.
Part 1: Crochet the Skirt Panels
Make two identical panels using Coral yarn and the 4 mm hook.
Foundation: Ch the number listed for your size plus 1.
For example, for size M, ch 81.
Row 1: Dc in the third ch from the hook and in each remaining chain. Turn. (80 dc)
Row 2: Ch 2, dc in each stitch across. Turn.
Row 3: Ch 2, dc in the first stitch, *ch 1, sk 1 st, dc in the next st*. Repeat from * across, ending with a dc in the final stitch. Turn.
Row 4: Ch 2, dc in every dc and work 1 dc into each chain space. Turn.
Row 5: Ch 2, dc in each stitch across. Turn.
Row 6: Repeat Row 3.
Row 7: Repeat Row 4.
Continue alternating the solid double crochet rows and mesh rows until the skirt measures approximately 52–58 cm from the bottom edge.
Creating the Gentle Flare
To give the dress a soft A-line silhouette, add stitches gradually.
On every sixth row, work 2 dc into the first stitch and 2 dc into the last stitch.
Repeat this increase process four times, spacing the increase rows evenly throughout the skirt.
Your panel will have eight additional stitches after four increase rows.
Count check: Original stitch count + 8 = new stitch count.
If you prefer a more fitted skirt, work only two increase rows.
Part 2: Create the Textured Waist
The waist section gives the Coral Sunset Summer Dress its flattering shape.
Switch to your 3.5 mm hook.
Row 1: Ch 2, dc across. Turn.
Row 2: Ch 2, work dc in BLO across. Turn.
Row 3: Ch 1, sc across. Turn.
Row 4: Ch 2, work dc in BLO across. Turn.
Row 5: Ch 2, dc across. Turn.
Repeat Rows 2–5 twice.
The alternating back-loop stitches create a raised ribbed effect that visually separates the skirt from the upper bodice.
Do not pull the waist stitches too tightly. You want the fabric to retain enough stretch for comfortable movement.
Part 3: Crochet the Upper Bodice
Return to the 4 mm hook.
Work even in double crochet for approximately 25–30 cm above the waist section.
For a little decorative texture, alternate one row of double crochet with one row of mesh stitches.
Bodice Row 1: Ch 2, dc across. Turn.
Bodice Row 2: Ch 2, dc across. Turn.
Bodice Row 3: Ch 2, dc in first st, *ch 1, sk 1, dc in next st*. Repeat across. Turn.
Bodice Row 4: Ch 2, dc across, placing one dc into each chain space. Turn.
Repeat Rows 1–4 until the bodice reaches approximately 25 cm from the waist.
Make two panels with matching bodice lengths.
Part 4: Shape the Neckline and Armholes
The upper portion needs enough room for comfortable arm movement.
Lay each panel flat with the right side facing you.
Mark approximately 18–20 cm at the center top for the neckline. Leave approximately 10–12 cm on each outer side for the shoulder straps, adjusting these measurements to your body.
For each shoulder section, attach yarn at the outer edge.
Row 1: Ch 2, dc across the marked shoulder stitches. Turn.
Row 2: Ch 2, dc across. Turn.
Repeat until each shoulder strap measures approximately 5–7 cm.
Fasten off.
Repeat on the opposite side.
Make the back panel with the same general shape. If you prefer a higher back neckline, leave a smaller center opening when marking the shoulder sections.
Try the panels against your body or a well-fitting dress before seaming to confirm the neckline and armhole placement.
Special Techniques and Decorative Details
Part 5: Add the Coral Peach Decorative Waist Stripe
For a beautiful sunset-inspired color transition, add a narrow peach stripe around the waist.
Attach Color B at the side seam.
Round 1: Ch 1, sc evenly around the waist section, placing one stitch in each row end and one stitch in each available stitch. Join with sl st.
Round 2: Ch 1, hdc in each stitch around. Join with sl st.
Round 3: Ch 1, sc in each stitch around. Join and fasten off.
This small detail adds contrast without overpowering the coral color.
Part 6: Crochet the Scalloped Skirt Hem
The scalloped hem is one of my favorite details because it gives the dress a soft, flowing finish.
With the right side facing, attach Color B to the bottom edge.
Round 1: Ch 1, sc evenly across the bottom edge. Join with sl st.
Round 2: Ch 1, sc in the first stitch, *sk 2 sts, work 5 dc in the next st, sk 2 sts, sc in the next st*. Repeat from * around.
Adjust the spacing slightly at the end if necessary so the scallops are distributed evenly.
Join with a slip stitch and fasten off.
You should see a repeating sequence of rounded shells along the bottom of the dress.
Part 7: Finish the Neckline and Armholes
Use Color A and your 3.5 mm hook.
Attach yarn at the neckline edge.
Round 1: Ch 1, sc evenly around the neckline. Join with sl st.
Round 2: Ch 1, sc in each stitch around. Join and fasten off.
Repeat the same process around both armholes.
Keep your stitches relaxed. If you crochet too tightly around these openings, the edges may pull inward and feel uncomfortable.
For a slightly more decorative appearance, you can use Color B for the final slip-stitch edging.
Assembly and Finishing
Once both panels are complete, it is time to turn them into a beautiful summer dress.
Step 1: Position the Panels
Place the front and back panels together with the right sides facing inward.
Make sure the waist stripes, skirt lengths, and bodice rows line up correctly.
Use stitch markers to hold the panels in place before sewing.
Step 2: Join the Side Seams
Starting at the bottom hem, use your tapestry needle and matching Coral yarn to sew the side seams.
Work upward toward the armhole openings.
Use a mattress stitch for a neat, nearly invisible seam.
Leave the appropriate armhole openings unseamed.
Repeat on the opposite side.
Step 3: Join the Shoulder Straps
Bring the front and back shoulder straps together.
Use slip stitches or a tapestry needle to join the corresponding edges.
Check that both shoulders have the same width and that the neckline sits comfortably.
Step 4: Weave in Loose Ends
Use a tapestry needle to weave in every loose yarn end.
For additional security, weave each end through several stitches in one direction and then reverse direction.
Avoid leaving loose ends near the waist or armholes where they could become uncomfortable.
Step 5: Check the Fit
Try on the dress before blocking.
Check the bust, waist, hips, shoulder placement, and overall length.
If the skirt feels too narrow, you can carefully open the side seams and add a narrow crochet panel. If the bodice feels loose, adjust the side seams slightly.
Blocking and Care
Blocking helps the Coral Sunset Summer Dress look polished and allows the lace stitches to settle into their intended shape.
Because this design uses cotton yarn, wet blocking is a good option.
Wet Blocking Instructions
- Fill a clean basin with cool or lukewarm water.
- Add a small amount of gentle wool-safe or delicate-fabric detergent.
- Submerge the dress and allow it to soak for approximately 10–15 minutes.
- Remove the dress carefully without twisting or wringing it.
- Press out excess water using a clean towel.
- Lay the dress flat on blocking mats.
- Gently arrange the skirt, waist, and scalloped hem into shape.
- Allow the garment to dry completely before wearing.
Do not hang the dress while it is wet. The weight of the cotton yarn can stretch the skirt and distort its shape.
Washing and Storage
- Hand wash in cool water when possible.
- Use mild detergent.
- Avoid bleach and harsh chemicals.
- Do not wring or twist the fabric.
- Dry flat in a shaded, well-ventilated area.
- Store folded rather than hanging.
With gentle care, your handmade dress should remain beautiful through many summer seasons.
Fit and Troubleshooting Tips
Even experienced crocheters sometimes encounter little problems when making garments. Here are a few things to watch for.
- The skirt is curling inward.
This can happen when your tension is too tight or the hook is too small. Check your gauge and consider moving up one hook size.
- The skirt looks too wavy.
Too many increases can create unnecessary fullness. Make sure your increases are spaced evenly and avoid adding extra stitches accidentally.
- The waist feels too tight.
The ribbed waist section should have comfortable flexibility. Use a slightly larger hook for this section or add a few stitches evenly around the waist.
- The mesh stitches look uneven.
Keep your chain spaces consistent. Avoid pulling the yarn too tightly when making chain stitches.
- The neckline feels uncomfortable.
If the neckline is too narrow, remove the edging and add a little more space when joining the shoulder straps.
- The dress is longer than expected.
Cotton can relax after washing. Measure your garment after blocking before making final length adjustments.
How to Customize Your Summer Dress
One of the nicest things about handmade clothing is that you can make small changes to suit your style.
- For a longer dress: Add 10–15 cm of skirt rows before beginning the waist section.
- For a shorter dress: Reduce the skirt length while maintaining the same waist and bodice proportions.
- For a fuller skirt: Add additional increase rows.
- For a more fitted silhouette: Reduce the number of skirt increases.
- For a romantic appearance: Add a second row of decorative shell edging.
- For a sunset color effect: Introduce peach and soft pink stripes throughout the skirt.
If you want to change the length significantly, remember that you will need additional yarn.
Final Thoughts
I love how the Coral Sunset Summer Dress brings together simple crochet stitches, delicate lace details, and a beautiful warm color. The combination creates a dress that feels cheerful, feminine, and comfortable without looking overly complicated.
This Coral Sunset Summer Dress Free Crochet Pattern is a lovely project for anyone who wants to create something special by hand. The textured waist, breathable skirt, and scalloped hem give the design its own personality.
Take your time with the measurements, check your stitch counts, and enjoy watching the dress grow row by row. You can also experiment with different shades of coral, peach, pink, or even soft sunset orange to make the design your own.
I’d love to see how your finished dress turns out! Share your crochet creation, leave a comment about the colors you chose, or save your favorite project photos on Pinterest for inspiration.
Happy crocheting, and enjoy wearing your beautiful handmade summer dress!


Leave a Reply
You must be logged in to post a comment.