

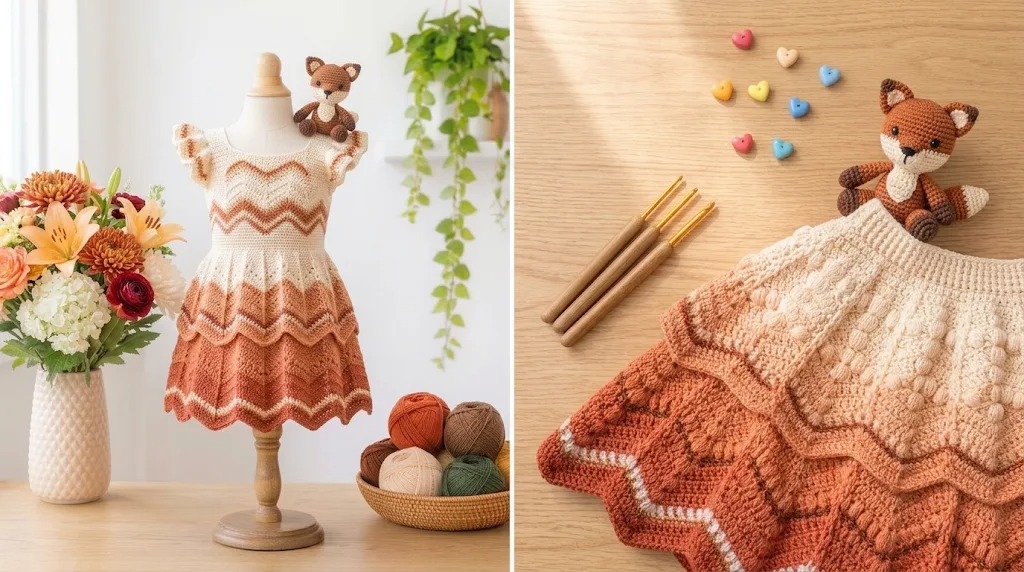
There is something special about autumn colors. Warm rust, golden mustard, cinnamon brown, and soft pumpkin shades always make me think of cozy afternoons, falling leaves, and handmade treasures.
When I started designing this Autumn Spice Gradient Baby Dress, I wanted something that looked delicate and charming without becoming overly complicated. I imagined a little dress that would be lovely for family photographs, birthday celebrations, autumn outings, or simply wearing on a cool afternoon.
The most enjoyable part of this design is watching the colors blend naturally from one shade into another. Instead of using several complicated colorwork techniques, the dress uses carefully planned color changes and textured crochet stitches to create a beautiful seasonal appearance.
This Autumn Spice Gradient Baby Dress Free Crochet Pattern features a comfortable yoke, a gently flared skirt, delicate sleeve openings, and a decorative scalloped hem. It is a lovely project if you enjoy making thoughtful handmade baby clothing.
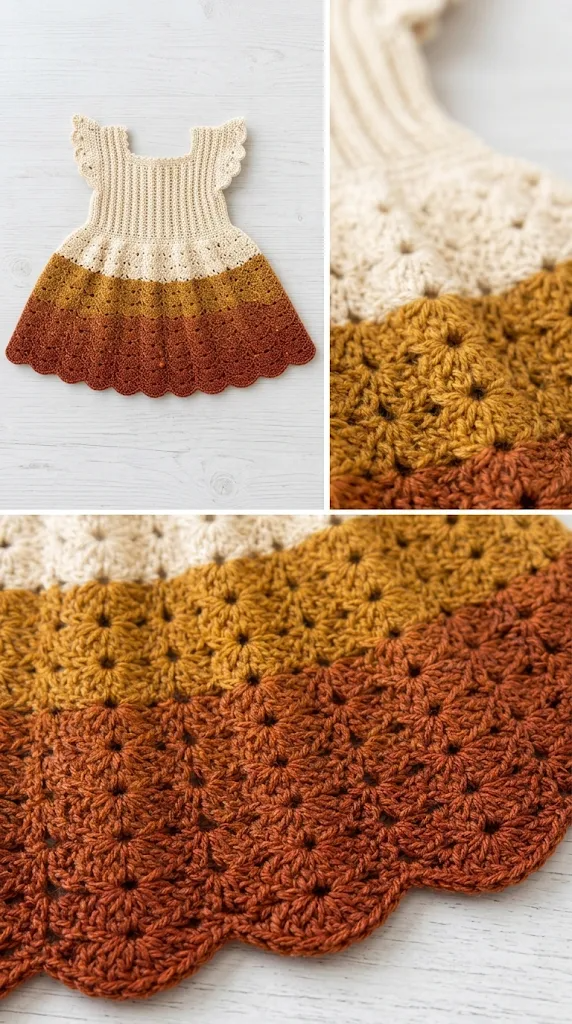
About This Autumn Spice Gradient Baby Dress Pattern
This baby dress is worked from the top down, beginning with a simple rectangular yoke. The yoke is shaped with evenly spaced increases to create comfortable armholes and a natural skirt opening.
After completing the yoke, the front and back sections are joined, and the skirt is worked in continuous rounds. A combination of double crochet stitches and textured shell stitches gives the skirt a soft, flowing appearance.
The gradient effect is created using three complementary autumn shades:
- Warm pumpkin orange
- Golden mustard
- Deep cinnamon rust
The finished dress has a comfortable fit and enough room for a baby to move freely.
Pattern Details
| Feature | Details |
| Skill level | Confident beginner to intermediate |
| Construction | Top-down |
| Terminology | US crochet terms |
| Sizes | 3–6, 6–12, 12–18 months |
| Main stitch | Double crochet |
| Design | Gradient skirt with textured edging |
| Sleeves | Short, gently shaped sleeves |
| Closure | Back button opening |
The instructions below use the 6–12-month size as the main example. Adjustments for the other sizes are included.
Materials You’ll Need
Yarn
Choose a soft, washable DK-weight baby yarn. A smooth acrylic, cotton-acrylic blend, or baby-friendly cotton yarn works nicely.
| Color | Purpose | Approximate Amount |
| Color A – Pumpkin | Upper yoke | 90 yards / 82 m |
| Color B – Mustard | Upper skirt | 130 yards / 119 m |
| Color C – Cinnamon | Lower skirt and edging | 150 yards / 137 m |
Total: Approximately 370 yards (338 m).
Allow 15% extra for gauge variation or a longer skirt.
Crochet Hooks
- 4.0 mm hook: Main dress construction.
- 3.5 mm hook: Button band and neckline edging.
Additional Supplies
- 2 small baby-safe buttons.
- Tapestry needle.
- Stitch markers.
- Measuring tape.
- Scissors.
- Blocking mat and rust-resistant pins.
- Optional removable stitch marker for tracking rounds.
Abbreviations and Terminology
This pattern uses standard US crochet terminology.
| Abbreviation | Meaning |
| ch | Chain |
| sl st | Slip stitch |
| sc | Single crochet |
| hdc | Half double crochet |
| dc | Double crochet |
| tr | Treble crochet |
| sk | Skip |
| st | Stitch |
| sts | Stitches |
| sp | Space |
| rep | Repeat |
| RS | Right side |
| WS | Wrong side |
| FO | Fasten off |
| BLO | Back loop only |
| shell | Multiple stitches worked into one stitch |
Basic Stitch Explanations
Chain (ch): Yarn over and pull through the loop on your hook.
Slip Stitch (sl st): Insert your hook into the stitch, yarn over, and pull through both the stitch and the loop on your hook.
Single Crochet (sc): Insert hook into the stitch, yarn over and pull up a loop. Yarn over and pull through both loops.
Half Double Crochet (hdc): Yarn over, insert hook, pull up a loop, then yarn over and pull through all three loops.
Double Crochet (dc): Yarn over, insert hook into the stitch, pull up a loop, yarn over and pull through two loops, then yarn over and pull through the remaining two loops.
Treble Crochet (tr): Yarn over twice, insert hook, pull up a loop, then work through two loops at a time three times.
Shell Stitch: Work 5 dc into the same stitch to create a fan-shaped decorative section.
Important notes:
- Turning chains do not count as stitches unless stated otherwise.
- Join rounds with a slip stitch.
- Check your stitch count at the end of each yoke row.
- Keep your tension relaxed around the neckline and armholes.
Gauge
Gauge is important because baby dresses need to fit comfortably without being too tight.
Using the 4.0 mm hook and DK-weight yarn:
- 18 dc = 4 inches (10 cm).
- 10 rows of dc = 4 inches (10 cm).
Making a Gauge Swatch
- Chain 22.
- Work dc across the row.
- Chain 2 and turn.
- Repeat until the swatch measures approximately 4 inches high.
- Measure the center 4-inch section.
If you have more than 18 stitches in 4 inches, change to a larger hook.
If you have fewer than 18 stitches, use a smaller hook.
Wash and dry your swatch as you intend to care for the finished dress before measuring.
Main Pattern Instructions
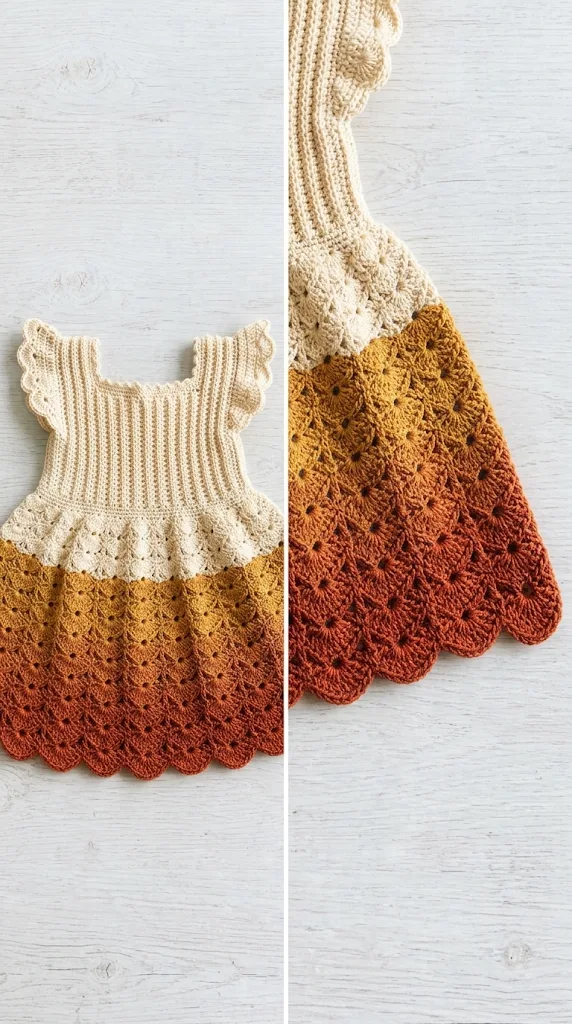
Size Guide
The following measurements are approximate.
| Size | Chest | Dress Length |
| 3–6 months | 18 inches | 13 inches |
| 6–12 months | 19 inches | 15 inches |
| 12–18 months | 20 inches | 17 inches |
The 6–12-month size is written in the main instructions.
For the smaller size, begin with 64 foundation chains. For the larger size, begin with 80 foundation chains.
These are approximate pattern sizes, so check the yoke against the baby’s measurements before joining the skirt.
Part 1: Creating the Upper Yoke
With Color A (Pumpkin) and the 4.0 mm hook, chain 72.
Foundation Row: Dc in the fourth chain from the hook and in each remaining chain. Turn.
Count: 70 dc.
Row 1: Ch 2, dc in the first 10 sts, 2 dc in the next st, dc in the next 14 sts, 2 dc in the next st, dc in the next 18 sts, 2 dc in the next st, dc in the next 14 sts, 2 dc in the next st, dc in the final 10 sts. Turn.
Count: 74 dc.
Row 2: Ch 2, dc across, placing 2 dc in each marked increase position. Turn.
Count: 78 dc.
Row 3: Ch 2, dc across, increasing at the four marked positions. Turn.
Count: 82 dc.
Row 4: Repeat Row 3.
Count: 86 dc.
Row 5: Repeat Row 3.
Count: 90 dc.
The increases gradually shape the upper section, allowing the fabric to spread comfortably around the shoulders and chest.
For a neat neckline, avoid pulling the starting chains too tightly.
Part 2: Shaping the Armholes
Now divide the yoke into front, back, and sleeve sections.
Place stitch markers to identify:
- First front section: 15 sts.
- First sleeve section: 15 sts.
- Back section: 30 sts.
- Second sleeve section: 15 sts.
- Remaining front section: 15 sts.
The exact division should be checked against the actual stitches available in your yoke. If necessary, redistribute one or two stitches so both sleeve sections are equal and the front and back remain balanced.
Armhole Row:
- Ch 2.
- Work dc across the first front section.
- Ch 4 for the underarm.
- Skip the first sleeve section.
- Work dc across the back section.
- Ch 4 for the second underarm.
- Skip the second sleeve section.
- Work dc across the remaining front section.
- Join or turn according to your chosen construction method.
You now have a joined bodice with two armhole openings.
Try the dress against the intended chest measurement before continuing.
Part 3: Creating the Gradient Skirt
The skirt is worked in joined rounds.
Join Color B (Mustard) at the underarm.
Round 1: Ch 2, work dc evenly around the entire skirt opening, including the underarm chains. Join with sl st.
Round 2: Ch 2, dc in each stitch around. Join.
Round 3: Ch 2, work 2 dc in every fifth stitch around. Join.
Round 4: Ch 2, dc in each stitch around. Join.
The increases create a gentle flare rather than a stiff, gathered appearance.
Part 4: Adding the Textured Skirt
The textured section adds movement and visual interest.
Round 5: Ch 2, sk 2 sts, work 5 dc in the next st, sk 2 sts, sc in the next st. Repeat around, adjusting the final repeat to fit the round.
Round 6: Ch 2, sc in the center dc of the next shell, ch 3, 5 dc in the next sc. Repeat around.
Round 7: Repeat Round 5, placing each new shell in the ch-3 space of the previous round.
Continue this shell pattern for another 2 rounds if you prefer a more decorative skirt.
The raised shell fans create a soft overlapping texture that looks especially pretty when the yarn changes from mustard to cinnamon.
Part 5: Completing the Cinnamon Gradient
Switch to Color C (Cinnamon).
Round 1: Ch 2, dc in each stitch or designated space around, maintaining the established stitch pattern.
Round 2: Ch 2, work dc evenly around.
Round 3: Ch 2, sk 2 sts, work 5 dc in the next st, sk 2 sts, sc in the next st. Repeat around.
Round 4: Repeat the shell pattern, placing shells into the appropriate spaces from the previous round.
For a longer dress, continue working additional dc rounds before the final shell edging.
Fasten off and weave in the yarn ends securely.
Special Techniques and Additional Elements
Decorative Scalloped Hem
A scalloped edge gives the bottom of the dress a polished finish.
Join Color C at the lower hem.
Edging Round:
- Ch 1.
- Sc in the first stitch.
- Skip 1 stitch.
- Work 5 dc in the next stitch.
- Skip 1 stitch.
- Sc in the next stitch.
- Repeat around.
Join with a slip stitch.
If the scallops begin to overlap, skip an additional stitch where needed. If they spread too far apart, reduce the spacing.
Short Sleeves
Join Color A at the armhole.
Round 1: Ch 2, work 24–30 dc evenly around the opening, adjusting to the actual circumference.
Round 2: Ch 2, dc around.
Round 3: Ch 1, sc around.
Fasten off.
Repeat for the second sleeve.
For a sleeveless version, simply work one round of sc around each armhole.
Neckline Edging
Using the 3.5 mm hook and Color A:
- Join yarn at the back neckline.
- Ch 1.
- Sc evenly around the neckline.
- Sl st to join.
- Fasten off.
Keep the edging soft and flexible.
Back Button Band
The back opening makes the dress easier to put on and take off.
With Color A, work sc along one side of the back opening.
Row 1: Ch 1, sc evenly along the opening.
Row 2: Ch 1, sc across.
Repeat on the opposite side.
On one band, create two buttonholes by working ch 2 and skipping 2 sts at evenly spaced positions. Work sc around the chain spaces on the next row.
Sew two small, securely attached buttons onto the opposite band.
For baby clothing, check all buttons and other small decorative pieces regularly for secure attachment.
Assembly and Finishing
Although the dress is worked mostly in one piece, a few finishing steps make a noticeable difference.
- Weave in all yarn ends using a tapestry needle.
- Check that both sleeves are equal in length.
- Ensure the neckline is smooth and does not pull.
- Attach the buttons securely.
- Check the skirt for uneven increases.
- Gently shape the scalloped hem.
If you want to add a little extra autumn character, consider a small crocheted leaf attached near the waist.
Keep decorative elements lightweight and firmly secured.
Blocking and Care
Baby garments need gentle care, especially when made with soft yarn.
For acrylic yarn, use gentle washing and avoid high heat.
For cotton or cotton-blend yarn, wet blocking can help the stitches settle into place.
Wet Blocking
- Fill a basin with cool or lukewarm water.
- Add a small amount of gentle detergent.
- Submerge the dress and allow it to soak briefly.
- Remove it carefully without twisting.
- Press excess water out using a clean towel.
- Lay the dress flat on a blocking mat.
- Gently arrange the skirt and scalloped hem.
- Allow it to dry completely.
Never hang the dress while wet because the skirt may stretch under its own weight.
Washing Instructions
- Wash gently according to the yarn label.
- Avoid harsh detergents.
- Do not use excessive heat.
- Dry flat.
- Store folded rather than hanging.
Fit and Troubleshooting Tips
The Yoke Feels Too Tight
Your gauge may be too small, or the neckline may be too restrictive.
Try a larger hook and check the chest measurement before proceeding.
The Skirt Curls Upward
This usually means the skirt needs additional increases.
Add another increase round, distributing increases evenly around the skirt.
The Skirt Looks Too Wavy
Too many increases can create unwanted ruffles.
Remove the last increase round and continue with plain dc rounds.
The Gradient Changes Look Too Sudden
Choose shades that share similar undertones. Pumpkin, mustard, and cinnamon work beautifully because they all have warm autumn tones.
You can also add an extra transition round between colors.
The Shells Do Not Line Up
Check that each shell is worked into the correct chain space or center stitch from the previous round.
Use stitch markers to identify the repeat positions.
The Dress Is Too Short
Add extra plain dc rounds before beginning the scalloped hem.
Adjusting the Size
For a smaller or larger baby, measure the chest circumference and compare it with the finished garment.
A little wearing ease is important. The dress should not fit tightly around the chest, arms, or neckline.
Final Thoughts
I love how the Autumn Spice Gradient Baby Dress brings together warm seasonal colors and delicate crochet texture. The pumpkin, mustard, and cinnamon shades create a beautiful autumn-inspired look, while the flared skirt and scalloped edging give the dress a sweet handmade finish.
This Autumn Spice Gradient Baby Dress Free Crochet Pattern is a lovely project for making a special handmade gift or creating something memorable for your own little one.
Take your time with the yoke, check your measurements as you work, and enjoy watching the gradient develop row by row.
I’d love to see your finished dress! Share your color choices, finished project photographs, or any creative changes you made. Your version might inspire another crocheter to try this beautiful autumn design.
Happy crocheting, and enjoy every stitch!



Leave a Reply
You must be logged in to post a comment.