

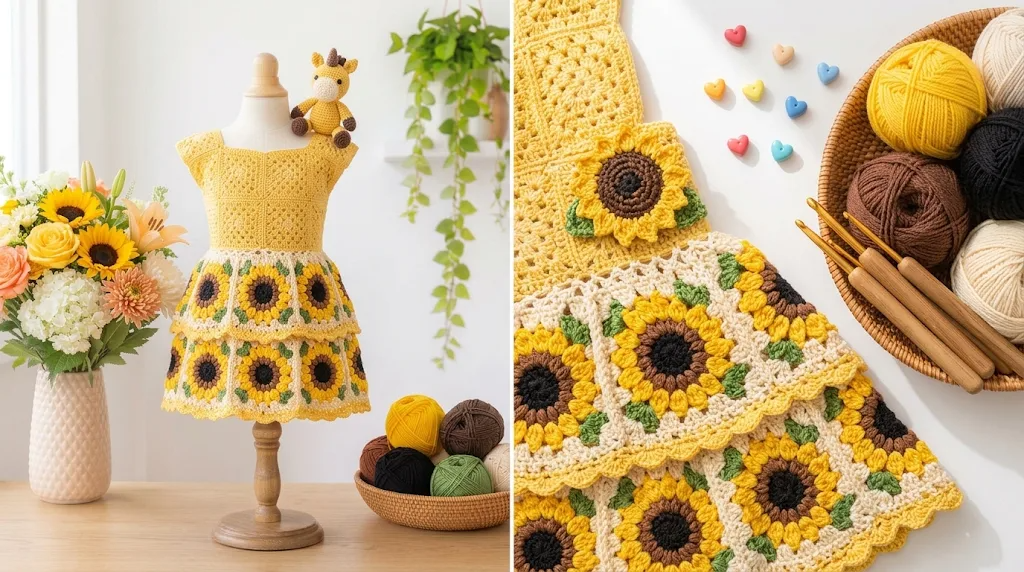
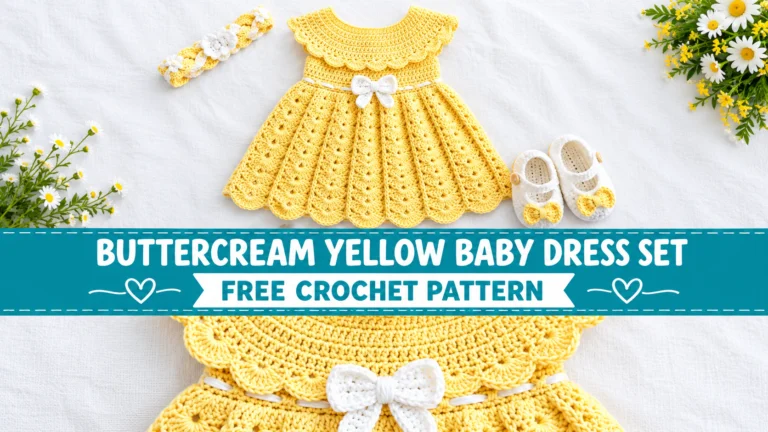
There is something especially sweet about a little handmade baby dress in sunflower yellow. It reminds me of warm sunshine, cheerful summer mornings, and tiny outfits that make everyone smile. I wanted to create a design that felt playful without becoming overly complicated, and granny squares seemed like the perfect starting point.
For this design, I imagined small floral-inspired squares joined into a comfortable bodice, with a gently flared skirt underneath. The sunflower yellow shade gives the dress its cheerful personality, while creamy white details soften the overall look.
This Sunflower Yellow Granny Square Baby Dress Free Crochet Pattern combines traditional crochet motifs with a simple dress construction. It is a lovely project for a special baby gift, birthday outfit, family gathering, or summer photoshoot.
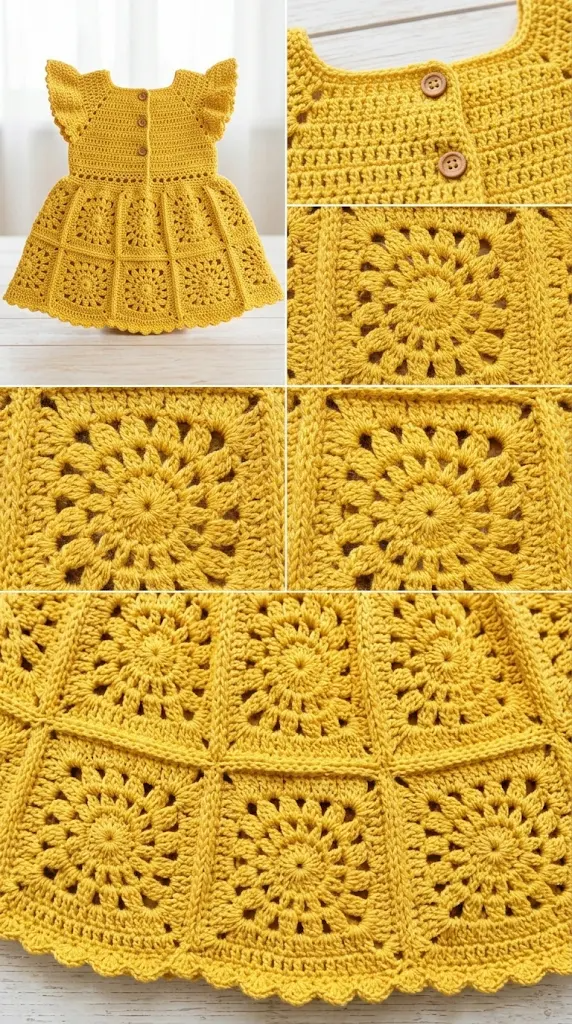
About This Pattern
This baby dress is made using individual granny square motifs that are joined together to create the upper bodice. The lower section is worked directly from the bottom edge of the bodice in joined rounds, gradually increasing to create a gentle A-line shape.
The neckline and armholes receive simple finishing borders for a neat appearance.
Pattern details:
- Skill Level: Advanced beginner to intermediate
- Construction: Separate granny squares joined into a bodice, followed by a crocheted skirt
- Crochet Terminology: US terms
- Main Color: Sunflower yellow
- Accent Color: Soft ivory
- Sizes: 3–6 months, 6–12 months, and 12–18 months
- Fit: Comfortable, slightly relaxed bodice with a flared skirt
- Sleeves: Sleeveless with decorative edging
The granny squares create a textured floral appearance, while the skirt provides soft movement. The finished dress should feel lightweight and comfortable rather than stiff.
Materials You’ll Need
Yarn
Choose a soft, washable baby-friendly cotton or cotton-acrylic blend.
| Color | Purpose | 3–6 Months | 6–12 Months | 12–18 Months |
| A – Sunflower Yellow | Main squares and skirt | 180 yd | 230 yd | 290 yd |
| B – Soft Ivory | Square centers and edging | 70 yd | 90 yd | 110 yd |
Use lightweight DK yarn (Category 3).
Allow approximately 15% extra yarn for gauge variation, joining, and finishing.
Crochet Hooks
- 3.5 mm hook for granny squares.
- 4 mm hook for the skirt.
- 3.25 mm hook for neckline and armhole edging.
Additional Supplies
- Tapestry needle
- Stitch markers
- Measuring tape
- Scissors
- Blocking mats and rustproof pins
- Two small buttons for the back opening
- Sewing needle and matching thread
Abbreviations and Terminology
All instructions use US crochet terminology.
| Abbreviation | Meaning |
| ch | Chain |
| sl st | Slip stitch |
| sc | Single crochet |
| hdc | Half double crochet |
| dc | Double crochet |
| sp | Space |
| st | Stitch |
| sts | Stitches |
| sk | Skip |
| rep | Repeat |
| rnd | Round |
| RS | Right side |
| WS | Wrong side |
Basic stitch explanations:
- Chain (ch): Yarn over and pull through the loop on your hook.
- Slip stitch (sl st): Insert the hook, yarn over, and pull through both the stitch and loop on the hook.
- Single crochet (sc): Insert hook, yarn over and pull up a loop, yarn over and pull through both loops.
- Half double crochet (hdc): Yarn over, insert hook, pull up a loop, yarn over and pull through all three loops.
- Double crochet (dc): Yarn over, insert hook, pull up a loop, yarn over and pull through two loops twice.
Special granny square cluster: Work 3 dc into the same chain space. This creates the familiar open granny square texture.
Turning chains do not count as stitches unless a step specifically says otherwise.
Gauge
Gauge is important because the bodice needs to fit comfortably without becoming too tight.
Using the 3.5 mm hook and DK yarn, make a granny square following the instructions below.
After blocking, your square should measure approximately 4 inches (10 cm) across.
If your square is larger, try a smaller hook. If it is smaller, move up one hook size.
Also make a small skirt swatch in double crochet. Aim for approximately 16 dc and 9 rows measuring 4 inches (10 cm).
Main Pattern Instructions
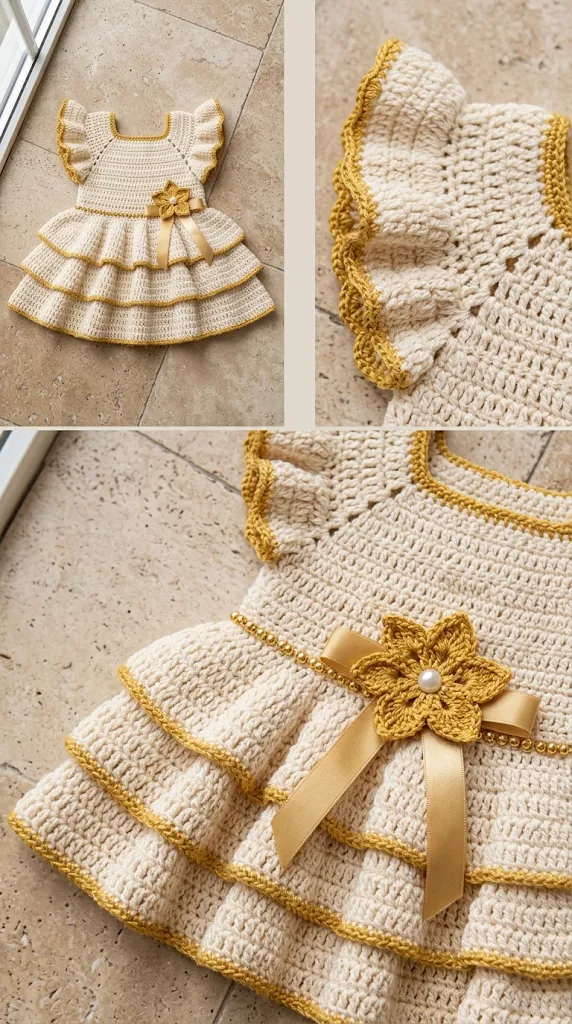
1. Granny Square Motifs
Each square begins with a small ivory center and develops into a sunflower yellow floral-style granny square.
Make the following number of squares:
| Size | Squares |
| 3–6 months | 8 |
| 6–12 months | 10 |
| 12–18 months | 12 |
For the larger sizes, arrange the squares in a wider bodice layout before joining.
Round 1 – Ivory Center
With Color B, make a magic ring.
- Ch 3 (counts as first dc).
- Work 11 dc into the ring.
- Sl st into the top of the beginning ch-3.
- Pull the ring closed.
Count: 12 dc.
Fasten off.
Round 2 – Sunflower Petal Clusters
Join Color A in any stitch.
- Ch 3.
- Work 2 dc in the same stitch.
- Ch 1.
- Skip 1 st.
- Work 3 dc in the next st.
- Ch 1.
Repeat around to create six clusters separated by chain spaces.
Sl st to join and fasten off.
Round 3 – Forming the Square
Join Color A in any ch-1 space.
- Ch 3, 2 dc, ch 2, 3 dc in the same space to form the first corner.
- Ch 1.
- In the next ch-1 space, work 3 dc, ch 2, 3 dc.
- Ch 1.
Repeat around.
You should have six corner spaces, so this round creates a hexagonal floral motif rather than a finished square.
Round 4 – Squaring the Motif
Join Color A in any ch-2 corner space.
Work the following sequence:
- In the first corner, work 3 dc, ch 2, 3 dc.
- Ch 1.
- In the next three chain spaces, work 3 dc in each, with ch 1 between clusters.
- At the next corner, work 3 dc, ch 2, 3 dc.
Continue the same pattern around, shaping four distinct corners.
Sl st to join.
Count check: Each square should have four corner spaces and three granny clusters along each side.
Fasten off and weave in the ends.
Make all remaining squares in the same way.
2. Joining the Granny Squares
Lay your completed squares on a flat surface with the right sides facing upward.
Arrange them into a bodice layout:
- 3–6 months: Two squares across the front and two across the back, with additional squares arranged to form the side sections.
- 6–12 months: Three squares across the front and two across the back.
- 12–18 months: Three squares across the front and three across the back.
Use a flexible slip-stitch join or mattress stitch.
Keep the joining tension relaxed so the bodice does not become stiff.
Before joining everything permanently, measure the circumference of the assembled bodice. It should be approximately:
| Size | Chest Circumference |
| 3–6 months | 18 in |
| 6–12 months | 19 in |
| 12–18 months | 20 in |
These are approximate finished measurements. Adjust square placement and joining tension as needed.
3. Bodice Edging
Once the squares are joined, work a neat border around the top and bottom edges.
Bottom edging:
Join Color B at the lower edge of the bodice.
Round 1: Ch 1, work 1 sc in each stitch and approximately 1 sc in each joining space. Distribute stitches evenly around the entire lower edge. Sl st to join.
Round 2: Ch 2, work 1 hdc in each stitch around. Sl st to join.
This creates a smooth foundation for the skirt.
Neckline edging:
Join Color B around the neckline.
- Ch 1.
- Work sc evenly around the neckline.
- Place 3 sc in each corner where necessary to prevent pulling.
- Sl st to join.
Fasten off.
4. Crocheting the Flared Skirt
The skirt is worked in joined rounds from the bottom edge of the bodice. Sunflower yellow creates a beautiful continuation of the floral upper section.
Switch to the 4 mm hook.
Round 1: Join Color A at the bottom edge of the bodice. Ch 2, work 1 dc in each stitch around. Sl st to join.
Round 2: Ch 2, work 1 dc in every stitch. Sl st to join.
Round 3: Ch 2, *work 2 dc in the next stitch, 1 dc in each of the next 5 stitches*. Repeat around.
Round 4: Ch 2, work 1 dc in every stitch.
Round 5: Ch 2, *work 2 dc in the next stitch, 1 dc in each of the next 6 stitches*. Repeat around.
Rounds 6–10: Ch 2, work 1 dc in every stitch.
For the larger sizes, continue repeating the increase round every fourth round, increasing the number of regular dc stitches between increases by one each time.
Keep the skirt spread naturally as you work. It should gradually widen without forming unwanted waves.
Skirt length guide:
| Size | Approximate Skirt Length |
| 3–6 months | 7 inches |
| 6–12 months | 8 inches |
| 12–18 months | 9 inches |
These measurements are taken from the bottom of the bodice to the hem.
5. Decorative Skirt Border
A delicate ivory border gives the dress a pretty finished appearance.
Join Color B at the bottom of the skirt.
Border Round 1: Ch 1, work 1 sc in each stitch around. Sl st to join.
Border Round 2:
- Ch 3.
- Skip 1 stitch.
- Work 1 sc in the next stitch.
- Ch 3.
- Skip 1 stitch.
- Work 1 sc in the next stitch.
Repeat around.
This creates a simple open scallop-like edge that complements the granny square texture.
Fasten off and weave in all loose ends.
Special Techniques and Additional Elements
Creating a Neat Floral Center
The small ivory center gives the granny squares a flower-inspired appearance. For a more pronounced sunflower look, you can add a few surface slip stitches in a slightly deeper golden shade.
Work these stitches around the center of each motif without pulling the yarn too tightly.
I recommend keeping this detail subtle. The dress already has plenty of texture from the granny square clusters.
Optional Shoulder Straps
For a sleeveless baby dress, comfortable shoulder straps are useful for keeping the bodice in place.
Make two straps using Color A.
Strap instructions:
- Ch 7.
- Row 1: Sc in the second ch from hook and across. (6 sc)
- Rows 2–12: Ch 1, turn, sc across. (6 sc)
Adjust the length to suit the baby and the bodice placement.
Sew the straps securely to the front and back of the dress. Add a small decorative ivory button to each strap if desired.
Back Opening and Buttons
For easier dressing, leave a small opening at the upper back.
Attach two small, securely sewn buttons to one side and create matching crochet chain loops on the opposite side.
Make sure all buttons are firmly attached and regularly inspected. Avoid loose beads, buttons, or other detachable decorations on clothing intended for babies.
Assembly and Finishing
Before completing the dress, lay it flat and check that the bodice and skirt are sitting evenly.
Follow these finishing steps:
- Check all granny square joins and reinforce any loose sections.
- Sew the shoulder straps securely in place.
- Attach the back buttons and chain loops.
- Check the neckline and armhole edges for loose or uneven stitches.
- Weave in every remaining yarn tail using a tapestry needle.
- Gently stretch the skirt into its natural A-line shape.
Pay particular attention to the underarm and shoulder areas. These sections experience movement when a baby wears the dress, so secure stitching is important.
Blocking and Care
Blocking helps the granny squares look even and gives the finished dress a more professional appearance.
Because this design uses baby-friendly cotton or cotton-blend yarn, gentle wet blocking is a good option.
Wet-Blocking Instructions
- Fill a basin with cool or lukewarm water.
- Add a small amount of gentle yarn wash.
- Submerge the dress and allow it to soak for approximately 10 minutes.
- Remove it carefully without twisting or wringing.
- Press out excess water using a clean towel.
- Arrange the dress on blocking mats.
- Gently shape the granny squares and skirt.
- Allow the garment to dry completely.
Avoid stretching the neckline or straps excessively.
Care Instructions
- Hand wash in cool water whenever possible.
- Use a mild detergent.
- Avoid bleach.
- Do not wring or twist the garment.
- Dry flat away from direct sunlight.
- Never hang the dress while wet, as the skirt may stretch.
- Store folded in a clean, dry place.
If your yarn label allows machine washing, use a gentle cycle and a laundry bag.
Fit and Troubleshooting Tips
Even an experienced crocheter can run into a few small problems when making granny square garments. Here are some solutions.
1. Granny Squares Are Curling
Curling usually happens when your crochet tension is too tight or the hook is too small.
Try using a larger hook and check that your corner chain spaces are not being pulled closed.
2. The Bodice Feels Too Tight
Check the finished chest measurement before attaching the skirt.
If necessary, use a larger square size or add a little width through the side joins. Avoid forcing the finished garment to stretch around the baby.
3. The Skirt Looks Wavy
Too many increases can make the skirt ruffle instead of flare.
If this happens, remove the most recent increase round and work another plain round before increasing again.
4. The Skirt Looks Too Narrow
If the skirt is hanging straight rather than forming a gentle A-line, add another increase round.
Distribute increases evenly around the circumference.
5. The Granny Squares Look Uneven
Block the squares individually before joining them. This makes it much easier to achieve matching dimensions.
6. The Straps Keep Slipping
Check the placement and length of the straps. Make sure they are securely attached to reinforced sections of the bodice.
Never rely on decorative stitches alone to hold the straps.
Final Thoughts
I love how this Sunflower Yellow Granny Square Baby Dress Free Crochet Pattern brings together traditional crochet techniques and a cheerful modern color combination.
The little floral-inspired motifs make the bodice special, while the soft flared skirt gives the dress a lovely shape. The ivory details add just enough contrast without taking attention away from the beautiful sunflower yellow.
You can also experiment with different shades. Soft peach, pale pink, lavender, or buttercream would all look lovely with the same granny square construction.
Most importantly, take your time with the little details. Neat joins, comfortable sizing, and careful finishing make a handmade baby dress even more special.
I hope you enjoy making this sweet crochet dress as much as I enjoyed designing it. If you create your own version, share your finished project in the comments or save it to Pinterest so other crochet lovers can find inspiration too.
Happy crocheting! 🌻


Leave a Reply
You must be logged in to post a comment.