

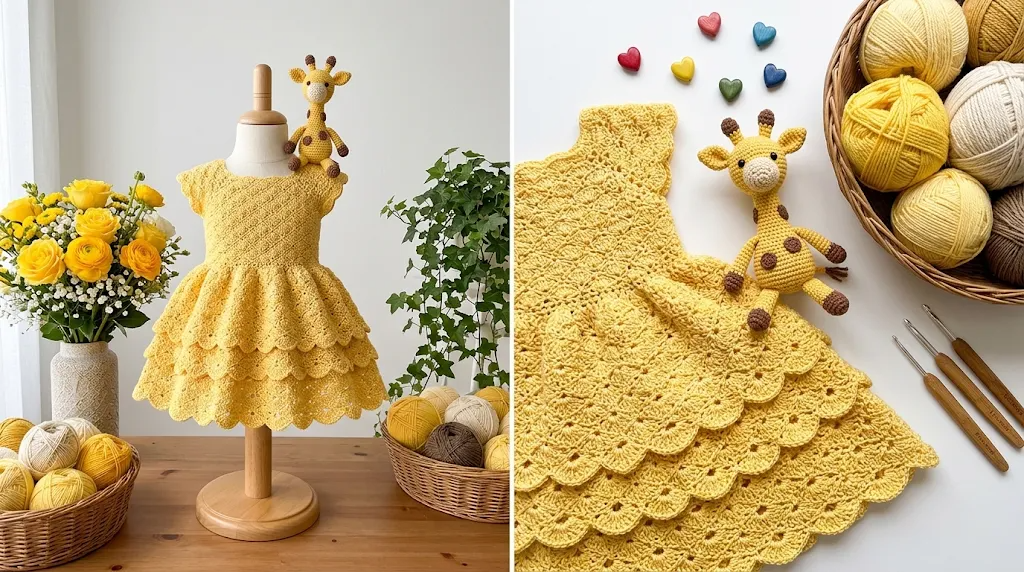
There is something so cheerful about a little yellow baby dress. The color reminds me of warm sunshine, fresh spring mornings, and tiny flowers opening in the garden. I wanted to create a crochet dress that captured that feeling while remaining soft, comfortable, and practical enough for a baby to wear.
When I started working on this design, I knew I wanted shell stitches to be the main feature. Shell stitches create beautiful fan-shaped textures without making the fabric feel overly complicated. They also give a simple baby dress a lovely handmade appearance.
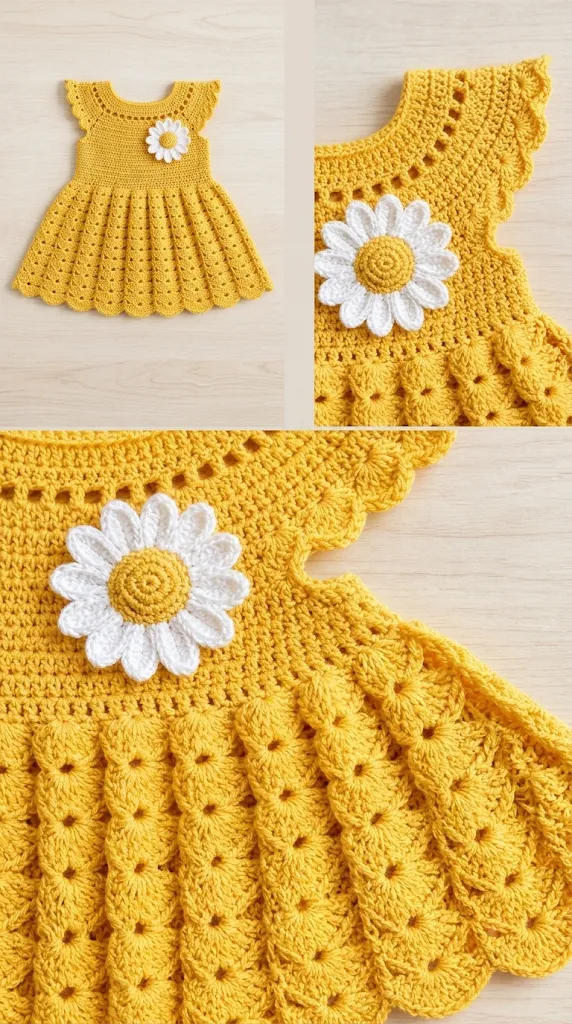
This Sunny Yellow Shell Baby Dress Free Crochet Pattern combines a simple bodice, a gently flared skirt, decorative shell stitches, and a delicate scalloped hem. It is a sweet project for baby showers, birthdays, spring celebrations, or everyday photographs.
About This Sunny Yellow Shell Baby Dress Pattern
This baby dress is worked from the top down, beginning with a rectangular yoke. The yoke is shaped using increases at four corners, creating the foundation for the bodice and skirt.
Once the yoke is complete, the sleeves are separated from the body. The front and back sections are joined, and the skirt is worked in rounds.
The skirt features repeating shell stitches that create a soft, flowing texture. A simple edging completes the bottom.
Skill Level: Confident beginner to intermediate.
You should be comfortable with basic crochet stitches, working in rounds, increasing, and following stitch repeats.
Finished Sizes
| Size | Approximate Chest | Dress Length |
| 0–3 months | 16 inches | 13 inches |
| 3–6 months | 17 inches | 14 inches |
| 6–12 months | 18 inches | 15 inches |
| 12–18 months | 19 inches | 16 inches |
The measurements are approximate. Choose the size according to the baby’s actual measurements and allow comfortable ease.
Materials You’ll Need
Yarn
Choose a soft, breathable cotton or cotton-blend yarn suitable for baby clothing.
- Color A – Sunny Yellow: 300–450 yards (275–412 meters), depending on size.
- Color B – Cream: 25–40 yards (23–37 meters), for decorative edging and bow details.
Yarn Weight: DK weight, category 3.
Allow approximately 15% extra yarn if your gauge differs from the pattern.
Crochet Hooks
- 4.0 mm crochet hook for the main dress.
- 3.5 mm crochet hook for the neckline and finishing details.
Additional Supplies
- Tapestry needle.
- Stitch markers.
- Measuring tape.
- Scissors.
- Blocking mat and rustproof pins.
- Three small, baby-safe buttons for the back opening.
Avoid detachable decorative pieces that could become choking hazards. Secure all closures carefully.
Abbreviations and Terminology
This pattern uses US crochet terminology.
- ch: Chain. Yarn over and pull through the loop on your hook.
- sl st: Slip stitch. Insert the hook, yarn over, and pull through both loops.
- sc: Single crochet. Insert the hook, yarn over, pull up a loop, yarn over, and pull through both loops.
- hdc: Half double crochet. Yarn over, insert hook, pull up a loop, yarn over, and pull through all three loops.
- dc: Double crochet. Yarn over, insert hook, pull up a loop, yarn over and pull through two loops twice.
- sk: Skip the indicated stitch.
- sp: Space.
- st/sts: Stitch/stitches.
- rep: Repeat.
- FO: Fasten off.
- RS: Right side.
- WS: Wrong side.
Special Stitch Instructions
Shell: Work 5 dc into the same stitch or space.
V-stitch: Work 1 dc, ch 1, and 1 dc into the same stitch.
Turning chains: Turning chains do not count as stitches unless a step specifically states otherwise.
Gauge
Gauge is important because it determines the final size and fit of your baby dress.
Using your 4.0 mm hook and DK yarn, crochet a small swatch in double crochet.
Gauge: 18 dc stitches and 10 rows = 4 inches (10 cm).
To check your gauge:
- Make a foundation chain of approximately 22 stitches.
- Work double crochet rows until the swatch measures about 4 inches.
- Allow the swatch to rest flat before measuring.
- Count the stitches across the center 4 inches.
If you have more stitches than required, try a larger hook.
If you have fewer stitches than required, try a smaller hook.
Main Pattern Instructions
Part 1: Crochet the Yoke
The yoke forms the upper part of the dress and creates the space needed for the sleeves and body.
Using Color A and your 4.0 mm hook:
Foundation: Ch 54 for the 3–6-month sample size.
Row 1: Dc in the fourth ch from hook and in each remaining ch. Turn. (52 dc)
Row 2: Ch 2, dc in the next 7 sts, (2 dc, ch 2, 2 dc) in the next st, dc in the next 10 sts, (2 dc, ch 2, 2 dc) in the next st, dc in the next 14 sts, (2 dc, ch 2, 2 dc) in the next st, dc in the next 10 sts, (2 dc, ch 2, 2 dc) in the next st, dc in the final 7 sts. Turn.
Row 3: Ch 2, dc in each dc until you reach the first ch-2 corner space. Work (2 dc, ch 2, 2 dc) into that space. Continue in dc to the next corner and repeat the corner increase. Repeat for all four corners. Turn.
Rows 4–8: Repeat Row 3, increasing at each of the four corner spaces.
The yoke should gradually widen with each row.
Check the measurements against the baby’s chest and shoulder width before moving forward.
Sizing note: For smaller sizes, begin with a shorter foundation chain and work fewer yoke rows. For larger sizes, use a longer foundation chain and additional increase rows. Always check the finished yoke measurements rather than relying only on row numbers.
Part 2: Separate the Sleeves
Lay the yoke flat with the right side facing you.
Place stitch markers at the four corner spaces.
The sections between the corner markers form the front, back, and sleeves.
Sleeve Separation Round:
- Ch 2.
- Work dc across the first front section.
- Skip all stitches across the first sleeve section.
- Ch 4 to form the underarm.
- Continue dc across the back section.
- Skip the second sleeve section.
- Ch 4.
- Finish the round by joining to the first dc with a sl st.
The two chain spaces create comfortable underarm openings.
Count your stitches and make sure the front and back sections are balanced.
Part 3: Crochet the Bodice
Continue working in rounds.
Round 1: Ch 2, dc in each stitch around, including the underarm chain spaces. Join with sl st.
Round 2: Ch 2, dc around. Join.
Rounds 3–5: Repeat Round 2.
The bodice should sit comfortably around the baby’s chest without pulling.
If you want a slightly longer bodice, add one or two more rounds before beginning the skirt.
Sunny Yellow Shell Stitch Skirt
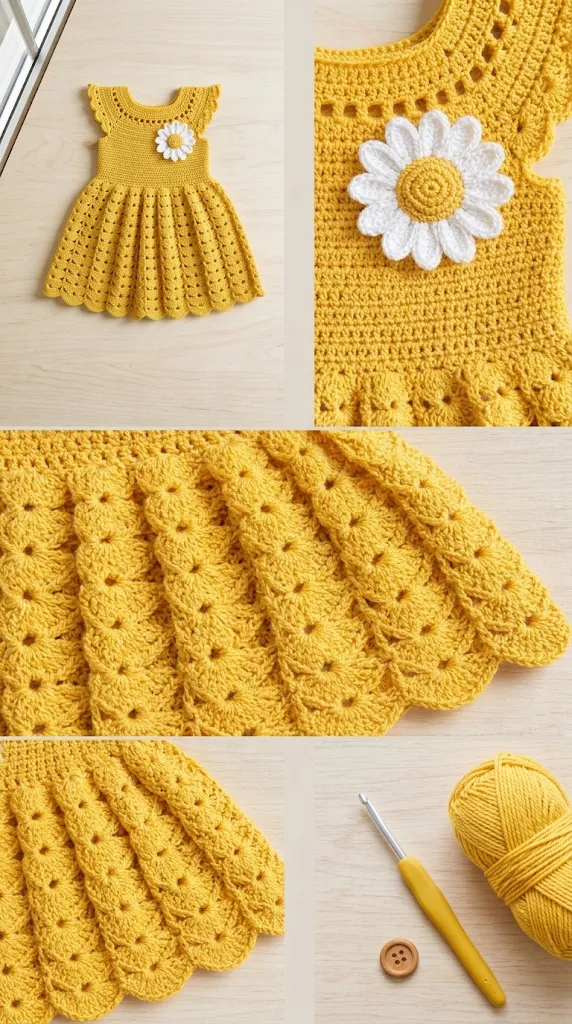
This is my favorite part of the design. The shell stitches create beautiful fan-shaped sections that make the skirt look fuller and more decorative.
The skirt is worked in repeating rounds.
Shell Stitch Foundation
Round 1: Ch 2, dc around the bodice, increasing evenly by working 1 extra dc approximately every 5 stitches. Join with sl st.
The increase round provides enough room for the skirt to flare.
Round 2: Ch 1, sc in the first stitch, sk 2 sts, work 5 dc in the next st, sk 2 sts, sc in the next st. Repeat around, adjusting the final repeat if needed to maintain the shell sequence. Join with sl st.
Round 3: Sl st into the center dc of the first shell. Ch 1, sc in the center of the shell, ch 2, work 5 dc in the next sc, ch 2, sc in the center of the next shell. Repeat around.
Round 4: Ch 2, work 1 dc in each dc of the shell groups and 1 dc in each chain space. Join.
Round 5: Repeat Round 2, placing each new shell into the center stitch of the previous round’s shell group.
Rounds 6–12: Repeat Rounds 3–5, maintaining the shell placement.
For a longer dress, continue the shell pattern until the desired length is reached.
The repeated fans create a gently layered appearance without requiring separate skirt panels.
Count check: Each shell contains 5 dc. Keep the number of shell groups consistent throughout each pattern repeat.
Decorative Neckline and Sleeve Edging
A neat neckline and sleeve finish make the dress look polished.
Neckline
Join Color B at the back neckline.
Round 1: Ch 1, sc evenly around the neckline. Join with sl st.
Round 2: Ch 1, sc in each stitch around. Join and FO.
Keep the neckline flexible so it does not feel tight when dressing the baby.
Sleeve Edging
Join Color B at the underarm.
Work one round of sc evenly around each sleeve opening.
Join with sl st and FO.
Avoid making the sleeve openings too tight. They should allow comfortable movement.
Beautiful Scalloped Hem
The scalloped hem complements the shell texture of the skirt.
Join Color B at any point along the bottom edge.
Round 1: Ch 1, sc evenly around the hem. Join.
Round 2: Ch 1, sk 1 st, work 5 dc in the next st, sk 1 st, sl st in the next st. Repeat around.
Adjust the final repeat as necessary to keep the edging even.
FO and weave in the ends.
The cream-colored scallops create a lovely contrast against the sunny yellow yarn.
Optional Crochet Bow
A small bow adds a charming finishing touch.
Using Color A:
Foundation: Ch 16.
Row 1: Hdc in the second ch from hook and across. Turn. (15 hdc)
Rows 2–5: Ch 1, hdc across. Turn.
FO, leaving a long tail.
Fold the rectangle into a bow shape by bringing both short ends toward the center.
Wrap the yarn around the middle several times and secure it firmly at the back.
For baby safety, embroider the bow onto the center front of the bodice instead of using a detachable pin or clip.
Assembly and Finishing
The dress is mostly worked in one piece, so assembly is simple.
- Weave in all loose yarn ends using a tapestry needle.
- Check the underarm sections for any small gaps.
- Use matching yarn to close any visible openings.
- Add the cream neckline edging.
- Complete both sleeve edges.
- Attach the decorative bow securely if desired.
- Check that all buttons and closures are firmly attached.
For a back opening, create a small overlapping section at the upper back and sew on three securely attached buttons. Make corresponding button loops using small chain spaces.
Check the finished garment carefully before allowing a baby to wear it.
Blocking and Care
Blocking helps the shell stitches open up and gives the skirt a more even shape.
For cotton or cotton-blend yarn:
- Fill a basin with cool or lukewarm water.
- Add a small amount of gentle detergent.
- Submerge the dress and allow it to soak for approximately 10 minutes.
- Rinse gently if needed.
- Press out excess water without twisting.
- Place the dress flat on a clean towel.
- Arrange the skirt and scalloped edging into shape.
- Allow it to dry completely.
Avoid hanging the dress while wet because the skirt may stretch under its own weight.
For regular care, hand washing is a gentle option. Always follow the yarn manufacturer’s care instructions.
Fit and Troubleshooting Tips
The yoke feels too tight
Your starting chain or gauge may be too small. Try a larger hook or adjust the starting chain for the next size.
The skirt curls inward
You may need more increase stitches in the foundation round. Add evenly spaced increases before beginning the shell pattern.
The skirt looks wavy
Too many increases can create excess fabric. Reduce the number of increases in the next attempt.
The shell stitches look uneven
Check that every shell contains exactly five double crochet stitches and that the following rounds are placed consistently.
The neckline feels stiff
Use a slightly larger hook for the edging or avoid pulling the single crochet stitches too tightly.
You want a longer dress
Add more shell repeat rounds before finishing the scalloped hem.
Final Thoughts
I love how this Sunny Yellow Shell Baby Dress brings together a cheerful color and a timeless crochet texture. The little shell fans give the skirt movement, while the simple bodice keeps the overall design comfortable and wearable.
The best part is that you can personalize the dress in so many ways. Try a soft lemon shade, add cream-colored edging, or choose a different pastel color combination to create a completely new look.
Take your time with the shell stitches, check your measurements as you work, and enjoy watching the little dress grow row by row.
I hope this Sunny Yellow Shell Baby Dress Free Crochet Pattern inspires you to create something special for a little one. If you make your own version, share your finished dress in the comments or on Pinterest. I’d love to see your color choices and beautiful handmade details!
Happy crocheting!


Leave a Reply
You must be logged in to post a comment.