


I wanted to make something that would turn an ordinary notebook into a little piece of happiness. You know those pretty journals that make you want to write down every thought, grocery list, random idea, and five-year plan? This project was inspired by exactly that feeling.
I started imagining a soft cream-colored crochet cover decorated with tiny red strawberries and fresh green leaves. I wanted something sweet without looking overly childish, with enough texture to feel special but still practical enough to use every day.
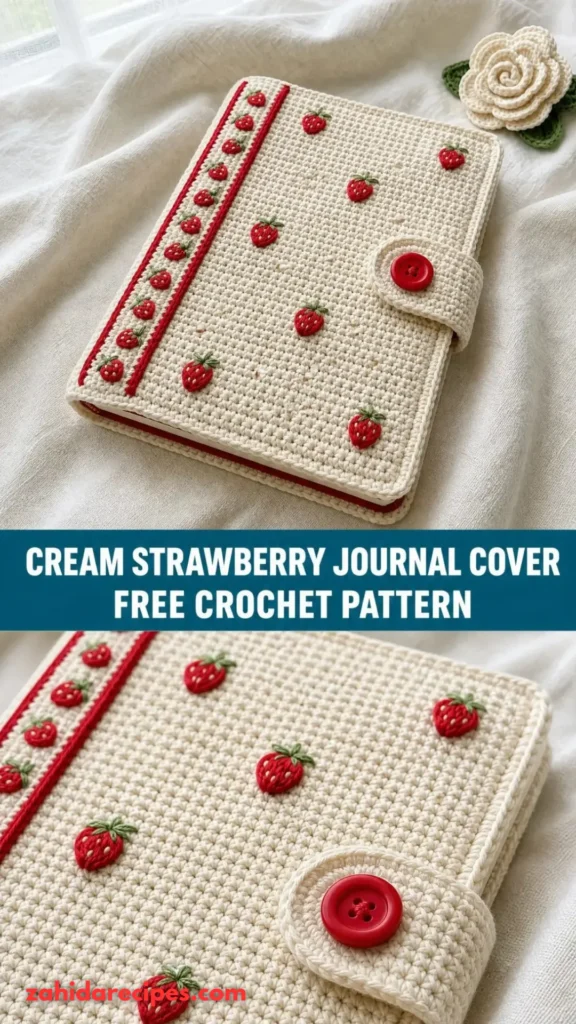
After experimenting with different stitches and strawberry placements, I settled on a simple rectangular construction with a textured crochet body, two protective inside flaps, and three-dimensional strawberry appliqués.
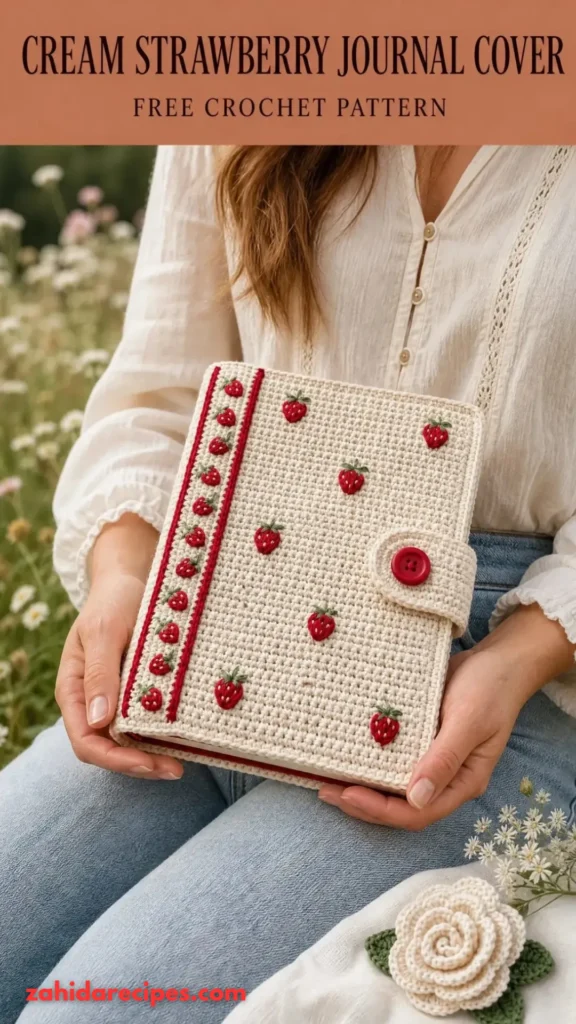
This Cream Strawberry Journal Cover Free Crochet Pattern is a lovely project for anyone who enjoys handmade accessories, cottagecore details, and little gifts that feel personal.
About This Cream Strawberry Journal Cover Pattern
This crochet journal cover is designed to fit a standard A5 notebook measuring approximately 5.8 x 8.3 inches (14.8 x 21 cm).
The cover is crocheted as one main rectangular panel. Two smaller extensions are added to create inside pockets that hold the notebook securely.
The cream background creates a soft, neutral appearance, while the strawberry appliqués add cheerful pops of red and green.
The design features:
- A textured cream crochet exterior.
- Three-dimensional red strawberry appliqués.
- Small green crochet leaves.
- A decorative cream border.
- Two inside notebook-holding flaps.
- A flexible construction that comfortably wraps around the journal.
Skill Level: Adventurous beginner to intermediate.
You should be comfortable with basic stitches, working in rows, increasing, decreasing, and sewing small crochet pieces together.
Finished Size: Approximately 6.2 x 8.6 inches (15.7 x 21.8 cm), excluding the inside flaps.
The pattern can be adjusted for different notebook sizes.
Materials You’ll Need
Yarn
Choose a soft cotton or cotton-blend yarn for a durable cover that holds its shape.
- Color A – Cream: Approximately 120 yards (110 meters) of DK-weight cotton yarn for the main cover.
- Color B – Strawberry Red: Approximately 20 yards (18 meters) for three strawberry appliqués.
- Color C – Leaf Green: Approximately 15 yards (14 meters) for strawberry leaves and stems.
- Color D – Soft Pink (optional): Approximately 5 yards (4.5 meters) for decorative strawberry details.
Allow 15% extra yarn if your tension tends to be tight or you are making adjustments.
Crochet Hooks
- 3.5 mm crochet hook for the main cover.
- 3 mm crochet hook for the strawberry appliqués.
- 3.5 mm hook for the decorative edging.
Notions
- Tapestry needle.
- Scissors.
- Stitch markers.
- Measuring tape.
- A standard A5 notebook.
- Sewing pins.
- Blocking mat and rust-resistant pins.
Abbreviations and Terminology
This pattern uses standard US crochet terminology.
| Abbreviation | Meaning |
|---|---|
| ch | Chain |
| sc | Single crochet |
| hdc | Half double crochet |
| dc | Double crochet |
| sl st | Slip stitch |
| st | Stitch |
| sts | Stitches |
| sc2tog | Single crochet 2 together |
| inc | Increase |
| rep | Repeat |
| RS | Right side |
| WS | Wrong side |
| FO | Fasten off |
Stitch Explanations
- Chain (ch): Yarn over and pull through the loop on your hook.
- Single Crochet (sc): Insert hook into the stitch, yarn over and pull up a loop, yarn over and pull through both loops.
- Half Double Crochet (hdc): Yarn over, insert hook, pull up a loop, yarn over and pull through all three loops.
- Double Crochet (dc): Yarn over, insert hook, pull up a loop, yarn over and pull through two loops twice.
- Slip Stitch (sl st): Insert hook into the stitch, yarn over and pull through both the stitch and loop on your hook.
- Increase (inc): Work two stitches into the same stitch.
- Single Crochet 2 Together (sc2tog): Insert hook into the first stitch and pull up a loop. Insert into the next stitch and pull up another loop. Yarn over and pull through all three loops.
Important: Turning chains do not count as stitches unless a specific instruction says otherwise.
Gauge
Gauge is important because the journal cover should fit snugly without stretching the notebook or sliding off.
Using the 3.5 mm hook and cream yarn:
- 18 sc = approximately 4 inches (10 cm).
- 20 rows = approximately 4 inches (10 cm).
Make a small practice swatch before starting.
If your swatch is too large, try a smaller hook. If it is too small, move up one hook size.
Remember that cotton yarn can relax slightly after washing and blocking.
Main Pattern Instructions
Step 1: Measure Your Journal
Before crocheting, measure your notebook.
For this pattern, we are using an A5 notebook approximately:
- Height: 8.3 inches (21 cm).
- Width: 5.8 inches (14.8 cm).
- Spine thickness: 0.6 inches (1.5 cm).
The main cover panel needs to wrap around the front, spine, and back of the notebook.
For this design, the panel measures approximately 19.5 inches wide and 8.6 inches tall.
Step 2: Crochet the Main Cream Panel
Using Color A and the 3.5 mm hook, create the main rectangular panel.
Foundation: Ch 88.
Row 1: Sc in the second ch from hook and in every remaining ch across. Turn. (87 sts)
Row 2: Ch 1, sc in every stitch across. Turn. (87 sts)
Row 3: Ch 1, hdc in every stitch across. Turn. (87 sts)
Row 4: Ch 1, sc in every stitch across. Turn. (87 sts)
Row 5: Ch 1, hdc in every stitch across. Turn. (87 sts)
Repeat Rows 2–5 until the panel measures approximately 8.6 inches (21.8 cm) tall.
Finish with a single crochet row.
Count: Maintain 87 stitches across every row.
Fasten off and weave in the yarn ends.
The alternating single and half double crochet rows create a subtle woven texture. This gives the cover a little more visual interest than a completely flat single crochet rectangle.
Step 3: Create the Inside Notebook Flaps
The inside flaps hold the notebook in place.
Make two identical flaps using Color A.
Foundation: Ch 25.
Row 1: Sc in the second ch from hook and across. Turn. (24 sts)
Rows 2–20: Ch 1, sc across. Turn. (24 sts)
Continue until the flap measures approximately 4.2 inches (10.7 cm) wide and 8.6 inches (21.8 cm) tall.
Fasten off.
Repeat for the second flap.
The finished flaps should cover approximately half of each inside notebook cover.
If your notebook has a thicker cover, make the flaps slightly wider.
Step 4: Crochet the Strawberry Appliqués
Now comes my favorite part!
These little strawberries transform the plain cream cover into something cheerful and decorative.
Make three strawberries using Color B.
Foundation: Ch 4.
Round 1: Work 2 sc into the second ch from hook, sc in the next ch, and 3 sc into the final ch. Continue along the opposite side of the foundation chain with sc in the next stitch and 1 sc in the final available stitch. Join with sl st. (8 sts)
Round 2: Ch 1, 2 sc in the first stitch, sc in the next 2 stitches, 2 sc in each of the next 3 stitches, sc in the next 2 stitches, and 2 sc in the final stitch. Join. (13 sts)
Round 3: Ch 1, sc in the first stitch, 2 sc in the next stitch, sc in the next 3 stitches, 2 sc in the next stitch, sc in the next stitch, 2 sc in the next stitch, sc in the next 3 stitches, 2 sc in the next stitch, and sc in the final stitch. Join. (17 sts)
Round 4: Ch 1, sc in each stitch around. Join. (17 sts)
Fasten off, leaving a long sewing tail.
Gently pinch the bottom of the strawberry to create a slightly pointed shape.
Make two additional strawberries.
Step 5: Add Strawberry Seeds
To give the strawberries a realistic appearance, add tiny embroidered details.
Using Color D or cream yarn:
- Thread a tapestry needle.
- Make small diagonal stitches across the red strawberry.
- Space the stitches evenly.
- Add approximately 5–7 seed details per strawberry.
Keep the stitches small so they don’t overpower the strawberry shape.
You can also use a slightly lighter pink yarn for a softer decorative effect.
Step 6: Crochet the Green Strawberry Leaves
Using Color C, make three small leaf clusters.
For each cluster:
Foundation: Ch 5.
Leaf 1: Sl st in the second ch from hook, sc in the next ch, hdc in the next ch, and dc in the final ch.
Ch 1.
Leaf 2: Sl st in the second ch from hook, sc in the next ch, hdc in the next ch, and dc in the final ch.
Ch 1.
Leaf 3: Sl st in the second ch from hook, sc in the next ch, hdc in the next ch, and dc in the final ch.
Fasten off, leaving a sewing tail.
Arrange the three leaves around the top of each strawberry.
Sew them securely in place using the tapestry needle.
Decorative Border
A neat border gives the journal cover a finished appearance and helps the edges look clean.
Attach Color A to any corner of the main rectangular panel.
Round 1: Ch 1, sc evenly around the entire panel. Work 3 sc into each corner to help the border turn smoothly. Join with sl st.
Round 2: Ch 1, sc in each stitch around, working 3 sc into the center stitch of each corner group. Join with sl st.
Fasten off.
Make sure the border lies flat. If it starts to curl, check your stitch placement and tension.
Assembly and Finishing
Once all the pieces are complete, it is time to turn them into a useful journal cover.
Attach the Inside Flaps
Place the main panel with the wrong side facing up.
Position one flap at each short end of the rectangle.
The flaps should overlap the inside edges slightly when the panel is wrapped around your notebook.
Pin them in place.
Using Color A, sew along the top and bottom edges of each flap, leaving the outer side edges open where the notebook covers will slide inside.
Check the fit before securing the final stitches.
Attach the Strawberry Appliqués
Turn the main cover right side up.
Arrange the three strawberries in a gentle diagonal cluster across the front.
I like placing one strawberry slightly higher than the other two because it creates a more natural, playful arrangement.
Pin each strawberry before sewing.
Use the long red yarn tails or matching thread to attach them securely.
Sew around the edges while keeping the center slightly raised.
Attach the green leaves above each strawberry.
Add Final Details
- Weave in every remaining yarn end.
- Check the corners, seams, and appliqués.
- Slide your notebook into the inside pockets and gently adjust the cover so it sits evenly.
Your cream strawberry journal cover is ready!
Blocking and Care
Cotton yarn benefits from gentle blocking because it helps the rectangular panel maintain its shape.
For wet blocking:
- Fill a basin with cool or lukewarm water.
- Add a small amount of gentle detergent.
- Submerge the crochet pieces for several minutes.
- Remove them carefully without twisting.
- Press out excess water using a clean towel.
- Shape the panel to the intended measurements.
- Pin the edges to a blocking mat.
- Allow everything to dry completely.
Avoid stretching the strawberry appliqués too much.
For everyday care:
- Hand wash gently when needed.
- Avoid harsh bleach.
- Dry flat.
- Do not hang the cover while wet.
- Store away from excessive moisture.
If using cotton-blend yarn, always follow the yarn manufacturer’s washing instructions.
Fit and Troubleshooting Tips
My Journal Cover Is Too Tight
Your crochet fabric may be too dense, or your notebook may be thicker than the sample.
Try using a larger hook or adding a few foundation chains.
The Cover Is Too Loose
Remove a few foundation chains or use a slightly smaller hook.
A snug fit is important because the notebook should stay securely inside the pockets.
The Main Panel Is Curling
Check your stitch count and make sure you are working into the first and final stitches of every row.
Blocking can also help correct mild curling.
My Strawberry Appliqués Look Flat
Use slightly thicker yarn or work the final round more loosely.
You can also add a small amount of polyester stuffing before closing the bottom edge, although this is optional.
The Inside Flaps Keep Slipping
Increase the flap width slightly and secure the seams with small, evenly spaced stitches.
Make sure the flaps are attached firmly to the main panel.
Can I Make This Cover for a Larger Notebook?
Absolutely!
Measure your notebook first.
For the main panel width, add together:
- Front cover width.
- Back cover width.
- Spine thickness.
- Approximately 0.5 inch (1.3 cm) of fitting ease.
For the panel height, add approximately 0.3 inch (0.8 cm) to the notebook height.
Adjust the foundation chain to match your desired width while maintaining the gauge.
Final Thoughts
There is something wonderfully satisfying about making an everyday object feel special with a little yarn and creativity.
This Cream Strawberry Journal Cover combines a soft neutral crochet texture with cheerful strawberry details, making it a lovely accessory for journaling, planning, studying, or simply keeping your favorite notebook protected.
I especially love how the little red strawberries stand out against the cream background. The design feels sweet, cozy, and just a little nostalgic.
You can experiment with different strawberry arrangements, add tiny flowers, or change the cream base to pale pink or buttery yellow.
Most importantly, make it your own!
I hope you enjoy creating this Cream Strawberry Journal Cover Crochet Pattern as much as I enjoyed designing it. Happy crocheting!


Leave a Reply
You must be logged in to post a comment.