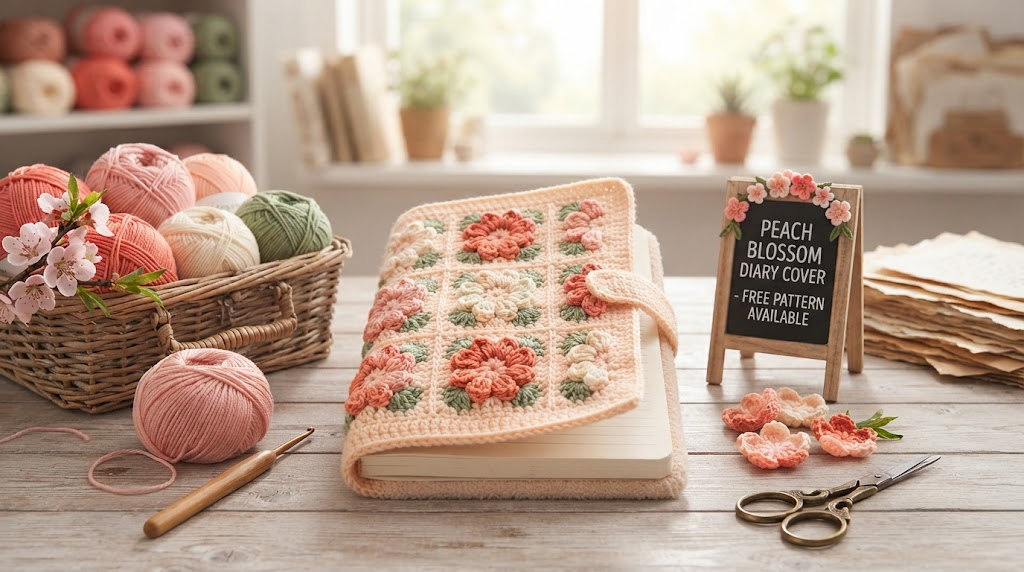
Peach Blossom Diary Cover Free Crochet Pattern
You can single crochet, right? Then you can make this peach blossom diary cover. Those pretty flowers and stems look fancy, but they are just simple chains and basic embroidery stitches. This cover turns a plain notebook into something that looks store-bought, yet you stitch every bit yourself.
The whole thing is two flat rectangles seamed together, plus a few cute appliques. No tricky shaping. No late-night frogging sessions. Ready to make a cover that protects your journal and makes you smile every time you open it?
Why This Diary Cover Pattern Feels So Good to Make
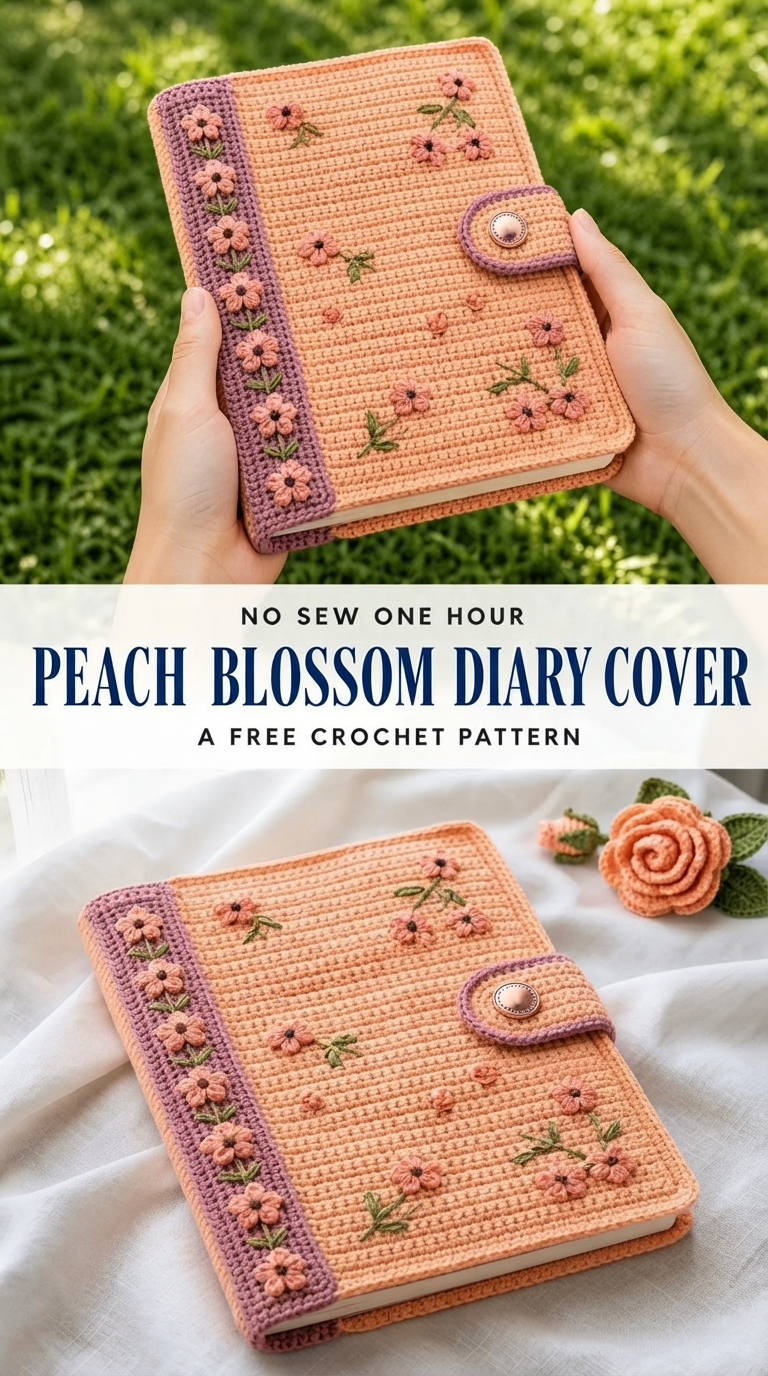
This project sits right in that sweet spot. The dense single crochet fabric feels sturdy and looks polished. Working in the back loop only creates soft horizontal ridges that give the cover texture without any extra effort.
You work each piece flat, then join them. No awkward corners to crochet around. Make the panels, seam them, add flowers, and slide your notebook inside. Simple as that.
It also makes a fantastic handmade gift. Picture giving a journal lover a custom cover in their favorite colors. Birthday? Done. Teacher thank-you? Perfect. Treat for yourself? Absolutely yes.
Materials You Need for Your Peach Blossom Cover
Gather these supplies before you start. Smooth cotton yarn works best so the ribbing and embroidery stay crisp.
Yarn:
- Main color (MC): Peach or apricot cotton yarn, about 200 yards (183 m)
- Contrast color A (CA): Dusty mauve or antique rose-purple cotton yarn, about 60 yards (55 m)
- Contrast color B (CB): Soft pink cotton yarn, about 40 yards (37 m) for flower appliques
- Contrast color C (CC): Medium sage green cotton yarn, about 20 yards (18 m) for stems and leaves
Hooks:
- US size D-3 (3.25 mm) for main panels and border strip
- US size C-2 (2.75 mm) for flower appliques
Notions:
- Tapestry needle for seaming and embroidery
- One magnetic snap set, 0.75 inch (18 mm) diameter, or one decorative shank button 0.75 inch (18 mm) diameter
- Scissors
- Stitch markers
- Straight pins for blocking and flower placement
- A5 notebook to check fit during construction
Yarn Options That Work Great
Stick with smooth DK-weight or light worsted cotton. Fuzzy yarns hide the ribbing and make embroidery harder.
Try these:
- Paintbox Yarns Simply DK – Peach Orange for MC, Dusty Rose for CA, Blush Pink for CB, Grass Green for CC
- Lion Brand 24/7 Cotton – Peach for MC, Blush for CA, Rose for CB, Fern for CC
- Drops Safran – shade 07 for MC, shade 18 for CA, shade 05 for CB, shade 11 for CC
Finished Size and Gauge
Closed cover: about 6.25 inches wide by 8.5 inches tall (16 cm by 21.5 cm)
Open cover: about 13.5 inches wide by 8.5 inches tall (34 cm by 21.5 cm)
Spine border strip: about 1 inch wide (2.5 cm) running the full height
These measurements fit a standard A5 notebook (about 5.8 by 8.3 inches or 14.8 by 21 cm).
Gauge: 6 stitches and 7 rows = 1 inch (2.5 cm) in back-loop-only single crochet with MC and US D-3 hook, after blocking.
Make a quick swatch: Chain 20. Work BLO sc across for 15 rows. Block flat. Measure the center 6 stitches by 7 rows. Adjust your hook if needed. Skip this and the cover might end up too loose or too tight. Trust me, the few minutes are worth it.
Skill level: Intermediate. You need solid single crochet, back-loop work, seaming, and basic embroidery. Nothing here is hard, but neat tension makes the finished piece look pro.
Time: About 8 to 12 hours total.
Abbreviations and Special Stitches
Here is every abbreviation you will see. A quick refresh never hurts.
- beg: beginning
- BLO: back loop only (insert your hook under just the back loop, the one farthest from you)
- ch: chain
- dc: double crochet
- hdc: half double crochet
- MC: main color
- CA: contrast color A (mauve)
- CB: contrast color B (pink)
- CC: contrast color C (green)
- rep: repeat
- rnd: round
- RS: right side
- sc: single crochet (insert hook, yarn over, pull up a loop, yarn over, pull through both loops)
- sc2tog: single crochet two together
- sk: skip
- sl st: slip stitch
- sp: space
- st(s): stitch(es)
- t-ch: turning chain
- WS: wrong side
- yo: yarn over
Special Stitch: Back-Loop-Only Single Crochet (BLO sc)
Insert your hook under the back loop only of the indicated stitch. That is the loop farthest from you as the work faces you. Yarn over and pull up a loop. Yarn over again and draw through both loops on your hook. One BLO sc complete.
This creates those lovely horizontal ridges. It looks like a different stitch but uses the exact same motion as regular single crochet.
Step-by-Step Pattern Instructions
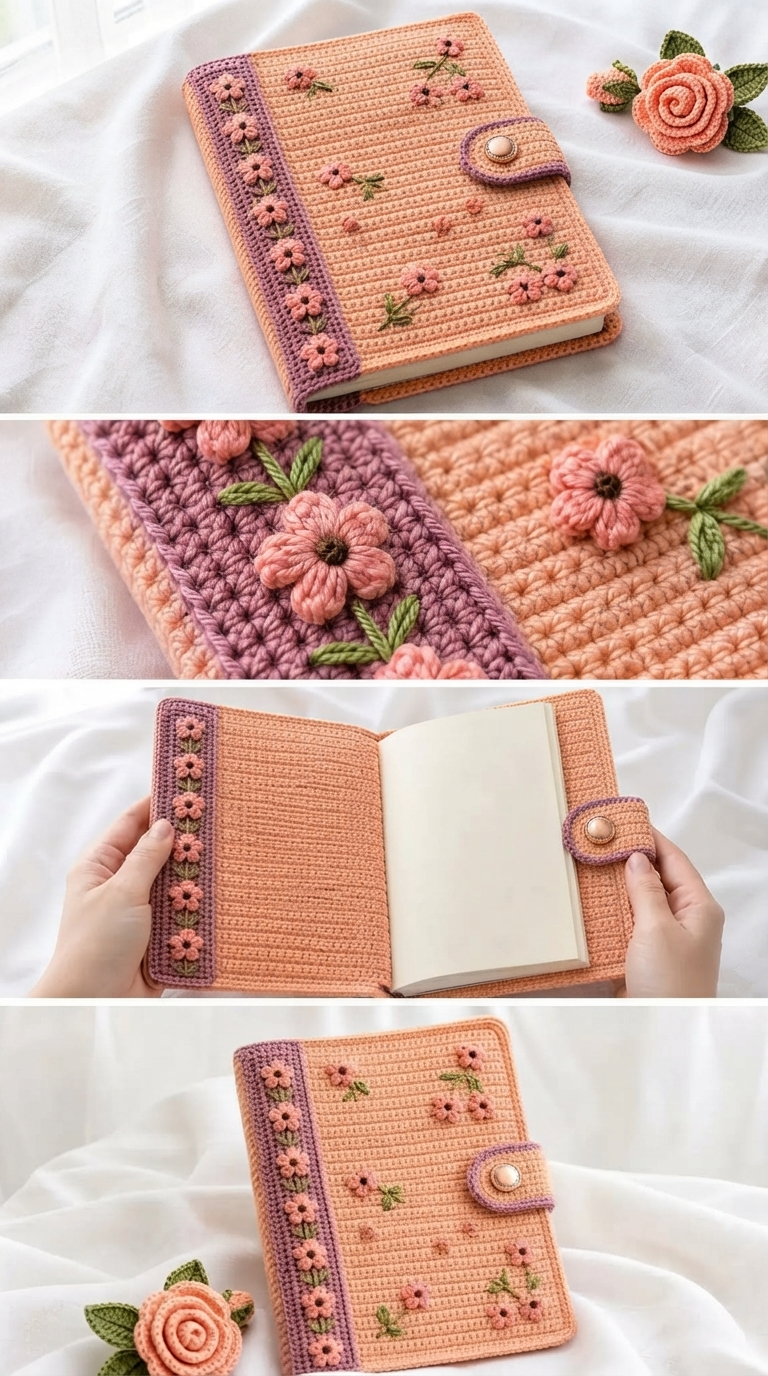
Time to hook up. Work carefully and check your measurements as you go.
Back Panel
With MC and D-3 hook, chain 39.
Row 1 (RS): Sc in 2nd ch from hook and in each ch across. Ch 1, turn. (38 sc)
Row 2: BLO sc in each st across. Ch 1, turn. (38 sc)
Rows 3 through 60: Repeat Row 2. Ch 1, turn at the end of each row. (38 sc each row)
After Row 60, do not turn. Fasten off and weave in ends.
Your back panel should measure about 6.25 inches wide by 8.5 inches tall after light blocking. If it is way off, check your gauge.
Front Panel
With MC and D-3 hook, chain 39.
Row 1 (RS): Sc in 2nd ch from hook and in each ch across. Ch 1, turn. (38 sc)
Row 2: BLO sc in each st across. Ch 1, turn. (38 sc)
Rows 3 through 60: Repeat Row 2. Ch 1, turn at the end of each row. (38 sc each row)
After Row 60, do not turn. Fasten off and weave in ends.
Block both panels before continuing. Cotton yarn loves a good blocking session and will even out beautifully.
Button Loop Tab
With CA and D-3 hook, chain 5.
Row 1: Sc in 2nd ch from hook and in each ch across. Ch 1, turn. (4 sc)
Row 2: BLO sc in each st across. Ch 1, turn. (4 sc)
Rows 3 through 10: Repeat Row 2. Ch 1, turn. (4 sc each row)
Fasten off, leaving a 14-inch tail for sewing.
Fold the tab in half widthwise to form a loop about 0.75 inch long. Pin the open raw ends together and set aside.
Assembling the Cover
Step 1: Place the back panel flat with RS facing up. Place the front panel on top with RS also facing up (both right sides out). The two wrong sides face each other in the middle. Align all four edges precisely.
Step 2: Position the folded button loop tab so its raw ends are sandwiched between the two panels at the right edge, centered at about 4.25 inches from the bottom edge. The loop extends outward to the right. Pin in place.
Step 3: With CA and D-3 hook, working through both panels together, begin at the top right corner. Work a row of sl st through both layers across the top edge. (38 sl sts) Fasten off.
Step 4: With CA and D-3 hook, working through both panels together, begin at the bottom right corner. Work a row of sl st through both layers across the bottom edge, securing the button tab raw ends as you pass through that area. (38 sl sts) Fasten off.
Step 5: Do not seam the left edge (spine side) or the right edge. The left edge remains open for the notebook spine.
Spine Border Strip
With CA and D-3 hook, chain 9.
Row 1: Sc in 2nd ch from hook and in each ch across. Ch 1, turn. (8 sc)
Row 2: Sc in each st across. Ch 1, turn. (8 sc)
Rows 3 through 60: Repeat Row 2. Ch 1, turn. (8 sc each row)
After Row 60, fasten off, leaving a 24-inch tail for sewing.
Position the strip vertically along the left side of the assembled cover front. Using CA threaded on a tapestry needle, whipstitch the right long edge of the strip to the left column of stitches on the front panel. Then fold the strip around to the back panel and whipstitch the left long edge to the back panel. Stitch the short ends neatly to close.
Daisy Applique Flowers
Make 18 flowers total using CB and the C-2 hook:
- 12 flowers for the front panel (arranged in 4 clusters of 3)
- 6 flowers for the spine border strip
Daisy Applique Flower Instructions:
With CB and smaller hook (C-2), make a magic ring (or ch 4, sl st to form ring).
Round 1: Ch 1, work 6 sc into ring, sl st to first sc to join. (6 sc)
Round 2: For each petal, ch 6, sl st back into the base sc you just left, then sl st into the next sc. Repeat until 6 petals are complete. Fasten off, leaving a 10-inch tail for sewing.
Pull your starting tail tight to close the center. Press each flower flat with a damp cloth before sewing onto the cover.
Flower Placement
Front panel clusters:
- Cluster 1 (upper left): 3 flowers about 1 inch from top edge, 0.75 inch from spine strip
- Cluster 2 (upper right): 3 flowers about 1 inch from top edge, 1.5 inches from right edge
- Cluster 3 (lower right): 3 flowers about 2.5 inches from bottom edge
- Cluster 4 (lower left): 3 flowers about 1.25 inches from bottom edge
Spine strip: Space 6 flowers evenly along the strip vertically, first flower 0.75 inch from top, last flower 0.75 inch from bottom.
Pin each flower in position. Using the long tail, sew the flower center firmly with 4 to 6 anchoring stitches.
Embroidered Stems and Leaves
Using CC threaded on a tapestry needle, add stems and leaves to complete the floral design.
For front panel clusters: Bring all three stems down to a single point, then continue with one shared stem about 0.75 inch below. Add one leaf pair at the junction and one at the stem base.
For spine strip flowers: Work one straight-stitch stem about 0.5 inch below each flower, with a pair of lazy daisy leaves at the base.
Lazy daisy stitch: Bring your needle up at the leaf base. Loop your thread and insert the needle back into the same hole. Bring the needle tip out at the leaf tip, catching the loop. Tack the loop down with a small straight stitch.
Attaching the Closure
For a magnetic snap: Carefully part the yarn fibers at the center right edge of the front panel, about 4.25 inches from the bottom. Insert the snap prongs through to the wrong side and press the washer over them. Repeat for the other snap half on the back panel.
For a button: Sew the button to the right edge of the back panel at the same position using CB or CA yarn.
Blocking, Care, and Size Tweaks
Fill a basin with cool water. Submerge your completed cover and gently press to saturate. Do not wring. Roll in a clean towel to remove excess water. Place the cover over your closed A5 notebook (wrapped in a plastic bag to protect from moisture). Pin the four corners square on a blocking mat. Allow to dry completely, about 24 hours.
Blocking over the actual notebook ensures a perfect fit.
Care: Machine wash on gentle cycle in cold water inside a mesh laundry bag, or hand wash in cool water. Reshape while damp. Lay flat to dry away from direct sunlight. Do not tumble dry. If pressing is needed, use a damp cloth and low heat on the wrong side only.
Size tips:
- A6 notebooks (about 4.1 by 5.8 inches): Work each panel for 25 stitches across and 41 rows tall. Reduce the spine strip to 5 stitches across and 41 rows tall.
- B5 journals (about 6.9 by 9.8 inches): Work each panel for 42 stitches across and 69 rows tall.
- General formula: Panel stitch count = desired width in inches multiplied by 6. Panel row count = desired height in inches multiplied by 7. Add 2 extra rows for seam take-up.
Helpful Tips for a Polished Finish
Mark the right side of your work on Row 1 with a stitch marker. The RS shows clear horizontal ridges from the BLO technique.
All turning chains are ch 1 and do not count as stitches. This keeps your edges neat and your stitch counts consistent.
Block before seaming. Blocked panels are much easier to align and join evenly.
If your cover feels slightly tight when inserting the notebook, block it a second time stretched over the closed notebook.
Take your time with flower placement. Pin everything first and step back to look at the overall arrangement before sewing anything down.
Related Articles:
- Lavender Purple Jellyfish Keychain Free Crochet Pattern
- Sage Garden Granny Square Tote Free Crochet Pattern
- Pastel Rainbow Jellyfish Amigurumi Free Crochet Pattern
Wrap-Up and Next Steps
There is something wonderfully satisfying about creating a handmade home for your thoughts and plans. This peach blossom cover protects your notebook and turns everyday writing into a little moment of beauty.
Pick your favorite peachy shades, grab your hooks, and start stitching. Once you finish, you will want to make another one right away. Happy crocheting from Sumara Patterns!