


I still remember the exact afternoon this bag began. Snow was falling in soft, silent flakes outside my studio window, and the light had that pale, silvery quality that only happens in deep winter. I had a skein of creamy white yarn sitting on the table, and I kept turning it over in my hands, thinking how much it looked like fresh snow. I wanted something practical—a tote I could actually carry to the market or the library—but I also wanted it to feel special, like a little piece of winter I could take with me.
The snowflakes came first. I sketched a few simple six-pointed motifs, then refined them until they had the right balance of openness and structure. Once I had a motif I loved, the rest of the bag grew around it almost naturally. The result is this Winter White Snowflake Tote—a clean, structured bag with raised snowflake panels that catch the light beautifully. It feels both delicate and sturdy at the same time, which is exactly what I was hoping for.
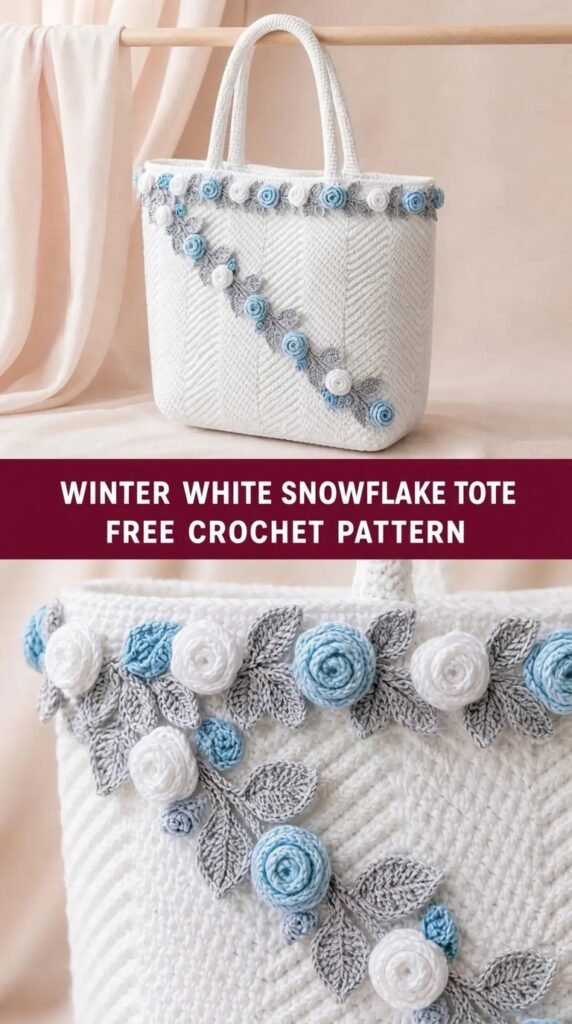
This free pattern walks you through every step so you can make your own.
About This Pattern
This is an intermediate-level project. You should already be comfortable with basic stitches, working in the round, and reading stitch counts. The snowflake motifs use a combination of clusters, chains, and picots, so a bit of concentration is required for those sections. Nothing here is overly complicated once you settle into the rhythm, but it is not a beginner project.
The bag is constructed in panels. You crochet two identical rectangular sides that feature a central snowflake motif surrounded by a simple textured background. The sides are then joined with a continuous side-and-bottom panel. Sturdy handles are worked separately and sewn on. The finished tote measures approximately 13 inches wide, 12 inches tall, and 4 inches deep after blocking. It has enough structure to stand on its own when empty, yet still softens nicely when filled.
The overall look is clean and winter-white, with the snowflakes providing the main visual interest. The fabric has a gentle drape while remaining firm enough for everyday use.
Materials You’ll Need
Yarn
- Color A (main body): approximately 650 yards / 595 meters of worsted-weight (category 4) yarn in a soft white or natural cream. I used a smooth mercerized cotton-blend that holds stitch definition well.
- Allow 15% extra for gauge variation and weaving in ends.
Hooks
- 4.0 mm (G-6) for the snowflake motifs and tighter sections
- 4.5 mm (7) for the main body panels and handles
Notions
- Tapestry needle
- Stitch markers (at least 6)
- Scissors
- Blocking mats and pins (or a blocking board)
- Optional: fabric for lining, sewing needle and matching thread if you choose to line the bag
Abbreviations and Terminology
All instructions use US crochet terminology.
- ch – chain
- sc – single crochet: insert hook, yarn over, pull up a loop, yarn over, pull through both loops
- hdc – half double crochet: yarn over, insert hook, yarn over, pull up a loop, yarn over, pull through all three loops
- dc – double crochet: yarn over, insert hook, yarn over, pull up a loop, yarn over, pull through two loops, yarn over, pull through remaining two loops
- tr – treble crochet: yarn over twice, insert hook, yarn over, pull up a loop, (yarn over, pull through two loops) three times
- sl st – slip stitch
- sp – space
- st(s) – stitch(es)
- sk – skip
- rep – repeat
- beg – beginning
- RS – right side
- WS – wrong side
- cl – cluster: work the indicated number of stitches leaving the last loop of each on the hook, then yarn over and pull through all loops on the hook
- picot – ch 3, sl st in the first ch of the three
Turning chains do not count as a stitch unless a step explicitly says they do.
Gauge
Work a 4-inch / 10 cm square in the background stitch pattern (alternating sc and hdc rows) using the 4.5 mm hook. You should have 16 stitches and 14 rows in 4 inches.
If your swatch is smaller than 4 inches, go up a hook size. If it is larger, go down a hook size. The snowflake motifs are worked more tightly on purpose; do not try to match the body gauge with the motif hook.
Main Pattern Instructions
Snowflake Motif (make 2)
Use the 4.0 mm hook and Color A.
Round 1: Make a magic ring. Ch 3 (counts as dc), 11 dc into the ring. Join with sl st to top of beginning ch-3. (12 dc)
Round 2: Ch 1, sc in same st, *ch 3, sk next st, sc in next st; rep from * around, ending with ch 3, join with sl st to first sc. (6 sc, 6 ch-3 sps)
Round 3: Sl st into first ch-3 sp, ch 3 (counts as dc), 2 dc in same sp, *ch 2, 3 dc in next ch-3 sp; rep from * around, ending with ch 2, join with sl st to top of beginning ch-3. (18 dc, 6 ch-2 sps)
Round 4: Ch 1, sc in same st, sc in next 2 dc, * (sc, ch 3, sc) in next ch-2 sp, sc in next 3 dc; rep from * around, ending with (sc, ch 3, sc) in last ch-2 sp, join with sl st to first sc.
Round 5: Ch 1, sc in same st, *sc in next 2 sc, hdc in next sc, (2 dc, tr, 2 dc) in next ch-3 sp, hdc in next sc, sc in next 2 sc, sc in next sc; rep from * around, adjusting the last few stitches to land correctly, join with sl st to first sc. Fasten off and weave in ends.
You now have two six-pointed snowflakes with slightly raised centers. Set them aside.
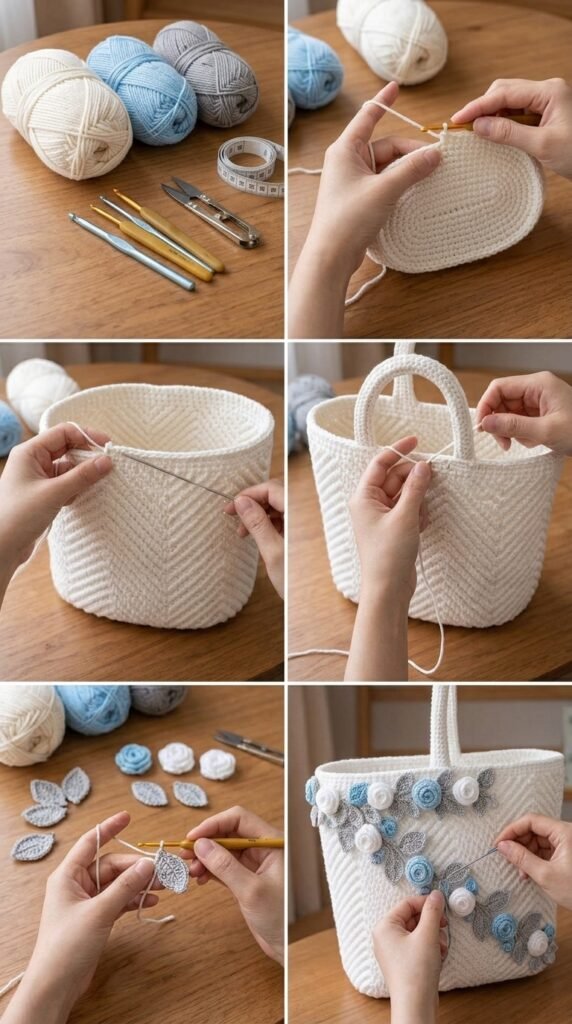
Front and Back Panels (make 2)
Use the 4.5 mm hook and Color A.
The panels are worked from the bottom up. The snowflake is joined in the center as you work.
Foundation: Ch 52.
Row 1 (RS): Sc in second ch from hook and in each ch across. Turn. (51 sc)
Row 2: Ch 1, hdc in each st across. Turn. (51 hdc)
Row 3: Ch 1, sc in each st across. Turn.
Rows 4–18: Repeat Rows 2 and 3, ending with a Row 2 (hdc row). You should have a rectangle that measures approximately 12.5 inches wide and 6 inches tall at this point.
Placing the Snowflake
Lay one snowflake motif right-side up on the center of the panel. The top of the motif should sit roughly at Row 12–13. Using a tapestry needle and a length of the same yarn, whipstitch the outer points and a few inner points of the snowflake to the panel. Keep the stitching light so it does not pull the fabric. The motif should sit flat without puckering.
Continue the panel above the motif:
Row 19: Ch 1, sc in each st across. Turn.
Row 20: Ch 1, hdc in each st across. Turn.
Rows 21–36: Continue alternating sc and hdc rows until the panel measures approximately 12 inches tall from the foundation chain. End with a sc row. Fasten off, leaving a long tail for seaming later.
Repeat for the second panel with the second snowflake.
Side and Bottom Panel
This long strip forms the sides and bottom of the tote in one continuous piece.
Foundation: Ch 18.
Row 1: Sc in second ch from hook and in each ch across. Turn. (17 sc)
Row 2: Ch 1, hdc in each st across. Turn.
Row 3: Ch 1, sc in each st across. Turn.
Repeat Rows 2 and 3 until the strip measures approximately 38 inches long (this accounts for the bottom and both sides). End with a sc row. Fasten off, leaving a long tail.
Handles (make 2)
Foundation: Ch 8.
Row 1: Sc in second ch from hook and in each ch across. Turn. (7 sc)
Row 2: Ch 1, sc in each st across. Turn.
Repeat Row 2 until the handle measures 18 inches long (or your preferred length). Fasten off, leaving a long tail for sewing.
For a slightly stronger handle, you may fold the strip in half lengthwise and whipstitch the long edges together, creating a double-thickness strap.
Assembly and Finishing
Place the front and back panels with right sides facing out and wrong sides together. Pin the side-and-bottom strip in place, starting at one top corner of the front panel, going down the side, across the bottom, and up the other side. The strip should meet the top edge of both panels evenly.
Using the long tails or a new length of yarn, whipstitch or mattress-stitch the strip to the panels all the way around. Take care at the bottom corners to ease the fabric so it does not buckle. Once both sides and the bottom are joined, weave in all ends securely.
Position the handles on the outside of the bag, approximately 2.5 inches in from each side edge. Sew the ends of each handle firmly to the top edge of the front and back panels, stitching through both thicknesses several times for strength. You may reinforce the attachment points with a small square of fabric on the inside if desired.
If you are adding a lining, cut fabric to match the finished dimensions of the bag, sew the lining pieces together, and insert it into the tote. Fold the top edge of the lining under and hand-stitch it just below the top edge of the crochet fabric.
Blocking and Care
Wet-block the finished bag for the best shape and stitch definition. Fill a basin with lukewarm water and a small amount of wool wash or mild detergent. Submerge the tote, gently squeeze out excess water without wringing, and roll it in a clean towel. Pin the bag to shape on blocking mats, paying special attention to the snowflake motifs so the points lie flat and open. Allow it to dry completely (this may take 24–36 hours depending on humidity).
Once dry, the fabric will feel firmer and the snowflakes will stand out more clearly.
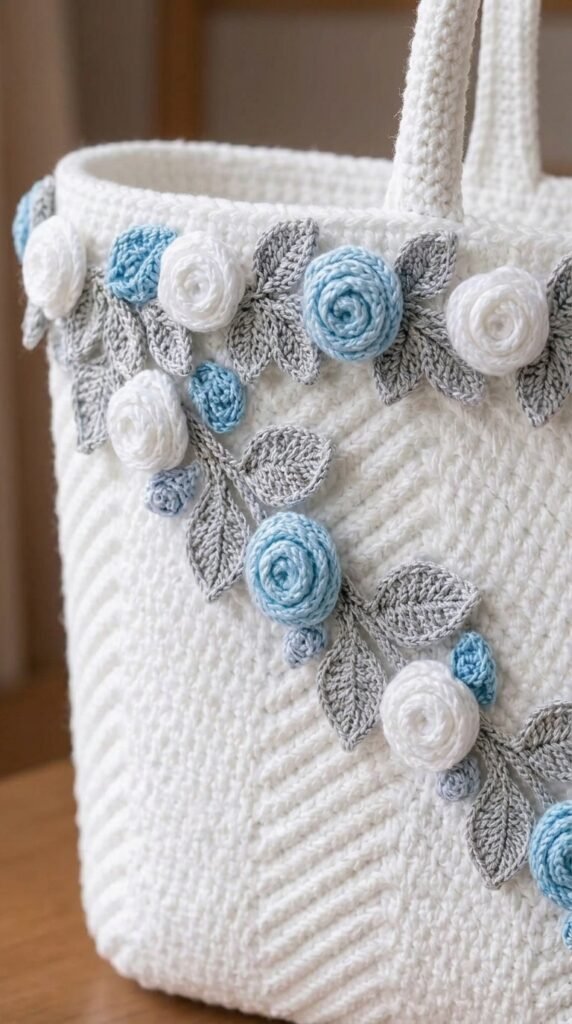
Care: Hand wash gently in cool water. Do not wring or hang the bag when wet, as the weight of the water can stretch the handles and distort the shape. Reshape and dry flat. Avoid high heat in the dryer.
Fit and Troubleshooting Tips
If the snowflakes cup or curl, your motif gauge is likely tighter than needed. Try the next larger hook for the motifs only, or gently stretch them during blocking.
If the side panels flare or the bag does not stand upright, check that your side-and-bottom strip is the correct length and that your seaming tension is even. A slightly tighter seam at the bottom corners often helps the bag hold its shape.
For a deeper bag, simply add more rows to the front and back panels before joining. For a wider bag, add stitches in multiples of two to the foundation chain and adjust the side strip length accordingly.
If the handles feel too stretchy, work them with a smaller hook or add a length of cotton cord inside the handle before seaming it closed.
FAQ’s
What skill level is this pattern?
Intermediate. You should be comfortable with clusters, working in the round for the motifs, and assembling pieces. The body of the bag uses only single and half double crochet, so the construction itself is straightforward once the motifs are done.
Can I use a different yarn weight?
Yes, but the finished size and drape will change. If you switch to a lighter yarn, go down a hook size and expect a smaller, softer bag. A heavier yarn will create a bulkier, more structured tote. Always swatch.
Do I have to line the bag?
No. The fabric is dense enough for light use without a lining. A lining is recommended if you plan to carry heavier items or small objects that might poke through the stitches.
How do I make the bag larger or smaller?
Add or subtract rows from the front and back panels for height. For width, adjust the foundation chain in multiples of two and lengthen or shorten the side-and-bottom strip to match. Keep the snowflake centered.
My snowflakes look different from each other. Is that a problem?
Small variations are normal and add character. As long as both motifs have six clear points and sit flat, they will look intentional once the bag is assembled and blocked.
Can I add a zipper or magnetic snap?
Yes. Sew a zipper into the top edge after assembly, or attach a magnetic snap to the inside of the top edges. Reinforce the snap area with a small piece of fabric if the yarn is soft.
Final Thoughts
There is something deeply satisfying about finishing a bag that feels both useful and beautiful. Every time I pick up my Winter White Snowflake Tote, I remember that quiet snowy afternoon and the simple pleasure of watching the motifs take shape under my hook. I hope yours brings you the same feeling.
If you make this tote, I would love to see it. Share a photo in the comments or tag your project so others can admire your snowflakes too. Happy crocheting, and may your winter projects keep you warm and creative.


Leave a Reply
You must be logged in to post a comment.