

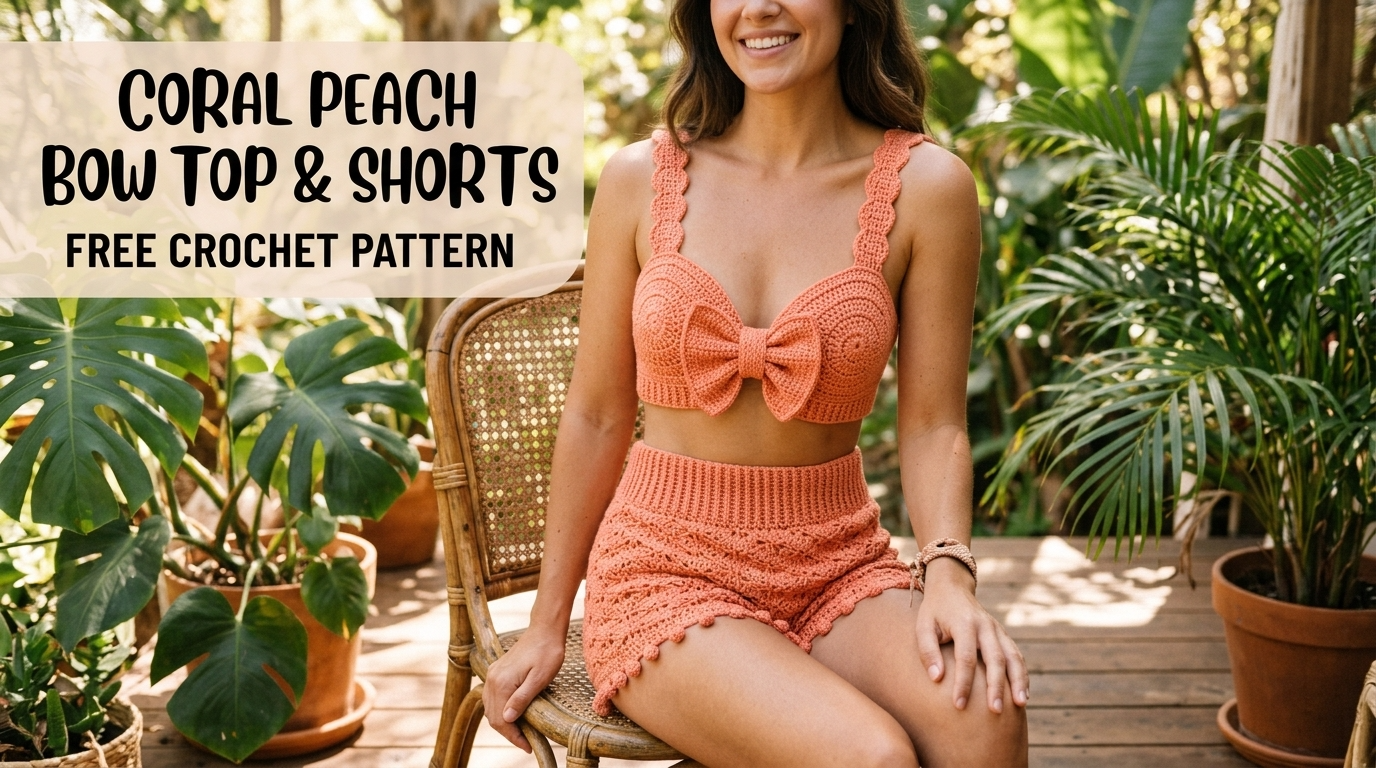
There is something about a matching crochet summer set that makes getting dressed feel a little more exciting. I wanted to create something feminine, playful, and comfortable enough for warm afternoons, beach walks, and casual summer outings.
I imagined a soft coral peach color, delicate straps, a flattering cropped top, and matching shorts with just enough texture to make the outfit interesting. Then came the bows! Those little decorative details turned a simple two-piece outfit into something genuinely charming.
This Coral Peach Bow Top and Shorts Free Crochet Pattern combines easy stitches, comfortable shaping, and sweet handmade details. You’ll get a coordinated summer outfit that feels special without requiring complicated lacework.
About This Pattern
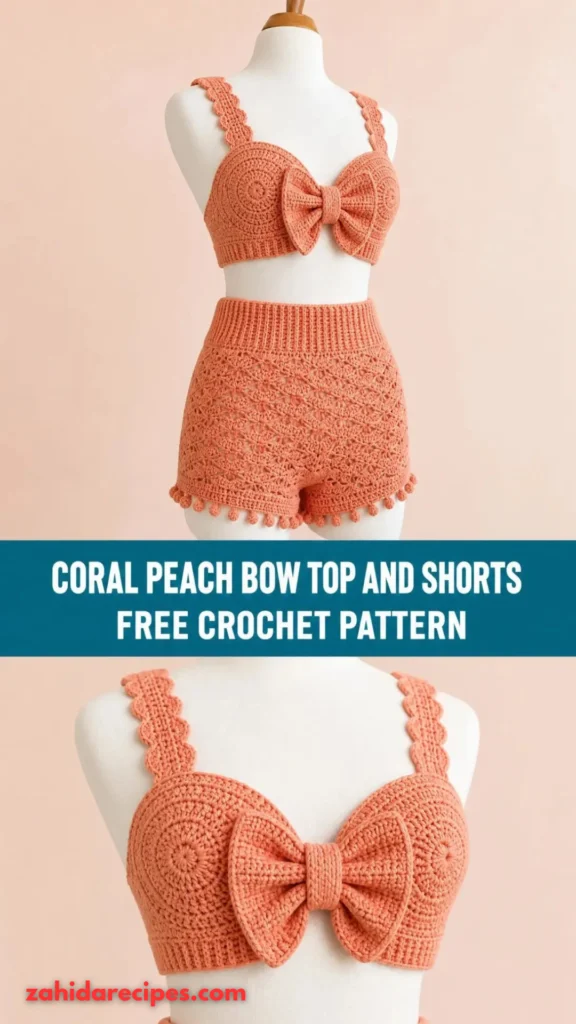
This crochet two-piece set includes a fitted cropped top and matching high-waisted shorts. Both pieces are worked separately and joined or assembled during finishing.
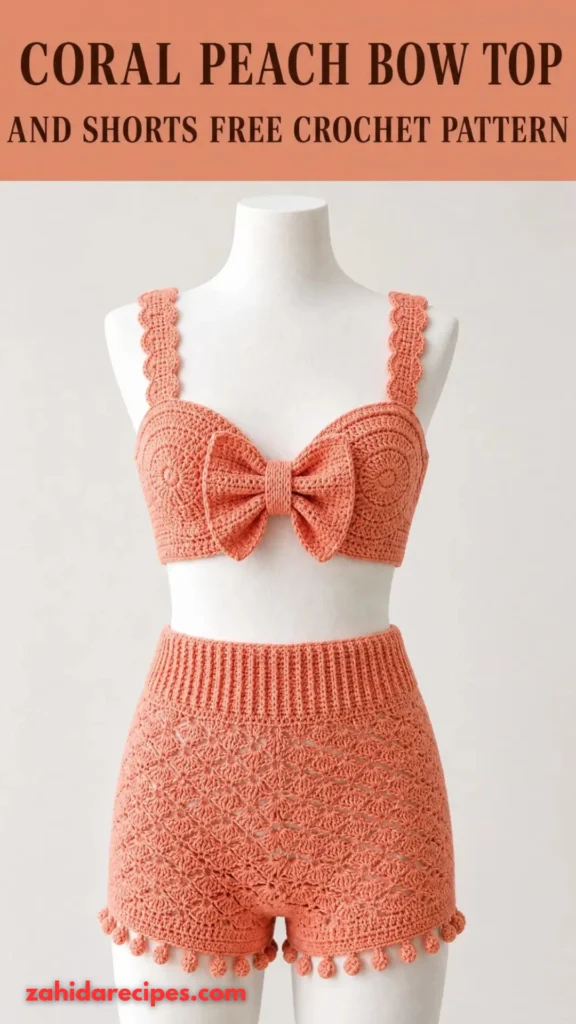
The top features a rectangular body with gently shaped upper edges, adjustable shoulder straps, and a decorative bow at the center front.
The shorts feature two individual leg sections, a comfortable elastic-style waistband, and small decorative bows near the sides. A simple scalloped edging gives the leg openings a delicate finish.
Skill Level: Confident beginner to intermediate.
Construction:
- The top is worked in two main sections.
- Shoulder straps are crocheted separately.
- The shorts are worked as two leg sections and joined at the center.
- The waistband is finished with a folded crochet casing and elastic.
- Decorative bows are made separately and sewn into position.
Finished Sizes
| Size | Bust | Waist | Hips |
| XS | 30–32 in | 24–26 in | 34–36 in |
| S | 34–36 in | 27–29 in | 37–39 in |
| M | 38–40 in | 30–32 in | 40–42 in |
| L | 42–44 in | 33–35 in | 43–45 in |
| XL | 46–48 in | 36–39 in | 46–49 in |
Choose the size closest to your actual measurements. The waistband elastic provides additional comfort and flexibility.
Materials You’ll Need
Yarn
Choose a soft cotton or cotton-blend yarn for breathable summer wear.
- Color A – Coral Peach: Approximately 650–900 yards (594–823 meters), worsted-weight cotton yarn.
- Optional Color B – Cream: Approximately 25 yards (23 meters) for contrasting bow centers or decorative details.
Allow 15% extra yarn if your gauge varies or you prefer longer straps and a deeper shorts rise.
Hooks
- 4.0 mm crochet hook for the main fabric.
- 3.5 mm crochet hook for firmer waistband and edging stitches.
Notions
- Flexible measuring tape.
- Tapestry needle.
- Stitch markers.
- Scissors.
- 1-inch-wide soft elastic.
- Sewing needle and matching thread.
- Blocking mat and rustproof pins.
Abbreviations and Terminology
All instructions use US crochet terminology.
- ch: Chain – yarn over and pull through the loop.
- sl st: Slip stitch – insert hook, yarn over, pull through the stitch and loop.
- sc: Single crochet – insert hook, yarn over, pull up a loop, yarn over and pull through both loops.
- hdc: Half double crochet – yarn over, insert hook, pull up a loop, yarn over and pull through all three loops.
- dc: Double crochet – yarn over, insert hook, pull up a loop, yarn over and pull through two loops twice.
- inc: Increase – work two stitches into the same stitch.
- dec: Decrease – crochet two stitches together.
- BLO: Back loop only – work into the back loop of the stitch.
- FO: Fasten off.
- RS: Right side.
- WS: Wrong side.
- st(s): Stitch(es).
- rep: Repeat.
Turning chains do not count as stitches unless specifically stated.
Gauge
With the 4.0 mm hook, your finished gauge should measure:
- 16 hdc stitches = 4 inches.
- 12 rows = 4 inches.
Make a practice swatch before starting.
If your swatch is too wide, switch to a smaller hook. If it is too narrow, try a larger hook.
Gauge is particularly important for the shorts because an overly tight fabric can make the waistband and leg openings uncomfortable.
Main Pattern Instructions
Part 1: Crochet Bow Crop Top
The top is made from two matching panels. The simple hdc texture creates a neat, flexible fabric that sits comfortably against the body.
Front and Back Panels
Use Color A and the 4.0 mm hook.
Choose your starting chain according to size:
| Size | Starting Chain | Approx. Width |
| XS | 58 | 14.5 in |
| S | 66 | 16.5 in |
| M | 74 | 18.5 in |
| L | 82 | 20.5 in |
| XL | 90 | 22.5 in |
Row 1: Hdc in the second chain from the hook and across. Ch 1, turn.
Row 2: Hdc in every stitch across. Ch 1, turn.
Rows 3–24: Repeat Row 2 until the panel measures approximately 8 inches long.
For a longer crop top, add rows in multiples of three. For a shorter top, remove rows evenly from both panels.
Make a second identical panel.
Count: Each panel should retain its original stitch count throughout.
Shaping the Upper Edges
To create a gently shaped neckline, work the following decreases along the top edge of the front panel.
Row 25: Hdc2tog, hdc across until 2 stitches remain, hdc2tog. Ch 1, turn.
Row 26: Hdc across. Ch 1, turn.
Row 27: Repeat Row 25.
Fasten off.
Repeat the same shaping on the back panel if you prefer a balanced neckline. For a lower front neckline, work two additional decrease rows on the front panel only.
Joining the Top
Place the two panels together with right sides facing inward.
- Sew the shoulder edges together, leaving approximately 4–5 inches open for the neck opening.
- Sew both side seams from the bottom upward.
- Leave approximately 6–7 inches open at each upper side for armholes.
- Turn the top right side out.
Try the top on before completing the seams. Adjust the armhole openings if necessary.
Crochet Shoulder Straps
Make two straps using the 3.5 mm hook.
Row 1: Ch 7. Sc in the second chain from the hook and across. (6 sc)
Rows 2–30: Ch 1, turn, sc across.
Adjust the number of rows to achieve your preferred strap length.
Attach one end of each strap to the front panel and the other end to the back panel. Position them evenly and check the fit before sewing securely.
For adjustable straps, attach small buttons to the back panel and create button loops at the strap ends.
Part 2: Matching Crochet Shorts
The shorts have a comfortable high-rise waist, two shaped leg sections, and a soft scalloped edge.
For this design, the waistband is worked first, followed by the body and individual legs.
Waistband Foundation
Using the 3.5 mm hook, ch loosely to the following approximate lengths:
| Size | Waistband Length |
| XS | 25 in |
| S | 28 in |
| M | 31 in |
| L | 34 in |
| XL | 38 in |
Join with a sl st, taking care not to twist the chain.
Round 1: Ch 1, sc in each chain around. Join with sl st.
Round 2: Ch 1, sc in BLO around. Join.
Rounds 3–10: Repeat Round 2.
This creates a flexible ribbed waistband.
Shorts Body
Change to the 4.0 mm hook.
Work hdc rounds into the waistband edge, increasing evenly until the circumference measures approximately the hip measurement plus 1 inch.
Round 1: Ch 1, hdc evenly around. Join.
Round 2: Ch 1, hdc around. Join.
Rounds 3–12: Repeat Round 2.
Continue until the fabric measures approximately 5 inches below the waistband.
To create additional hip room, increase evenly across the next round. Work one increase approximately every 10 stitches, distributing them evenly around the body.
For the next 3 rounds, work hdc evenly without increases.
The fabric should now reach the upper thigh and crotch area.
Dividing the Shorts into Legs
Lay the shorts flat and identify the front and back center points.
Place markers at both sides of the crotch division. The two leg openings should be approximately equal.
Using the working yarn, attach at one side marker and work around the first leg opening. Join the front and back sections with a short chain bridge of 6–10 stitches, depending on your preferred crotch width.
Round 1: Hdc around the first leg opening, including the chain bridge. Join.
Rounds 2–8: Hdc around without increasing.
Repeat for the second leg.
Adjust the number of rounds to make the shorts shorter or longer.
For a more relaxed leg opening, add one increase on each side of the leg every third round.
Fit note: Try the shorts on before completing the second leg. Both leg openings should have the same circumference and length.
Special Techniques and Decorative Elements
Crochet Bow Appliqués
The bows are the prettiest part of this outfit. I recommend making three: one larger bow for the center of the top and two smaller bows for the shorts.
Use Color A or optional Color B.
Large Bow
Row 1: Ch 21. Hdc in the second chain from the hook and across. (20 hdc)
Rows 2–7: Ch 1, turn, hdc across.
Fasten off, leaving a long sewing tail.
Fold the rectangle lengthwise so the shorter edges meet. Pinch the center tightly and wrap the yarn around it several times to form the bow shape.
Secure the yarn at the back.
Small Bows
Row 1: Ch 13. Hdc in the second chain from the hook and across. (12 hdc)
Rows 2–5: Ch 1, turn, hdc across.
Fasten off and shape each bow using the same center-wrapping method.
Sew the large bow securely to the center front of the top. Attach the smaller bows near the outer sides of the shorts.
Scalloped Shorts Edging
Using the 3.5 mm hook, attach yarn to the bottom edge of one leg.
Round 1: Sc evenly around the leg opening. Join with sl st.
Round 2: Ch 1, skip 1 stitch, work 5 dc into the next stitch, skip 1 stitch, sl st into the next stitch. Repeat around.
Adjust the final spacing slightly if necessary to keep the scallops even.
Repeat around the second leg.
Optional Decorative Straps
For a little extra detail, crochet two narrow ties.
Row 1: Ch 31, sc in the second chain from the hook and across.
Fasten off and make a second tie.
These can be attached at the sides of the top as decorative bows or used to create a more adjustable fit.
Assembly and Finishing
Before weaving in all the loose ends, lay both pieces flat and check that their edges are even.
- Sew the large bow firmly to the center front of the top.
- Attach the smaller bows to the shorts.
- Check both shoulder straps for equal length.
- Reinforce the underarm seams.
- Check the crotch seam carefully because it receives extra tension during wear.
- Weave in all loose yarn ends using a tapestry needle.
Adding Elastic to the Waistband
Measure a comfortable elastic length around your waist, allowing a little overlap for sewing.
Thread the elastic through the waistband casing using a safety pin.
Overlap the ends by approximately 1 inch and sew securely.
Close the opening with matching yarn or thread.
Make sure the elastic lies flat and is not twisted.
Blocking and Care
Blocking helps the crochet fabric settle into its intended shape and gives the bows a cleaner appearance.
For cotton yarn, I recommend gentle wet blocking.
- Fill a basin with cool water and a small amount of mild detergent.
- Submerge the finished pieces and gently squeeze out excess water.
- Avoid twisting or wringing the fabric.
- Roll each piece in a clean towel to remove extra moisture.
- Lay the top and shorts flat on a blocking mat.
- Shape the straps, neckline, scallops, and bows carefully.
- Allow everything to dry completely before wearing.
Care instructions:
- Hand wash in cool water.
- Use gentle detergent.
- Avoid bleach and harsh chemicals.
- Dry flat rather than hanging.
- Store folded in a clean, dry place.
- Avoid excessive heat when ironing or steaming cotton yarn.
Fit and Troubleshooting Tips
1. The Top Feels Too Tight
If the top feels restrictive around your bust, check your gauge first. You can add stitches to both panels, keeping the increases equal.
For a more relaxed fit, use a larger hook or add approximately 1 inch to the panel width.
2. The Top Straps Keep Slipping
Shorten the straps slightly or move their attachment points closer to the center of the back panel.
You can also use adjustable button loops for a more flexible fit.
3. The Shorts Waistband Rolls Over
Make sure your waistband stitches are firm and your elastic is not excessively loose.
Working the ribbing in BLO creates a stretchy texture, but the elastic provides the main support.
4. The Shorts Leg Openings Feel Too Tight
Add a few extra stitches evenly around each leg opening before beginning the scalloped edging.
Avoid making the decorative border too tight.
5. The Bows Look Uneven
Check that both sides of each bow rectangle have the same number of rows.
Wrap the center yarn evenly and secure the back with several small stitches. Blocking the bow before attaching it can also improve its shape.
6. The Fabric Looks Too Stiff
Cotton crochet fabric can become stiff when the hook is too small or the stitches are too tight.
Try a 4.5 mm hook for the main fabric while keeping the smaller hook for the waistband.
Customization Ideas
One of my favorite things about this crochet set is how easily you can change its personality.
- Romantic look: Add tiny cream-colored bows and delicate scalloped edges.
- Beach style: Make the straps longer and add small side ties to the shorts.
- Minimalist design: Use the same coral peach yarn throughout and keep the bows simple.
- Extra feminine detail: Add a narrow picot border around the top neckline.
- Longer shorts: Continue working additional hdc rounds before finishing the leg openings.
You can also experiment with soft pink, ivory, butter yellow, or dusty rose yarn. Each shade gives the outfit a slightly different summer feel.
Final Thoughts
I absolutely love how the Coral Peach Bow Top and Shorts Free Crochet Pattern brings together simple crochet techniques and sweet feminine details.
The matching pieces create a coordinated outfit, while the little bows add personality without making the design feel overly complicated. The cotton fabric makes it a lovely option for warm weather, and you can customize the length, straps, and decorative details to suit your style.
If you’re making this set, take your time with the fitting and finishing. Those little adjustments can make a big difference in how comfortable the finished outfit feels.
I’d love to see your finished version! Try a different color combination, experiment with the bow placement, or make the shorts a little longer.
Share your creation on Pinterest or with your crochet community and inspire someone else to pick up their hook.
Happy crocheting! 💗


Leave a Reply
You must be logged in to post a comment.