

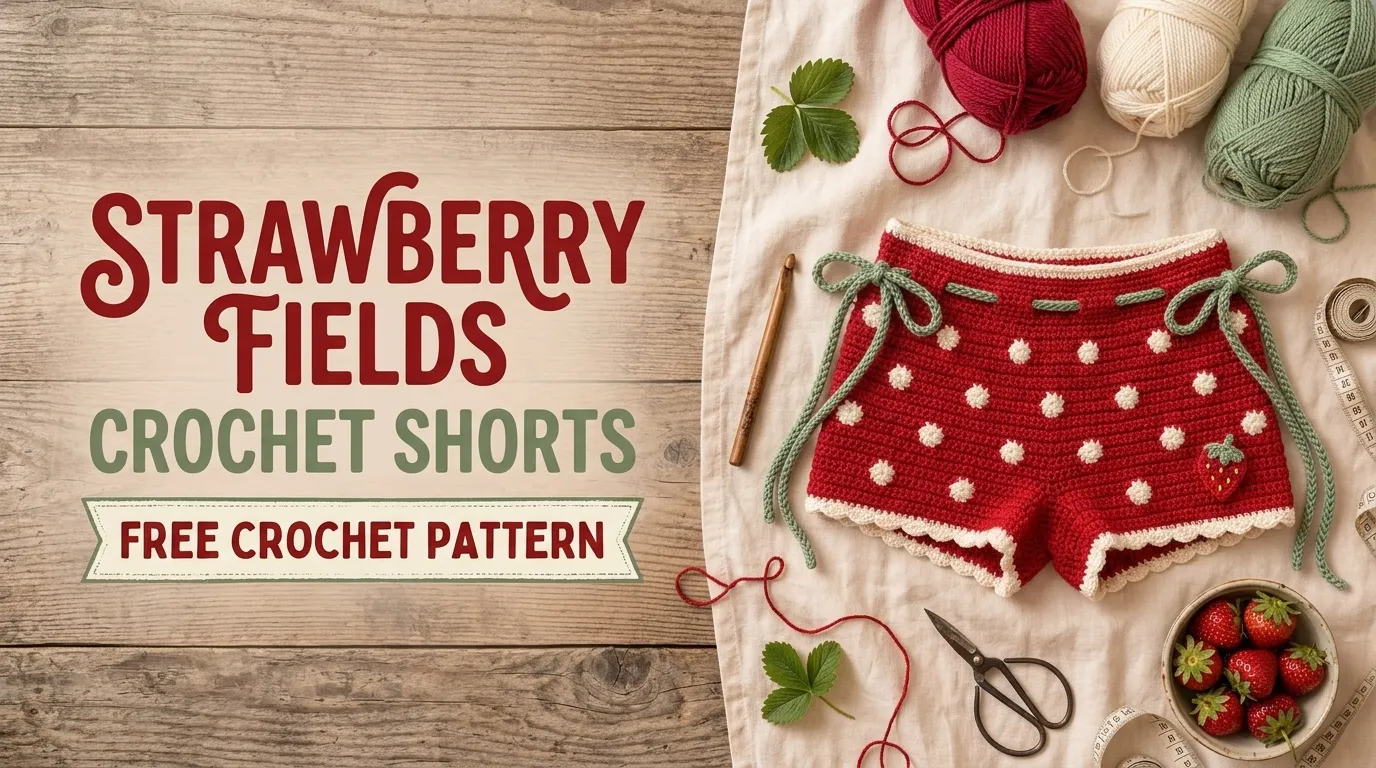
Some crochet projects are simply too cute to put down, and these Strawberry Fields Crochet Shorts are definitely one of them! I wanted to create something playful, summery, and comfortable enough to wear on warm afternoons. Something that feels handmade in the loveliest possible way.
Strawberries were my inspiration. I imagined juicy red details, tiny green leaves, and a soft, breathable fabric that would look adorable with a simple tank top or oversized summer shirt.
After experimenting with stitch textures and shaping, I settled on a design with a comfortable waistband, two separate leg sections, and little strawberry-inspired motifs scattered across the fabric.
These Strawberry Fields Crochet Shorts are a fun intermediate crochet project with a relaxed silhouette and charming fruit-inspired details. Grab your favorite yarn, and let’s make something sweet!
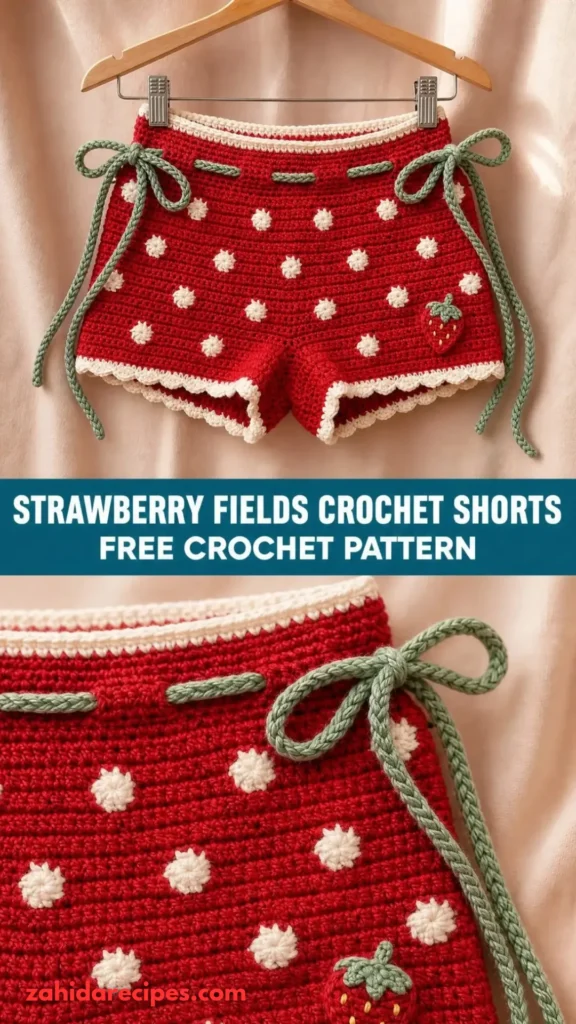
About This Strawberry Fields Crochet Shorts Pattern
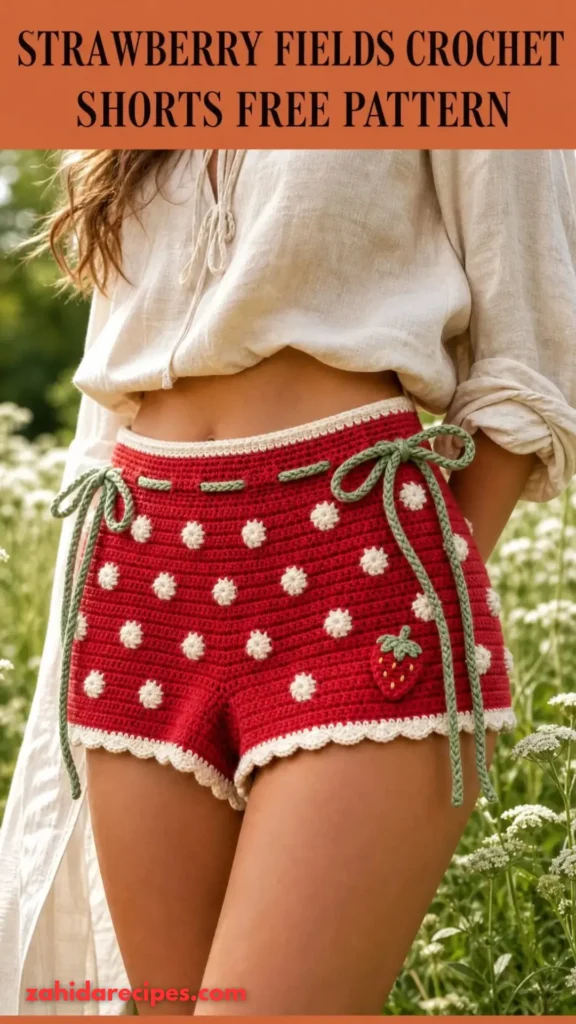
This pattern creates high-waisted crochet shorts with a comfortable waistband and gently relaxed legs.
The shorts are worked from the waist down. First, you’ll crochet the waistband, then build the upper body and divide it into two leg openings. Each leg is worked separately in rounds.
Small strawberry motifs are added afterward using red and green yarn. This gives the shorts their signature appearance without making the construction unnecessarily complicated.
- Skill Level: Intermediate
- Construction: Top-down, seamless body with separately worked legs and decorative motifs.
- Sizes: XS, S, M, L, and XL.
Finished Waist Measurements
- XS: 24–26 inches
- S: 26–28 inches
- M: 28–30 inches
- L: 30–33 inches
- XL: 33–36 inches
The elastic waistband and adjustable drawstring help create a flexible fit. For the best result, compare your measurements with the finished garment before completing the waistband.
Materials You’ll Need
Yarn
Choose a soft cotton or cotton-blend yarn for comfortable summer wear.
- Color A – Strawberry Red: 150–220 yards for strawberry motifs.
- Color B – Fresh Leaf Green: 60–90 yards for leaves and decorative details.
- Color C – Cream or Soft White: 350–550 yards for the main shorts.
- Color D – Light Pink: 30–50 yards for optional strawberry highlights.
Use lightweight DK cotton yarn (Category 3). Allow approximately 15% extra yarn for gauge variation and adjustments.
Crochet Hooks
- 3.5 mm crochet hook for the waistband and main fabric.
- 3.0 mm crochet hook for decorative strawberry details.
Notions
- Tapestry needle
- Stitch markers
- Measuring tape
- Scissors
- Soft elastic, approximately ¾ inch wide
- Optional cotton drawstring cord
- Blocking mat and pins
Abbreviations and Terminology
All instructions use US crochet terminology.
- ch: Chain – yarn over and pull through the loop.
- sl st: Slip stitch – insert hook, yarn over, and pull through both loops.
- sc: Single crochet – insert hook, yarn over, pull up a loop, yarn over, and pull through both loops.
- hdc: Half double crochet – yarn over, insert hook, pull up a loop, yarn over, and pull through all three loops.
- dc: Double crochet – yarn over, insert hook, pull up a loop, yarn over and pull through two loops twice.
- sc2tog: Single crochet decrease – work two stitches together into one.
- BLO: Back loop only – crochet into the back loop of the stitch.
- FLO: Front loop only – crochet into the front loop of the stitch.
- MR: Magic ring.
- st(s): Stitch(es).
- rep: Repeat.
- RS: Right side.
- WS: Wrong side.
Important notes:
- Turning chains do not count as stitches unless specifically stated.
- Join rounds with a slip stitch unless instructed otherwise.
- Use stitch markers to identify the center front, center back, and side positions.
- Check stitch counts at the end of each increase round.
Gauge
Gauge is especially important for crochet shorts because you want enough room around the hips without creating a loose, saggy waistband.
Using your 3.5 mm hook and main cream yarn, crochet a small swatch in half double crochet.
Target Gauge:
- 18 hdc = 4 inches.
- 14 rows = 4 inches.
Make a swatch measuring approximately 5 x 5 inches.
If your swatch has too many stitches, move up one hook size. If it has too few stitches, move down one hook size.
Wash and dry your swatch before measuring if your chosen yarn changes texture after washing.
Main Pattern Instructions
Part 1: Crochet the Waistband
The waistband is worked in joined rounds using single crochet stitches through the back loops. This creates a stretchy ribbed texture.
Using Color C and a 3.5 mm hook, make a foundation chain according to your size.
| Size | Foundation Chain |
|---|---|
| XS | 120 |
| S | 132 |
| M | 144 |
| L | 156 |
| XL | 168 |
Round 1: Join the chain with a slip stitch, being careful not to twist it. Ch 1, sc in each chain around. Join with a sl st. (120, 132, 144, 156, 168 sts)
Round 2: Ch 1, sc in BLO of each stitch around. Join.
Rounds 3–10: Repeat Round 2.
For a taller waistband, work additional rounds until it measures approximately 2–2.5 inches.
Fasten off.
Part 2: Create the Main Shorts Body
Switch to the 3.5 mm hook if necessary.
Attach Color C to the upper edge of the waistband.
To create a comfortable hip fit, increase evenly around the first body round.
| Size | Waistband Sts | Increase Sts | New Total |
|---|---|---|---|
| XS | 120 | 24 | 144 |
| S | 132 | 24 | 156 |
| M | 144 | 24 | 168 |
| L | 156 | 24 | 180 |
| XL | 168 | 24 | 192 |
Round 1: Ch 1. Work 1 hdc in each stitch around, increasing evenly by the number shown above. Join.
For example, for XS, work 4 hdc, 2 hdc in the next stitch, and repeat this sequence around.
For larger sizes, distribute the 24 increases evenly around the round.
Round 2: Ch 1, hdc in every stitch around. Join.
Round 3: Ch 1, hdc in every stitch around. Join.
Round 4: Ch 1, alternate 1 hdc and 1 dc around for a subtle textured finish. Join.
Round 5: Ch 1, work hdc in every stitch around. Join.
Repeat Rounds 2–5 until the body measures approximately 6–7 inches from the top of the waistband.
For a higher-rise design, add two or three additional rounds before dividing the legs.
Part 3: Divide the Shorts Into Two Legs
This is the most important construction step.
Lay your shorts flat and identify the center front, center back, and both side positions.
Place stitch markers at all four positions. The front and back sections should each contain half of the total body stitches.
Each leg will use:
- One quarter of the front stitches.
- One quarter of the back stitches.
- An 8-chain crotch bridge on each side.
First Leg:
- Attach yarn at the center front marker.
- Work hdc across the first front quarter until you reach the side marker.
- Ch 8 to create the first crotch bridge.
- Skip the corresponding center-back section and work across the back quarter of the same leg.
- Ch 8 to connect the back section to the starting point.
- Join with a slip stitch.
Count: Each leg contains approximately half the total body stitches plus 16 bridge chains.
Second Leg:
Repeat the same process with the remaining front and back quarters.
Check that both legs have matching stitch counts and that the crotch bridges are positioned symmetrically.
Part 4: Crochet the Leg Sections
Work each leg separately in joined rounds.
Round 1: Ch 1, hdc in each stitch around, including the crotch bridge chains. Join.
Round 2: Ch 1, hdc around. Join.
Round 3: Ch 1, alternate hdc and dc around. Join.
Round 4: Ch 1, hdc in every stitch around. Join.
Repeat Rounds 2–4 until each leg measures approximately 4–5 inches from the crotch.
For a slightly shorter summer style, use 3 inches. For a relaxed longer fit, work up to 6 inches.
Fasten off.
Repeat for the second leg.
Finishing the leg openings: Work one round of sc around each opening. Keep your tension relaxed so the edges don’t pull inward.
Special Techniques and Additional Elements
Part 5: Crochet the Strawberry Motifs
Now comes my favorite part!
The little strawberries transform these simple crochet shorts into something special. You’ll make several small motifs separately and sew them onto the finished fabric.
Use Color A and a 3.0 mm hook.
Strawberry Motif:
Round 1: Make a magic ring. Work 6 sc into the ring. Pull tight and join with a sl st. (6 sts)
Round 2: Ch 1. Work 2 sc in each stitch around. Join. (12 sts)
Round 3: Ch 1. Work 1 sc in the next stitch, 2 sc in the following stitch. Repeat around. Join. (18 sts)
Round 4: Ch 1. Sc in the first 4 stitches, sc2tog, repeat around. (15 sts)
Round 5: Ch 1. Sc in the first 3 stitches, sc2tog, repeat around. (12 sts)
Fasten off, leaving a long sewing tail.
Gently shape the bottom of the strawberry into a slightly pointed tip while weaving in the yarn.
Part 6: Add Strawberry Leaves
Using Color B, attach yarn near the top of the strawberry.
Leaf 1: Ch 4. Sl st into the second chain from the hook, sc in the next chain, hdc in the final chain. Sl st back into the strawberry.
Repeat this process four more times around the top.
You should have five little green leaves.
Fasten off and weave in the ends.
Part 7: Add Strawberry Seeds
Use Color D or a contrasting cream yarn.
With a tapestry needle, make tiny straight stitches across the red strawberry.
Add approximately 5–7 seed stitches to each motif.
Keep the stitches small and evenly distributed.
Make sure all yarn ends are securely fastened on the inside of the shorts.
Part 8: Decorative Waistband Drawstring
To make an adjustable waistband, use Color C.
Drawstring:
Ch approximately 180–220 stitches, depending on your size. Sl st into the second chain from the hook and continue to the end.
Fasten off.
Weave the drawstring through the waistband near the top, passing it between the stitches at regular intervals.
Add small knots at both ends to prevent unraveling.
Assembly and Finishing
Once the shorts and strawberry motifs are complete, arrange everything before sewing.
I recommend placing the strawberries in a scattered pattern rather than arranging them in perfectly straight lines.
A little irregularity makes the finished garment feel more natural and playful.
Suggested Motif Placement:
- Place 3–4 strawberries on the front left leg.
- Place 3–4 strawberries on the front right leg.
- Add 2–3 strawberries across the back.
- Keep the waistband mostly plain.
- Leave small spaces between motifs to prevent the fabric from becoming heavy.
Use the tapestry needle and matching red yarn to sew each strawberry securely onto the shorts.
Attach the top of each motif first, then stitch around the remaining edges.
Avoid pulling the stitches too tightly because this can cause the shorts to pucker.
Check the crotch area carefully and reinforce any loose joins with matching yarn.
Blocking and Care
Blocking helps even out the stitches and gives your Strawberry Fields Crochet Shorts a more polished appearance.
For cotton yarn, gentle wet blocking works beautifully.
- Fill a basin with cool or lukewarm water.
- Add a small amount of gentle detergent.
- Submerge the shorts and allow them to soak for approximately 10 minutes.
- Remove them carefully without twisting.
- Press out excess water using a clean towel.
- Lay the shorts flat on a blocking mat.
- Shape the waistband, legs, and strawberry motifs.
- Allow them to dry completely.
Care Instructions
- Hand wash in cool water when possible.
- Use gentle detergent.
- Avoid bleach.
- Never hang the shorts while wet.
- Dry flat to maintain their shape.
- Store folded rather than hanging.
If using cotton-blend yarn, follow the yarn manufacturer’s washing instructions.
Fit and Troubleshooting Tips
Why Are My Shorts Too Tight Around the Hips?
You may have too few stitches or a tighter gauge than required.
Try using a larger hook or adding evenly distributed increases to the body.
Why Is My Waistband Curling?
Check that your foundation chain isn’t twisted. Also, avoid pulling your single crochet stitches too tightly.
Why Are the Leg Openings Uneven?
Count the stitches around both legs and check that the crotch bridges contain the same number of chains.
Why Do My Strawberry Motifs Look Wavy?
Your sewing tension may be too tight. Secure the motifs with small stitches without pulling the fabric inward.
Can I Make the Shorts Longer?
Absolutely! Simply add more rounds to each leg before working the final single crochet edging.
Can I Use Different Colors?
Of course! Pink strawberries, white flowers, pastel green leaves, or even tiny embroidered flowers would look lovely.
Final Thoughts
These Strawberry Fields Crochet Shorts are such a cheerful addition to a handmade summer wardrobe. I love how the little strawberry motifs turn a simple crochet garment into something playful, colorful, and full of personality.
The combination of soft cotton yarn, a comfortable waistband, and sweet fruit-inspired details makes this project especially enjoyable for anyone who loves cute handmade clothing.
You can experiment with the colors, adjust the leg length, or add extra strawberries to make your shorts completely unique.
Most importantly, take your time and enjoy every stitch. Handmade clothing doesn’t need to be perfectly identical to look beautiful.
I hope you have as much fun making these Strawberry Fields Crochet Shorts as I had designing them. If you make your own pair, share your finished creation and inspire another crocheter to bring a little strawberry sweetness into their summer wardrobe!


Leave a Reply
You must be logged in to post a comment.