

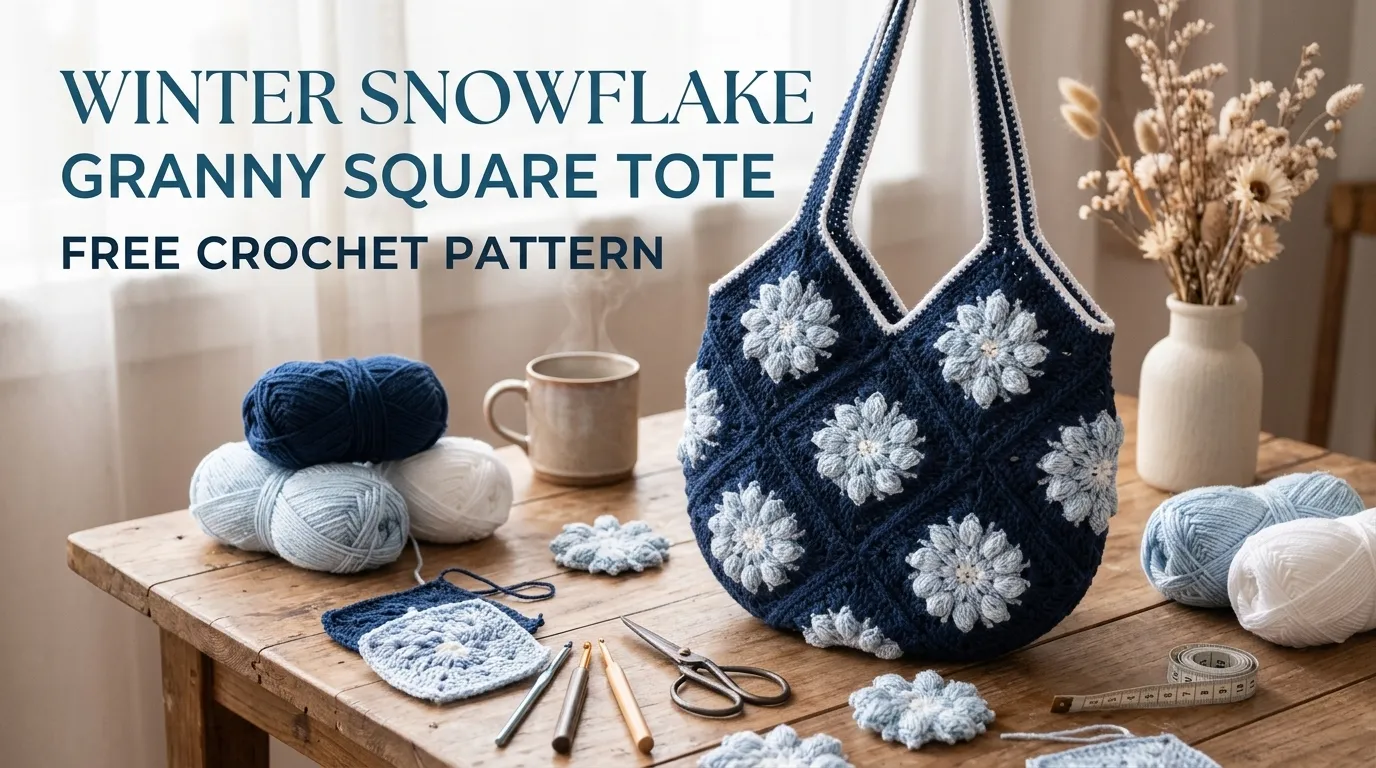
The result is a roomy, practical bag with a lovely handmade appearance. This Winter Snowflake Granny Square Tote Free Crochet Pattern combines traditional granny squares, simple snowflake motifs, and sturdy crochet handles into one charming project.
Grab your favorite winter yarn colors, and let’s make something beautiful!
About This Winter Snowflake Granny Square Tote Pattern
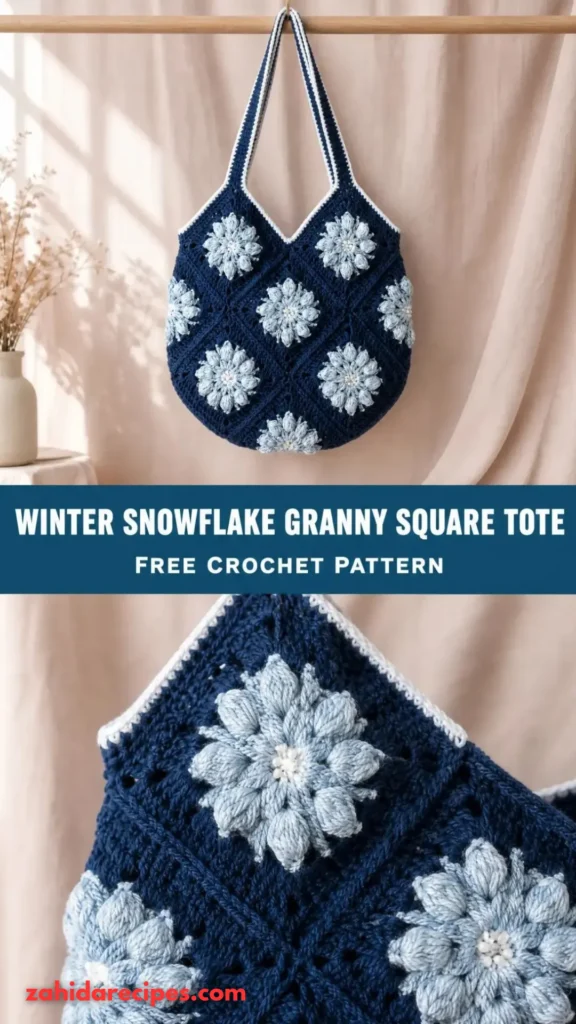
This tote bag is constructed from eight individual granny squares featuring decorative snowflake centers.
Each square is crocheted separately and joined to create a rectangular bag body. A matching bottom panel provides extra structure, while a reinforced upper edge and crocheted handles make the tote comfortable to carry.
The snowflake details are worked using white yarn against a contrasting background, creating a pretty winter-inspired appearance.
Skill Level: Intermediate
You should be comfortable with:
- Working in joined rounds.
- Making granny clusters and chain spaces.
- Changing yarn colors.
- Following stitch placement instructions.
- Seaming crochet pieces together.
Finished Measurements:
- Width: Approximately 14 inches.
- Height: Approximately 14 inches.
- Depth: Approximately 4 inches.
- Handle drop: Approximately 10 inches.
Your finished measurements may vary depending on yarn, hook size, and personal tension.
The bag is designed for everyday essentials such as a wallet, phone, small notebook, water bottle, and crochet supplies.
Materials You’ll Need
Yarn
Choose a medium-weight cotton or cotton-blend yarn for a sturdy tote that holds its shape.
- Color A – Navy Blue: Approximately 350 yards. Used for granny square backgrounds, joining, and bag construction.
- Color B – White: Approximately 180 yards. Used for snowflake motifs and decorative details.
- Color C – Icy Blue: Approximately 250 yards. Used for square borders and color accents.
- Color D – Light Gray: Approximately 100 yards. Used for additional edging and decorative rounds.
Allow approximately 15% extra yarn for gauge variations and finishing.
Crochet Hooks
- 4.0 mm crochet hook for granny squares and snowflake details.
- 4.5 mm crochet hook for the main bag construction and handles.
Additional Supplies
- Tapestry needle.
- Stitch markers.
- Sharp scissors.
- Measuring tape.
- Blocking mats and pins.
- Optional cotton bag lining.
- Sewing needle and matching thread.
Abbreviations and Terminology
This pattern uses US crochet terminology.
| Abbreviation | Meaning |
|---|---|
| ch | Chain |
| sl st | Slip stitch |
| sc | Single crochet |
| hdc | Half double crochet |
| dc | Double crochet |
| tr | Treble crochet |
| st | Stitch |
| sts | Stitches |
| sp | Space |
| sk | Skip |
| rep | Repeat |
| rnd | Round |
| RS | Right side |
| WS | Wrong side |
| MC | Main color |
| CC | Contrast color |
Basic Stitch Instructions
- Chain (ch): Yarn over and pull through the loop on your hook.
- Slip Stitch (sl st): Insert hook into the indicated stitch, yarn over, and pull through both the stitch and the loop on your hook.
- Single Crochet (sc): Insert hook, yarn over and pull up a loop, yarn over and pull through both loops.
- Half Double Crochet (hdc): Yarn over, insert hook, pull up a loop, yarn over and pull through all three loops.
- Double Crochet (dc): Yarn over, insert hook, pull up a loop, yarn over and pull through two loops twice.
- Treble Crochet (tr): Yarn over twice, insert hook, pull up a loop, then yarn over and pull through two loops three times.
- Granny Cluster: Three double crochet stitches worked into the same chain space.
Important: Turning chains do not count as stitches unless a step explicitly says otherwise.
Gauge
Gauge is important because you want all eight granny squares to be the same size.
Using your 4.0 mm hook and medium-weight cotton yarn:
- 4 rounds of granny square pattern should measure approximately 4 inches.
- Each completed square should measure approximately 6.5 inches across.
Work a small practice square before beginning the project.
If your square is too small, try a larger hook. If it is too large, move down one hook size.
Keep your tension consistent throughout the project.
Main Pattern Instructions
Part 1: Making the Snowflake Granny Squares
You will need eight matching granny squares.
Each square features a white snowflake-inspired center, surrounded by icy blue and navy granny square rounds.
Snowflake Center
Using Color B (White), make a magic ring.
Round 1: Ch 3 (counts as first dc), work 11 dc into the ring. Join with sl st to the top of beginning ch-3.
Count: 12 dc.
Round 2: Ch 1, sc in the same stitch. Ch 3, sk 1 st, sc in next st. Repeat around.
Join with sl st to the first sc.
Count: 6 sc and 6 ch-3 spaces.
Round 3: Ch 1, sc in the first sc. In the next ch-3 space, work (sc, hdc, 3 dc, hdc, sc). Repeat in each remaining ch-3 space.
Join with sl st.
You should now see six decorative points forming a snowflake-inspired flower shape.
Fasten off white yarn.
Adding the Icy Blue Background
Attach Color C to any space between the decorative snowflake points.
Round 4: Ch 3, work 2 dc in the same space. Ch 2, work 3 dc in the next space. Ch 2, continue around, placing 3 dc clusters in each space.
Join with sl st.
Round 5: Ch 3, work 2 dc in the first space. Ch 1, work 3 dc in the next space. At each corner, work (3 dc, ch 2, 3 dc). Continue around.
Join with sl st.
Fasten off.
Navy Blue Granny Square Border
Attach Color A in any corner chain-2 space.
Round 6: Ch 3, work (2 dc, ch 2, 3 dc) in the same corner. Ch 1, work 3 dc in each side space. At every corner, work (3 dc, ch 2, 3 dc).
Round 7: Repeat Round 6, maintaining the same corner increases and side clusters.
Fasten off and weave in all ends.
Your completed square should measure approximately 6.5 inches.
Repeat until you have eight identical squares.
Part 2: Arranging the Granny Squares
Lay all eight squares on a flat surface with their right sides facing upward.
Arrange them into two rows of four squares.
Keep the snowflake motifs facing the same direction for a balanced appearance.
Check that all squares are approximately the same size before joining.
Part 3: Joining the Squares
There are several ways to join granny squares, but I recommend the single crochet join for this tote.
It creates a slightly raised seam that looks decorative and helps reinforce the bag.
Using Color A:
- Place two squares together with wrong sides facing each other.
- Insert your hook through the corresponding stitches on both squares.
- Work one sc through both layers.
- Continue across the entire edge.
- Repeat for all horizontal and vertical joins.
Join the four squares in the first row, then repeat for the second row.
Finally, join both rows together along their long edges.
You should now have one rectangular bag panel measuring approximately 14 inches wide and 13 inches tall.
Fasten off and weave in all ends.
Part 4: Creating the Bottom Panel
The bottom panel gives the tote extra room and helps it hold everyday items.
Using Color A and your 4.5 mm hook:
Foundation: Ch 42.
Row 1: Sc in the second ch from hook and in each remaining ch. Turn.
Count: 41 sc.
Row 2: Ch 1, sc across. Turn.
Rows 3–8: Repeat Row 2.
You should have a rectangular panel approximately 14 inches long and 3.5–4 inches wide.
Fasten off, leaving a long tail for sewing.
Attaching the Bottom Panel
Position the bottom panel along the lower edge of your joined granny square body.
Use stitch markers to secure the corners.
With Color A and a tapestry needle, sew the bottom panel to the bag body using a mattress stitch.
Keep your stitches even and avoid pulling too tightly.
The bottom should sit flat without puckering.
Part 5: Building the Tote Bag Shape
Fold the rectangular granny square panel so the two short sides meet.
The bottom panel should sit between the front and back panels.
Using Color A, join the side edges with a neat single crochet seam.
Work from the bottom corners upward, making sure both sides are aligned.
Fasten off and weave in all ends.
Special Techniques and Additional Elements
Decorative Snowflake Details
To make the snowflake centers stand out, you can add small surface crochet details using white yarn.
Attach white yarn near the center of a snowflake.
Work surface slip stitches outward toward the tips of the motif.
Repeat around the snowflake to create delicate raised lines.
Keep the stitches loose enough that the granny square does not pull or distort.
This optional detail creates a lovely layered winter effect.
Reinforced Top Border
A strong top edge helps your tote maintain its shape.
Attach Color A to any upper corner.
Round 1: Ch 1, work sc evenly around the entire opening. Place 3 sc in each corner.
Join with sl st.
Round 2: Ch 1, sc in each stitch around. Join with sl st.
Round 3: Ch 1, work one reverse single crochet (crab stitch) in each stitch around.
The crab stitch creates a firm, attractive finishing edge.
Fasten off and weave in the ends.
Crochet Tote Handles
Make two identical handles.
Using Color A and your 4.5 mm hook:
Foundation: Ch 61.
Row 1: Sc in the second ch from hook and across. Turn.
Count: 60 sc.
Row 2: Ch 1, sc across. Turn.
Rows 3–5: Repeat Row 2.
You should have a sturdy handle approximately 15 inches long.
Fold the handle lengthwise if desired and sew the edges together to create a thicker strap.
Repeat for the second handle.
Attaching the Handles
Place one handle on the front panel and the second on the back panel.
Position each handle approximately 3 inches from the side seams.
The handle ends should overlap the top border by approximately 1.5 inches.
Use stitch markers to keep the placement symmetrical.
Sew each end securely using a tapestry needle and matching yarn.
For extra strength, sew around each attachment point twice.
Assembly and Finishing
Before considering your tote finished, take a few minutes to check all the details.
- Weave in every loose yarn end.
- Check that the side seams are secure.
- Make sure the bottom panel is attached evenly.
- Check that both handles are positioned at equal distances.
- Reinforce the handle attachment points.
- Gently stretch the bag into its intended rectangular shape.
Optional Fabric Lining
If you plan to carry smaller items, adding a fabric lining is a wonderful idea.
Cut two pieces of cotton fabric to match the front and back dimensions of the bag.
Sew the pieces together along the sides and bottom, leaving the top open.
Fold the upper edge inward and press.
Place the lining inside the tote and hand-sew it to the inside of the crochet top border.
A lining helps prevent small items from slipping through the granny square openings.
Blocking and Care
Blocking makes a noticeable difference in granny square projects.
It helps even out the stitches, smooth the edges, and give your finished tote a more polished appearance.
Wet Blocking
- Fill a basin with cool water.
- Add a small amount of gentle wool-safe or cotton-friendly detergent.
- Submerge the crochet piece briefly.
- Remove excess water by pressing gently between towels.
- Shape the bag on blocking mats.
- Pin the granny square edges evenly.
- Allow everything to dry completely.
Avoid twisting or wringing the tote.
If you used cotton yarn, wet blocking is generally a good choice.
Care Instructions
- Hand wash in cool water when possible.
- Use mild detergent.
- Avoid harsh bleach.
- Dry flat.
- Never hang the bag while wet.
- Store in a dry place away from direct sunlight.
If your bag has a fabric lining, follow the fabric care instructions too.
Fit and Troubleshooting Tips
My Granny Squares Are Different Sizes
This usually happens because of changing tension.
Check your gauge and count your stitches after each round.
Block the squares before joining to help them match.
My Snowflake Motifs Look Uneven
Make sure the center ring is tightened properly and that each decorative point has the same stitch combination.
Avoid pulling the stitches too tightly around the center.
The Bag Sides Are Curling
Your tension may be too tight, or your hook may be too small.
Try a larger hook for the granny square border.
Blocking can also help straighten slightly curled edges.
My Tote Bag Stretches Too Much
Cotton yarn is a good choice, but even cotton can stretch under weight.
Use a smaller hook for firmer stitches, reinforce the handles, and consider adding a fabric lining.
Avoid carrying very heavy items.
The Handles Feel Flimsy
Add another row or two of single crochet to each handle.
You can also place cotton webbing inside the handle for additional support.
Can I Make the Tote Larger?
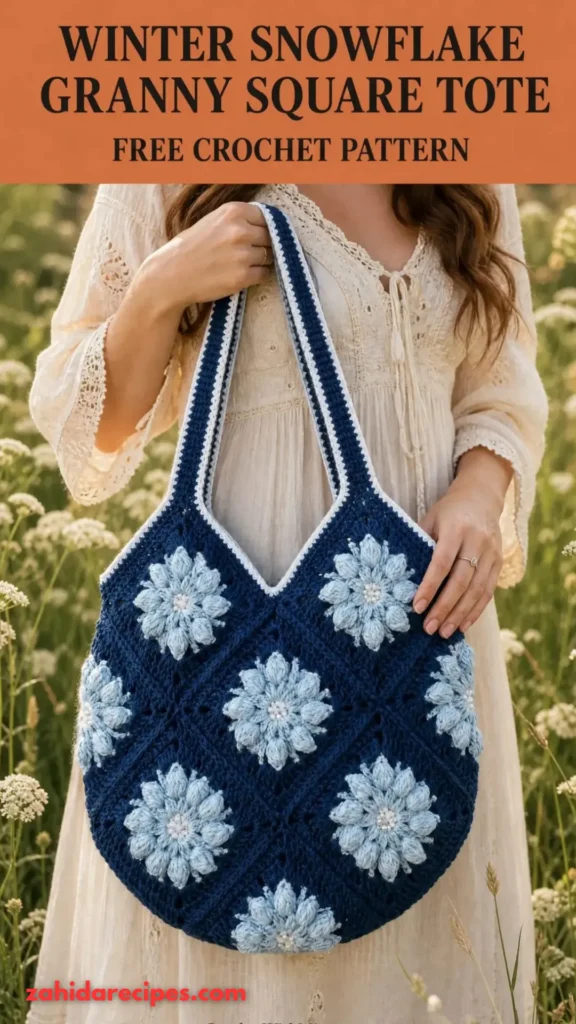
Absolutely!
Add another round to each granny square before joining.
For a wider bag, make additional squares and adjust the bottom panel accordingly.
Just remember that larger bags need stronger handles and more reinforcement.
Final Thoughts
I absolutely love how this Winter Snowflake Granny Square Tote turns traditional crochet squares into something practical and beautiful.
The combination of navy, icy blue, and white gives the bag a frosty winter appearance, while the snowflake centers add just enough detail to make every square feel special.
Although the project involves several individual pieces, the construction is enjoyable once you get into the rhythm of making the squares. And seeing all eight snowflakes come together into one finished tote is incredibly satisfying!
You can experiment with different winter shades, add a fabric lining, or personalize the handles to create a bag that feels completely your own.
I hope you enjoy making this Winter Snowflake Granny Square Tote Free Crochet Pattern as much as I enjoyed designing it.
Happy crocheting, and may your stitches always be even and your yarn never tangle!




Leave a Reply
You must be logged in to post a comment.