Dusty Rose Romantic Crochet Bell Top Free Pattern
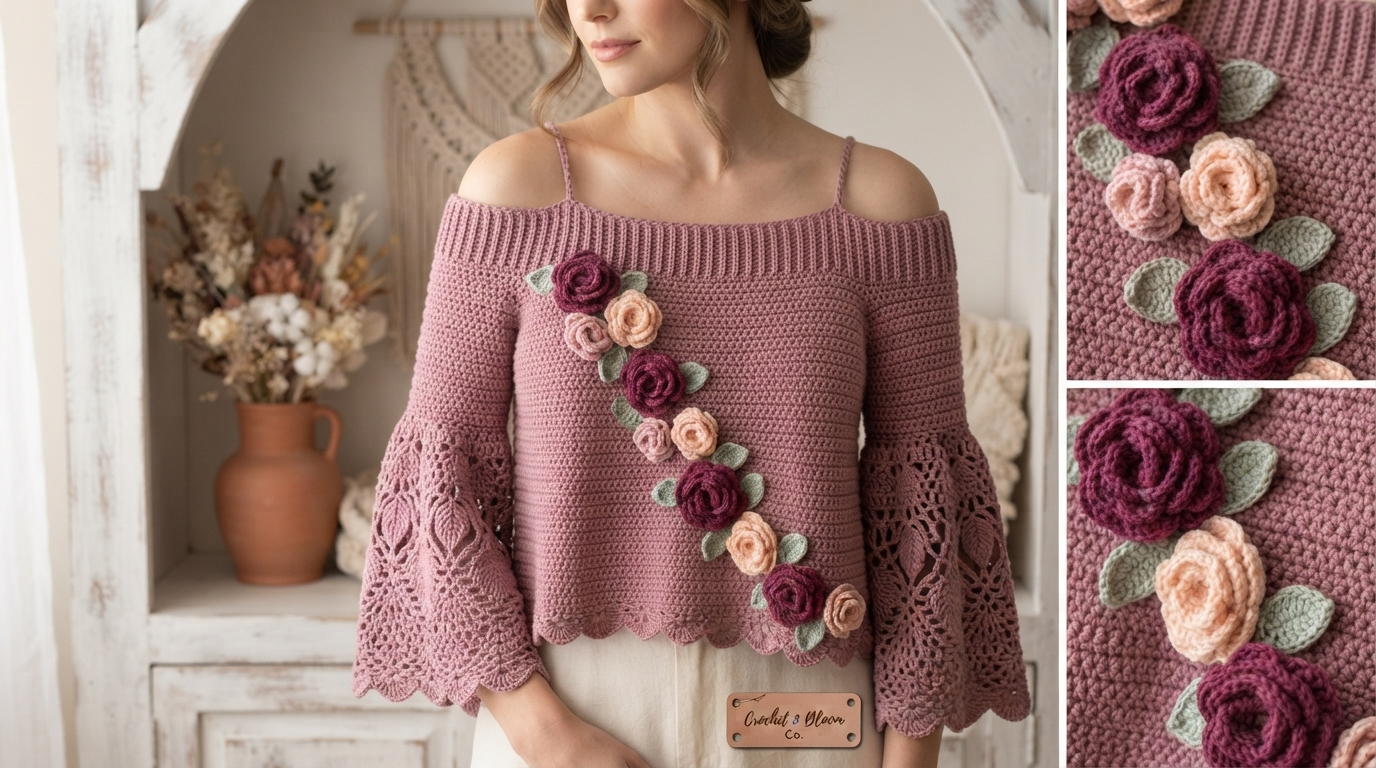
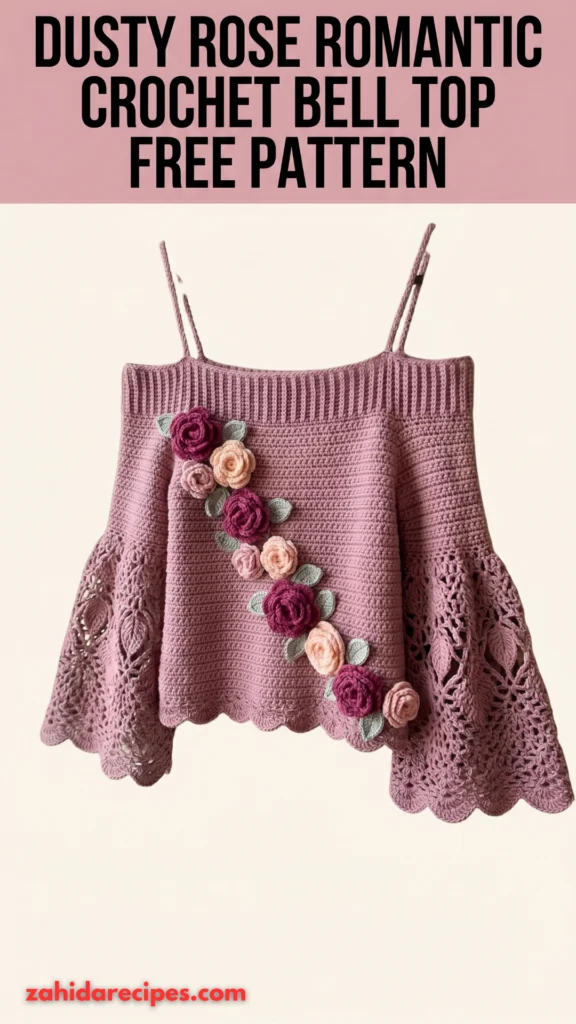
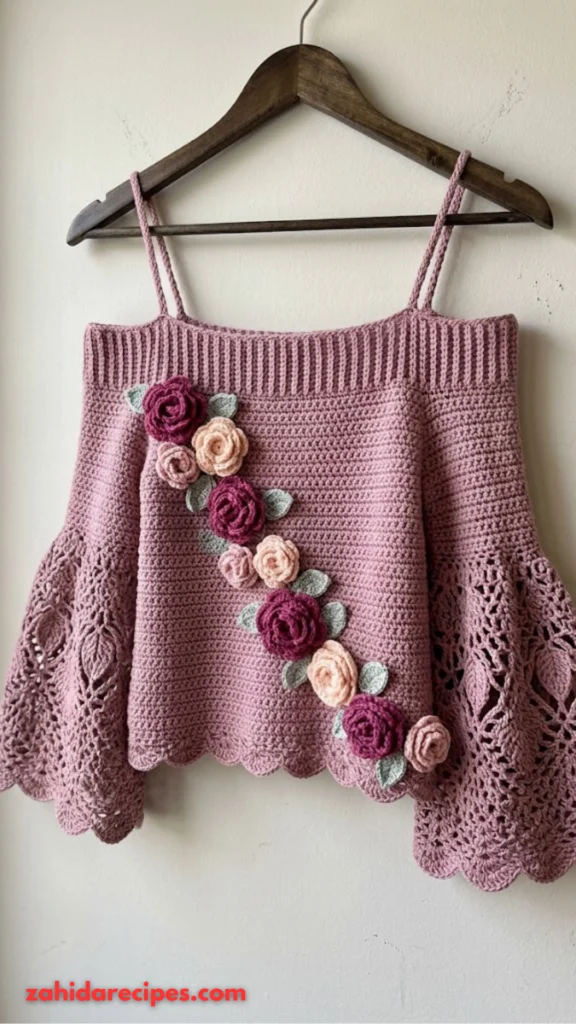
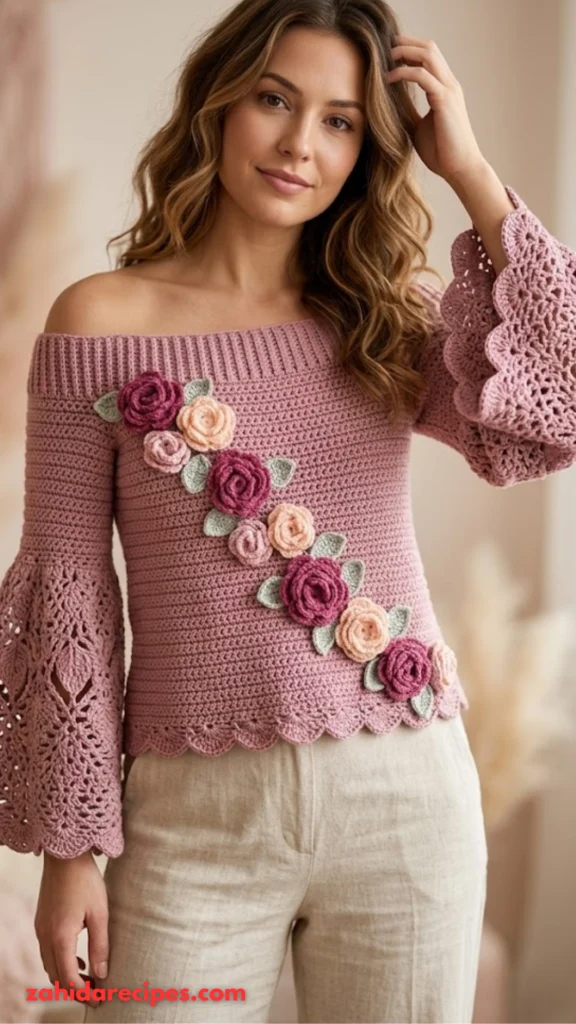
This dusty rose bell top is the crochet project that makes you fall in love with your hook all over again. It mixes vintage charm with modern style — think cottagecore princess meets festival fashion. The dramatic bell sleeves, the lace panels, and that cascade of roses down the front? Total showstoppers. The best part? You only need basic stitches to make it. Let me walk you through everything.
Why This Pattern Deserves a Spot in Your Project Bag
Most crochet tops feel either too plain or too complicated. This one hits the sweet spot. The body works up fast with simple single crochet rows. The lace bell panels and roses add the wow factor without demanding expert skills. And the scalloped hem? It gives the whole top a polished, store-bought finish. Here is what makes this design stand out:
- Dramatic bell sleeves with lace leaf motifs
- Dimensional crochet roses cascading down the front
- Scalloped hem for a clean, professional look
- Ribbed neckband that stretches comfortably
- Adjustable sizing — just add or remove stitch repeats
This tutorial takes you from yarn to finished garment with clear, step-by-step instructions.
Skill Level: Who Can Make This?
Intermediate. You should feel comfortable with basic crochet stitches and reading patterns. The lace panels need some focus, but I wrote them out row by row. The roses are beginner-friendly once you get the coiling technique down. Is this your first garment? You can still do it. Take your time with the lace sections. Maybe practice one rose before committing to all nine. IMO, the roses are the most fun part anyway.
Finished Measurements and Sizing
Size shown: Small/Medium. Sizing note: You can adjust this pattern by adding or subtracting stitch repeats in the body. Each repeat adds roughly 2 inches. Want a cropped version? Work fewer rows before the underarm shaping. Want it longer? Add rows. This pattern is flexible like that.
Materials You Will Need
Yarn
I recommend 100% cotton or a cotton/acrylic blend. The structure holds better than pure acrylic, and the drape looks beautiful for bell sleeves. Suggested brands:
- Lion Brand 24/7 Cotton
- Paintbox Yarns Cotton DK
- Drops Safran
Hook
4.0mm hook (G-6). Adjust if your gauge is off.
Notions
- Tapestry needle
- Stitch markers
- Scissors
- Measuring tape
Gauge Matters (Do Not Skip This)
18 stitches x 20 rows = 4 inches in single crochet using a 4.0mm hook. Please swatch and adjust your hook size if needed. If your gauge is too loose, the top will be larger and less structured. If too tight, it will be smaller and stiffer. Trust me — a quick swatch saves hours of frogging later.
Abbreviations and Stitch Definitions
Let me define every stitch before we begin. Read through these once so you recognize them in the pattern.
- ch — chain
- sc — single crochet
- dc — double crochet
- hdc — half double crochet
- sl st — slip stitch
- sk — skip
- sp — space
- st(s) — stitch(es)
- BLO — back loop only
- MC — main color
Special Techniques Used
Back Loop Only Ribbing
Working into only the back loop creates horizontal ridges that look like knit ribbing. This is how we get that stretchy, textured neckband.
Shell Stitch
Multiple double crochets worked into the same stitch or space, creating a fan shape.
Coiled Rose
A long strip of ruffled crochet that gets rolled and stitched to form a dimensional flower.
Pattern Instructions
Part 1: Body Front Panel
The body is worked flat in rows, then seamed at the sides. Foundation: With MC and 4.0mm hook, ch 78. Row 1: Sc in 2nd ch from hook and in each ch across. (77 sc) Row 2: Ch 1, turn. Sc in each st across. (77 sc) Rows 3 through 50: Repeat Row 2. (77 sc each row) You should now have a rectangle approximately 17 inches wide and 10 inches tall. Shape for Underarm: Row 51: Ch 1, turn. Sk first 5 sts, sc in next 67 sts, leave last 5 sts unworked. (67 sc) Rows 52 through 60: Ch 1, turn. Sc in each st across. (67 sc) Divide for Neckline: Row 61: Ch 1, turn. Sc in first 25 sts. Leave remaining sts unworked. (25 sc) — this is the left shoulder. Rows 62 through 65: Continue on these 25 sts, decreasing 1 st at neck edge each row. (21 sc after Row 65) Rows 66 through 70: Work even on 21 sts. Fasten off. Rejoin yarn to work right shoulder, skipping center 17 sts for neckline. Work Rows 61 through 70 in mirror image.
Part 2: Body Back Panel
Work exactly as Front Panel through Row 60. Row 61 through 70: Continue working straight across all 67 sts without neckline shaping. The back neckline will be created by the ribbed neckband. Fasten off.
Part 3: Ribbed Neckband
The neckband is worked separately and sewn on. This creates that beautiful stretch and texture. Foundation: Ch 12. Row 1: Sc in 2nd ch from hook and in each ch across. (11 sc) Row 2: Ch 1, turn. Working in BLO, sc in each st across. (11 sc) Repeat Row 2 until piece measures approximately 30 inches or stretches comfortably around entire neckline opening. Fasten off, leaving long tail for seaming.
Part 4: Lace Bell Panels (make 2)
These dramatic sleeves are the star of the show. Each panel is worked flat, then attached along the side seams. Foundation: With MC, ch 42.
Row 1: Dc in 4th ch from hook, dc in each ch across. (40 dc)
Row 2: Ch 3 (counts as dc), turn. Dc in each st across. (40 dc)
Row 3: Ch 3, turn. Dc in next 3 sts. Ch 2, sk 2, dc in next 4 sts. Repeat from * across. (40 sts including ch spaces)
Row 4: Ch 3, turn. Dc in each dc, 2 dc in ch-2 sp. Repeat across. (40 dc)
Row 5 through 8: Repeat Rows 3 and 4 twice more. Begin Lace Leaf Motif:
Row 9: Ch 5, turn. Sk 2, dc in next st. Ch 2, sk 2, dc in next st. Repeat across. (14 dc, 13 ch-2 sps)
Row 10: Ch 3, turn. 5 dc in first ch-2 sp (shell made). Sc in next ch-2 sp, 5 dc in next ch-2 sp (shell). Repeat across.
Row 11: Ch 6, turn. Sc in center dc of first shell. Ch 5, sc in center dc of next shell. Repeat across.
Rows 12 through 20: Continue alternating shell rows and chain loop rows, gradually increasing the shells to create the leaf fan shapes visible in the photo. Scalloped Edge: Final Row: 7 dc in ch-5 sp, sl st between shells. Repeat across to create scalloped bottom edge. Fasten off.
Part 5: Scalloped Body Hem
With right side facing, join MC to bottom edge of body. Round 1: Sc evenly around entire bottom edge, working approximately 3 sc per 2 row ends. Join with sl st. Round 2: Ch 1. Sc in next st, sk 2, 5 dc in next st (shell), sk 2. Repeat around. Join. Round 3: Sc in center dc of shell, ch 3, sc in next sc, ch 3. Repeat around. Join. Fasten off.
Part 6: Spaghetti Straps (make 2)
Method: Ch 100. Sl st in 2nd ch from hook and in each ch across. Fasten off. This creates a firm, thin strap approximately 14 inches long. Adjust chain count for your preferred length.
Part 7: Crocheted Roses
These dimensional roses are easier than they look. You create a ruffled strip, then coil it into a rose shape. Large Rose (make 4 in assorted colors): Ch 40. Row 1: Dc in 4th ch from hook. 3 dc in next ch. Repeat across. The strip will ruffle dramatically. Fasten off, leaving 12 inch tail. Coil the strip starting from the beginning (tighter center), stitching through the bottom as you go to secure. The ruffles become petals. Small Rose (make 5 in assorted colors): Ch 25. Work as large rose.
Part 8: Leaves (make 12 to 15)
Foundation: With sage green, ch 10.
Row 1: Sl st in 2nd ch from hook, sc in next, hdc in next, dc in next 2, hdc in next, sc in next, sl st in last. Ch 1, do not turn. Working along opposite side of foundation chain, sl st, sc, hdc, dc, dc, hdc, sc, sl st. This creates a pointed leaf shape. Fasten off, leaving tail for attaching.
Assembly: Putting It All Together
Step 1: Block all pieces lightly. Pin body panels with wrong sides together and seam side edges using mattress stitch or slip stitch through both loops.
Step 2: Attach lace bell panels along side seams, positioning so they drape from underarm to hem.
Step 3: Seam ribbed neckband into a loop. Pin evenly around neckline opening with seam at center back. Whip stitch in place, stretching slightly as you go.
Step 4: Attach straps to front and back of neckband, approximately 4 inches from center on each side. Try on and adjust placement for your shoulders.
Step 5: Arrange roses and leaves in a cascading diagonal line from upper left toward lower right (as shown in photo). Pin in place. Once satisfied, stitch each piece securely to the body using yarn tails and tapestry needle.
Step 6: Weave in all ends. Block finished garment if desired.
Styling Tips for Your New Top
This romantic bell top pairs beautifully with high waisted jeans, flowy skirts, or layered over a simple slip dress. The roses add enough detail that you can keep jewelry minimal. For cooler weather, layer over a fitted long sleeve tee. FYI, this top also looks adorable with wide-leg linen pants for a breezy summer vibe.
Helpful Tips for Success
- Swatch first. Your gauge decides the final fit.
- Practice one rose before making all nine. You will get faster with each one.
- Use stitch markers at the underarm and neckline shaping. It keeps everything symmetrical.
- Block your pieces before assembly. It makes seaming so much easier.
- Try on as you go. Adjust strap placement and rose layout to suit your body.
Final Thoughts
I truly hope you enjoy creating this romantic crochet bell top as much as I enjoyed designing it. There is something magical about watching those roses take shape and seeing this garment come together piece by piece. When you finish yours, I would absolutely love to see it. Tag me on Instagram or share in my Facebook group. Seeing your creations is the best part of this whole journey. Happy crocheting, friend. You have got this.