Mocha Autumn Rose Crochet Top Free Pattern
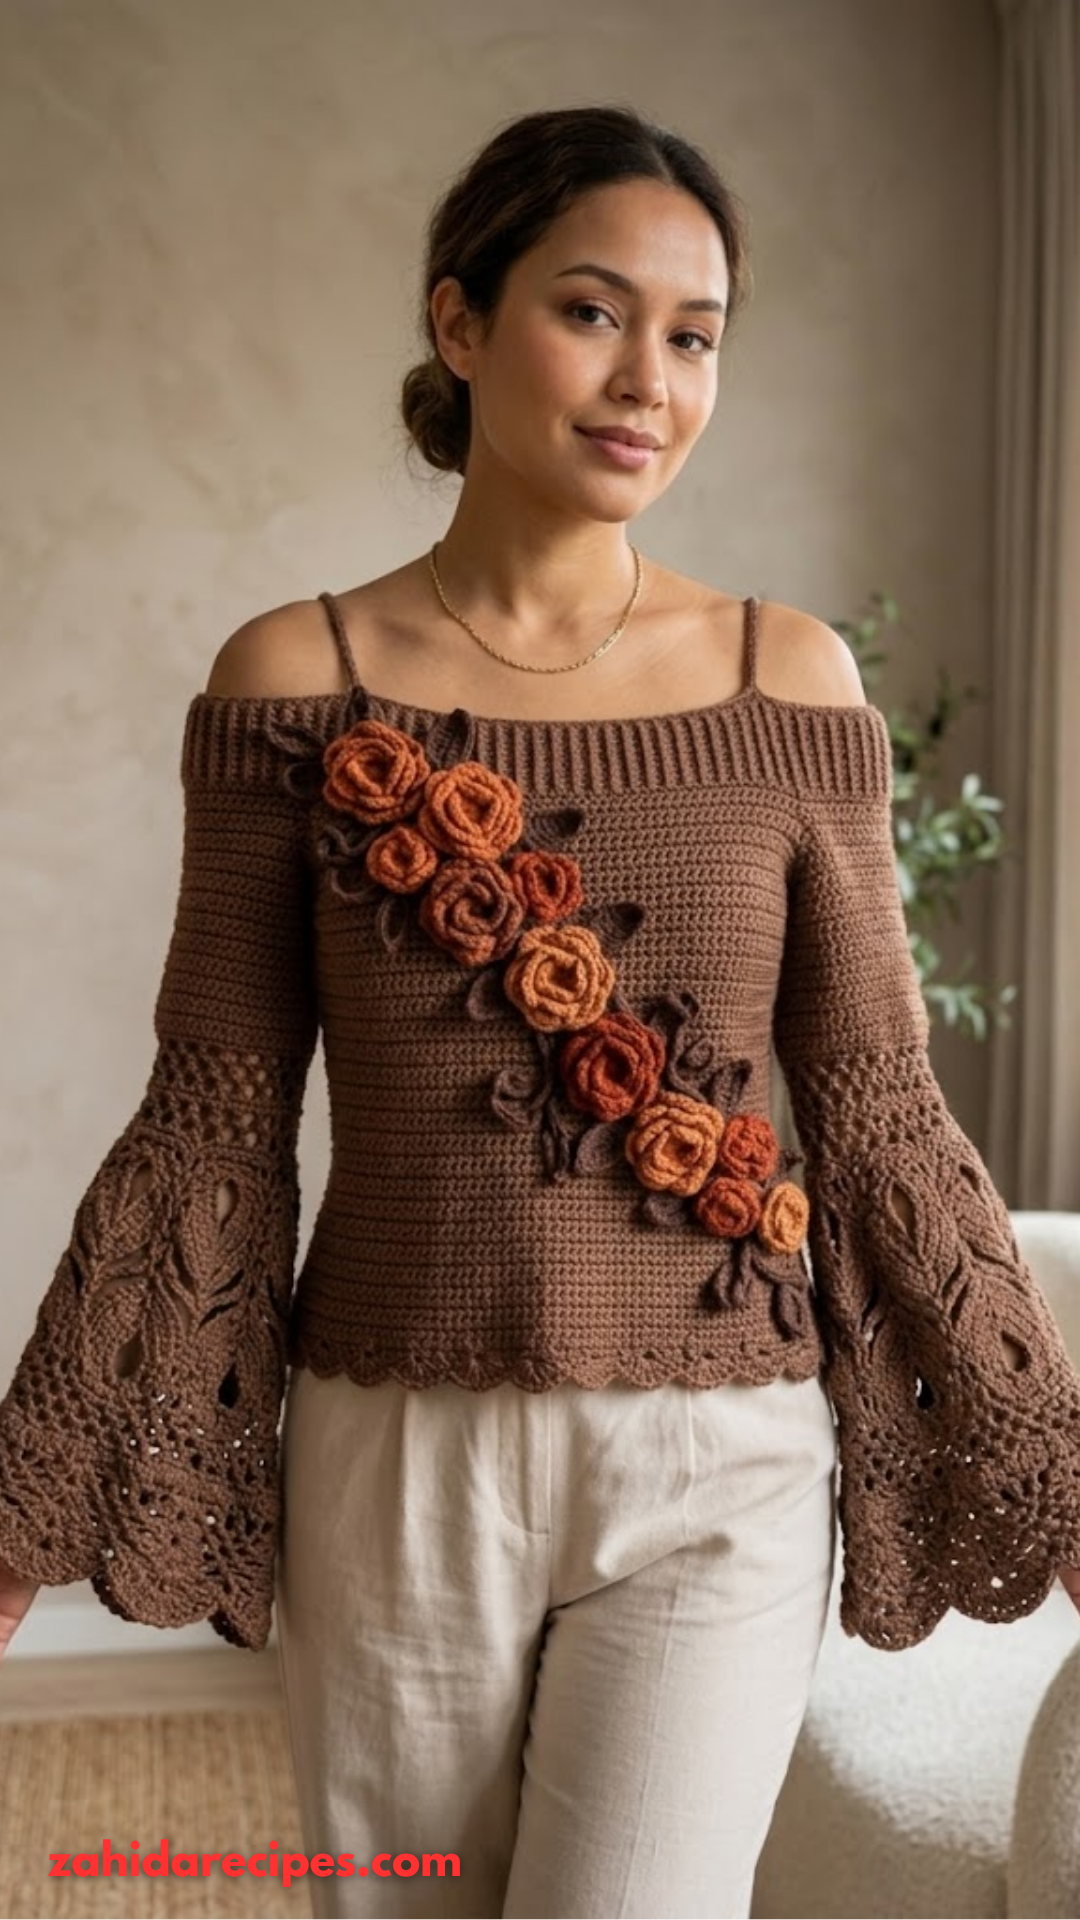
Fall just got a whole lot prettier. This Mocha Autumn Rose Crochet Top mixes a simple solid body with big, dramatic bell sleeves and a diagonal trail of soft dimensional roses in warm sunset colors. You get cozy structure plus romantic flair without complicated construction. Ready to make a statement piece that feels like autumn hugging your shoulders?
Why This Top Feels Like Pure Autumn Magic
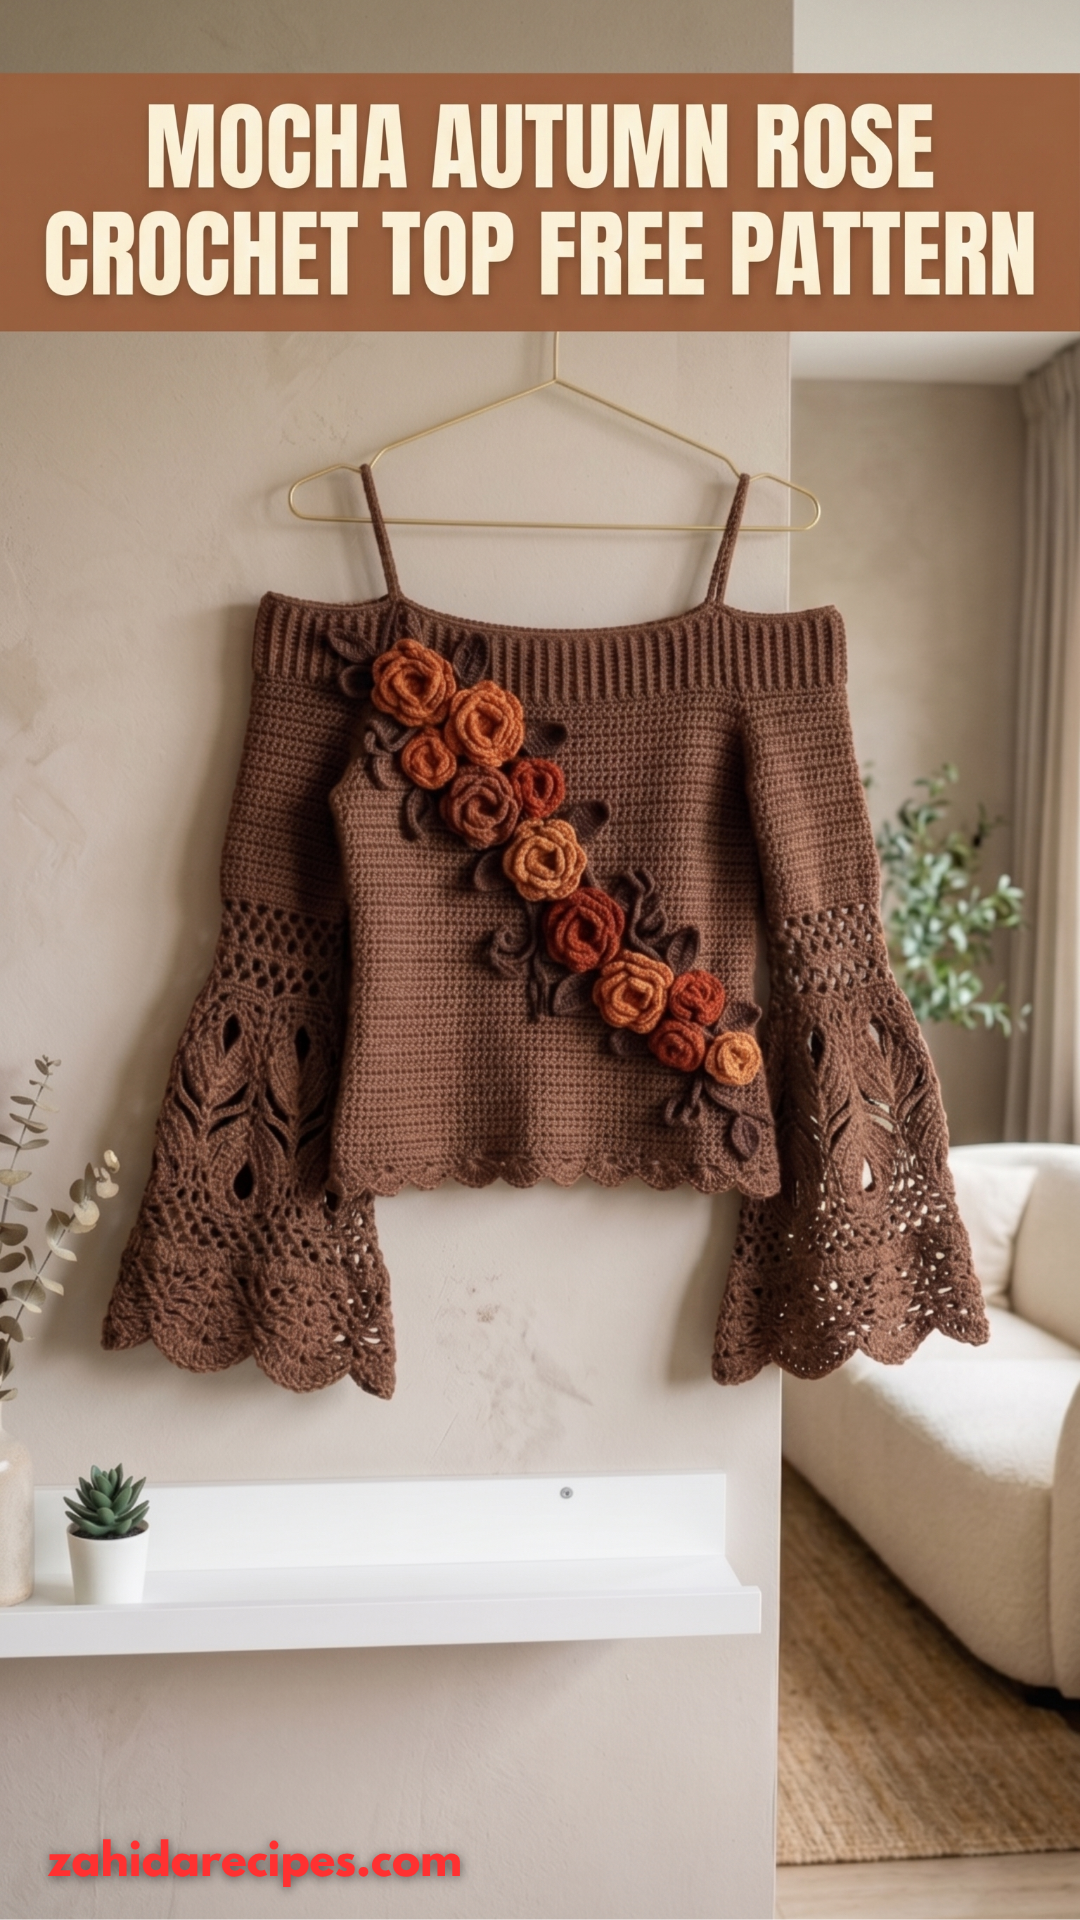
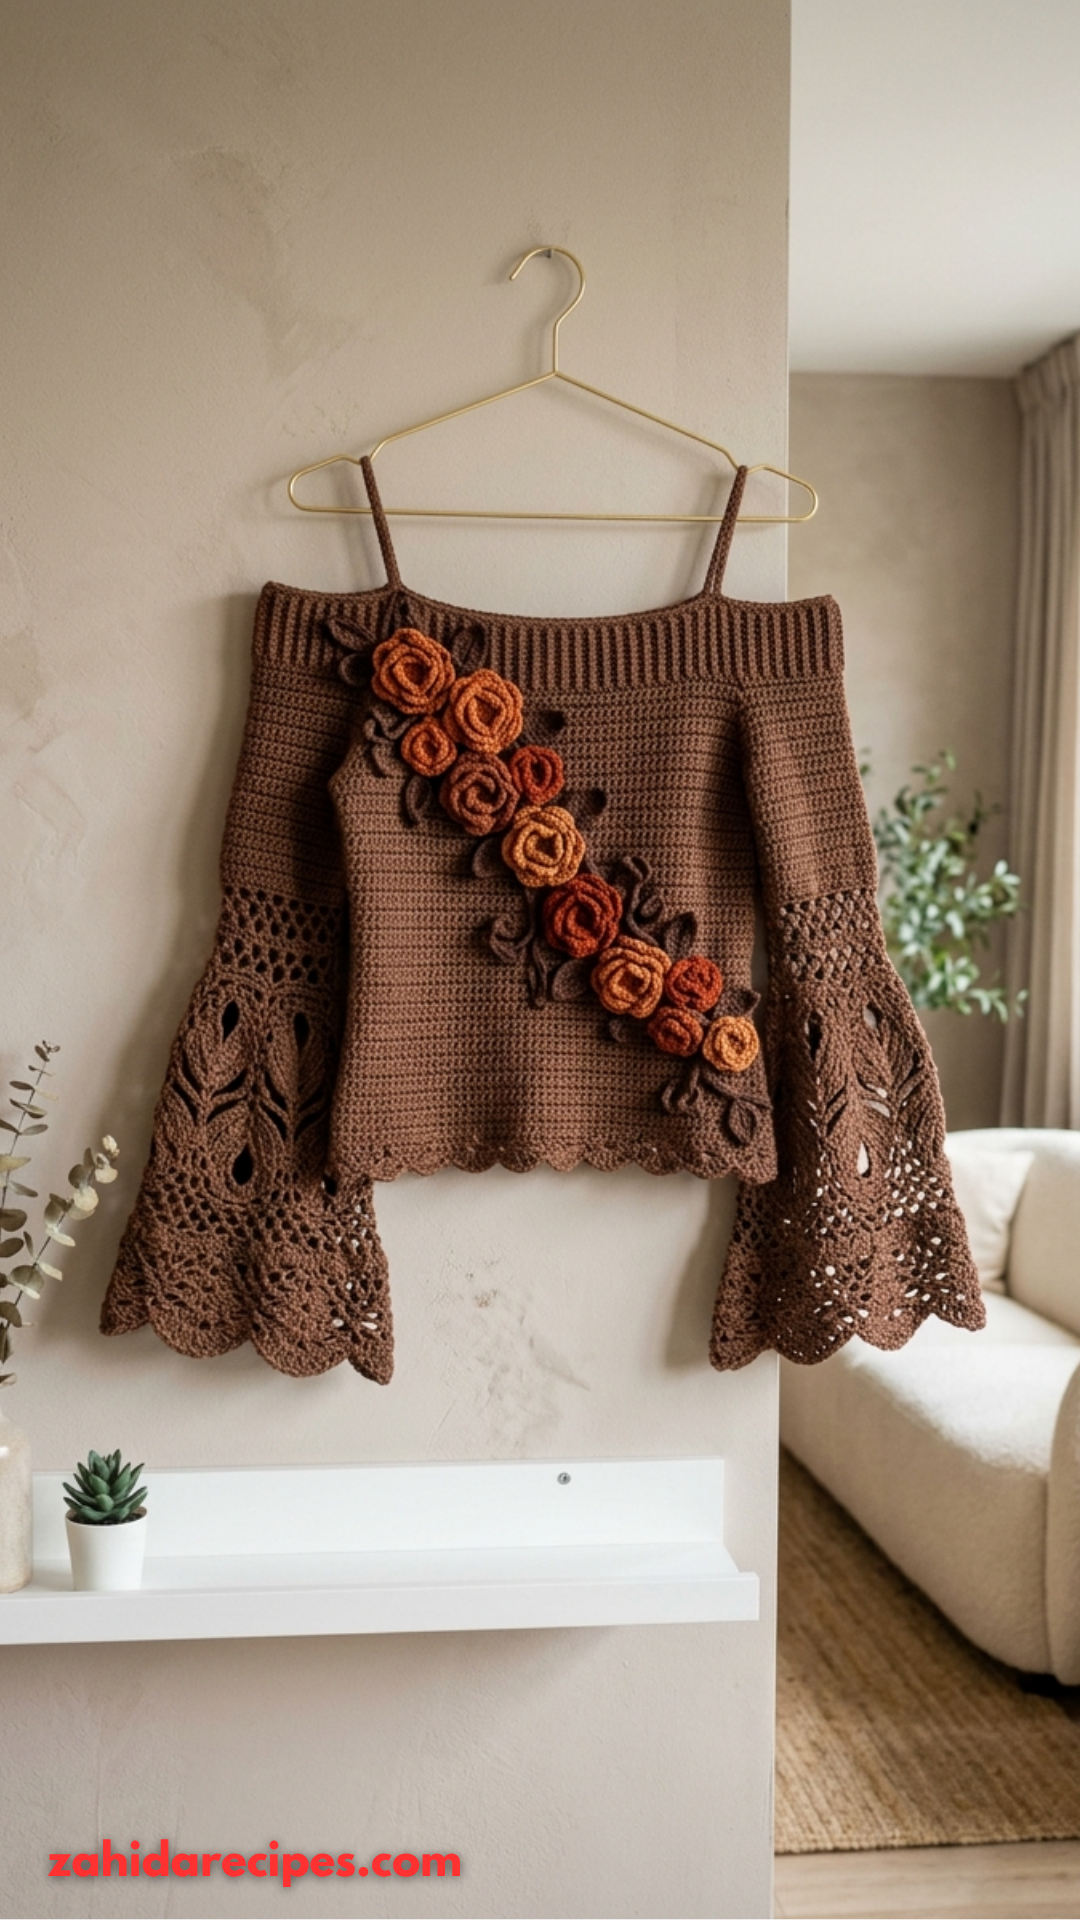
Picture a cropped top that hits right at your natural waist. The body stays relaxed and easy while those flared sleeves do all the talking. A ribbed neckline keeps things neat and slightly stretchy. The solid single crochet bodice works up fast. Then openwork lace panels and leaf cutouts on the sleeves add airy drama.
Those roses in burnt orange, rust, and golden amber cascade diagonally across the front. They look fancy but go on last as separate motifs. A scalloped hem finishes everything with soft vintage vibes. Honest question — does any other fall project give you this much style for the effort?
This design works for intermediate crocheters. Adventurous beginners can handle it too if they take one section at a time.
What You Need Before You Start
Grab your supplies and you will fly through this.
Yarn (worsted weight):
- Main Color (MC): 400 yards mocha brown or taupe
- Contrast Color A (CA): 40 yards burnt orange
- Contrast Color B (CB): 40 yards rust red
- Contrast Color C (CC): 40 yards golden amber
- Leaf Color (LC): 30 yards dark brown or chocolate
Cotton blend or bamboo blend gives the best drape. Pure acrylic works but feels warmer. Skip anything stiff.
Hooks:
- 5.0mm (H/8) for the main fabric
- 4.5mm (7) for roses and leaves (optional, tighter motifs)
Notions:
- Yarn needle
- Stitch markers
- Scissors
- Measuring tape
- Rust-proof pins for blocking
Gauge: 16 stitches and 18 rows = 4 inches in single crochet with 5.0mm hook. Always swatch. Too small? Go up a hook size. Too big? Go down.
Finished Measurements (size Medium, with adjustment notes):
- Bust: about 38 inches with slight ease
- Length (shoulder to hem): about 16 inches
- Sleeve length: about 18 inches from shoulder seam to cuff
- Bell sleeve width at cuff: about 14 inches
Stitch multiples make width changes simple.
Stitches and Pattern Notes You Will Use
Here is every abbreviation spelled out clearly.
- ch – chain: yarn over, pull through loop on hook
- sl st – slip stitch: insert hook, yarn over, pull through stitch and loop on hook in one motion
- sc – single crochet: insert hook, yarn over, pull up loop (2 loops on hook), yarn over, pull through both loops
- hdc – half double crochet: yarn over, insert hook, pull up loop (3 loops), yarn over, pull through all 3 loops
- dc – double crochet: yarn over, insert hook, pull up loop (3 loops), yarn over, pull through 2 loops, yarn over, pull through remaining 2 loops
- tr – treble crochet: yarn over twice, insert hook, pull up loop (4 loops), [yarn over, pull through 2 loops] three times
- sk – skip
- sp – space
- BLO – back loop only
- FLO – front loop only
- inc – increase (2 stitches in same stitch)
- dec – decrease (work 2 stitches together)
- RS – right side
- WS – wrong side
Pattern notes:
The bodice works flat in two panels (front and back), then seams at the sides. Ribbed neckband works separately and attaches. Sleeves work flat, seam into tubes, then attach to armholes. Straps are simple chains with sc edging. Roses, leaves, and the floral arrangement make separately and sew on last. Scalloped edging goes on the hem and sleeve cuffs after everything joins.
Step-by-Step Instructions
Time to crochet. Follow each section in order.
Back Panel
With MC and 5.0mm hook:
Row 1: Ch 77. Sc in 2nd ch from hook and in each ch across. Turn. (76 sts)
Rows 2–54: Ch 1, sc in each st across. Turn. (76 sts)
This rectangle measures about 19 inches wide and 12 inches tall.
Shape armholes:
Row 55: Ch 1, sl st in first 5 sts, ch 1, sc in next 66 sts, leave remaining 5 sts unworked. Turn. (66 sts)
Row 56: Ch 1, sc2tog over first 2 sts, sc to last 2 sts, sc2tog. Turn. (64 sts)
Rows 57–60: Repeat Row 56. (56 sts after Row 60)
Rows 61–72: Ch 1, sc in each st across. Turn. (56 sts)
Fasten off. Weave in ends.
Front Panel
Work exactly as Back Panel through Row 72.
Do not fasten off yet.
Neckline shaping (optional): For a slightly scooped front neckline, on Row 70 work 20 sc, skip center 16 sts, work remaining 20 sc. Work each shoulder side separately for 2 more rows, decreasing 1 st at neck edge each row. Fasten off both sides.
Prefer a straight neckline like the back? Skip the shaping.
Ribbed Neckband
The ribbed texture comes from working in back loop only.
With MC and 5.0mm hook:
Row 1: Ch 9. Sc in 2nd ch from hook and each ch across. Turn. (8 sts)
Rows 2–120: Ch 1, sc BLO in each st across. Turn. (8 sts)
This stretchy band measures about 26 inches long. Adjust length to match your top edge measurement plus ease.
Fasten off, leaving long tail for seaming.
Bell Sleeves (Make 2)
Sleeves mix solid sections, lace panels, and decorative leaf cutouts.
Solid Upper Sleeve:
With MC and 5.0mm hook:
Row 1: Ch 41. Sc in 2nd ch from hook and each ch across. Turn. (40 sts)
Rows 2–20: Ch 1, sc in each st across. Turn. (40 sts)
Begin increases for bell shape:
Row 21: Ch 1, 2 sc in first st, sc to last st, 2 sc in last st. Turn. (42 sts)
Rows 22–24: Ch 1, sc in each st across. Turn. (42 sts)
Row 25: Repeat Row 21. (44 sts)
Continue alternating 1 increase row with 3 plain rows until you have 60 sts (approximately Row 45).
Lace Panel Section:
Row 46: Ch 3 (counts as dc), sk 1 st, dc in next st, ch 1, sk 1 st across to last 2 sts, dc in last 2 sts. Turn.
Row 47: Ch 3, dc in each dc and ch-1 sp across. Turn. (60 sts)
Row 48: Ch 4 (counts as dc + ch 1), sk 1 st, dc in next st, ch 1, sk 1 st across. Turn.
Row 49: Repeat Row 47.
Rows 50–55: Alternate Rows 48 and 47 for continued mesh effect.
Leaf Cutout Motif Panel:
Row 56: Ch 1, sc in first 8 sts, ch 5, sk 5 sts (creates opening), sc in next 10 sts, ch 5, sk 5 sts, sc in next 10 sts, ch 5, sk 5 sts, sc in last 8 sts. Turn.
Row 57: Ch 1, sc in each sc and 5 sc in each ch-5 sp across. Turn. (60 sts)
Rows 58–62: Work sc across, maintaining stitch count.
You will crochet leaf motifs separately later and sew them centered over the openings.
Scalloped Cuff Edging:
Final Row: Sc in next st, sk 1 st, 5 dc in next st (shell made), sk 1 st across. End with sc in last st. Fasten off.
Leaf Motifs (Make 12 total: 6 for sleeves, 6 for rose arrangement)
With LC and 4.5mm hook:
Ch 10. Sl st in 2nd ch from hook, sc in next ch, hdc in next ch, dc in next 3 ch, hdc in next ch, sc in next ch, sl st in last ch.
Ch 1, working down opposite side of foundation chain: sl st, sc, hdc, dc, dc, dc, hdc, sc, sl st.
Fasten off, leaving tail for attaching.
This creates a small pointed leaf about 2 inches long.
Dimensional Roses (Make 7 to 9 total)
Make a variety: 3 in CA (burnt orange), 3 in CB (rust), 2 to 3 in CC (golden amber).
Rose Pattern:
With contrast color and 4.5mm hook:
Ch 40.
Row 1: Dc in 4th ch from hook, 2 dc in next ch across. Turn. (approximately 74 dc)
Row 2: Ch 3, 2 dc in next st across.
Fasten off, leaving 12-inch tail.
Starting from the beginning of the strip, roll tightly to form rose center, then continue rolling more loosely for outer petals. Use yarn tail to stitch through base layers, securing the spiral. Do not cut tail until rose attaches to the top.
This rolled method creates dimensional, realistic roses without complicated petal shaping.
Straps (Make 2)
With MC and 5.0mm hook:
Ch 60. Sc in 2nd ch from hook and each ch across. (59 sts)
Fasten off.
Adjust chain length for desired strap length. These should reach from front neckband, over shoulder, to back neckband with enough ease so they do not dig in.
Putting It All Together
Assembly turns your pieces into a real garment. Go slow here.
- Block all pieces before seaming. Wet block or steam lightly. Let dry completely.
- Seam side edges of front and back panels using mattress stitch or whip stitch. Leave top 5 inches open on each side for armholes.
- Attach ribbed neckband to top edge of front and back, stretching slightly to fit. The ribbing sits along the upper edge like a structured band.
- Seam sleeves along long edge to form tubes.
- Attach sleeves to armhole openings, easing fullness at shoulder. Pin before sewing.
- Attach straps to inside of neckband at front and back, spacing approximately 4 inches from center.
- Add scalloped edging to bottom hem: Join MC at side seam, work shell pattern around entire hem, sl st to join. Fasten off.
- Attach leaves inside sleeve cutouts using yarn needle. Tack at center vein.
- Arrange roses and leaves diagonally from left shoulder toward right hip. Pin in place. Try on if possible to check placement. Sew each rose securely through base. Tuck leaves behind and between roses.
Finishing Tips and Fun Customizations
Weave in all ends securely before wearing. Store flat or hang on a padded hanger to keep the bell sleeve shape. Hand wash gently in cool water and reshape while damp.
Want to switch things up?
- Longer length: Add more rows to the bodice before armhole shaping.
- Wider fit: Add stitches to the foundation chain in multiples of 4 for ease.
- Different rose colors: Try jewel tones for winter or pastels for spring.
- No roses: The top looks lovely without dimensional flowers. Add simple embroidery instead.
- Long sleeves without bell: Skip increases and lace panels for fitted sleeves.
IMO, the roses make this top unforgettable, but the solid version still looks sharp.
Related Articles :
- Sage Green Botanical Lace Bucket Bag Free Crochet Pattern
- Charcoal Gray Modern Tote with Silver Tassels Free Pattern
- Monochrome Gray Drawstring Bucket Bag Free Crochet Pattern
You Did It — Now Wear That Autumn Glow
This Mocha Autumn Rose Crochet Top looks way more complicated than it actually is. Each section stays manageable on its own. The real drama comes from putting them all together. You now have a wearable statement piece that feels like golden fall light wrapped around you.