


I still remember the exact afternoon the idea for this bracelet settled into place. I was sitting on the porch with a cup of tea, watching the first roses in the garden open under a soft spring sky. The petals were the palest pink with just a hint of deeper color at the center, and the new leaves were that bright, almost glowing green that only appears for a few weeks each year. I kept thinking how lovely it would be to wear a little piece of that garden on my wrist—something light, wearable every day, and full of those same soft shapes.
I sketched a few rose motifs that evening, played with petal counts, and tried different ways to attach leaves so they would sit naturally against the wrist. After a few trials I settled on a simple foundation band that can be adjusted, topped with three dimensional roses and trailing leaves. The finished piece feels delicate without being fragile, and it catches the light in a way that always makes me smile when I glance down.
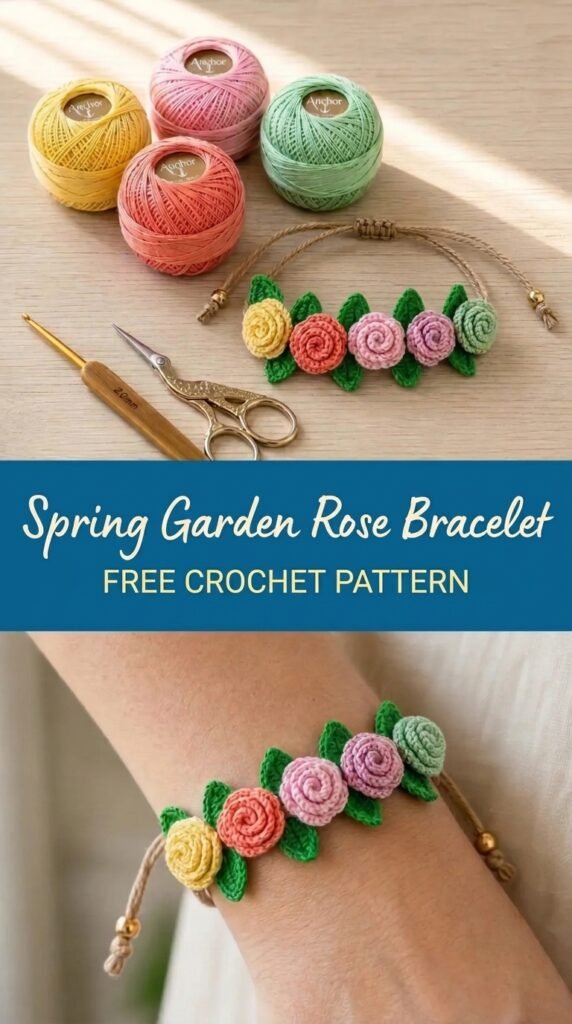
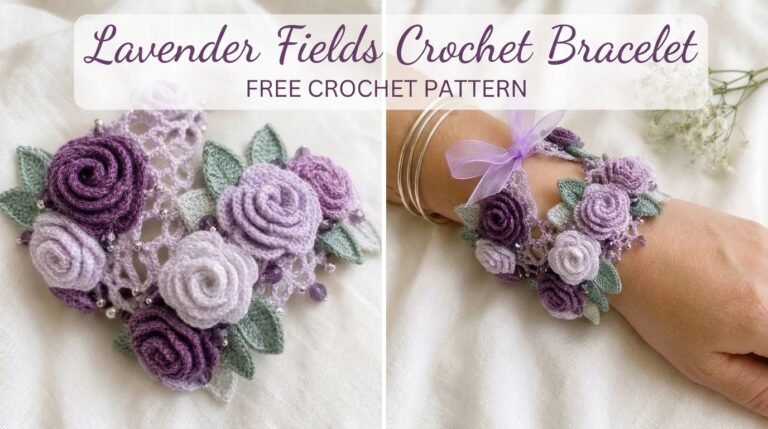
This is the Spring Garden Rose Bracelet. It is a free crochet pattern designed to give you a wearable floral piece that looks like it grew straight from a spring border. The roses have layered petals, the leaves have gentle shaping, and the whole bracelet is light enough for all-day wear.
About This Pattern
This bracelet is built in three main stages. First you crochet a narrow adjustable foundation band that sits comfortably against the wrist. Next you create individual rose motifs with layered petals and small green leaves. Finally the motifs are sewn or crocheted onto the band in a gentle curve so the bracelet has movement and a natural garden look.
The pattern is written for intermediate crocheters. You should be comfortable working in the round, changing colors cleanly, and sewing small pieces together with a tapestry needle. Beginners who have made a few amigurumi or floral motifs can manage it with patience, but the petal shaping and placement take a bit of care.
Finished size is designed for a wrist circumference of approximately 6 to 7.5 inches (15–19 cm). The foundation band is adjustable with a simple button or chain-loop closure, so one size covers most adult wrists. The roses measure about 1.25 inches (3 cm) across when blocked. The overall bracelet sits low on the wrist and has a soft drape rather than a stiff cuff.
Materials You’ll Need
Yarn
I used a fine cotton blend that gives clean stitch definition and a soft hand. Any similar fingering or lace-weight cotton or cotton-blend yarn will work.
- Color A (main rose pink): approximately 25 yards / 23 meters
- Color B (deeper rose center): approximately 10 yards / 9 meters
- Color C (leaf green): approximately 20 yards / 18 meters
- Color D (foundation band – soft cream or pale green): approximately 30 yards / 27 meters
Allow 15 % extra for gauge variation and swatching.
Hooks
- 2.25 mm (B-1) hook for the rose petals and leaves (gives a firm, neat motif)
- 2.5 mm (C-2) hook for the foundation band (slightly looser for comfort against the skin)
Notions
- Tapestry needle
- 3–4 locking stitch markers
- One small button (8–10 mm) or a bead for the closure
- Blocking pins and a soft mat or foam board
- Optional: a tiny bit of fabric glue or clear nail polish to secure ends if desired
Abbreviations and Terminology
All instructions use US crochet terminology.
- ch – chain
- sc – single crochet (insert hook, yarn over, pull up loop, yarn over, pull through both loops)
- hdc – half double crochet (yarn over, insert hook, yarn over, pull up loop, yarn over, pull through all three loops)
- dc – double crochet (yarn over, insert hook, yarn over, pull up loop, yarn over, pull through two, yarn over, pull through remaining two)
- tr – treble crochet (yarn over twice, insert hook, yarn over, pull up loop, yarn over and pull through two three times)
- sl st – slip stitch
- st(s) – stitch(es)
- sp – space
- BLO – back loop only
- FLO – front loop only
- FO – fasten off
Turning chains do not count as a stitch unless a step explicitly says they do. When working in the round, join with a slip stitch unless otherwise noted.
Gauge
Work a small practice square in single crochet with Color D and the 2.5 mm hook:
10 sc and 12 rows = 1 inch (2.5 cm).
If your swatch is larger, go down a hook size for the band. If it is smaller, go up a size. The rose motifs are worked tightly on purpose so the petals hold their shape; do not loosen the tension on those pieces even if your band gauge is slightly different.
Main Pattern Instructions
Foundation Band
With Color D and 2.5 mm hook, ch 61 (or a multiple that measures approximately 7.5 inches / 19 cm when slightly stretched).
Row 1: Sc in 2nd ch from hook and in each ch across. (60 sc) Turn.
Row 2: Ch 1, sc in each st across. Turn.
Rows 3–6: Repeat Row 2.
At the end of Row 6, do not fasten off. Ch 12 to form a button loop, then sl st into the last st of the band to secure. FO and weave in ends.
Place a stitch marker at the center of the band; this will be the placement guide for the middle rose.
Rose Motif (make 3)
Each rose is worked in two colors: Color B for the tight center and Color A for the outer petals.
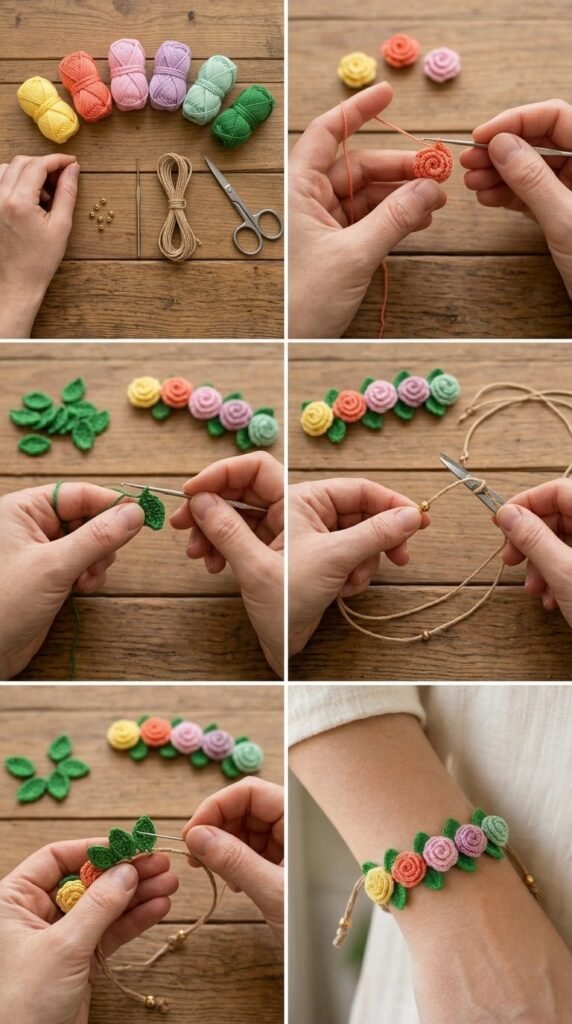
Center (Color B, 2.25 mm hook)
Make a magic ring.
Round 1: Ch 1, 6 sc into ring. Join with sl st to first sc. (6 sc)
Round 2: Ch 1, 2 sc in each st around. Join. (12 sc)
FO Color B, leaving a short tail.
First petal layer (Color A)
Join Color A in any st.
Round 3: *Ch 3, 3 dc in same st, ch 3, sl st in same st, sl st in next st; repeat from * around. (6 petals)
Join with sl st to the base of the first ch-3.
Second petal layer
Work behind the first layer into the remaining free loops of Round 2.
Round 4: *Ch 4, 4 dc in same st, ch 4, sl st in same st, skip next st, sl st in next st; repeat from * around. (6 larger petals)
Join and FO, leaving a 12-inch tail for sewing.
Gently shape the petals outward with your fingers. The inner petals should sit upright and the outer ones should cup slightly.
Leaf (make 6 – two per rose)
With Color C and 2.25 mm hook, ch 8.
Row 1: Sc in 2nd ch from hook, hdc in next, dc in next 3, hdc in next, sc in last. Ch 1, rotate to work along the opposite side of the foundation chain.
Row 2: Sc in first, hdc in next, dc in next 3, hdc in next, sc in last. Sl st to the tip to close. FO, leaving a tail for sewing.
The leaf should be slightly pointed at both ends and measure about 1 inch (2.5 cm) long.
Special Techniques / Additional Elements
Shaping the Rose Petals
After the second petal layer is complete, lightly steam the motif from the wrong side or wet-block it on a pin board. Pin the outer petals so they flare gently while the center stays compact. This creates the classic layered rose look without extra stitching.
Optional Surface Detail
If you want a bit more definition, use a short length of Color B and surface slip stitch around the base of the inner petals once the rose is attached to the band. This is completely optional and can be done after assembly.
Assembly and Finishing
Lay the foundation band flat with the button loop at one end.
Position the three roses along the center of the band: one at the marked middle, and one approximately 1.25 inches (3 cm) to each side. The roses should sit slightly overlapping the edges of the band so they appear to grow from it rather than sit on top.
Using the long tails and a tapestry needle, sew each rose firmly through the center and through a few outer petal bases. Take small stitches so the sewing does not show on the right side.
Next sew two leaves under each rose, angling them outward and slightly downward so they follow the curve of the wrist. Secure the base of each leaf with a few stitches, then take one or two stitches along the mid-vein to keep the leaf from flipping.
Once all motifs are attached, try the bracelet on and mark the exact button placement. Sew the button securely to the opposite end of the band. Weave in every remaining end on the wrong side.
Blocking and Care
Wet-block the finished bracelet. Submerge it in lukewarm water with a drop of mild soap, gently squeeze out excess water (do not wring), and pin it flat on a blocking board. Shape the roses so the petals are open and the leaves lie naturally. Allow to dry completely.
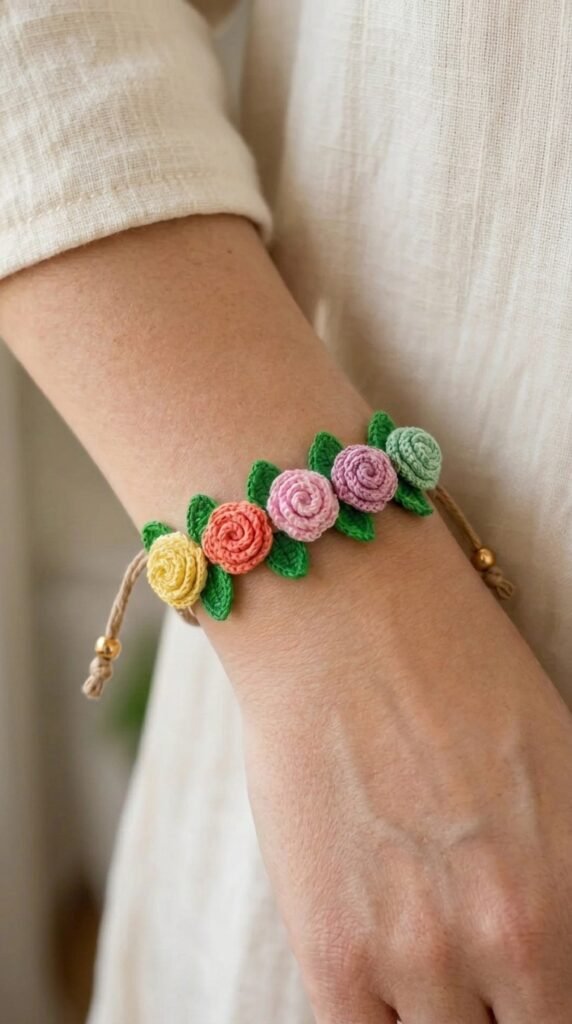
Care: Hand wash in cool water, reshape, and dry flat. Never hang the bracelet while wet—the weight of the water can stretch the band. Store flat or loosely coiled when not wearing.
Fit and Troubleshooting Tips
If the band feels too tight, add a few extra chains at the beginning or use a slightly larger hook for the foundation only.
If the roses look flat, check that the outer petal layer was worked into the free loops behind the first layer—working into the same stitches collapses the shape.
If the bracelet cups or twists, make sure the leaves are sewn with equal tension on both sides of each rose.
For a smaller wrist, reduce the foundation chain by 6–8 stitches and place the outer roses a little closer to the center.
If the button loop feels loose, chain fewer stitches or add a second row of slip stitches along the loop for strength.
Final Thoughts
I hope this Spring Garden Rose Bracelet brings a little of that first-rose-of-the-season feeling to your wrist. There is something quietly joyful about wearing a piece that started as a garden moment and ended as something you can put on every day.
I would love to see how your roses turn out—different pinks, softer greens, or even a version in pure white for a bridal look. Share a photo if you feel like it, tag your work, or simply enjoy the quiet satisfaction of finishing a small, lovely thing.
Happy stitching, and may your spring be full of petals.
FAQ’s
Can I use a different yarn weight?
Yes, but the finished size and drape will change. A sport-weight yarn will produce a larger, slightly bulkier bracelet; a true lace-weight will make it more delicate. Adjust hook size accordingly and make a full motif test before committing to the band.
How long does this project take?
Most makers finish the three roses and six leaves in one evening and complete the band and assembly the next day. Total time is usually 4–6 hours depending on experience.
Is the bracelet stretchy?
The cotton band has modest give. The button-and-loop closure gives the main adjustability. If you need more stretch, substitute a soft merino or cotton-blend yarn with a bit of elasticity for the foundation only.
Can I make more or fewer roses?
Absolutely. Two roses create a lighter, more minimal look; four roses fill the band more densely. Adjust spacing so the motifs do not crowd.
What if I don’t have a magic ring?
Begin the rose center with ch 2 and work the 6 sc into the second chain. Pull the tail to close the hole as tightly as possible.
Can the pattern be made longer for an anklet?
Yes. Increase the foundation chain to the desired length and space the roses evenly. The same motifs work beautifully as an anklet.


Leave a Reply
You must be logged in to post a comment.