


I still remember the night this bracelet was born. It was late autumn, the kind of evening when the air feels heavy with the scent of wet earth and dying roses. I was walking through an old cemetery garden near my house — the kind with iron gates and moss-covered stone — and a single deep red rose was still blooming against the black of the night. The petals looked almost velvet under the streetlamp, dark and dramatic, and I thought, “I need that on my wrist.”
I went home and started sketching. I wanted something that felt like a secret garden at midnight: layered roses that stood up from the band, deep burgundy against near-black, a little bit of sparkle at the heart of each bloom, and a bracelet that could be worn with a black dress or a leather jacket equally well. After three prototypes and a lot of frogging, the Midnight Garden Gothic Rose Bracelet finally settled into the shape I loved.

This is that pattern. It’s intermediate, a little dramatic, and completely free.
About This Pattern
This bracelet is built from a series of individual three-dimensional gothic roses joined to a simple foundation band. Each rose is worked in the round with layered petals that create a raised, almost sculptural look. The band itself is a narrow strip of single crochet worked in black, giving the roses a dark backdrop so they really stand out. The finished piece measures approximately 7.5–8.5 inches long (adjustable) and sits about 1.75 inches wide at the fullest point of the roses.
Skill level is intermediate. You should be comfortable with working in the round, changing colors cleanly, and following stitch counts carefully. The rose construction uses front-post stitches and a few decreases that create the petal shaping. Nothing is overly complex, but the pattern does require attention.
The bracelet has a soft drape once blocked and sits comfortably on the wrist without feeling stiff. The roses are firm enough to hold their shape but not so dense that they dig in.
Materials You’ll Need
Yarn
- Color A (Midnight Black): approximately 45 yards / 41 meters of DK weight yarn (I used a merino-acrylic blend for structure and softness)
- Color B (Deep Burgundy / Gothic Rose): approximately 55 yards / 50 meters of the same DK weight
- Color C (optional dark forest green for tiny leaves): approximately 10 yards / 9 meters
Allow 15% extra for gauge variation and tension differences.
Hooks
- 3.5 mm (E) hook for the roses and band (gives a firm fabric that holds petal shape)
- 3.25 mm (D) hook optional for tighter petals if you tend to crochet loosely
Notions
- Tapestry needle
- Stitch markers (at least 4)
- 5–7 small black or dark metallic beads (4–6 mm) for rose centers
- Blocking mat and pins
- Optional: small lobster clasp or adjustable chain for a more finished closure (you can also leave the ends open and sew them together for a continuous band)
Abbreviations and Terminology (US Terms)
- ch – chain
- sc – single crochet (insert hook, yarn over, pull up loop, yarn over, pull through both loops)
- hdc – half double crochet (yarn over, insert hook, yarn over, pull up loop, yarn over, pull through all three loops)
- dc – double crochet (yarn over, insert hook, yarn over, pull up loop, yarn over, pull through two, yarn over, pull through remaining two)
- tr – treble crochet (yarn over twice, insert hook, yarn over, pull up loop, yarn over, pull through two three times)
- fpdc – front post double crochet (yarn over, insert hook from front to back around the post of the indicated stitch, yarn over, pull up loop, complete as a normal dc)
- sc2tog – single crochet two together (insert hook in first stitch, yarn over, pull up loop, insert hook in next stitch, yarn over, pull up loop, yarn over, pull through all three loops)
- sl st – slip stitch
- st(s) – stitch(es)
- rnd – round
- rep – repeat
Turning chains do not count as a stitch unless a step explicitly says they do. When working in the round, join with a slip stitch to the first stitch of the round unless otherwise noted.
Gauge
Work a small practice rose using Color B and the 3.5 mm hook.
The finished rose (after light blocking) should measure approximately 1.4–1.5 inches across at its widest point.
If your rose is larger, go down a hook size. If it is smaller and denser than you like, go up a half size. The band gauge is less critical, but aim for a firm fabric that does not stretch excessively when worn.
Main Pattern Instructions
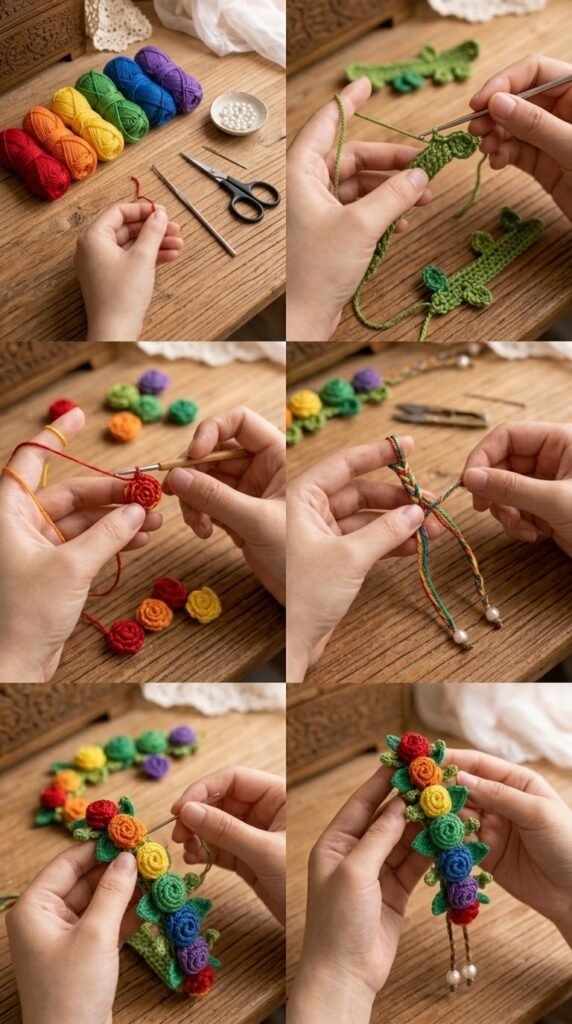
Foundation Band
With Color A and 3.5 mm hook:
Row 1: Ch 8. Sc in 2nd ch from hook and in each ch across. (7 sc)
Row 2: Ch 1, turn. Sc in each st across. (7 sc)
Repeat Row 2 until the band measures approximately 6.75 inches (or the length that comfortably wraps your wrist with a little overlap). Do not fasten off. You will attach the roses along one long edge later.
Place a stitch marker at each end of the band so you can easily identify the working edge.
Gothic Rose Motif (Make 5)
Each rose is worked in continuous rounds. Use a stitch marker to mark the first stitch of each round and move it up as you go.
With Color B and 3.5 mm hook:
Rnd 1: Make a magic ring. Ch 1, work 6 sc into the ring. Pull the ring closed. Do not join; continue working in a spiral. (6 sc)
Rnd 2: 2 sc in each st around. (12 sc)
Rnd 3: *Sc in next st, 2 sc in next st; rep from * around. (18 sc)
Rnd 4 (inner petals): Working in the front loops only for this round: *sc in next st, hdc in next st, (dc, tr, dc) in next st, hdc in next st, sc in next st, sl st in next st; rep from * around. You should have three petal shapes. (the remaining stitches sit behind for the next layer)
Rnd 5 (middle petals): Working now in the back loops of Rnd 3 (the ones left free): *sc in next 2 sts, hdc in next st, (dc, tr, dc) in next st, hdc in next st, sc in next 2 sts, sl st in next st; rep from * around. This creates three larger overlapping petals.
Rnd 6 (outer petals): Working into the remaining free back loops and the spaces between previous petals: *sc in next st, hdc in next st, dc in next st, (tr, ch 1, tr) in next st, dc in next st, hdc in next st, sc in next st, sl st in next st; rep from * around. This final layer gives the rose its full gothic volume.
Fasten off Color B, leaving a 10-inch tail for sewing.
Rose Center: Thread a tapestry needle with a short length of Color A or a strong black sewing thread. Sew a small bead firmly into the very center of the rose (through the magic ring area). Knot securely on the wrong side and weave in ends.
Make a total of five roses.
Optional Tiny Leaves (Make 6–8 if desired)
With Color C:
Ch 6. Sc in 2nd ch from hook, hdc in next, dc in next, hdc in next, sc in last. Fasten off, leaving a tail for sewing. These are simple elongated leaves that can be tucked under the roses for extra garden detail.
Assembly and Finishing
Lay the foundation band flat with the right side facing you. Space the five roses evenly along the length of the band, starting about ¾ inch from each end. The roses should sit slightly overlapping the edge of the band so they appear to grow from it.
Using the long tails left on each rose and a tapestry needle, sew each rose firmly to the band. Work from the underside of the rose, catching several stitches of both the rose base and the band. Secure tightly but avoid pulling so hard that the band puckers.
If you are adding the optional leaves, sew them underneath or slightly to the side of the roses so only the tips peek out.
Once all roses are attached, try the bracelet on. If you want a continuous band, sew the short ends of the foundation band together with a whip stitch or mattress stitch, matching the stitch counts carefully. If you prefer an adjustable closure, sew a small lobster clasp to one end and a short chain (or jump ring) to the other.
Weave in all remaining ends carefully on the wrong side.
Blocking and Care
Light wet-blocking makes a noticeable difference with these roses. Fill a basin with lukewarm water and a drop of mild wool wash. Submerge the finished bracelet for 10–15 minutes. Gently squeeze out excess water (do not wring). Lay flat on a blocking mat and shape each rose so the petals stand up and spread slightly. Pin the outer edges of the petals if needed. Allow to dry completely.
Care: Hand wash only in cool water. Never hang the bracelet while wet — the weight of the water can stretch the band and distort the roses. Dry flat. Store flat or loosely coiled to protect the petal shape.
Fit and Troubleshooting Tips
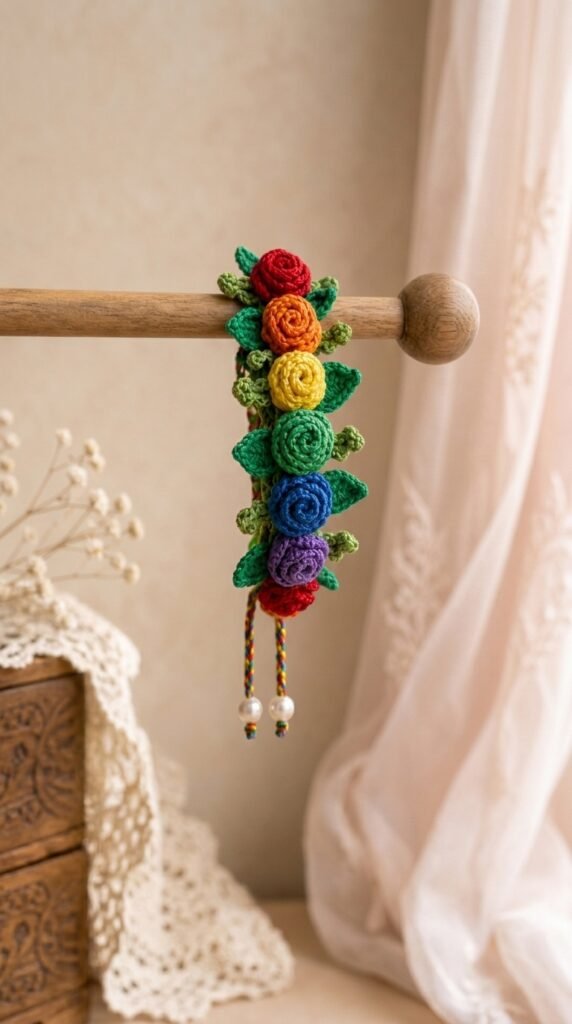
- If the roses look too flat after the outer petal round, you may be working too tightly. Try a slightly larger hook for the final petal layer only.
- If the band feels stretchy and the roses pull apart when worn, go down a hook size for the foundation band.
- Cupping or curling at the edges of the roses usually means the outer petal increases were worked too tightly. Blocking almost always corrects this.
- For a smaller wrist, make only four roses and shorten the band accordingly. For a larger wrist, add a sixth rose and extend the band by 1–1.25 inches.
- If the bead centers feel insecure, reinforce them with a tiny dab of clear fabric glue on the wrong side after sewing (optional and completely removable if you
prefer pure crochet).
FAQ’s
Is this pattern suitable for beginners?
This is written as an intermediate pattern because of the layered petals, working in the front and back loops separately, and the need to keep careful stitch counts. Confident beginners who have already made a few projects in the round and are comfortable with color changes can manage it, especially if they take the roses slowly and use plenty of stitch markers.
Can I use a different yarn weight?
DK weight gives the best balance of structure and softness for the three-dimensional roses. Sport weight will produce a smaller, more delicate bracelet; worsted weight will make the roses bulkier and the band thicker. If you substitute, adjust your hook size to match the recommended rose diameter of about 1.4–1.5 inches.
Do I have to use beads?
No. The beads add a subtle gothic sparkle, but you can simply embroider a small French knot or a few stitches of contrasting yarn in the center of each rose instead. The pattern still looks complete without them.
How long does one bracelet take to make?
Most makers finish the five roses and band in 4–6 hours, plus another 30–45 minutes for sewing and blocking. The first rose always takes the longest while you get used to the petal layers.
Can I make matching earrings or a necklace?
Yes. The same rose motif works beautifully as earrings (make two and attach earring findings) or as a single focal rose on a simple chain for a pendant. Just omit the foundation band.
My roses are cupping or curling. What went wrong?
This is almost always tension-related on the outer petal round. Try a half-size larger hook for Rnd 6 only, or give the finished roses a thorough wet block and gently shape the petals outward while they dry. Most cupping disappears after blocking.
How do I adjust the length for different wrist sizes?
Measure your wrist and add about ½–¾ inch for ease. Shorten or lengthen the foundation band accordingly, and adjust the number of roses (four for smaller wrists, six for larger). Keep the roses evenly spaced so the design still feels balanced.
Is the pattern written in US or UK terms?
All instructions use US crochet terminology.
You Might Also Like
- Honeybee Garden Butterfly Charm Free Crochet Pattern
- Lemon Citrus Summer Charm Bracelet Free Crochet Pattern
- Winter White Camellia Crochet Bracelet Free Pattern
- Mint Green Woven Bag on Vanity Free Pattern
Final Thoughts
There is something quietly powerful about wearing a piece of the night garden on your wrist. Every time I put this bracelet on I remember that single stubborn rose glowing against the dark, and I feel a little more dramatic, a little more myself.
I hope you enjoy making your own Midnight Garden Gothic Rose Bracelet. If you do, I would love to see it — leave a comment with a photo, tag me on socials, or pin your finished piece so other makers can find their way to this pattern. Happy stitching, and may your roses always bloom a little dark and a little wild.


Leave a Reply
You must be logged in to post a comment.